Have you ever wondered how photographers are able to depict lights with a star effect along piers, boardwalks or a sunrise with trailing rays peering through beams? One easy way is with a star filter. The other requires a simple technique using the light, the camera and the aperture (f/stop) settings. Either way, the stars are within your reach (couldn't resist the pun).
Examples of lights that can be cast into starbursts include (but are not limited to) lighted street posts, holiday lights, leading lights on a pier or street, the sun, a candle and even a lightbulb.
1. Creating the Star Effect with Aperture Settings
Creating the star effect with your camera is easy. As the image is being composed, just remember to push the aperture to f/16 or higher such as a f/18 or even f/22. I've seen starburst images where the aperture was set at f/8 and f/11, but I've had better luck at f/16 and higher.
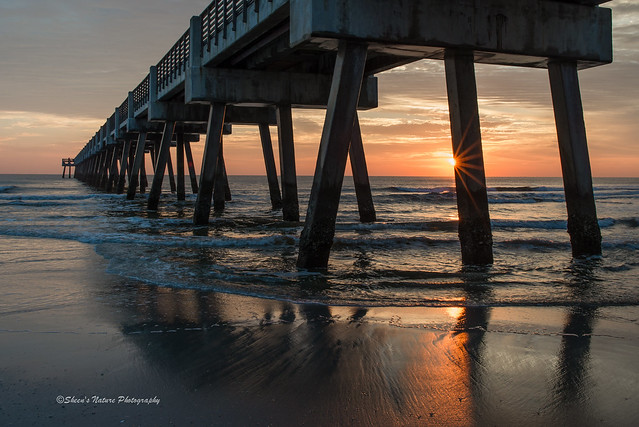
Sheen's Nature Photography – Settings: f/16, ISO 200, 1/30 sec
Starbursts with Aperture Technique
A beautiful (and easy) technique is to capture the sun peaking around an object. Watch for the sun as it partially rises above a roofline, peers around a beam underneath a pier or radiates through leaves or branches. The effect may be a half-starburst or full starburst. Since the sun is moving quickly, we need to compose and adjust our settings quickly so that we'll return with a variety of images to choose from.
How it Works
The smaller you make your aperture, the more “starburst” you’ll see in your image. If you want to switch up the look, experiment with different lenses as well as different apertures.
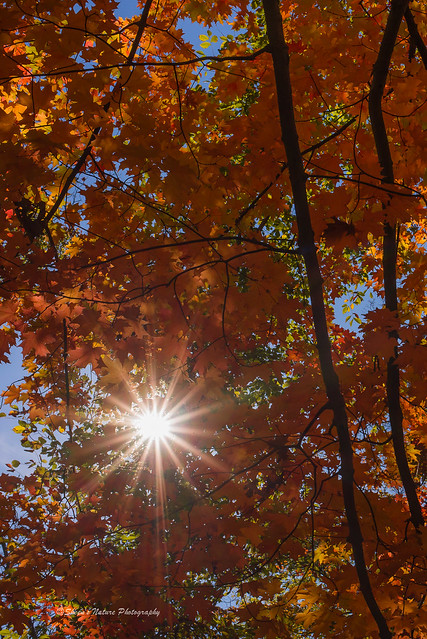
Photo by Sheen's Nature Photography – Settings: f/16, ISO 500, 1/250 sec.
Interesting Starbursts Trivia
- The number of rays from each starburst is based on the number of aperture blades in a given lens.
- If the lens has an even number of blades, the number of star points will equal the number of blades. A lens with 6 blades will have 6 points, 8 blades will have 8 points
- If the lens has an odd number of blades, the number of points will be double the number of blades. Seven blades will have 14 points, 9 blades will have 18. The fall leaves with the sunburst was taken with my 50mm 1.8 which has 7 blades and the result is 14 points.
Summary of Important Tips
A lot of starburst images are captured at low light but daylight can also present fascinating starburst moments too. Here's additional tips to make sure you get sharp, clear starburst/starlights.
- Use a tripod as you'll be working with longer shutter speeds to let in more light
- A remote trigger is also suggested to minimize camera shake
- Work with a low ISO to keep out the digital noise
- Check your histogram! Even though you may be working in low light, depending on the shutter speed and settings, the highlights can get blown out.
- Since the number of blades can impact how the starburst looks, play with different lenses and switch up the settings a bit. An f/22 will have a different effect than an f/16.
- If working with a zoom lens, zooming out will give you more starburst in the image.
- Never look directly into the sun, even on low light days. We use our eyes a lot, let's take care of them!
2. Using Star Filters
A star filter is also referred to as a cross screen filter. A star filter creates star points or a star pattern that radiates from a bright light. The number of star points varies by the type of filter purchased. Filters are available from four, six, eight up to sixteen points. At Amazon.com they have multiple brands, filter sizes and point selections. Costs vary by manufacturer, filter size and quality with prices starting at $8.00 to over $100 USD. Tiffen offers a NorthStar filter at Amazon starting at $107 USD (77mm as example).
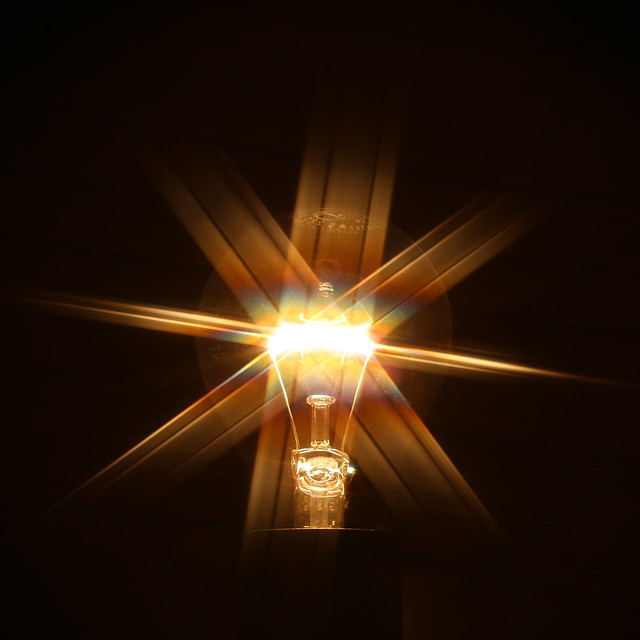
Photo by Markus Grossalber
Because if used on the lens like a circular polarizing or neutral density filter, you'll need to know the filter size of your lens when ordering. The points can be moved directionally by rotating the filter just as you would a circular polarizer.
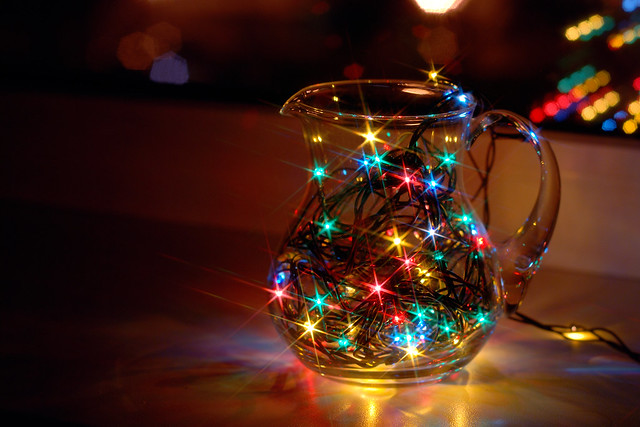
Photo by Olga Filonenko
Since the holidays are upon us, there are many colorful lighting opportunities to practice capturing starbursts. Whether you create your own with settings or use a filter, experiment (I thought the holiday lights by Olga Filonenko in the pitcher was creative), have fun and share your stars.


10 Comments
The photography I found on Flickr is the most interesting in seen. Thank you and keep up the good work. I really enjoyed the light stalking
Thanks Larry! Have a great evening!
Super information for amature photographer, well done
Hi Jimmy – have fun with this and share your starbursts. Would love to see them!
Thanks for all the help. Keep the tips coming.
You’re very welcome Bonnie! Happy New year!
If you have a great photo without a starburst and you feel a starburst would enhance the look of the photo, try a starburst software program such as Topaz Starburst. This programs allows for pre stet and custom stars. I do try to grab the rays, but I’m not always successful.
Thanks Sheen for the great tips.
Hi Max – thank you for putting the Topaz info out there for our readers and for you comments. Best to you in 2015!
I am just getting into photography, and really appreciate this article. For a novice like me it was very enlightening, pun intended. That you for including all the the camera settings too. I will diffenetly try to duplicate some the the shots. Pleas keep these articles coming.
Hi Jack – LOL on the pun! Thank you for your feedback – and please share your photos. Cheers for a great 2015!