Let's face it, photography is an equipment intensive hobby. For photographers just getting started in the craft, it can be difficult to justify dropping some cash on gear you're not sure you will even end up using.
In other instances, you may find yourself in need of a certain piece of gear, like a tripod, but don't have one readily available. In a lot of these situations, it's easy enough to summon up some ingenuity and improvise to get the job done.
So, be sure to check out these four do-it-yourself photography hacks that almost any photographer could find useful.
Neutral Density Filter
ND filters are wonderful tools to keep handy. Depending on the ND filter itself, they can stop out anywhere from 1 stop of light to upwards of 10 stops. This will allow you take photos in bright sunlight using a narrow aperture or long shutter speeds, both which are useful to give you full artistic control over your photos.
However, a decent 10-stop filter can cost well over a $100. For some, that may be out of the budget for a filter they won't use very often.
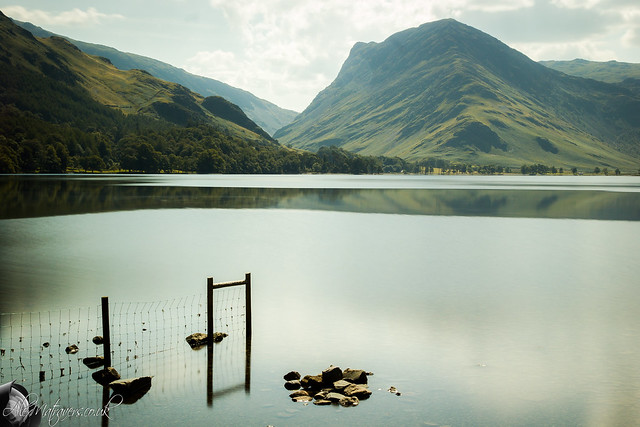
Fortunately, an inexpensive piece (less than $5 on Amazon) of welding glass can serve as a substitute. Like ND filters, welding glass comes in a variety shades.
A shade 12 piece of welding glass is equivalent to about 15.6 stops of light; a shade 8 piece of welding glass is about 10 stops. The catch is, most welding glass is tinted–most typically green–so you'll need to adjust your white balance to correct the tint along with few basic post processing skills.
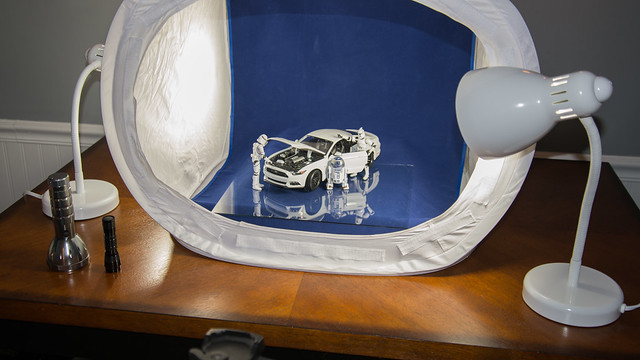
DIY Light Tent
If product photography isn't your usual type of photography, the chances of you having a light tent are pretty low. That's why I love this little hack. You can get great results without a ton of work or big investment.
These DIY light tents are perfect for the occasional shoot where you need to photograph something with a seamless background.

There are many, many variations of DIY light tents out there, including the one I explain how to build in this tutorial. What's great about these are the plans are easily customizable depending on what you have available to build with and, of course, the size of light tent you need.
DIY Background
Another neat DIY hack is using tiles as a cost effective backdrop, background, or reflective surface (such as in the photo below). Glass or granite tiles work great to give a polished, highly reflective surface to enhance product photography or other types of shots.
Clear glass works well, as you can always slip a piece of colored paper below it to change the look up, but there are also a wide array of different color options and sizes available as well.
Next time you're at the local hardware store, browse through the tile department to look at all the different styles available. One of my favorites are the ceramic tiles that look like wood planks. Since individual tiles are pretty inexpensive, it's easy to build up a nice little collection of colors, sizes, and textures so you have the perfect look for whatever it is you happen to be photographing.
DIY Stabilizer
Don't get me wrong, I love my tripod–I use it all the time, for all different styles of photography. As much as I love to have it, there are times when I really don't want to carry it around, or can't carry it with me, even though it would be extremely useful.
Though this particular hack doesn't always work (I wouldn't want to do long exposures with it), it still comes in use when I'm in tight quarters or are shooting somewhere tripods are not allowed. Plus, it's incredibly easy and incredibly inexpensive to make.
All you'll need is a metal washer, a 1/4″ bolt, and a piece of heavy duty string cut to a length just a little bit shorter than you are. Just tie one end of the string to the washer–be sure to knot it securely–then tie the other end to the bolt.
To use it, you screw the bolt into the tripod thread on your camera, then step on the washer. You may need to adjust the length of the string to give you a taut line when the camera is at eye-level.
The tension of the string helps to stabilize your camera. Just be careful not to use excessive pressure when pulling the string tight so you don't put undue stress on the tripod threads of your camera.
What's Your Favorite Hack?
The hacks listed above are just scratching the surface. As photographers, our creativeness tends to stretch beyond just taking photos, we're also pretty clever when it comes it figuring out how to take them.
For even more inspiration, take a look at 6 DIY Hacks That Will Enhance Your Photographs, right here on Lightstalking. And if we missed your favorite DIY photography hack, be kind enough to share it with us in the comments!
You can also check out these 11 fast and cheap photography hacks!


1 Comment
How about having a series of washers on your string so that you can brace your camera at different heights?