The incredible assortment of buttons on your camera can be intimidating. We’re not talking about just pro level DSLRs, either; even entry level cameras really pack it in when it comes to button array. It can be overwhelming, especially for those just getting started in photography. How do you know, of all the features available on your camera, which ones you should learn first? While some might suggest it’s worth the effort to learn everything your camera is capable of, the more measured approach is to master the essentials first then move on to other features. The importance of being comfortable with your camera cannot be understated; mastering the following DSLR features will help you take control of your camera and, by extension, your creativity.
1. Focus Tracking
If all you ever shoot is static subjects — landscapes, still life, portraits, etc. — then you’ll never need to worry about this. But odds are at some point you are going to encounter a rapidly moving subject. Don’t miss out on a potentially great photo due to not knowing how to capture it. To photograph a moving subject you will need to use continuous autofocus mode. In continuous AF mode, your camera will automatically and continuously adjust focus while you half-press the shutter and track your subject. Continuous AF is ideal for birds in flight and sports.
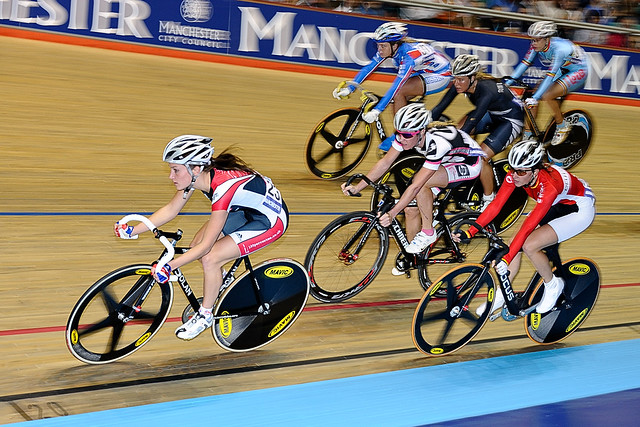
Photo by johnthescone
2. Continuous Shooting
Continuous shooting, or burst mode, is the perfect complement to focus tracking. In single shot mode, you take a shot by fully depressing the shutter button; you won’t be able to take another shot until you lift your finger off the shutter button and then fully press it again. Burst mode, however, allows you to take multiple shots in succession simply by keeping the shutter button pressed. When photographing fast moving subjects good timing is decidedly important, but continuous shooting mode can increase the likelihood of capturing the perfect moment.
3. Histogram Display
While seasoned photographers recognize the importance of not being too restrictive with the idea of “proper” exposure, we’ve all got to learn the basics of exposure before we can operate with any useful degree of creative freedom. Learning to balance the exposure triangle (aperture, shutter speed, ISO) is the typical starting point, and it’s a good starting point. Your camera, however, provides a visual representation of exposure via the histogram. This will let you quickly determine if your image (or parts of your image) is over- or underexposed. Don’t let the word histogram put you off — it is easy to use: the left side represents shadows, the right side represents highlights. If the bulk of the graph is to the left, your image is underexposed, to the right your image is overexposed. The “ideal” histogram will be evenly distributed, but this ideal won’t apply in every situation. As you continue to shoot, you’ll learn the nuances involved in interpreting the histogram.

Photo by LeighMilwardRMIT
4. ISO
The digital counterpart to film speed, ISO is a measure of the sensor’s sensitivity to light — higher ISO levels correspond to greater light sensitivity. Photographers typically want to stick to low ISO numbers but sometimes boosting ISO is necessary, even at the risk of increased noise. Fortunately, most current DSLRs sport sensors that are markedly better at handling low light shooting than the cameras of just a few years ago. Auto ISO is now a standard feature and works fine in most instances; if you want to take further control of exposure, however, learning how to use ISO is a vital step. Keep these ISO guidelines in mind:
- ISO 100: Sunny days or indoor flash photography
- ISO 200-400: Overcast days, shade, or well-lit indoors
- ISO 800-1600: Very low light outdoors and indoors without flash
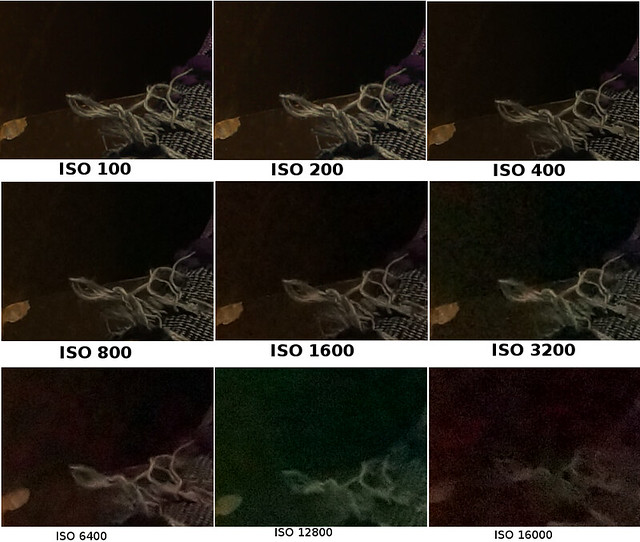
Photo by Vicente Pantoja
5. Shooting Mode
The mode dial on your camera will feature several shooting options, from fully automatic to fully manual, including a few scene-specific modes like Sports, Macro, or Night. If your ultimate goal is to get comfortable with manual mode (M), a good place to start is one of the “semi-manual” modes — aperture priority (A or Av) or shutter priority (S or Tv).
In aperture priority mode you will set the aperture yourself, often determined by how much depth of field you want. The camera will take care of shutter speed and ISO.
Shutter priority mode is especially useful when you need to capture fast moving objects as sharply as possible. Generally, you will need to set a shutter speed of 1/500th sec. or faster. The camera will take care of aperture and ISO.

Photo by Ian Muttoo
The tips here are indeed basic, but these are some of the features that new photographers will want to concentrate on before worrying about other, perhaps more superfluous, features. With consistent practice you’ll be able to locate functions and change settings without taking your eye away from the viewfinder. It’s a small but laudable goal that can make a world of difference in your growth as a photographer.


3 Comments
Thank you all though I know most of this it is a good reminder and I will pass this on to other camera club members.
I rate Auto-Bracketing pretty high as an essential yet basic feature. I was surprised to find this feature to be missing on a medium priced Nikon DSLR a friend of mine purchased. Of course manually bracketing a shot can be acceptable but it’s not always optimal.
not limited to DSLRs !