Did you know that there are five basic photographs that every photographer must learn how to create? All other camera techniques in photography are based on these five photographs and mastery of these is essential to any photographer. If you know how to achieve these shots with ease given different lighting situations (with or without the aid of artificial light), then it means you have a solid foundation of camera skills. And I don't mean just being able to create such photographs at random and through sheer luck but being able to visualize a result and use a technique as if it was second nature.
If you're a novice photographer and you're wondering what camera setting you need to prioritize (aperture, shutter speed, or ISO), then this might shed some light.
Let's take a look at each of the five:
1. The Background Blur Shot
This is probably everyone’s favorite, and to the experienced, it's known as “shallow depth of field“. Being able to achieve blur using shallow depth of field, on any type of camera (including creating them using your camera phone or point and shoot cam) shows that you understand the relationship between sharpness and blur, how it works in a photograph, and how to create it. This is done by mainly placing your subject of interest inside that area of sharpness, known as depth of field, while placing your background behind, or placing your foreground before your subject in an area with a desirable blurry effect. Take it a notch further and you should be able to produce beautiful bokeh.
Being able to determine the amount of blur needed to create stunning shots lies in your understanding of depth of field and what affects it – aperture size, distance, and focal length.
2. The Everything-Sharp Photo
If you can get all your photos sharp without having to use your flash, then that in itself is an achievement. Landscape photographers train themselves into achieving to add the beauty of wide depth of field in their landscape shots.
Using a wide depth of field will make everything sharp at infinity. This means that you are creating a photograph where everything looks sharp because the depth of field is so wide there is no room for blur. Of course, moving subjects are an exception as that can create some form of blur. Hyperfocal distance is also an important subject to tackle when creating photographs using wide depth of field and something that photographers need to understand.
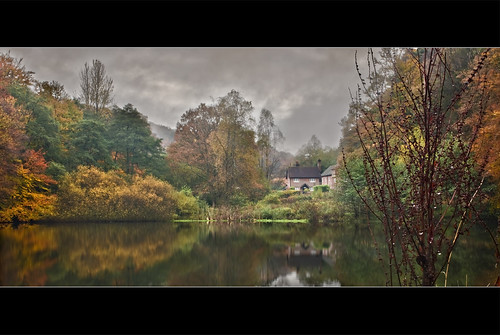
Photo by Johan J.Ingles-Le Nobel
Although most people would seem to get this right most of the time especially if you're using a point and shoot, understanding when, why, and how it is created is a whole different level.
3. Motion Blur
Another favorite of new photographers is capturing subjects in motion to the point that they blur in the scene. This shot is achieved mainly by using a slow shutter speed. This too had been my favorite technique to learn when I started photography, trying everything from light trails, light painting, and turning the sea into a milk-like silky form.
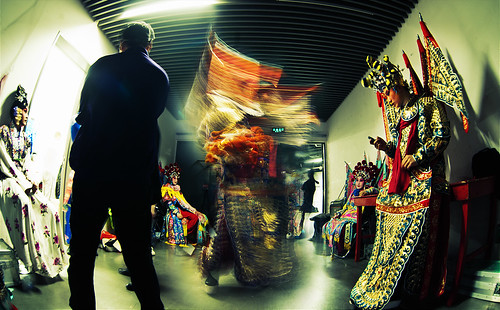
Photo by Jonathan Kos-Read
Learning to create motion blur photos isn't just about learning slow shutter techniques, it also requires knowledge in the fundamental details of focusing and depth of field since sharpness is still very important. Being able to understand motion blur also means familiarization with luminance and exposure. And even when you’re shooting outdoors at high noon, the experienced photographer can still create such an effect with the right tools, settings, and knowledge.
4. Freeze Motion
Have you tried freezing a moving subject? A water droplet suspended on air, a dare-devil at the point of his death defying moment, or making something look like it’s floating in mid-air – these are just some examples.
The idea of a photo finish uses the technique called stop motion or freeze motion, where at the time when two runners reach the finish line side-by-side, a photo is taken to capture a snapshot of who really crossed the finish line first. The technique that is used is stop motion. Stop motion can be used with the aide of flash or studio strobes or it can be done using natural light at the right time of day.

Photo by Giuseppe Milo
There are infinite possibilities and opportunities that you can capture, but understanding how fast shutter speed works will enable you to create these kinds of shots. Whether you do it with the help of a flash or not, every photographer should know how to capture moments like these.
5. The Grainy Shot
Before digital photography even came to existence, film grain was embraced by photographers who understood its beauty. Grain was basically dependent on the ASA (ISO) of the film used. Even when shooting at night or in low light, grain added texture to an image. Unfortunately, digital wasn't able to effectively replicate this effect as it couldn't handle dark tones very well when you chose a high ISO. The result instead is digital noise.
And like physical noise, most people find it too loud, so to speak. Digital noise can be very ugly and that's why a lot of photographers don't like it. Also, if you zoom in close enough to see the pixels, you will notice a little bit of pixel merging happening which can be mistaken as being slightly blurry even if your photo is actually sharp. This becomes worse as your ISO goes up.
Photo by Robert Ramirez
But it doesn't seem to be noticeable all the time. There are images created using a high ISO where film grain is somewhat replicated. The secret is in the ability of a photographer to make judgement calls as to when is the best time to use a specific ISO setting based on luminance. Sure, you simply increase the ISO when you encounter low light, but most of the time, you get more digital noise, which doesn't successfully replicate film grain. Essentially, if you know how to create beautiful grainy photos, then you also understand how to create the opposite, smooth and flawless image.
So which of these five are you confident in creating?
If you want to know more about how to create these types of photos, check out these other Lightstalking articles:


9 Comments
I would add the “Long Exposure” shot. Everyone loves the blurred waterfall or beach shot wight the water looking blended together.
Thanks Dillon 🙂 I think I should have made it clearer. Long exposure shots are actually based on motion blur. That’s why I mentioned light trails and the silky sea effect in number 3 🙂
I think last 2 options is something I want get better at, especially the The Grainy Shot. Loved the one you have here.
OK, I’ll be honest and say that, when I saw the title I thought ‘here we go again, another load of Must Do rules’ but when I opened it up I was pleasantly surprised! It makes for a really practical take on teaching the exposure triangle. Thanks.
But I think you should complete the logical set by including, at #6, the low-ISO, high detail shot.
The grainy shot?
In fact, I’m getting really fed up with ‘milky water’ shots’! (shock-horror!). Every magazine you pick up has a seascape or a river or a waterfall looking totally unnatural – water doesn’t look like that and OK let’s take a few snaps with long exposure but not every single time. Give it a rest, please. Rant over.
Yeah Sean, it’ll sound weird if we call it The Digital Noise 🙂
Haha. That is true, Byron. A lot of magazines really like dreamy surreal landscapes. Still a skill every photographer needs to know 🙂 Cheers!
Nicely put together and well thought out. And yes they are the basics….. Many thanks
Thanks for sharing, so many out there that should know these but don’t. I expect lots of people will be getting slr’s for xmas and think errr ok what do I do now.