Before you head out to your favorite concert hall with your intents set on shooting some pictures of your favorite band, make sure you have the proper permissions to do so. Ninety percent of all venues will require you to have proper press credentials and be on a list in order to bring in a DSLR or professional equipment of any sort. There are usually very strict guidelines surrounding concert photography and not following those guidelines can easily get you removed from the concert regardless of whether you paid to be there or not.
If you are just getting started in concert photography, shooting local talent at small do-it-yourself venues is a great way to build your portfolio and gain some experience. When shooting at larger shows, photographers are usually penned into a small area directly in front of the stage, known as the press pit. Here you will be allowed to take photographs during a set number of songs, usually the first three, that have been determined ahead of time. Once you have permissions to photograph, the rest of the art is in the details. Here are a few tips to get you started:
Equipment – One advantage of shooting concerts is the minimal amount of equipment you'll need to carry around. Usually, it's just your camera body and one or two lenses. When selecting your camera body, it's very important that it will allow you shoot fully manual at high ISO ratings. As digital technology improves, such cameras are easier to come across. If you have a camera capable of taking photos on a high ISO and produce a minimal amount of noise, your photography will benefit from it. A higher ISO will allow you to use quicker shutter speeds, thus reducing motion blur and camera shake. Where lenses are concerned, a 24-70mm will be your best friend. Also, go with a lens that has a wide aperture setting to catch as much of the elusive lighting as possible. Don't forget to pack extra batteries!
Lighting – If you're considering a foray into concert photography, it's worth knowing that lighting at most concert venues will nearly always work against you. The light source generally comes from spotlights, which are often moving about the stage and audience. A good concert photographer must think outside of the box to find ways to utilize the available light.
Why not just use a flash, you say? First of all, flash photography is prohibited at many concerts and even if you could use it, it's only going to light up the smoke that inevitably fills up such places, leaving the band lost in the fog. Also, while difficult to work with at times, the spotlights found in venues are capable of producing dramatic light and play an essential role in the story you are trying to portray. The use of a flash will only take away from that.
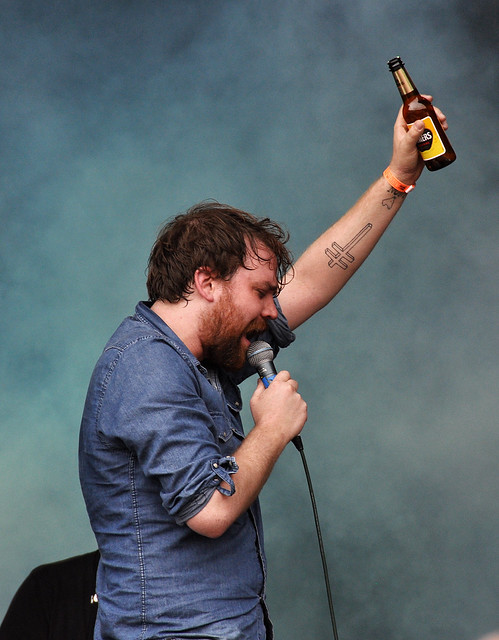
The trick to working with the light is paying attention to what it's doing and putting yourself in a position that will allow you to fully utilize it. Look at the photograph below for example. The yellow spotlight seen in the background is producing a nice, glowing hair light, while the fill light is coming from a spotlight that is facing the musician. From this position, the spotlight, doing what it is designed to do, also aids in the composition of the frame by creating contrast in the background. Had this photograph been taken head on, you would have lost the dark edges that frame it.
Composition – Composition can be tricky in concert photography simply because so many other elements must be working you favor. For example, great composition means very little when you don't have the light available to make the photograph work. You also have other obstacles to deal with like trying to photograph people that are sometimes jumping and flailing around like, well, rock stars. Stages can be cluttered with equipment and you'll need to position yourself in a place where you can have an unobstructed view of the band or risk an unfortunately placed microphone stand ruining your photograph.
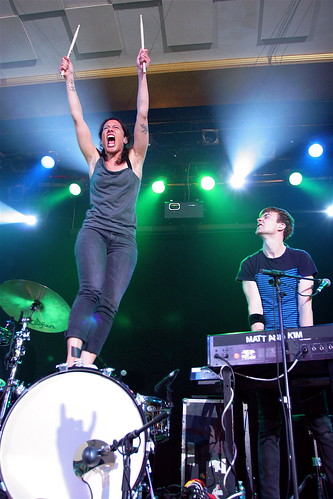
A common mistake novice photographers make is focusing on just the singer of a band. Try to photograph all members of the band, including the drummer! Don't be afraid to look into the audience and take photographs of the fans either. Many great photo opportunities are lost because the photographer is fixated on the stage.
Taking The Shot – Some of the best concert photographs are action shots of the band members thrashing around on stage. It may be useful to track your subject with your camera so you're ready to snap away when they do something especially awesome. Just don't get into the habit of doing this all the time or you will miss out on a lot of great shots that are happening elsewhere. Shoot on the fastest shutter speed possible, without sacrificing the exposure. You want those action shots to be frozen, but they still need to be exposed properly.
By all means, avoid chimping. That is, taking a photograph then immediately looking at the back of your camera to see what you got. You should know what you are going to get before you even press the shutter release. Chimping, a phenomenon unique to the realm of digital photography, is the number one cause for missed opportunities. Don't get mixed up in this bad habit!
Some Final Considerations – Concerts are less than ideal conditions for your expensive equipment. There's a lot of sweat, spilled drinks, and the chance of getting bumped into by an over zealous fan is incredibly high. If you are at all concerned for your investments, use the neck strap on your camera to prevent dropping it in case of a collision and use a UV or NC filter on your lens to protect it from moisture.
Tiffany Mueller is a professional music and fine art photographer. Published in various publications including magazines, art journals, as well as books, Tiffany has been fortunate enough to have been in a perpetual state of travel since her youth and is currently working on a 50-states project. You can also keep up with Tiffany via Twitter or on her personal blog.


4 Comments
Why avoid chimping?
Loosing the chance to mess up another shot?
Great advice…
My suggestion: chimp. Have a quick look at the histogram and the composition. Nothing too in depth. Just a second to know the exposure came out right.
Someone new wil prgress a lot faster with some instant feedback as to what works and what doesn’t.
Chimping is NOT having a “quick look” at the histogram.
I am in the Midwest where is a place to submit concert photos
I always look at the first few shots to tweak settings. I always set the cameras to shoot both RAW and JPEG and I always shoot with two bodies – one loaded with a medium zoom and one to give me a wider shot. If it’s a pro-lit concert, the ISO need not be very high, bit never shoot on auto ISO. Most concerts are between 600 – 1000 ISO. When I can, I talk to the sound-light board at the back of the venue and request a white wash for the first three songs – that’s usually the max we’re allowed to photograph. They can still have all the funky colour, but the white wash gives a much better skin tone. Sometimes they can do it, sometimes the artists have told them what they want – and that ain’t it.