There exists in society an unfortunate idea that gear is the chief distinction between a professional and an amateur photographer. Sure, there may be a correlation between skill level and camera class, but it’s silly to think that simply owning a high end camera with “pro” features makes one a professional; or that using an entry level camera places you permanently in the novice category. In my experience, I’ve found that new photographers are more likely to think along these lines (though they are by no means the only ones who have failed to disabuse themselves of such notions), which is one of the reasons they are sometimes so eager to upgrade their camera.
As I have argued in the past, unnecessary upgrades can rob you of a comprehensive learning experience with your camera and they certainly won’t bring you any closer to possessing pro level skill. The camera you currently own is far more capable than you realize; in fact, it can probably do a number of the same things higher end cameras can do. If you want to learn to use your camera the way the pros use theirs, below are 4 techniques you can start using today.
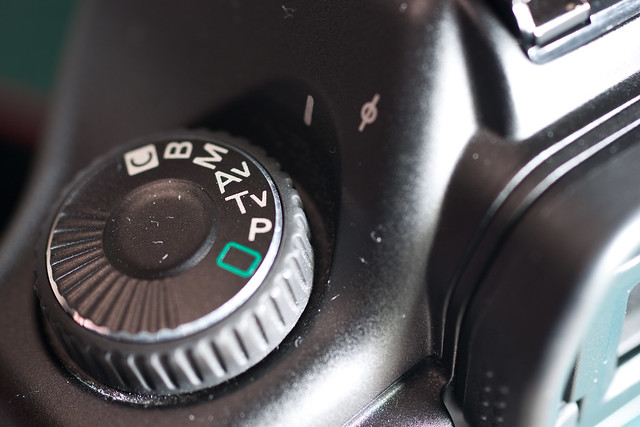
Advanced Exposure Modes
One of the best things you can do for yourself is get out of “P” mode. Program mode is a decent learning tool and a nice safety net to have in place when you just need to get the shot, but if you are looking to take more control of your camera you will want to look to the advanced exposure modes: aperture priority, shutter priority, and manual.
Aperture priority allows you to set the aperture of your choice, leaving the camera to set shutter speed. This mode is ideal when you need to control depth of field.
Shutter priority is ideal for scenarios in which you want to capture movement; choose a fast shutter speed to freeze motion, or use a slower shutter speed to incorporate motion blur. The camera will take care of setting the aperture.
Manual exposure mode represents the ultimate in creative control, allowing the photographer to set both aperture and shutter speed. This is particularly useful in tricky lighting situations. While shooting in manual may take extra practice to master, you will undoubtedly find it a powerful and valuable skill.
Back-Button Focusing
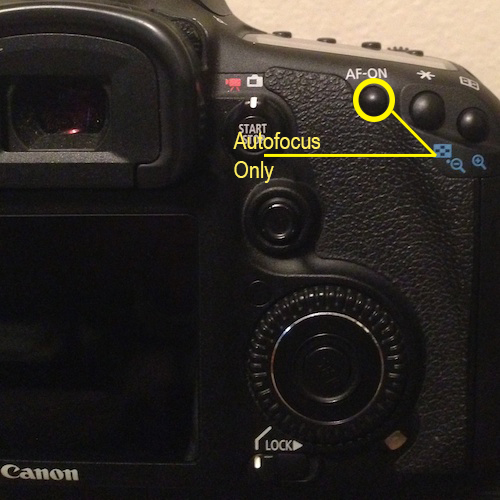
If you learned to use your camera under its default setup, then you’re familiar with the process of pressing the shutter button halfway to initiate metering and autofocus and then pressing it fully to take the shot. It works well enough but there’s another way — perhaps a better way to shoot.
With back button focus, you take away the task of focusing from the shutter button and assign it to a button on the rear of your camera, typically the AF-ON/AF-L button or * button.
The advantages of back button focus include reducing (or eliminating) the need to switch your lens to manual focus, easily maintaining continuous focus, and improved stability as you don’t need to half-press anything. You use your thumb to engage and maintain focus while using your index finger to fire off a shot. It may sound unimpressive and it takes some getting used to, but once you become accustomed to back button focus you might never return to the old way.
Auto Exposure Lock (AE-Lock)
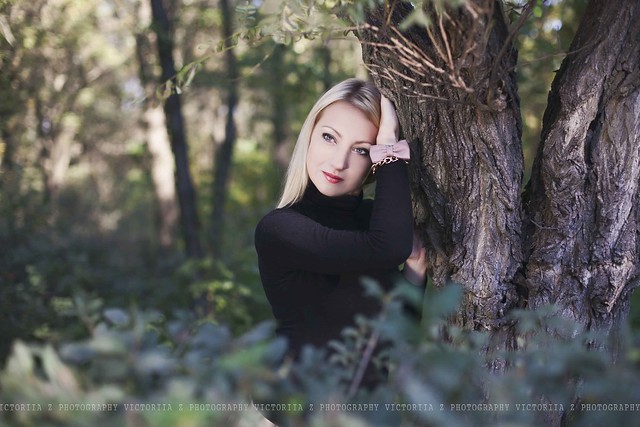
AE lock does exactly what the term suggests: it locks in a camera’s exposure settings, allowing the photographer to move the camera from one area of a scene to another without the camera changing aperture or shutter speed values. This might come in handy when using the focus and recompose method of portraiture — meter for your subject and the camera locks exposure so that you can recompose for better framing, otherwise you would end up exposing for the background instead of your subject.
Spot Metering
By default, cameras are set to matrix, evaluative, or some other similarly named metering mode designed to work well in a wide variety of lighting situations. But when things become a bit tricky, such as when working with a backlit subject, spot metering makes it easy for the photographer to get a meter reading from a small portion of the subject rather than taking readings from across the overall scene.
Your camera’s default metering mode is certainly competent, but spot metering provides an extra measure of precision which can, among other things, facilitate greater creativity — such as making silhouettes.

Conclusion
While the ideas presented here will be old hat for experienced photographers — professional or not — they can be a boon to newer photographers who haven’t quite discovered all their camera is capable of, yet are tempted to upgrade. In all likelihood, there’s no need for that — simply have a look through your camera manual to learn how to access and activate the features listed above. Between advanced exposure modes and back-button focus, auto exposure lock and spot metering, you will be well on your way to shooting like a pro (with plenty of practice, of course).


1 Comment
The truth is that talented photographers can take exceptional images with the most basic of camera gear.
Earlier this year a highly commended image was made Canon photo of the week.
it was taken using an 8 year old entry level DSLR & kit lens (low cost).
You can’t buy creativity.