Insects can be a somewhat divisive topic. People tend to have clear cut feelings about bugs: some love them, others hate them. There’s usually no ambivalence about it. Naturally, these feelings extend to photography; if you enjoy insects, you’ll probably get a thrill out of chasing after them all in the name of a great shot. On the other hand, if you detest bugs, then the very thought of going anywhere near them is hardly your idea of fun…so this may not be for you.
However, even if you do have an aversion to insects, stick around and read through the advice that follows; you might change your mind.
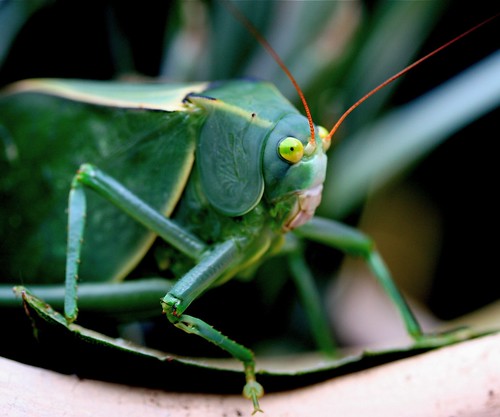
Photo by rainy city
Before You Begin
There are many, many variables involved in insect photography, not the least of which is the insects themselves. They occupy a diverse range of habitats, they vary tremendously in shape, size, and color and, perhaps most importantly, they employ different modes of mobility. It wouldn’t make much sense, then, to present you with a very specific set of instructions for photographing crawling insects as if to suggest no one’s interested in flying insects. So, the tips here will certainly be detailed enough to help make you successful in your quest to photograph bugs, yet will be general enough to apply to a variety of insect-shooting scenarios.
What You Will Need
A dedicated macro lens will no doubt give you the best results when it comes to getting very sharp, very close up images. But if this is beyond your budget, or you want to simply try your hand at insect photography before tossing a lot of money at special equipment, there are a number of other options at your disposal:
- Extension Tube – An extension tube is an apparatus that is attached between the camera body and whatever lens you are using; the distance created between the sensor and the front lens element allows you to focus more closely to your subject.
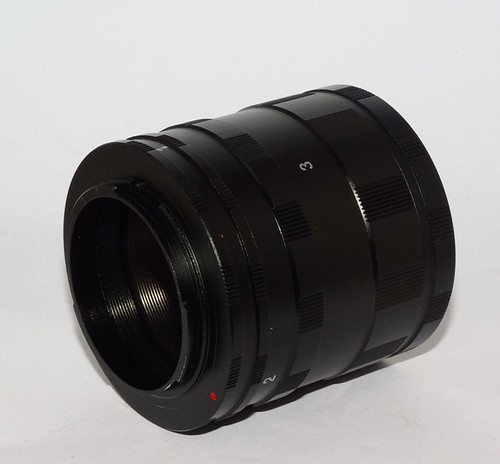
Extension tube. Photo by tourist_on_earth
- Close Up Filter – This works kind of like a magnifying glass. You screw it onto the front of your lens to increasing the magnifying power of the lens to which the filter is attached.
Close-up lens filters. Photo by asgw
- Reverse Mount Macro Lens – Attaching a lens to your camera backwards so that the rear lens element faces the front can also approximate the effect of a dedicated macro lens. You can use any lens in your collection, but a prime lens will yield better image quality — 50mm lenses are commonly used in this fashion. All you will need to purchase is a reverse ring adapter (about $10USD). You can read more about them here.
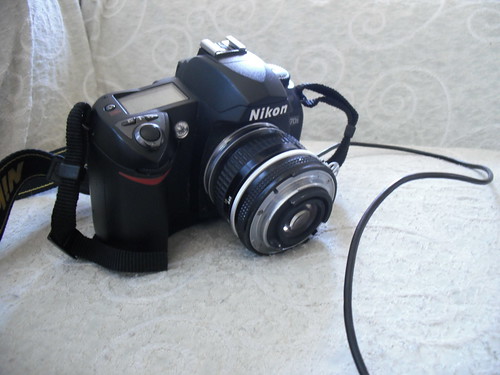
50mm reversing ring. Photo by teresatrimm
There are insect photographers who swear by the use of a tripod and off-camera flash. There are probably as many who wholly shun the use of those items. Once you become more comfortable with the process of shooting insects, you will be able to make a determination as to whether you want to add a tripod and/or flash to your set up.
Know Your Subject
You don’t need a degree in entomology, but it helps to become at least moderately acquainted with the insects you plan to photograph. Knowing their habitat, for example, will help you in knowing where to look in your area for any given region-specific insects. And knowing their habits can assist you in knowing when is the best time of day to capture certain bugs.

Photo by Brisbane City Council
Of course, photography is often a resoundingly unpredictable activity; this is especially true when it comes to insect photography. There will be plenty of occasions when you simply happen across some unknown creature. There’s no time to ponder over what kind of bug you’re looking at; you should be worried about capturing the shot.
If later you still need to identify your mystery macro subject, here are some useful resources to consult:
- https://bugguide.net/node/view/6/bgimage
- https://www.insectidentification.org
- https://www.whatsthatbug.com
Time to Shoot
Once you’ve chosen a location to begin capturing insect images, all that’s really left to do is start clicking away, right? That may be an oversimplified way of putting it, but it’s not entirely untrue. The steps below will guide you to your final destination — awesome insect photos.
1. Think like an artist
A common mistake made by novice insect photographers is they imitate the very clinical images of bugs they’ve seen in sources like textbooks and encyclopedias. Take a more artistic approach; you should regard insect photography as insect portraiture. While you can’t ask an insect to pose for you, your goal is to capture it in a unique, dynamic way that emphasizes something interesting about the insect.
2. Patience and timing
These two qualities will take you a long way in insect photography. Bugs do not operate according to our whims and desires; they don’t care about what we wish they would do. We’re on their time. Thus, your best bet is to take the stalker approach. Identify your target, follow it around, study its behavior. Most importantly, don’t scare it off. You will need to move deliberately, often slowly; and don’t get too close. You may even need to get on the ground and get dirty. Whatever it takes to go unnoticed while getting as close as you can.
3. Metering and exposure
Once you’ve found the critter you want to photograph, the next step is to ensure your camera is set to get an optimal exposure. This can be tricky, especially if you’re using a macro lens. With most insect photography, you want to maximize depth of field; stop your lens down as much as reasonably possible (usually f/32 for most macro lenses, f/22 for most non-macro lenses). Be aware that lenses tend to suffer from the effects of diffraction at such extreme apertures, which results in a significant loss of image quality. You can experiment to discover the limitations of your lens, but just for the sake of depth of field you will want to stay at f/16 or higher. Furthermore, since aperture is such a vital component of insect photography, you will likely find it more practical to use manual (M) mode on your camera so that you have full control over the aperture setting.
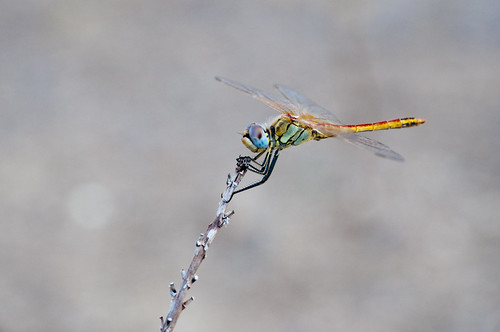
Photo by Horia Varlan
Using aperture priority (Av) isn’t entirely out of the question, but the problem is your camera will choose the shutter speed that creates what it deems to be a proper exposure based on the metering; more often than not, you will end up with shutter speeds far to slow to hand hold. It is here that a flash and/or tripod may become useful to you. Depending on the conditions, however, many insect photographers will use the sun as their main light as long as they can get fast enough shutter speeds to prevent camera shake.
4. Focus
Focusing is yet another challenge you will encounter during insect photography. Bugs are small — some much smaller than others — and they often move swiftly and erratically.
Here, again, you will want to work in manual focus mode. As capable as current DSLR auto focus systems are, they are not all that efficient when working at macro magnifications. There are any number of things that can aversely affect your attempts to focus accurately: wind, breathing, stress. While you have no control over the wind, there is a technique you can use to help minimize the effects of breathing and stress (which manifest themselves as camera shake). Set your lens to its highest magnification (make sure it’s set to manual focus), then slowly begin to move in on your subject until it is in sharp focus. Now…fire away! You might also consider setting your camera to continuous drive mode (burst mode or something similar according to your particular camera) in order to quickly capture multiple frames, thus increasing your chances of getting a keeper.
Final Thoughts
There is no one-size-fits-all approach to photography in general, insect photography in specific. There are so many variables to consider as far the environment in which you’re working, the type of lens you’re using, and the subjects themselves. There is a strong trial and error component to insect photography and, for many enthusiasts, that is part of the fun.
While the process can certainly be a challenge, the rewards are unquestionably worth all your time and effort.


2 Comments
I spend hours trying to identify flowers & bugs, thanks for giving me some new sources to check out!
I’ve gotten plenty of usage out of those links! : ) Glad you find them helpful too.