var tve_frontend_options = {"is_editor_page":"","page_events":[],"is_single":"1","ajaxurl":"https:\/\/www.lightstalking.com\/wp-admin\/admin-ajax.php","social_fb_app_id":"234010690138279","dash_url":"https:\/\/www.lightstalking.com\/wp-content\/plugins\/thrive-visual-editor\/thrive-dashboard","translations":{"Copy":"Copy"},"post_id":"5729","user_profile_nonce":"2885af77a2","ip":"64.227.14.160","current_user":[],"post_title":"What the Dutch Masters Can Teach Us About Photography: The Center of Interest","post_type":"post","post_url":"https:\/\/www.lightstalking.com\/center-of-interest\/","is_lp":"","post_request_data":[],"conditional_display":{"is_tooltip_dismissed":false}};
var advanced_ads_pro_visitor_conditions = {"referrer_cookie_name":"advanced_ads_pro_visitor_referrer","referrer_exdays":"365","page_impr_cookie_name":"advanced_ads_page_impressions","page_impr_exdays":"3650"};
var essb_settings = {"ajax_url":"https:\/\/www.lightstalking.com\/wp-admin\/admin-ajax.php","essb3_nonce":"27feacd063","essb3_plugin_url":"https:\/\/www.lightstalking.com\/wp-content\/plugins\/easy-social-share-buttons3","essb3_stats":true,"essb3_ga":false,"essb3_ga_ntg":false,"blog_url":"https:\/\/www.lightstalking.com\/","post_id":"5729","internal_stats":true};
The Dutch golden age of painting in the 17th century produced some of the most incredible art the world has ever seen. These masters of light drew on a rich heritage spanning hundreds (and arguably thousands) of years and are still revered for their knowledge and mastery of composition and colour. But what can they really teach us about the modern art of photography? As it turns out, plenty. So much, in fact, that entire books could be written. So in the interests of brevity we're going to briefly cover a single element of composition that the Dutch masters were brilliant at.
The Center of Interest
Take a look at these paintings and the way that each of them has a very specific and obvious center of interest.
De Koppelaarster by Gerrt Van Honthorst (1625)
Peasants in an Interior by Adriaen van Ostade (1661)
River Landscape with Riders by Aelbert Cuyp (1655)
You will notice that in each case your eye is drawn to a specific area of the painting. The woman in the first painting, the peasants on the left of the second painting and the riders and man in the red jacket in the last. In painting this is known as a center of interest and it's something that can be used to great effect in photography too. But how?
Luckily there are some very simple explanations of how to achieve the effect of a center of interest in a photograph much the same way as the Dutch masters achieved it in their paintings. Let's take a look at some of the more obvious ways to produce a center of interest in your photographs.
1) Strong Colour – The eye is drawn to colour and if you have a strong element of colour in a specific area of your shot, then the viewer will be drawn to look at it. If you are photographing a scene with an obvious area of bright colour then consider making it your center of interest. Be sure to compose the shot so that the element of colour is well places (remember your rule of thirds for example).
2) Strong Contrast – Similar to strong colour, an area of high contrast (light on dark or dark on light) will also serve to draw the eye. This is another chance to intentionally place a center of interest. This can be seen in all of the paintings above.
Bonus Tip: In photography you can use depth of field to isolate the center of interest so that the foreground and background are less focused (by widening your aperture).
3) Compose It – The center of interest is very rarely in the center of the image (almost never among the Dutch masters). Remember your general rules of composition, but don't be stymied by them. The photograph below, for example, does have the center of interest in the center of the image, but uses symmetry for an interesting effect.
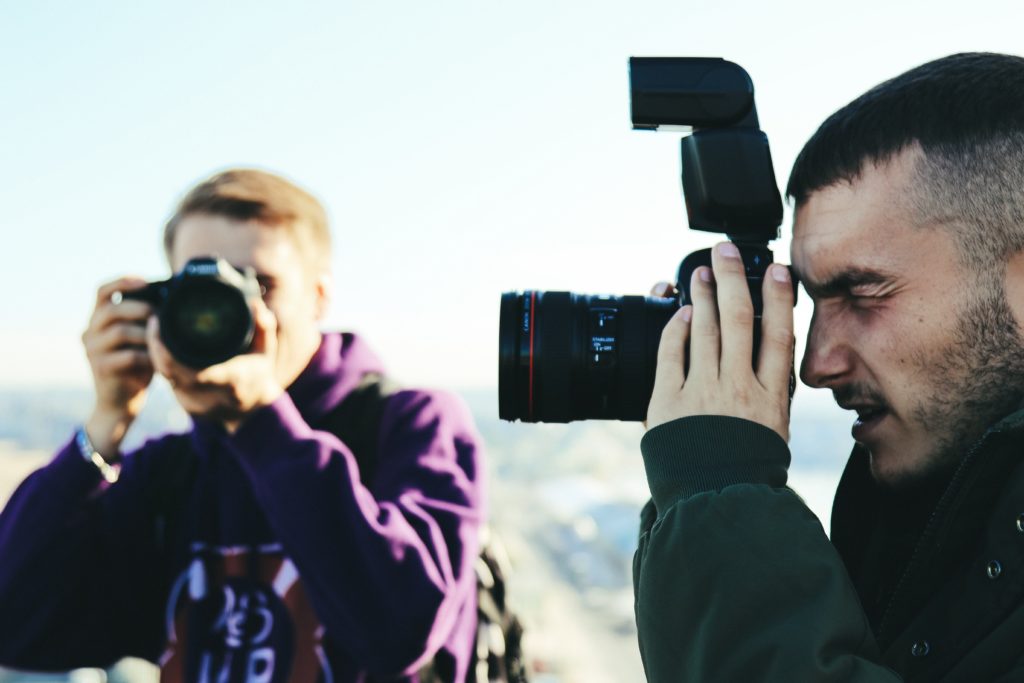
4) Interesting Subject – You can draw the eye to a center of interest by putting an interesting object there. In most cases this is a person or object, but can also be a natural (but obvious) element of the natural surrounds. In all of the paintings above, the center of visual interest is also the most interesting thing in the scene. In the photograph below, it's very obvious.
5) Compliment It – This basically means that the other visual elements in the image should draw the viewer towards the center of interest. Use leading lines to lead the eye for example. In the last painting, notice how the main tree lines on the hill and next to the water point directly to the man in the red coat. In the image below, the most obvious leading line leads straight to the center of interest – the main waiting for a train.
6) Keep it Clear – Basically the thing you want to avoid is placing visual impediments to people looking at the center of interest. Try to to allow things to block it (no tree branches going across it or foreground elements that jut into it for example)
7) Be Patient – The Dutch masters were able to spend as much time on a single painting creating the exact effect they wanted. They had the advantage that they could paint things as they wanted, whereas a photographer largely has to work with what they find (especially in natural environments). Be patient and look for ways to incorporate the elements that lead to a great center of focus and remember that the more you practice, the more likely it will be that the perfect visual opportunity will present itself.
About Author
Rob is the founder of Light Stalking. His love for photography started as a child with a Kodak Instamatic and pushed him into building this fantastic place all these years later, and you can get to know him better here. Rob's Gear Camera: Nikon D810 Lenses: Nikkor 14-24 f/2.8, Nikkor 50mm f/1.8
A fascinating article and goes to show that the modern photographer can learn a lot for the old masters Oil, watercolour, acrylic or photograph the principles of good lighting are always important.
I am so grateful for my Art History degree – the article is a great means to deliver these critical elements of art to photographers at any level. thanks!
I think the old masters of art are a great resource to learn about composition, value and the other elements and principles of art. My favorite Dutch master is of course Rembrandt whose use of light teaches us so very much about movement, emphasis, the evocative mood. Try blurring his work or squinting at it sometime and realize what a wonderful abstract artist he might have been! From Vermeer to Van Gogh and beyond, there is so much to realize from them!
Should you decide this a good thing to remember is to decide one center of interest. This center interest ideally is the most lighted of all objects and others are partly concealed by shadows.
It’s always good to be reminded of the basics! Thanks. Great article. Couple typos … “Be sure to compose the shot so that the element of colour is well placeD,” and “Try NOT to allow things to block it.”
Valuable advice. I had much this issue with this photo
[url=https://www.flickr.com/photos/natecochrane/6518818619/]https://farm8.staticflickr.com/7168/6518818619_22448caeda_s.jpg[/url] [url=https://www.flickr.com/photos/natecochrane/6518818619/]A nail in the environment[/url] by [url=https://www.flickr.com/people/natecochrane/]natecochrane[/url], on Flickr
A contact suggested reworking it so I placed a grad ND on it in Lightroom and lightened the area of interest to avoid confusion in the viewer’s mind. Now it’s a more successful image and closer to my vision.
Valuable advice. I had much this issue with this photo
A contact suggested reworking it so I placed a grad ND on it in Lightroom and lightened the area of interest to avoid confusion in the viewer’s mind. Now it’s a more successful image and closer to my vision.
I totally agree! Modern photographers can learn a lot for the old Dutch masters like Adriaen Van Ostade! More of his artwork here: WahooArt.com
Thank you for that wonderful advice.
Thank you. As a landscape painter this was very helpful.
var advanced_ads_cookies = {"cookie_path":"\/","cookie_domain":""};
var advadsCfpInfo = {"cfpExpHours":"3","cfpClickLimit":"3","cfpBan":"7","cfpPath":"","cfpDomain":"www.lightstalking.com"};
var beloadmore = {"url":"https:\/\/www.lightstalking.com\/wp-admin\/admin-ajax.php","query":{"post__not_in":[5729],"category_name":"photographic-composition","posts_per_page":3}};
var tve_dash_front = {"ajaxurl":"https:\/\/www.lightstalking.com\/wp-admin\/admin-ajax.php","force_ajax_send":"1","is_crawler":"","recaptcha":[],"post_id":"5729"};
var TVE_Ult_Data = {"ajaxurl":"https:\/\/www.lightstalking.com\/wp-admin\/admin-ajax.php","ajax_load_action":"tve_ult_ajax_load","conversion_events_action":"tve_ult_conversion_event","shortcode_campaign_ids":[],"matched_display_settings":[],"campaign_ids":[],"post_id":5729,"is_singular":true,"tu_em":"","evergreen_redirects":[]};
(function() { var po = document.createElement('script'); po.type = 'text/javascript'; po.async=true;; po.src = 'https://www.lightstalking.com/wp-content/plugins/easy-social-share-buttons3/lib/modules/conversions-pro/assets/share-conversions-tracker.js'; var s = document.getElementsByTagName('script')[0]; s.parentNode.insertBefore(po, s); })();(function() { var po = document.createElement('script'); po.type = 'text/javascript'; po.async=true;; po.src = 'https://www.lightstalking.com/wp-content/plugins/easy-social-share-buttons3/assets/modules/pinterest-pro.min.js'; var s = document.getElementsByTagName('script')[0]; s.parentNode.insertBefore(po, s); })();(function() { var po = document.createElement('script'); po.type = 'text/javascript'; po.async=true;; po.src = 'https://www.lightstalking.com/wp-content/plugins/easy-social-share-buttons3/assets/modules/subscribe-forms.min.js'; var s = document.getElementsByTagName('script')[0]; s.parentNode.insertBefore(po, s); })();(function() { var po = document.createElement('script'); po.type = 'text/javascript'; po.async=true;; po.src = 'https://www.lightstalking.com/wp-content/plugins/easy-social-share-buttons3/assets/js/essb-core.min.js'; var s = document.getElementsByTagName('script')[0]; s.parentNode.insertBefore(po, s); })();
let ccwpDOMLoaded=!1;
let ccwp_loaded = false;
let resources_length=0;
let resources =undefined;
let is_last_resource = 0;
ccwpUserInteractions=["keydown","mousemove","wheel","touchmove","touchstart","touchend","touchcancel","touchforcechange"];
ccwpUserInteractions.forEach(function(e){
window.addEventListener(e,calculate_load_times);
});
function calculate_load_times() {
// Check performance support
if (performance === undefined) {
console.log("Performance NOT supported");
return;
}
// Get a list of "resource" performance entries
resources = performance.getEntriesByType("resource");
if (resources === undefined || resources.length <= 0) {
console.log("NO Resource performance records");
}
if(resources.length){
resources_length=resources.length;
}
for(let i=0; i < resources.length; i++) {
if(resources[i].responseEnd>0){
is_last_resource = is_last_resource + 1;
}
}
let uag = navigator.userAgent;
let gpat = /Google Page Speed Insights/gm;
let gres = uag.match(gpat);
let cpat = /Chrome-Lighthouse/gm;
let cres = uag.match(cpat);
let wait_till=300;
let new_ua = "Mozilla/5.0 (Linux; Android 11; moto g power (2022)) AppleWebKit/537.36 (KHTML, like Gecko) Chrome/109.0.0.0 Mobile Safari/537.36";
let new_ua2 = "Mozilla/5.0 (Macintosh; Intel Mac OS X 10_15_7) AppleWebKit/537.36 (KHTML, like Gecko) Chrome/109.0.0.0 Safari/537.36";
if(gres || cres || uag==new_ua || uag==new_ua2){
wait_till = 3000;
}
if(is_last_resource==resources.length){
setTimeout(function(){
console.log("ccwpTriggerDelayedScripts timeout : "+wait_till);
ccwpTriggerDelayedScripts();
},wait_till);
}
}
window.addEventListener("load", function(e) {
console.log("load complete");
setTimeout(function(){
calculate_load_times();
},100);
});async function ccwpTriggerDelayedScripts() {
if(ccwp_loaded){ return ;}
ccwpPreloadStyles();
ccwpPreloadDelayedScripts();
ccwpLoadCss();
ccwpScriptLoading();
ccwp_loaded=true;
}
function ccwpPreloadStyles() {
let e = document.createDocumentFragment();
var cssEle = document.querySelectorAll("link[rel=ccwpdelayedstyle]");
for(let i=0; i <= cssEle.length;i++){
if(cssEle[i]){
cssEle[i].href = removeVersionFromLink(cssEle[i].href);
let r = document.createElement("link");
r.href = cssEle[i].href;
r.rel = "preload";
r.as = "style";
e.appendChild(r);
}
}
document.head.appendChild(e);
}
function ccwpPreloadDelayedScripts() {
var e = document.createDocumentFragment();
document.querySelectorAll("script[type=ccwpdelayedscript]").forEach(function(t) {
var n = removeVersionFromLink(t.getAttribute("src"));
if (n) {
t.setAttribute("src", n);
var r = document.createElement("link");
r.href = n, r.rel = "preload", r.as = "script", e.appendChild(r)
}
}), document.head.appendChild(e)
}
function ccwpScriptLoading(){
var jsEle = document.querySelectorAll("script[type=ccwpdelayedscript]");
jsEle.forEach(function(t) {
t.type = "text/javascript";
if(t.src)
{
t.src = removeVersionFromLink(t.src);
}
});
}function ccwpLoadCss(){
var cssEle = document.querySelectorAll("link[rel=ccwpdelayedstyle]");
for(let i=0; i <= cssEle.length;i++){
if(cssEle[i]){
cssEle[i].href = removeVersionFromLink(cssEle[i].href);
cssEle[i].rel = "stylesheet";
cssEle[i].type = "text/css";
}
}var cssEle = document.querySelectorAll("style[type=ccwpdelayedstyle]");
for(let i=0; i <= cssEle.length;i++){
if(cssEle[i]){
cssEle[i].type = "text/css";
}
}
}
function removeVersionFromLink(link)
{
if(ccwpIsValidUrl(link))
{
const url = new URL(ccwpFormatLink(link));
url.searchParams.delete("ver");
url.searchParams.delete("time");
return url.href;
}
else{
return link;
}
}
function ccwpIsValidUrl(urlString)
{
if(urlString){
var expression =/[-a-zA-Z0-9@:%_\+.~#?&//=]{2,256}\.[a-z]{2,4}\b(\/[-a-zA-Z0-9@:%_\+.~#?&//=]*)?/gi;
var regex = new RegExp(expression);
return urlString.match(regex);
}
return false;
}
function ccwpFormatLink(link)
{
let http_check=link.match("http:");
let https_check=link.match("https:");
if(!http_check && !https_check)
{
return location.protocol+link;
}
return link;
}
_Adriaen_van_Ostade.jpg")


12 Comments
Great article. Lots to learn from the classics.
A fascinating article and goes to show that the modern photographer can learn a lot for the old masters Oil, watercolour, acrylic or photograph the principles of good lighting are always important.
I am so grateful for my Art History degree – the article is a great means to deliver these critical elements of art to photographers at any level. thanks!
I think the old masters of art are a great resource to learn about composition, value and the other elements and principles of art. My favorite Dutch master is of course Rembrandt whose use of light teaches us so very much about movement, emphasis, the evocative mood. Try blurring his work or squinting at it sometime and realize what a wonderful abstract artist he might have been! From Vermeer to Van Gogh and beyond, there is so much to realize from them!
Great article – good advice!https://lightstalking.com/wp-content/uploads/2011/06/Gerrit_van_Honthorst_-_De_koppelaarster.jpg
Should you decide this a good thing to remember is to decide one center of interest. This center interest ideally is the most lighted of all objects and others are partly concealed by shadows.
It’s always good to be reminded of the basics! Thanks. Great article. Couple typos … “Be sure to compose the shot so that the element of colour is well placeD,” and “Try NOT to allow things to block it.”
Valuable advice. I had much this issue with this photo
[url=https://www.flickr.com/photos/natecochrane/6518818619/]https://farm8.staticflickr.com/7168/6518818619_22448caeda_s.jpg[/url]
[url=https://www.flickr.com/photos/natecochrane/6518818619/]A nail in the environment[/url] by [url=https://www.flickr.com/people/natecochrane/]natecochrane[/url], on Flickr
A contact suggested reworking it so I placed a grad ND on it in Lightroom and lightened the area of interest to avoid confusion in the viewer’s mind. Now it’s a more successful image and closer to my vision.
Valuable advice. I had much this issue with this photo
https://farm8.staticflickr.com/7168/6518818619_22448caeda_s.jpg
https://www.flickr.com/photos/natecochrane/6518818619/
A contact suggested reworking it so I placed a grad ND on it in Lightroom and lightened the area of interest to avoid confusion in the viewer’s mind. Now it’s a more successful image and closer to my vision.
I totally agree! Modern photographers can learn a lot for the old Dutch masters like Adriaen Van Ostade! More of his artwork here: WahooArt.com
Thank you for that wonderful advice.
Thank you. As a landscape painter this was very helpful.