var tve_frontend_options = {"is_editor_page":"","page_events":[],"is_single":"1","ajaxurl":"https:\/\/www.lightstalking.com\/wp-admin\/admin-ajax.php","social_fb_app_id":"234010690138279","dash_url":"https:\/\/www.lightstalking.com\/wp-content\/plugins\/thrive-visual-editor\/thrive-dashboard","translations":{"Copy":"Copy"},"post_id":"208944","user_profile_nonce":"04876fb9ff","ip":"47.156.119.228","current_user":[],"post_title":"How to Use Fill Light to Improve Your Portraits","post_type":"post","post_url":"https:\/\/www.lightstalking.com\/fill-light-portraits\/","is_lp":"","post_request_data":[],"conditional_display":{"is_tooltip_dismissed":false}};
var advanced_ads_pro_visitor_conditions = {"referrer_cookie_name":"advanced_ads_pro_visitor_referrer","referrer_exdays":"365","page_impr_cookie_name":"advanced_ads_page_impressions","page_impr_exdays":"3650"};
var essb_settings = {"ajax_url":"https:\/\/www.lightstalking.com\/wp-admin\/admin-ajax.php","essb3_nonce":"f6325c5592","essb3_plugin_url":"https:\/\/www.lightstalking.com\/wp-content\/plugins\/easy-social-share-buttons3","essb3_stats":true,"essb3_ga":false,"essb3_ga_ntg":false,"blog_url":"https:\/\/www.lightstalking.com\/","post_id":"208944","internal_stats":true};
As you advance in your photography know-how, a natural evolution will be your desire to light elements of your photographs in a way that you find more pleasing or creative. One thing that is really necessary to master for this evolution, and a key feature when photographing portraits is fill light.
Fill light is usually necessary when the subject is lit from the back (with the light source in the frame) thus the side facing the camera is generally quite dark (though it can happen in plenty of other situations when a scene is unevenly lit). If you don’t fill in that shadow you’ll often have to overexpose the background where the light source is in order to get the subject exposed correctly. There are several ways to use fill light in a situation like this, each with its own challenges.
How to Use a Reflector for Fill Light
This is probably the cheapest tool to help you get some fill light when necessary. Reflectors utilize available light, meaning they simply reflect the sun back towards your subject. Now, as opposed to a flash, the reflector provides softer light due to the sheer size of its surface. As you probably know by now, the bigger the surface – the softer the light is. You can easily find 40 inch reflectors (in diameter) for around 20-30$, but if you wish you can get even bigger ones for a similar price.
Another good thing with reflectors is that the brand doesn’t matter much, since there are no “high tech” parts in it – it’s a simple reflective surface, nothing special. The branded ones will maybe last longer due to better materials used, but so far I haven’t seen many reflectors falling apart due to bad build quality, and all of them were no name brands.
The downside, however, is that you often need a third person to hold the reflector since it is often really difficult to hold it by yourself and shoot the photo. Yes, you can set it up on a tripod or something similar, but if it is large enough it can easily get knocked down and get moved by the wind. Additionally, if it is not a strong light source, like the sun for example, the reflector won’t be really efficient: the less light there is, the less light it can bounce back.
How to Use Fill flash
Fill flash is often the best way to go, if you know how to use it of course. Yes, the flash is simple to set up, if you don’t mind the harsh shadows and different color temperature. If you want to match the color temperature however, you’ll have to fiddle with it a bit. Using gels and softboxes/umbrellas will soon become a must as you strive for better quality images, and, of course you’ll want it off camera as well, so you’ll need to bring tripods and so forth.
Fill flash is the way you get best quality images if there is not enough light to bounce back with a reflector. The key thing that you need to remember about the quality of the images when using flash, is that it is an intense precise light due to the high power, but because of the short burst of light emitted it usually increases sharpness by freezing the subject.
Sure, it is a tad more complicated to work with, and more expensive, but if you can afford the cost and the effort the results can be great.
How to Use HSL Recovery in Lightroom
If you don’t have a flash or a diffuser on hand, and you really want to do a portrait like these you'll need to do some post processing. You’ll have to rely on the dynamic range of the sensor and your post processing technique.
A combination of a reflector and HSL recovery is used in this image. Most of the skin luminance is restored using the yellow and orange luminance sliders.
The trick to this is the histogram. Shoot the photo but have a good look at the histogram and make sure the highlights are just about to get clipped (ie stacked to the right without touching the far right edge of the graph). When you load up the shot in Lightroom, open up the shadows as much as you can without allowing any artefacts. Then, use the HSL panel, select Luminance and click on the face of your subject – drag upwards and it will brighten just those tones. HSL will usually prove better than just using adjustment brush with exposure since it will induce less noise (because it only boosts certain channels, not all of them).
Of course, this won’t replace a reflector or a flash, but it will prove better than no recovery at all. Bear in mind that noise is very hard to avoid here: depending on the capabilities of the sensor in your camera, the amount of noise will vary. Generally, the wider the dynamic range of the sensor, the less noise you’ll have.
About Author
Photographer who loves challenging and experimental photography and loves sharing his knowledge about it.
var advanced_ads_cookies = {"cookie_path":"\/","cookie_domain":""};
var advadsCfpInfo = {"cfpExpHours":"3","cfpClickLimit":"3","cfpBan":"7","cfpPath":"","cfpDomain":"www.lightstalking.com"};
var beloadmore = {"url":"https:\/\/www.lightstalking.com\/wp-admin\/admin-ajax.php","query":{"post__not_in":[208944],"category_name":"light","posts_per_page":3}};
var tve_dash_front = {"ajaxurl":"https:\/\/www.lightstalking.com\/wp-admin\/admin-ajax.php","force_ajax_send":"1","is_crawler":"","recaptcha":[],"post_id":"208944"};
var TVE_Ult_Data = {"ajaxurl":"https:\/\/www.lightstalking.com\/wp-admin\/admin-ajax.php","ajax_load_action":"tve_ult_ajax_load","conversion_events_action":"tve_ult_conversion_event","shortcode_campaign_ids":[],"matched_display_settings":[],"campaign_ids":[],"post_id":208944,"is_singular":true,"tu_em":"","evergreen_redirects":[]};
(function() { var po = document.createElement('script'); po.type = 'text/javascript'; po.async=true;; po.src = 'https://www.lightstalking.com/wp-content/plugins/easy-social-share-buttons3/lib/modules/conversions-pro/assets/share-conversions-tracker.js'; var s = document.getElementsByTagName('script')[0]; s.parentNode.insertBefore(po, s); })();(function() { var po = document.createElement('script'); po.type = 'text/javascript'; po.async=true;; po.src = 'https://www.lightstalking.com/wp-content/plugins/easy-social-share-buttons3/assets/modules/pinterest-pro.min.js'; var s = document.getElementsByTagName('script')[0]; s.parentNode.insertBefore(po, s); })();(function() { var po = document.createElement('script'); po.type = 'text/javascript'; po.async=true;; po.src = 'https://www.lightstalking.com/wp-content/plugins/easy-social-share-buttons3/assets/modules/subscribe-forms.min.js'; var s = document.getElementsByTagName('script')[0]; s.parentNode.insertBefore(po, s); })();(function() { var po = document.createElement('script'); po.type = 'text/javascript'; po.async=true;; po.src = 'https://www.lightstalking.com/wp-content/plugins/easy-social-share-buttons3/assets/js/essb-core.min.js'; var s = document.getElementsByTagName('script')[0]; s.parentNode.insertBefore(po, s); })();
let ccwpDOMLoaded=!1;
let ccwp_loaded = false;
let resources_length=0;
let resources =undefined;
let is_last_resource = 0;
ccwpUserInteractions=["keydown","mousemove","wheel","touchmove","touchstart","touchend","touchcancel","touchforcechange"];
ccwpUserInteractions.forEach(function(e){
window.addEventListener(e,calculate_load_times);
});
function calculate_load_times() {
// Check performance support
if (performance === undefined) {
console.log("Performance NOT supported");
return;
}
// Get a list of "resource" performance entries
resources = performance.getEntriesByType("resource");
if (resources === undefined || resources.length <= 0) {
console.log("NO Resource performance records");
}
if(resources.length){
resources_length=resources.length;
}
for(let i=0; i < resources.length; i++) {
if(resources[i].responseEnd>0){
is_last_resource = is_last_resource + 1;
}
}
let uag = navigator.userAgent;
let gpat = /Google Page Speed Insights/gm;
let gres = uag.match(gpat);
let cpat = /Chrome-Lighthouse/gm;
let cres = uag.match(cpat);
let wait_till=300;
let new_ua = "Mozilla/5.0 (Linux; Android 11; moto g power (2022)) AppleWebKit/537.36 (KHTML, like Gecko) Chrome/109.0.0.0 Mobile Safari/537.36";
let new_ua2 = "Mozilla/5.0 (Macintosh; Intel Mac OS X 10_15_7) AppleWebKit/537.36 (KHTML, like Gecko) Chrome/109.0.0.0 Safari/537.36";
if(gres || cres || uag==new_ua || uag==new_ua2){
wait_till = 3000;
}
if(is_last_resource==resources.length){
setTimeout(function(){
console.log("ccwpTriggerDelayedScripts timeout : "+wait_till);
ccwpTriggerDelayedScripts();
},wait_till);
}
}
window.addEventListener("load", function(e) {
console.log("load complete");
setTimeout(function(){
calculate_load_times();
},100);
});async function ccwpTriggerDelayedScripts() {
if(ccwp_loaded){ return ;}
ccwpPreloadStyles();
ccwpPreloadDelayedScripts();
ccwpLoadCss();
ccwpScriptLoading();
ccwp_loaded=true;
}
function ccwpPreloadStyles() {
let e = document.createDocumentFragment();
var cssEle = document.querySelectorAll("link[rel=ccwpdelayedstyle]");
for(let i=0; i <= cssEle.length;i++){
if(cssEle[i]){
cssEle[i].href = removeVersionFromLink(cssEle[i].href);
let r = document.createElement("link");
r.href = cssEle[i].href;
r.rel = "preload";
r.as = "style";
e.appendChild(r);
}
}
document.head.appendChild(e);
}
function ccwpPreloadDelayedScripts() {
var e = document.createDocumentFragment();
document.querySelectorAll("script[type=ccwpdelayedscript]").forEach(function(t) {
var n = removeVersionFromLink(t.getAttribute("src"));
if (n) {
t.setAttribute("src", n);
var r = document.createElement("link");
r.href = n, r.rel = "preload", r.as = "script", e.appendChild(r)
}
}), document.head.appendChild(e)
}
function ccwpScriptLoading(){
var jsEle = document.querySelectorAll("script[type=ccwpdelayedscript]");
jsEle.forEach(function(t) {
t.type = "text/javascript";
if(t.src)
{
t.src = removeVersionFromLink(t.src);
}
});
}function ccwpLoadCss(){
var cssEle = document.querySelectorAll("link[rel=ccwpdelayedstyle]");
for(let i=0; i <= cssEle.length;i++){
if(cssEle[i]){
cssEle[i].href = removeVersionFromLink(cssEle[i].href);
cssEle[i].rel = "stylesheet";
cssEle[i].type = "text/css";
}
}var cssEle = document.querySelectorAll("style[type=ccwpdelayedstyle]");
for(let i=0; i <= cssEle.length;i++){
if(cssEle[i]){
cssEle[i].type = "text/css";
}
}
}
function removeVersionFromLink(link)
{
if(ccwpIsValidUrl(link))
{
const url = new URL(ccwpFormatLink(link));
url.searchParams.delete("ver");
url.searchParams.delete("time");
return url.href;
}
else{
return link;
}
}
function ccwpIsValidUrl(urlString)
{
if(urlString){
var expression =/[-a-zA-Z0-9@:%_\+.~#?&//=]{2,256}\.[a-z]{2,4}\b(\/[-a-zA-Z0-9@:%_\+.~#?&//=]*)?/gi;
var regex = new RegExp(expression);
return urlString.match(regex);
}
return false;
}
function ccwpFormatLink(link)
{
let http_check=link.match("http:");
let https_check=link.match("https:");
if(!http_check && !https_check)
{
return location.protocol+link;
}
return link;
}
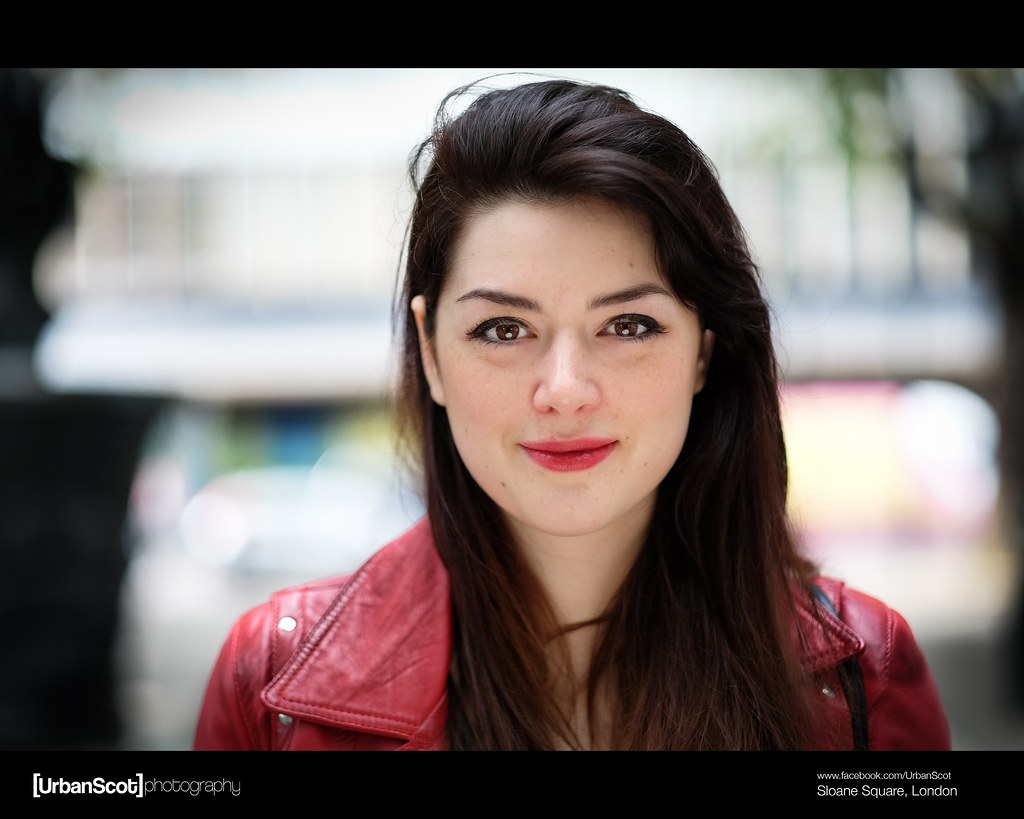 Photo by Peter McConnochie
 Photo by Vox Efx


