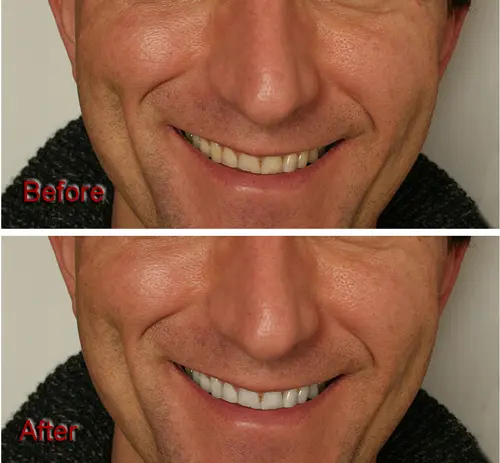
Smiles seem to be one of the fundamental criteria for determining what constitutes a likable portrait. Of course, not every portrait needs to feature a smiling subject in order to be considered good — that could quickly become boring; but beautiful smiles do have a way of grabbing the viewer’s attention.
You always want your subjects to look their best, so no matter how naturally attractive the person you’re photographing is, sometimes you need to make a few post-processing tweaks to achieve exactly the look you’re going for. And teeth often need a bit of digital enhancement. There are numerous ways to brighten teeth and it isn’t as complicated a task as you might think. With just a few steps in Photoshop, you can add that missing sparkle to a subject’s teeth without it taking up too much of your time.
1. Open your image.
2. Make a selection around the teeth. You can use the Magnetic Lasso Tool, the Pen Tool, the Magic Wand Tool — any selection tool will get the job done, so feel free to use whatever you’re comfortable with.
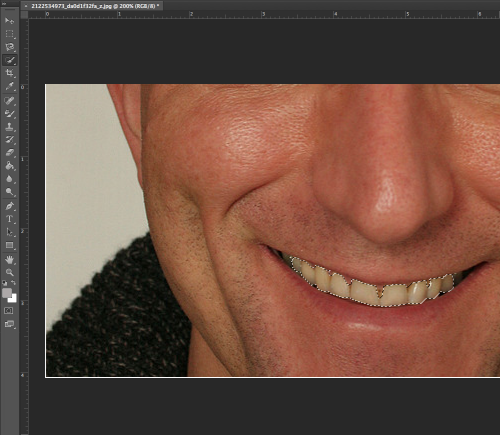
If you need to further refine your selection, right click and choose “Refine Edge…” Perhaps the most helpful refinement you can make is to Feather the selection (this will “smooth” out your selection some). A value of 5 should be good, but you should adjust according to the needs of the image you're working on.
3. Create an adjustment layer. Go to Layer > New Adjustment Layer > Hue/Saturation, or click the New Layer button at the bottom of the Layers Palette and select Hue/Saturation.
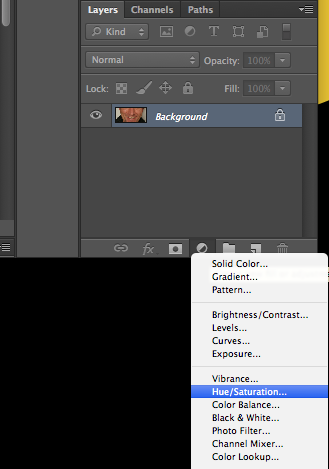
Decrease Saturation and increase Lightness until teeth arrive at a whiter, brighter, but still natural looking state.
4. Create a second adjustment layer. Command-click (Mac) or control-click (Win) on the adjustment layer you created in the step above (be sure to click on the black box). You will see the previous selection return.
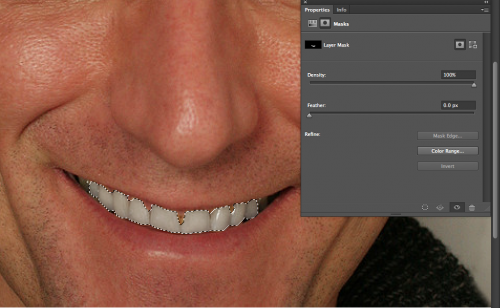
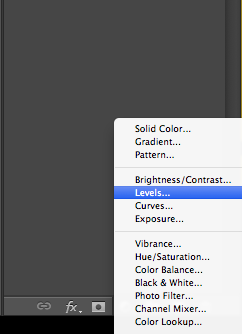
Now go to Layer > New Adjustment Layer > Levels, or click the New Layer button at the bottom of the Layers Palette and select Levels.
You will see a histogram with three sliders beneath it. These sliders, from left to right, represent shadows, mid tones, and highlights. Adjust these to restore or enhance definition in the teeth. Again, how much work needs to be done here will depend on the image you’re working with.
And voila! You're done.
