Content-Aware Scaling is somewhat of an unsung hero and one of many nifty little tricks that get buried behind their bigger, more popular editing tool counterparts in Photoshop. Content-Aware Scaling is actually, really useful and, if you ever need to give your photo a different aspect ratio but not by cropping, this tool might just be the one for the job. For example, the widespread use of apps like Instagram increases the need to turn square cropped photos into an aspect ratio more suitable for framing. Or, those times when you have a portrait orientated photo, but want it to be landscape orientation and you do not want to crop it down to the correct orientation. Content-Aware Scale is exactly the right Photoshop maneuver for you. The good news is, it's really easy to do – here's how!
The Step By Step
Certain images are better suited to getting quality results than others. For example, images with lots of sky will scale nicely, whereas images with a lot of subjects and detail will require a little more work. And, of course, there are always the images that will never look quite right.
This isn't too complicated a process, but I've made a video walk through of the steps for those of us that prefer learning through videos. If you prefer text to videos, read on.
We'll be working with the snapshot you see above that I took on my phone right inside the Instagram app. I like this image, but want it to be a nice landscape portrait so I'll show you how to use Content Aware Scaling to change the aspect ratio. You can download a copy of the image right from Flickr by clicking here or work with an image of your own. Regardless, the first thing we're going to do is open it up in Adobe Photoshop.
Adjusting Canvas Size
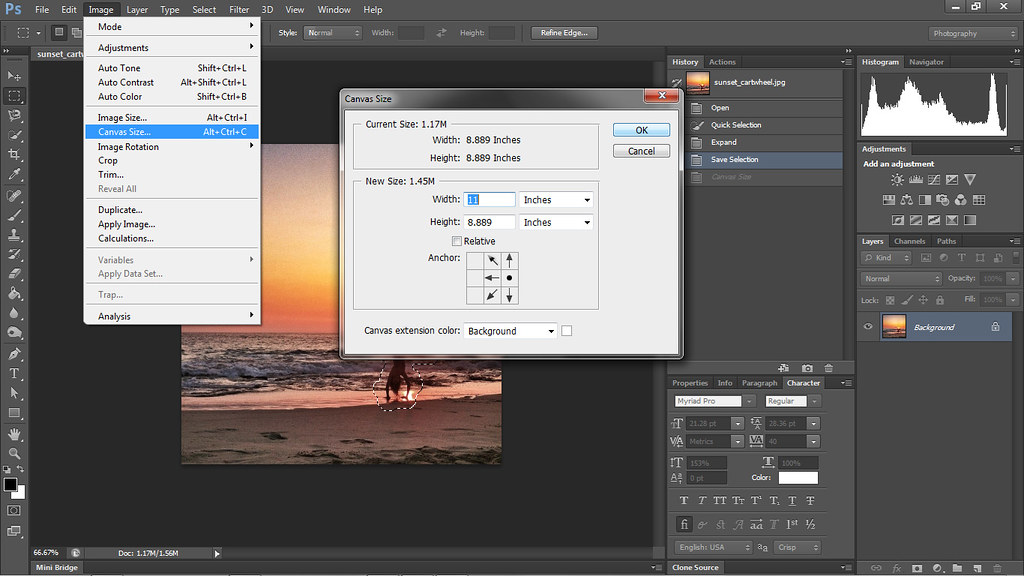
Let's go ahead and stretch out the canvas so we have some room to work on. Click on Image > Canvas Size. When the dialog box appears, adjust the size to what you want to scale your image to. I'm going for an image that is around a 8.5 x 11 aspect ration, so I plug those numbers in and press OK. If you're not sure what size you want yet, just double the size of the canvas. This will give you plenty of room to work with and you can always crop out the unused portion of the canvas when you are done. (Click on the images for a bigger resolution)
Expanding the canvas
Selecting The Protected Areas
Next, grab the Quick Selection and make a rough selection around the girl and the sun. It doesn't have to be perfect, so don't spend too much time on it. Now, go to Select > Modify > Expand. When the dialog box appears, type in 10 pixels and press OK. This will expand the Quick Selection you just made and extend it outwards away from the girl for another 10 pixels for a little extra wiggle room.
With the Quick Selection still active, go to Select > Save Selection. When this dialog box appears, type a new descriptive Name in such as Girl & Sun. Click OK. We'll get back to why these steps are important soon.
Making The Content Aware Scale
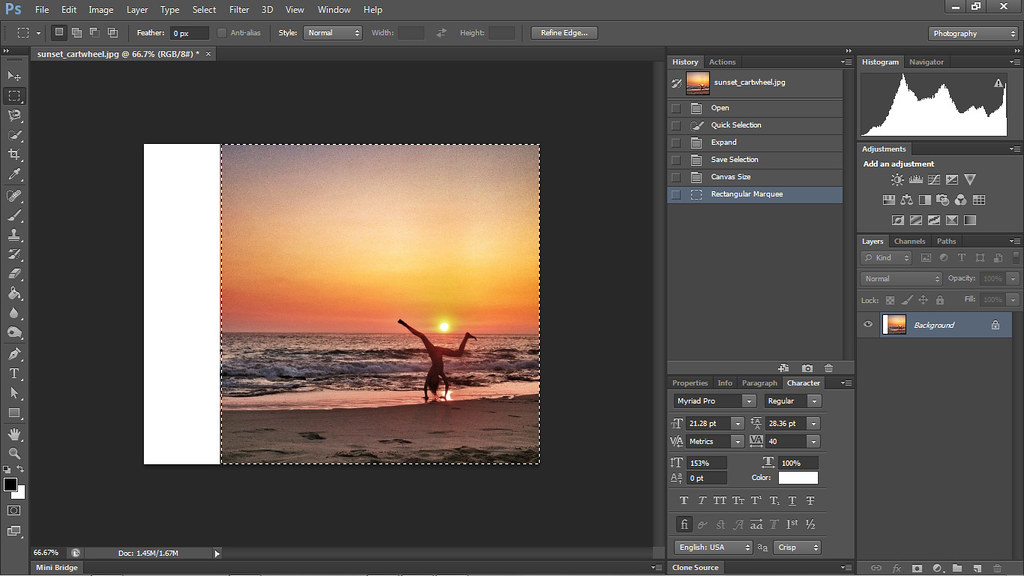
Grab the Rectangular Marquee Selection Tool and use it to select the entire original square crop image.
Selecting the square crop for scaling
Once that is done, go to Edit > Content Aware Scale. Drag the left edge of the image out to the edge of the canvas you added earlier, thus creating a landscape.
As you can see, something doesn't look right. The girl was stretched out and the distortion looks really bad. This is where all the Quick Selection steps will come in handy. With the Content Aware Scaling still active, but before you apply the scale, go up to the top of the screen and click the drop down menu titled “Protect.” Select the Quick Selection you named in the previous step. In this case we'll click on Girl & Sun.
All Finished!
Because we selected and defined the area immediately surrounding the girl, the are was protected from distortion. You'll see the girl magically pop back to her normal sized self. That is all there is to it. While the changes we made in this image were small, this is a good example of an image that could have been stretched out a significant amount more if needed. Feel free to experiment with it until you are comfortable with the process–you never when it will come in handy!


3 Comments
Not sure if this went through.I have PSE 10. I have an image I would like to scale one side this way. Is there a way in PSE 10
Thanks a lot, I just tried it out and it reay worked, I’m learning so much from you guys !!!! Keep giving us these realy great lessons !
Hey thanks. It worked! This will be really useful for things like Facebook covers as their aspect ration is so unusual that I always have to make adjustments. Some really interesting images I’ve created just don’t lend themselves to being that wide. I like knowing how to use this tool in my toolbox. It was always there, like many things in Photoshop, which is such a rich, deep program with so many great tools still awaiting discovery.