One of the largest problems many folks have with digital photography is the amount of noise that ends up in the final image. Noise basically presents itself as graininess or speckles, usually most recognizable across larger areas of uniform colour such as sky. We will take a look at how to reduce noise in photos.
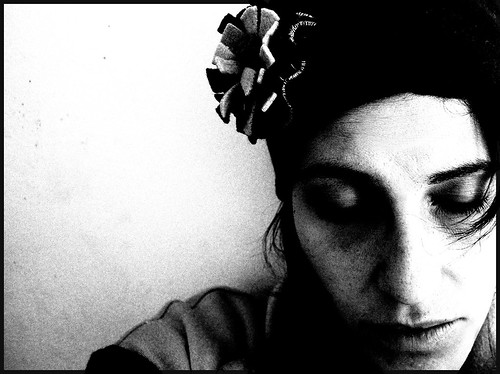
While sometimes moise is a desirable effect such as in some of the photos below, often you will want to minimise it. The bad news is that there is no perfect solution to noise problems, but the good news is that there are things you can do to reduce noise in your photographs, and in many cases, eliminate noise.

Take A Look At What Causes Noise And How To Reduce Noise In Photos:
What Is Noise?
In photography, noise refers to irregular grainy spots that you see in images rendering the details of the image less sharp. These are pixels that do not represent the correct colour or exposure of the scene and can make the image look awkward.

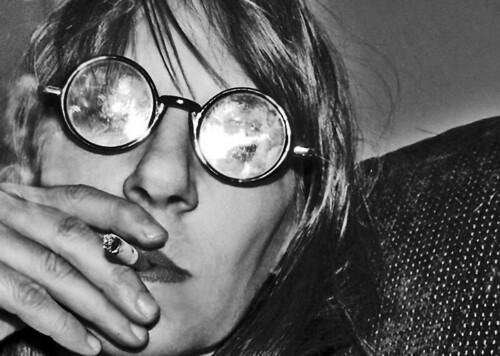
Here is an example.

What Causes Noise?
Truly knowing how to reduce or eliminate noise is better served by knowing what causes it. In photography there are several types and causes of noise.
The first scenario is that image sensor heat can increase enough to stimulate electrons (“Thermal Noise”). These superfluous electrons then get mixed in with the “true” photoelectrons that are the real target of our image sensor. The analog signal (which is converted to pixels by the sensor) is therefore contaminated before it even gets to that point.
In some situations the above scenario can cause each of the photosites on an image sensor to generate superfluous signals which can then contaminate the neighboring photosites. On smaller image sensors which cram more photosites into a smaller area, this effect can be magnified.
Another common cause of noise is shooting at higher ISO settings. As these settings basically magnify the light signal, they also magnify other unwanted signals such as background interference (eg. heat sources). When you are photographing an area of low light, the background signals can be strong enough to compete with the signals from the limited light in the scene you are shooting.
Long exposure photography is another reason why noise gets introduced in images. Long exposure leads to the sensor heating up depending on the amount of time the exposure is made and this heat leads to hot pixels showing up on the resulting image.
So the two main reasons why noise shows up in a photograph are shooting at high iso and making long exposure images. Should the photographer then stick to only low ISO values or not do long exposure photography?
No, that is not the case.
There are certain precautions the photographer can take while shooting the images or follow certain procedures after the shoot so noise can be minimised or eliminated from photographs.
Types of Noise:
Here are the main types of noise that usually show on a digital image:
- Thermal Noise: Thermal noise is also called hot pixels and these appear as a result of the sensor heating up during long exposures. These are bright and coloured.
- Colour Noise: This is also called chroma noise and are random coloured specks that appear all over the image. This noise is a result of shooting at high ISO values
- Luminance Noise: This type of noise affects the brightness of the pixels and hence appears as contrasty specks, which could be, dark grains in brighter areas and/or bright specks in darker areas.
What Can a Photographer Do About Noise?
As with anything, photography presents us with a series of compromises when it comes to solving the problem of noise. Here are some of the more obvious things you can do to reduce noise in your images.
Check out this article on Understanding Noise And How To Reduce It In-Camera and In Post-Production
Shoot At a Low ISO
It's a simple one, but if the situation will allow it, then turn down the ISO. Reducing the sensitivity of the sensor reduces the chance that it will pick up unwanted interference. It is best to stick to the lowest ISO value possible and this should be possible when shooting landscapes using a tripod during the daytime.
But there are times when the light will be low and you may need to shoot handheld – make sure you increase the ISO value lastly after making the desired aperture and shutter speed settings. A good understanding of the exposure triangle, rule of equivalent exposure and reciprocity law will give you an idea of how these values can be changed to get the right exposure.
Shooting the night sky will require higher ISO values and long exposure times and also shooting at night will also require higher iso settings.
Here are some ways in which shooting at higher iso values can be avoided if possible:
- Shoot using the widest aperture value so the lens can let in as much light possible into the camera.
- Using a tripod can help shoot at lower iso values provided the planned photo allows for that flexibility.
- You can use a flash if that will help with some needed light.
Note: Always take photographs at various iso settings using your camera to find out at what iso value the image quality starts to degrade due to noise.

Here is a closer comparison:

Reduce Shutter Speed
This simply reduces the chance that unwanted signals will get mixed in with the ones you really want to capture. Again, it's really only a solution if the shooting conditions allow for you to reduce shutter speed.
What about long exposure photography? This definitely creates some of the most stunning and dramatic images and it surely requires leaving the shutter open for a longer period of time. So work out a time that is best for your camera and stay within those limits. You will need to experiment with various combination of settings to figure out the correct iso and shutter speed combination for better noise free or minimal noise images.
Utilise the In-Camera Noise Reduction Feature
Most DSLRs come with an in-camera noise reduction feature. In many cases this does a fine job of reducing noise during image processing. The downsides to this are that the processing time of the image is often increased (sometimes by many seconds) and there can also be loss of finer detail in the shot.
For very long exposures like night sky photography and other long exposure shots, it is best to avoid using this feature as it takes the same amount (if not more) of processing time as the exposure time. This will not be favourable when you are shooting time lapse videos or star trail images as there will be break in the video or trails. This feature can be good for shorter exposures.
Check this out! – Should You Turn Noise Reduction On Or Off For Astrophotography?
Shoot At The Right Exposure:
Remember to always correctly expose your images because underexposing your images may make the shadow areas very dark that when you pull out those details while post processing, it will reveal unwanted noise. So, it is best practise to keep an eye on the histogram, so that you get an evenly lit scene with shadow and highlight details. Bear in mind that blown out highlights are also impossible to recover.
Always Shoot Raw:
We know that there are so much details recorded in a raw file compared to a jpeg image and hence shooting raw will help you get the best quality out of your raw file while post processing. This will give you greater flexibility to remove noise while post processing whereas a jpeg image shot at the same settings (low light, high iso) will show unwanted artefacts that cannot be removed as the file is already compressed.
Find out How to Reduce Noise in Your Images Without Using Software and How To Reduce Noise By Shooting Multiple Exposures
Don't be Afraid to Use Post Processing To Minimise Noise:
There are several pieces of dedicated software available to digital photographers with the sole purpose of reducing noise in your images. Many people recommend noise reduction software as an integral part of any photographer's arsenal. You can also utilise noise reduction techniques in other software such as Photoshop, GIMP or Lightroom. Make sure to zoom in 100% so you can make sure the quality of the image is good at full zoom.
Check out this guide! – A Beginners Guide To Reducing Noise In Post Production
Some tutorials you might be interested in include:
- How to Reduce Noise in Photoshop With the Power Of the “Blend If” Tool
- Turn Down the Noise in Photoshop
- Noise Removal with Selective Gaussian Blur in GIMP
- Reduce digital noise in your photos in Adobe Lightroom.
Keep Your Camera Cool
This one is often overlooked, but many people report that simply keeping your camera cool (or at least out of hot storage areas) immediately before a shoot can have a significant impact on improving noise in photos. The idea here is to minimise electrons that are stimulated by heat on your sensor, therefore reducing contamination in the signal.
Noise is simply one of those challenges that photography throws at us from time to time that make it challenging to get that perfect shot. With a little forethought it's easy enough to account for it and continue the chase!


13 Comments
A couple of things:
1) In-Camera Noise Reduction Feature. This doesn’t help with regular noise as such, it only helps with ‘hot spots’ that are caused by the overheated pixels on the sensor. These are very easy to clone out so I think it’s better to leave this feature disabled.
2) A major cause of noise is underexposure. This can happen when trying to reduce the exposure to avoid blown highlights as the shadows then end up underexposed and noisy. Or simply the whole photo was underexposed for some reason. ‘Exposing to the right’, where you push the histogram as far right as possible without clipping highlights, helps minimize noise but means the image may look too bright on the LCD.
Yep, expose to the right! I did a test last weekend shooting my black labrador against a black background. In film days you would underexpose a black subject. I did that, resulting in lots of noise. Then I overexposed by 2 f-stops and reduced expose in lightroom by 2 f-stops: nearly noiseless (7d @800 ISO) and much more dark tonals to work on.
great!
https://abayarong.files.wordpress.com/2010/09/smile.jpg?w=950&h=570
I think the in-camera noise reduction feature is useless for people photography as it takes way too long for my taste. It’s okay for landscapes and whatnot where you have more time.
Of course, it is not the case that we always WANT to reduce noise. There are plenty of situations where it adds a nice touch to the photo.
Lightroom 3 all the way! Best noise reduction I’ve used.
Hey Chris… You beat me to it.
Exposing to the right is far better than underexposing your shot. Not only for reducing noise, but also because there is more information retained in the file on the right hand side of the histogram. In post, it is much easier to bring an exposure back down a stop. If you clip the blacks, you won’t get them back
In-camera reduction as well as reducing noise via PS PP, while helpful to a degree, both suppress sharpness and clarity, a critical loss for prints. Best if possible to use a lower ISO, wider aperture, slower shutter and a tripod. Then too realize that depending upon the camera you are using, the sensor may not be capable of properly capturing enough light, or the lens may not have enough glass; e.g., an 17-40 F4 will not unless pushed by the techniques listed, do as good a job as a 50 F1.2 and even then the faster glass will always do a better job, especially when the image is cropped. Problem is the cost.
Nice article LS.
Shooting in RAW will give more room for getting details back that seems burned out when the tecnique “overexposing” is used (together with lowest ISO)
For Nikon “Raw” (NEF-files), the best program to handle this, is their (Nikon’s) own program Capture NX2. (Also the best program for noise reduction and sharpening).
I also want to thank for all the good articles in here.
nice article….
You need to highlight the main cause of noise in digital imaging, quantum statistics. The photons of a scene reach the sensor at slightly different intervals. This causes noise and this effect is magnified during low light scenarios. In the highlights, this isn’t a problem because of the abundance and frequency of light hitting the sensor, however, in the dark/shadow areas quantum statistics rears its ugly head.
Helpful!