If you're new to portrait photography, starting your work outdoors is an inexpensive and simple way to experiment with your camera. There's no need to construct a studio environment, and learning how to manipulate natural lighting is a great skill to acquire. Below are a few introductory-level tips for those who want to see an improvement in their outdoor portraits immediately.
Lighting
Shooting into the sun (meaning your subject is backlit) is generally a bad idea unless you’re going for a silhouette portrait, as seen below
You’re going to find that portraits backlit by the sun will throw your light meter way off. You'll either have a portrait with the sky exposed well but your model in shadow (like above), or your model will look nice but your background will be incredibly overexposed.
There is a simple fix to this: use your flashgun (preferably off-camera) and expose for the sky. This will allow you to capture both your model and the background with the correct exposure (or close enough to it). The right power level of strobe lighting will depend on the strength of your flash and how strong the sunlight is (whether or not it’s behind the horizon line yet, if it's being filtered by clouds, etc.), but you can always adjust the power of a flashgun to compensate.
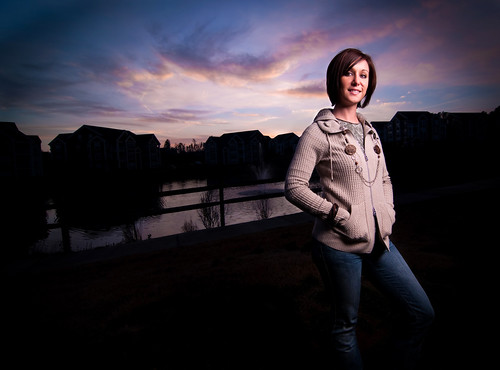
As you can see in this image, the photo was exposed for the sky leaving anything on the ground in darkness. The off-camera strobe (positioned high and to the right of the photographer) illuminated this model to create a powerful portrait. Also note how the shadow middle ground (the houses and pond) helped to separate the model from the sky and give some depth to the image.
Instead of a strobe, you can easily use a reflector for the sun which will not only give your image a warmer feel (as opposed to the coldness of flash), but it will allow you to see how the light will fall on your model before taking the photo. This will give you time to readjust the reflector if necessary instead of chimping your photos to see how the strobe light turned out. Your assistant can easily position themselves off-camera with one of the many kinds of reflectors available. Want to see how reflectors work? Check out this cheat sheet.
Finally, it's a good idea to shoot in RAW format so that you have some recovery room to work with in case the exposure of your model and/or background is off a bit.
Bokeh and Aperture
When shooting outdoor portraits, you’ll want a fast lens (f/2.8 or faster) so you can obtain interesting background blur to not only make your portraits attractive, but to also provide some isolation between the model and the background.
If you’re looking for bokeh in your background, make sure that there is an adequate amount of room between your model and any background elements (such as a tree or building). The less space between your model and the background, the harder it will be to obtain bokeh. Also note that really beautiful bokeh does not come from using a wide aperture with enough room between your model (focal point) and the background. While this helps, it’s certainly not the source. Light and/or reflected light is what creates well-defined bokeh, such as sunlight or a bright blue sky peeking in between individual leaves.
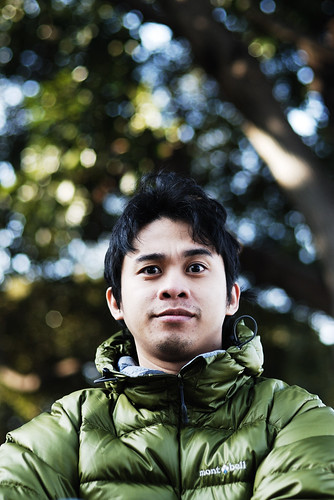
Since the blue sky is so much brighter than the leaves in shadow, the contrast creates this great bokeh in the background.
So there is a substantial difference between just blurring your background and obtaining bokeh – try to find light if you want a dreamlike background as seen in the image above.
Context and Your Environment
If you’re looking for a portrait that goes beyond just isolating a model with a wide aperture, consider creating an image that has both context and a suitable environment.
What kind of mood are you going for? Are you looking to compliment your model or contrast with them? How about scale – should your model take up the entire image or do you want the environment to be the focal point.
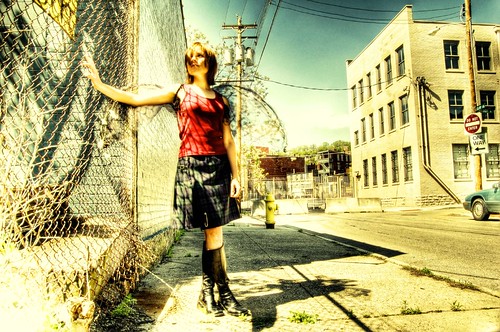
In this image, the model is interacting with her environment, and the post process tone mapping compliments the grungy feel to this urban portrait.
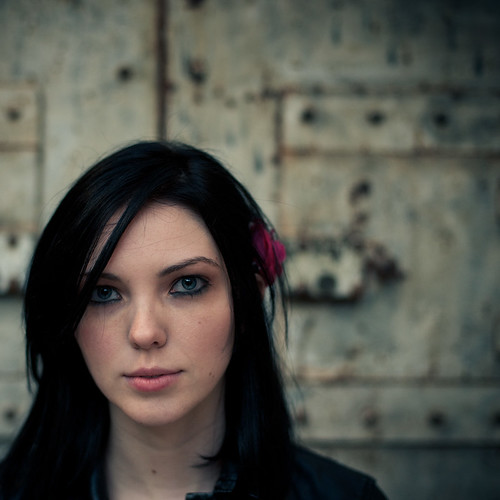
This portrait was not created by accident – the photographer chose to put their model in front of this textured background to provide added interest, and then chose to blur it a bit by using a wide aperture to isolate the model.
Here, the model was put into a very complimentary environment. The green field and blue sky display a perfect summer day, and the red umbrella directs more focus around the model so that she doesn’t get lost in the field – not to mention adds a lot of visual interest. This portrait is a wonderful example of putting the model into context.
Outdoor portraits can be hard to master as there are so many elements beyond the control of the studio – such as the weather, lighting, and so on. However, the environmental benefits are certainly worth the risk as you can't recreate the outdoors in a studio.
Read more great articles by Christopher O’Donnell at his blog or follow him on Facebook. You can also enter his print giveaway contest by signing up for his newsletter.


5 Comments
Great article Chris. I’m going to have to try these suggestions out this weekend.
Great article and some excellent tips on taking the background from blur to bokeh.https://seanjconnollyphotography.co.uk/pageimages/sitting_in_trees.jpg
Going to try some of these tips this weekend.
I’m a amateur photographer and I would like to know:
The girl against the fence, was the photo edited after it was taken because the color is totally different than the one with the girl with the red umbrella? If it wasn’t edited how do you capture that type of color in a photograph?
Marlene, a filter (action) would have been added… if you have photoshop, a great set of actions that I use are from Coffee Shop or Coffee House… google and see what you think 🙂