We bet that just about every photographer (at one time or another) has had the desire to try photographing puppies. How can we resist? They're cute, cuddly, they smell good, they're silly, and they love to play, which can lead to all sorts of interesting photographic opportunities.
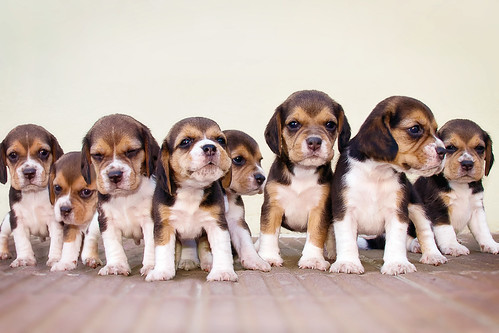
JAN0177F by Kent DuFault, on Flickr
But… Photographing Puppies isn't as easy as it looks. The characteristics which make puppies interesting subjects are the exact same characteristics which make them difficult to photograph. They move constantly and quickly; and according to the experts they have an attention span of approximately three seconds. So, how do you get an award winning puppy photo? Here are some tips!
Keep them with A Parent – preferably Mommy
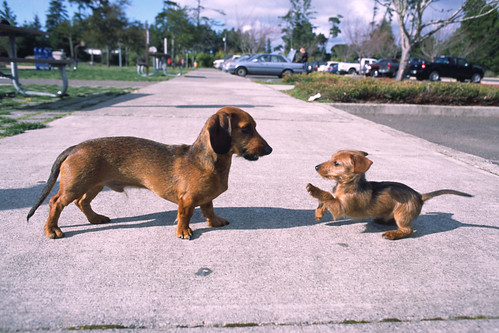
puppy fight by tunaboat, on Flickr
Puppies have a tendency to calm down a bit when an adult dog is present; especially their mommy. It's a good way to start your photographic session as allows them to get used to the activity. But the above photograph has several problems which leads us to our next suggestion.
Choose a good location
The photograph above is cute and has some interesting interaction. But the background is very distracting and leads the viewer away from the subject, which is that cute puppy. So, when choosing a location, consider this: you want somewhere where this is a lot of light (you must have enough shutter speed to stop their movement and depth-of-field to keep things in focus. Even if you have enough daylight, consider using bounce cards, or fill flash, to open up those shadowy areas around the eyes. Stay close, so that the photograph depicts their cute fuzzy face and expression. Avoid busy backgrounds as this will detract from your subject. Finally, try to confine your puppies in a tight space. This will help you keep focused on the action. Consider the image below
This photograph was taken in a scenario that was not all that different from our original example with the Dachshunds. The location was right right outside the owner's front door, on a sidewalk, with a residential street just behind the photographer's back. The photographer made several important choices to really focus on the dogs. The first choice was a longer lens. This allowed a tightly composed image for visual impact, and it helped throw the distracting background out of focus. What if you don't have a longer lens?
Software Solutions
Even with the best planning, there are occasions where a busy background can't be avoided. This was the situation above. There where annoying road signs in the background. The photographer turned to one of his favorite post-processing software solutions: Focal Point 2.0 by onOne Software Company. This particular program allows creative control over focus, focal point, and the bokeh effect. There are any number of software programs you could use, but the point is, isolate your subject.
Enlist some help
Having some extra hands to assist you will be invaluable, especially if you're dealing with a large litter. For the group photograph that opened this article, the photographer had three helpers: his wife, his niece, and the puppies owner.
BFM0194P by Kent DuFault, on Flickr
This is how the puppy group shot was set-up. The photographer placed them near a blank unobtrusive wall. The puppies were set down in a line facing the photographer and squished together, side by side, to help keep them in place. A photographer's helper was on either side of the line-up keeping them in place. The photographer was lying on his belly. The third helper leaned over the photographer while holding a treat above his head. The lighting was natural light with a fill flash. On the photographer's command, the helpers released the puppies and fell back out of the picture. The photographer was able to get two, maybe three, shots before the puppies dispersed and had to be reset.
Let's look at some puppy photographs and see what went right and what went wrong
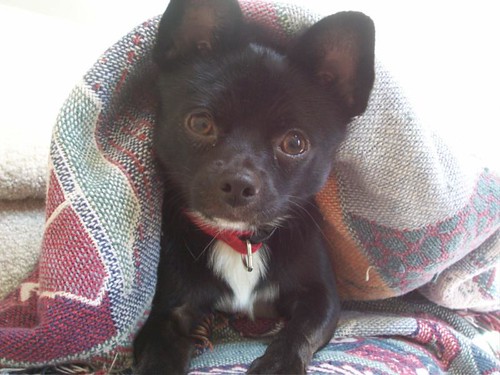 Puppy by rogerajohnson, on Flickr
This is a fairly well done puppy photo. The photographer used the blanket as an element of composition, and it helped to control the puppy's movement. But the example brings up a good point. If you're photographing a very dark puppy, don't place them in front of a very light background, and conversely, don't place a white (or light) puppy in front of a dark background. You are setting yourself up for contrast failure.
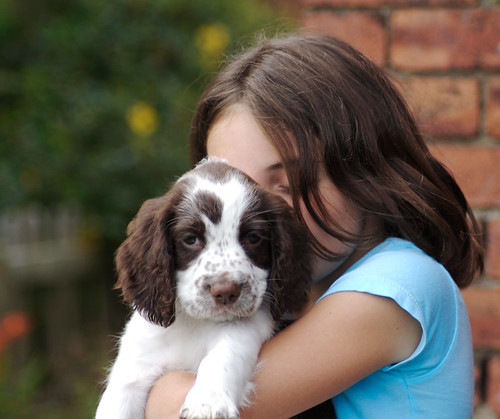
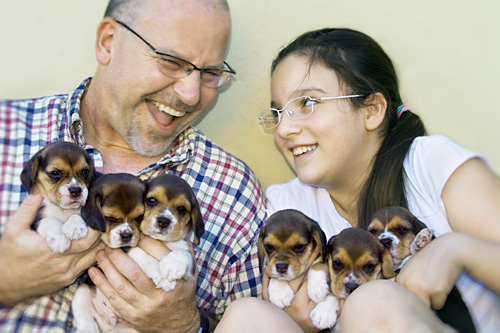
Puppy Love by smlp.co.uk, on Flickr
This image is a nice example of incorporating human interaction. The photographer made a good choice with a simple background. The lighting is natural light. A bounce card or fill flash would have been a nice touch to fill in the shadows. Overall, well done!
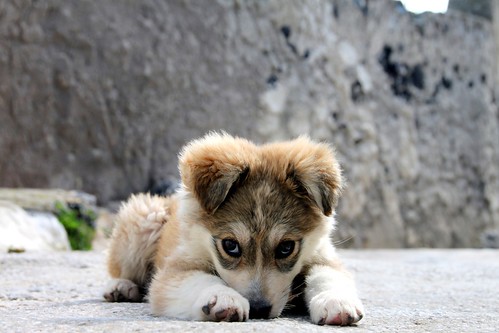
The Puppy by Klearchos Kapoutsis, on Flickr
There is no doubt that this is a cute puppy picture! And, the photographer made an excellent choice for a background. Where this fails is the framing. All that wall space in the background adds nothing to the photograph. If the photographer had moved a few steps closer to tighten up the framing and provided some fill light, this would have gone from being a cute picture to an award winner.

Pug Puppy by jmcmichael, on Flickr
This had the potential to be truly memorable. The photographer got in close to capture the details of that unbelievable face. But- And it's a big but- When shooting portraits, whether it's puppies, people, or orangutans keep your point of focus on the eyes. If it is elsewhere, the natural tendency of your viewers will be to go to that point in the photograph first. In this photograph that point of focus is down by the dogs neck, near the scarf.
Let's recap our puppy pointers!
- Use the puppies parents
- Bring helpers (wranglers) to help control the movement
- Bring treats to get the puppies attention
- Use a clean background
- Pick a location with a lot of light and use reflectors or fill flash if possible
- If necessary choose software solutions
- Watch your contrast. Don't put a black puppy against a setting sun
- Frame tight- let the viewer see those cute puppy details
- Get down to the puppies level
- Keep your focus on the eyes
- Incorporate props or human interaction when you desire it
We hope you feel inspired and will now create some dynamic mind-blowing puppy portraits! And when you do- Be sure to submit your images here on our forums so that we can enjoy seeing them.


3 Comments
Great article, thanks for the pointers
Kent, I appreciate you choosing one of my photos from my Flickr collection (rogerajohnson). While I agree with everything you said about contrast concerning the photo, I wanted to point out that this photo was taken by my then 8 year old daughter with a simple point n shoot camera. The staging and dog control was all her.
Awesome job for any photographer , especially an 8 year old! Hope she has continued to shoot.