The seashore. The coastline. The oceanfront. No matter what term one prefers to use, the seas have long been a favorite subject for photographers. The sea, much like the cosmos, represents a mystery as most of us have little firsthand insight as to what goes on beneath the surface. The sea is also a locale marked by ever changing mood and drama; it is, thus, no wonder why photographers are so enraptured by the sea.
Photographing seascapes is, of course, comparable to landscape and cityscape photography in its treatment of the subject, but it also shares similarities with event photography or street photography insofar as the need to be patient and observant so that you capture the perfect moment. The following tips will help you with that.
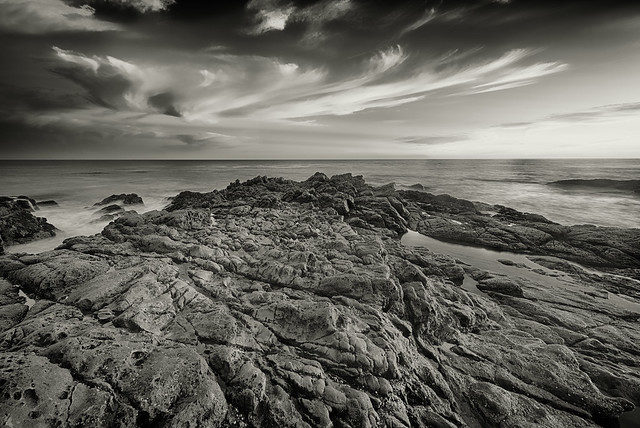
Photo by Joel Olives
Timing
It sounds cliche but timing is everything. Especially when seeking to photograph beautiful seascapes. Sure, you’ve heard about the importance of timing in other genres of photography, but seascape photography is time-sensitive in ways that differentiate it from other types of photography.
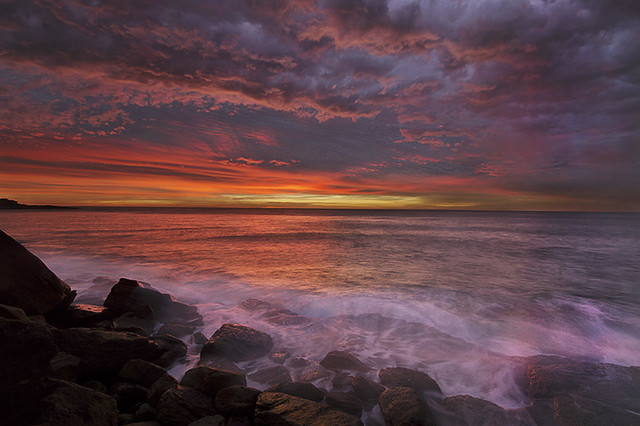
Photo by Nigel Howe
- Time of day. You can take your camera to the shoreline any time of day you like. But if you’re looking to maximize your opportunity, it’s important to carefully consider what time of day you choose to shoot. It’s all about the lighting. That oft-talked-about “golden hour” is ideal in this situation as it is in so many others. Approximately an hour before sunset or an hour after sunrise, the sun is low in the sky and gives off a soft, warm light in which colors really pop. If you want skies teeming with brilliant shades of red and gold to accompany the blue water, then shooting at the right time of day is a must. Once the sun is higher in the sky, lighting will be harsher and colors more washed out.
- Weather. While you have no control over the weather, you can use it to your advantage. Don’t be dissuaded by storm clouds, for example. Use them to add mood and drama to your photos. Similarly, clear blue skies can serve as a wonderful complement to the blues in the water. Rain and fog/mist can also work in your favor and enhance the images you make. Bad weather doesn’t have to be your enemy, just make sure that both you and your gear are prepared to deal with the elements.
- Tide. There’s high tide and there’s low tide. As far as photographers are concerned, it’s really that simple — tidal phase will determine how you treat the sea as a subject. If you shoot during high tide, you will have the opportunity to capture crashing waves or water rushing over exposed rocks. During low tide, rocks may be further exposed and a small selection of previously hidden subjects such as shells, crabs, sand dollars, or starfish will be revealed.
Holistic Seascapes
Depending on your location, it may be wise to treat seascapes more generally as landscapes. It may not make sense — or even be possible — to limit the scene to sky, water and sand. There are a wide variety of additional subjects that can and should be included in your photo — vegetation, rock formations, sea life, driftwood, piers, lighthouses, boats, even people. Any of these things can make an image more visually compelling and add context to the overall scene. Take a look at a location guide or photographs that others have taken at a particular location in order to get a basic idea of the topography, and then scout your location more thoroughly upon arrival to choose a prime location to setup your camera.
Gear and Technique
Ready to shoot? Make sure you’re properly equipped before reaching your location. Here are a few ideas for items you will want to have with you.
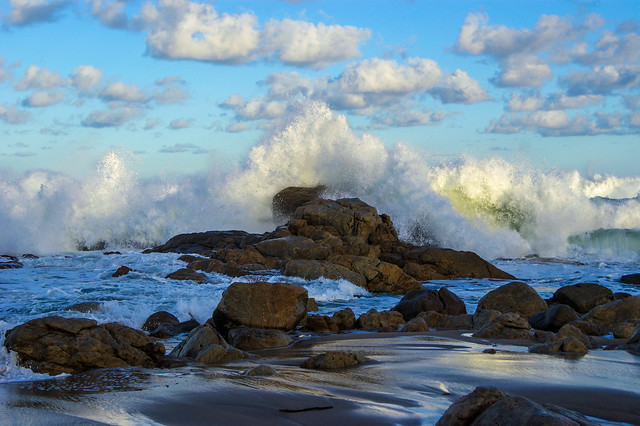
Photo by Phil Dolby
- Tripod. Just like you would for a landscape or cityscape shot, be sure to bring your tripod. If you’re shooting in good light, the tripod won’t be needed to stabilize for long exposures but it will help you keep the camera level. Of course, if you are doing any long exposures you won’t be able to make them without a tripod.
- Wide-Angle lens. It’s not that seascapes can’t be made with some other type of lens, but using a wider focal length will help convey a sense of grandeur to the viewer. You typically want your seascapes to be as immersive as possible, hence the “-scape” in “seascape.” Ideally, a focal length wider than 35mm is the way to go, but you can certainly get great shots using other focal lengths.
- Filters. With all the sand and salt spray swirling around, you will want to protect your lens not only to keep the front element clean, but also to keep it from getting scratched. A simple UV filter will suffice for this purpose. Additionally, if you plan on doing any long exposures and you want to smooth out flowing water, you will need a neutral density filter. If you need help balancing exposure between the foreground and the sky, then you will need a graduated neutral density filter.
Now that you have an idea of what you want to shoot, here are a few guidelines regarding techniques and camera settings that will help you successfully capture all that you’ve envisioned.
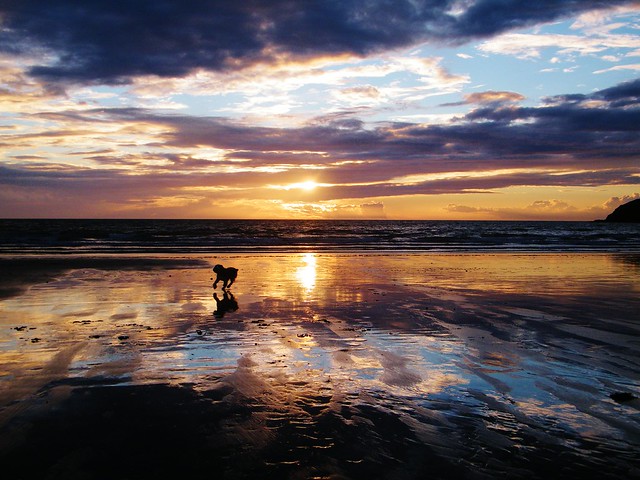
Photo by Hannah Gilbert
- Moving water. There are two basic approaches to capturing the movement of water. One way is to freeze motion. You might use this method to photograph crashing waves, for instance. To freeze motion, use a relatively fast shutter speed — 1/100th sec. or faster, though a lower limit of 1/60th sec. is possible. A fast shutter speed will also preserve definition in the waterline. The other approach is to blur the water using a slow shutter speed. You are essentially capturing motion blur, which is what causes the smoothness of the water. How much blur you want is a matter of taste; start with a shutter speed of 1/10th sec. and add time according to your desired strength of effect. If you find you can’t get adequately slow shutter speeds without overexposing the shot, you will need to use a neutral density filter. ND filters come in various strengths — ND4, ND8, ND10, with each blocking more light than the one before it, allowing for longer exposure times. Longer exposure times, in turn, create a great blur effect on the water. This technique can also have implications for the sky when there are clouds present, as the long shutter speeds will create beautiful cloud trails. In all instances, you should set an aperture of f/16 for lots of depth of field, and set ISO to 100 to minimize noise.
- Reflections. One of the great things about shooting water is that it is reflective. Sure, this can sometimes be a drawback (whenever you want to eliminate reflections, use a polarizing filter), but used properly a reflective sea can make for a stunning photo. This works especially well when the sun is peeking from behind the clouds. Exactly how much cloud cover there is will have a direct impact on exposure time, but it is unlikely you will need to shoot slower than 1/80th sec. Since you are not using a long exposure time, you have a little more wiggle room with ISO; set ISO to 400 or 800 with an aperture of f/16.
Composition
In classic landscape fashion, including an interesting foreground element helps to solidify the visual interest in the photo. If you’re including rocks or wood in the foreground, experiment with perspective and place the camera very low to ground. Or shoot from atop a cliff or hill. If there is a pier or dock present, make use of leading lines. And remember that oftentimes less is more — don’t forsake the tried but true rule of thirds.
Photo by Prachanart Viriyaraks
Conclusion
There is no single “best” way to photograph seascapes. A seascape may contain an extra element such as a lighthouse, or it may be minimalistic in form, containing only sand, sea, and sky. This all comes down to a matter of taste — what do you, as the photographer — wish for your image? Once you’ve answered this question for yourself, all that is left to do is settle into your location of choice, observe your surroundings, and let the right moment come to you. Many landscape and seascape photographers claim that this is a profoundly relaxing way to spend their time. Once you’ve tried it, I don’t doubt you will agree. And you get to go home with beautiful images. It’s the ultimate win-win situation.


6 Comments
Thank you for your insight. I will be going to Dauphin Island in June, as we do every year, and I am anxious to try some of your tips. I agree, there is not right way, but this advise adds more tricks in my bag!
What absolutely gorgeous photos! Thanks for sharing
Great article, but one thing I’d like to add is to get there early for sunrise and/or stay late after sunset. From my experience the best color in the sky often comes well before the sun actually peeks over the horizon. I make it a point to be on the seacoast at least 30 minutes prior to actual sunrise.
Thanks a lot for the turorial, Anton! Can you recommend a ND filter, that doesn’t produce color cast on film during long time exposures?
Lee Filters claim not to have any color cast at all. From my experiments, it seems pretty accurate.
Thanks, Rob! I’ll try more expensive Lee filters for my color projects