Photography is about capturing light, this is something we've covered several times. There are instances though where there is not enough natural light, or light in a place you would like it to be that you'll need to create your own. For this, flashes exist.
Getting started in flash photography is actually really simple, and modern technology has enabled anyone to use external flashes. With that said, I'm going to skip over the pop-up, on-camera style flashes that adorn most DSLR cameras today. My reasoning is that they simply don't work well and often times create a horrible shadow on your subject from the hood of your lens.
The gear you need will be, to some extent, defined by your budget. Any modern DSLR can and will benefit from an TTL style flash, that is, through the lens metering. The computer inside your camera will determine what the best exposure is for each shot based on the current shutter speed, aperture and ISO you've selected in virtually any mode while the camera is on the hot-shoe. These flashes, commonly called speedlights, are available from nearly every camera manufacture and several third party providers too and do an amazing job, and can function in full manual model. The downside is that a decent one will usually set you back $300-500.
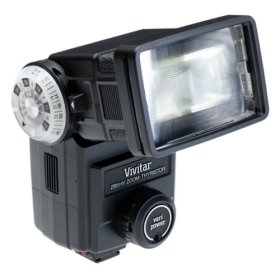
There is another option for those working on a budget though. A very popular flash from the previous century, the Vivitar 285HV has become a go-to flash for many shooters today, even with DSLRs. At around a hundred dollars, it's hard to beat this kind of value. The flash doesn't offer TTL metering, so in order to use it properly you'll need to do some quick calculations based on how far your subject is and what your desired effect will be.
Digital photography and the ability to instantly review your shots can help you get the exposure correct, however utilizing a light meter will yield in much faster work with far less guess-work and in the end, a more pleasurable photograph.
Taking the flash to the next level will require a little more gear, and the first piece to look into is a flash bracket.
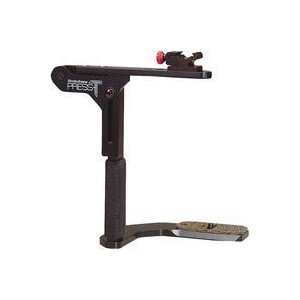
Most are similar to this model, mounting to the tripod socket on the bottom of the camera and putting the flash 1-6″ above the camera. The benefit to this type of bracket is to greatly reduce red-eye by moving the flash further away from the center of the lens. Additionally, models similar to this one have a hinge on them, somewhat seen on the left of the bracket. When you turn the camera counter-clockwise while shooting, the bracket flips 90 degrees to put the flash vertically above the lens, again to reduce red-eye but also to stop side-shadows from happening.
Some camera systems like Nikon do not require a cable, the on-camera flash can trigger the hot-shoe mounted flash (provided it's a Nikon), but for use with most camera brands and third party flashes an off camera cord will also be needed.
Enhancing your flash photography, and color correcting it can be achieved with gels, or tinted translucent pieces of heat resistant plastic.
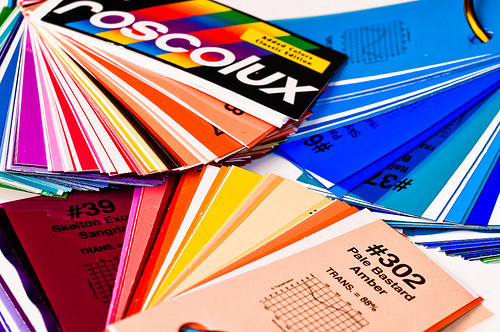
Many companies offer sample packs of them that are only a few dollars and are actually the perfect size to be taped onto your flash. Use these to help change color or set the mood in your photographs.
Flash photography is a very broad and wide topic, so this article is geared towards getting you started with simple gear. Future articles will feature more on off-camera flash use and advanced settings.

7 Comments
A very interesting article. Thank you for sharing. Not sure if I should see it as a damper or just another challenge to beat. But there sure is a lot to it to mastering photography.
But I suppose, knowing what you need to master is the first step to mastering it!
A useful article. Thanks
Can you recommend a flash that is compatible with a canon eos 450D, has TTL and is under £300?
Gee, and I thought all I needed to get started in flash photography was a trench coat…
Nikon users have a marvelous compromise option available, a TTL “speedlight” for around $125 – the venerable speedlight 400 with bounce angle capabilities in 4 steps (up to 90 degrees) and an amazing range (works out to about 65 feet.) Setting it at about 45 degrees effectively ends red-eye indoors (you do need a surface for the light to bounce from.)
Accordingly, I’ve no idea why they’d settle for the Vivitar solution described above, but perhaps somebody can enlighten me. (*ahem*)
Incidentally, if you’re relying on an internal/pop-up flash you’ll likely be amazed how much longer your batteries last when they’re only running the camera while an external flash relies on its own batteries.
Great article, although I would recommend getting the best possible flashes and a strobis kit, as the power and portability is very useful for all manner of photography work.
I used the Vivitar flashes for years, they are great, but doesn’t offer the kind of power and recycle time available to the Canon 580 ex (although it is very expensive)
Lots of people like the Yongnuo Chinese flashes they can be found on ebay and are modeled closely to the original canon and nikon versions. worth checking out