I don’t know about you, but on days when fog or mist dominate the atmosphere I feel similarly overcome by sluggishness.
Staring out the window into the haze, I figure I’ll just take it easy while I wait for conditions to clear up. Until I look up, that is. I look up at the surrounding buildings and the way they dramatically disappear into the fog and next thing I know I’m hightailing it out the door.
Note: For other scenarios, take a look at our article on landscape photography ideas.
Fog and mist are beautiful, but at the same time create a quiet and moody feel to the entire scene and in people. Fog, mist and even low clouds can be used to create visually stunning images, but these are also situations that can sometimes be tricky to handle. You see the outdoors like landscapes and buildings covered beautifully with fog/mist and you are unable to recreate what you exactly saw at location.
What could be the reason for this?
It all comes down to one thing, which is light. The light and colours may be flat and very soft and dull, but truly the scene looks surreal. So, this beautiful mood is a very good time to get out and shoot, but how do you get that shot?
Keep reading to learn a few tips to help you take better photos in foggy and misty conditions. There are certain things you need to take care of to get better photos in mist and fog.
Get An Early Start
Most of the time fog and mist develop overnight and they may not stick around the entire day, so fight the urge to stay in bed on dreary days as there may be some great shots awaiting you.

Get The Exposure Right
Getting the exposure right is probably the trickiest part of shooting mist and fog.
If you’ve ever experienced the frustration of photographing snow, just know that the same dynamics are in play. Your camera will insist on metering everything as middle gray, meaning the whiteness of the fog/mist (which are reflective subjects) will be rendered drab and grayish and the image will be underexposed.
You can overcome this by overexposing the shot. How much you will need to overexpose will obviously depend on the atmospheric conditions at the time, but you probably won’t need to go more than one stop over. Depending on the available light conditions, use exposure compensation.

Use Manual Focus
Foggy/misty/hazy conditions bring with them diminished contrast, which means your camera’s autofocus system is going to struggle to find something to lock onto. You’re better off using manual focus.
Depending on the scene you’re attempting to capture, you might be able to just set your lens to infinity and be done with it. If not, just stop your lens down to ensure you’ve got adequate depth of field, which will provide you with some room for error when it comes to focusing.

Establish An Anchor Point
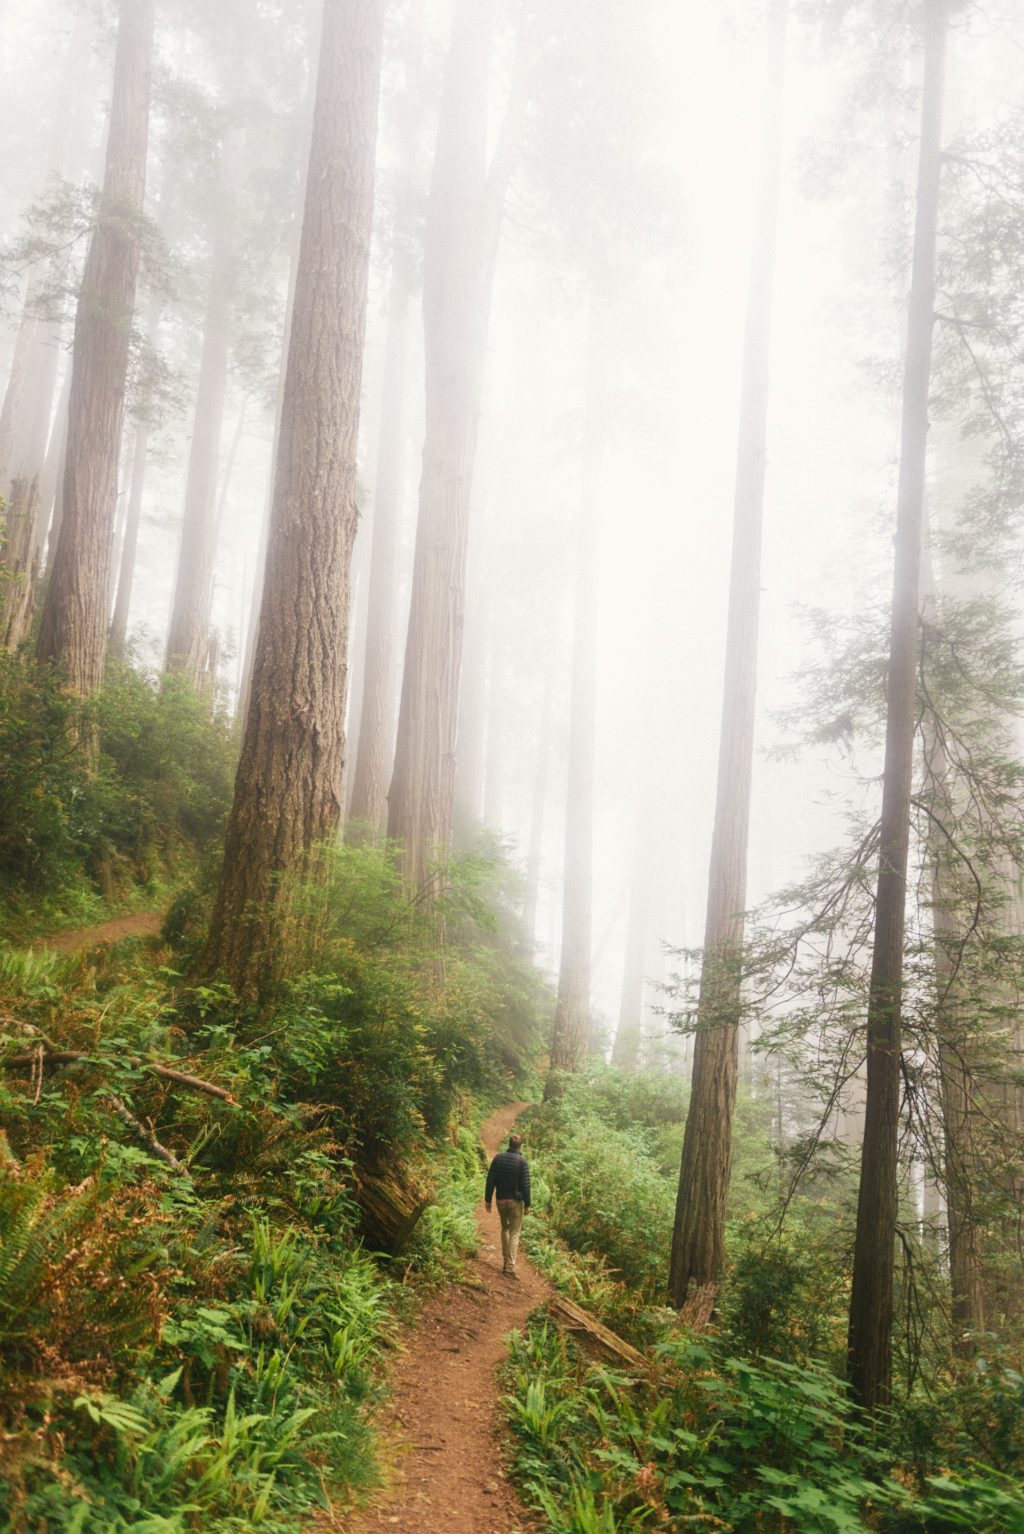
Speaking of focusing, you need something to focus on — something that draws the viewer in and serves as the visual bedrock of your image. Use leading lines or a vanishing point to create an air of mystery and pull the viewer deeper into the fog.
You can portray scale and distance by focusing on a foreground object near to you; this object will display more detail, color, and contrast while the rest of the scene falls away into the distant mist. If you happen to be surrounded by tall buildings don’t forget to look up, as they make wonderful focal points.

Tips To Increase Depth And Contrast In Fog and Mist Photos:
- Give more attention to composition when photographing foggy and misty scenes which otherwise can look flat and lack depth. Arrange elements in the frame so that they are at various distances from the camera, thereby showing scale and adding dimension to the image.
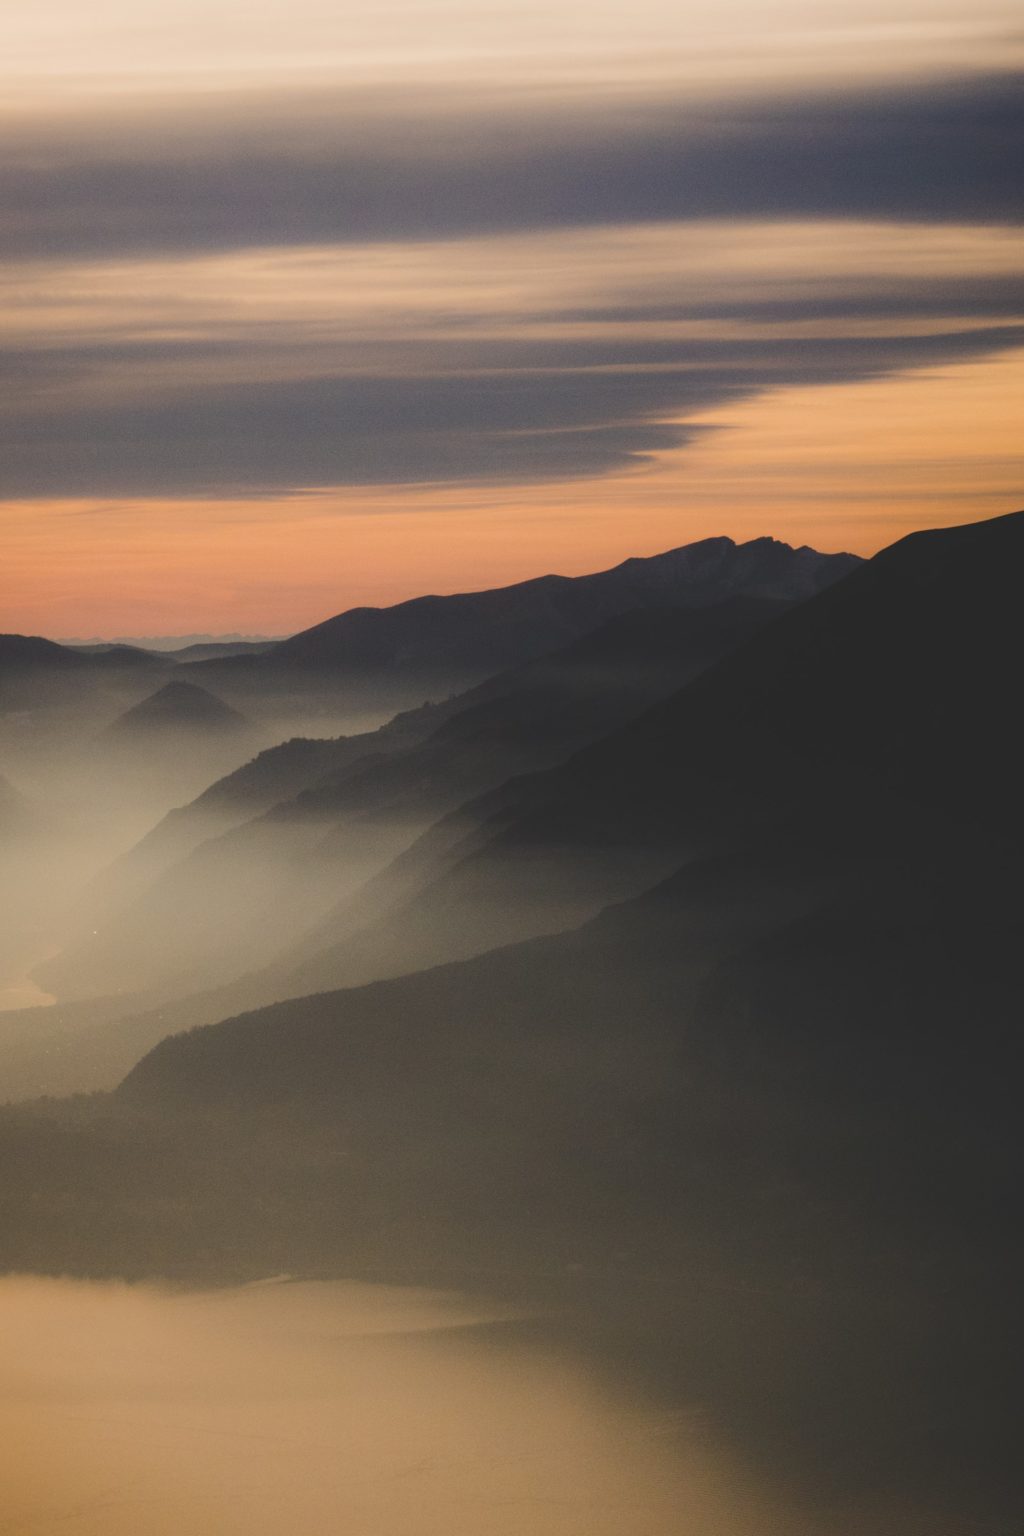
- Silhouettes are something to explore when photographing foggy and misty scenes.

Use Shutter Speed For Artistic Impact
Fog can vary in texture and distribution. How you want the fog in your photo to appear comes down mostly to shutter speed. If you want to capture the cloud-like clumps of fog that closely represent what you are seeing in real time, then a relatively short shutter speed is required.
On the other hand, you might go for a more ethereal look by using a longer shutter value to capture the fog as it moves across the scene.

Bring Your Tripod…Maybe
I already implored you to get up early; if you do take this advice you’ll probably need a tripod. The already low light conditions will only be exacerbated by the presence of fog, preventing you from being able to hand hold your shots.
Of course, you will definitely need a tripod if you intend to do any long exposures. But if you’re lucky enough to have fog settle into your town during the middle of the day, you may very well be able to do without the tripod.

Shoot Raw
Most of you are already doing this, but if you’re not you should know that shooting raw will not only allow you to edit your photos without losing image quality, but it will also make it easier to deal with the white balance issues that shooting in the fog can present. If, however, you insist on shooting jpegs, set your white balance to cloudy.
Some Tips To Take Care of Photos in Mist and Fog:
- Light on a foggy day is similar to light on a heavily overcast day, except for the fact that the air has a lot of water particles suspended that it redirects or scatters the light from the light sources making it extremely diffused, and so the image is rendered soft and lacks contrast.

- As a result of this, you will need to make relatively long exposures to get sharp details in the image, also making sure it is not too long to record the movement of fog, unless that is intentional for creative reasons.
- Depending on the light conditions, you may have to also use exposure compensation to get the exposure right.
- Watch out for those beams of light through canopies early in the morning as their effect can be accentuated by the fog and can help with composition and with creating compelling images.

- If you are going to be using a white balance preset, use the one for “Cloudy” or “Overcast” so you get the best results. If you shoot raw, you can play with white balance while post processing to bring in the mood you are looking for in the image.

- Keep an eye on your lens to see if the water droplets condense on the glass. This usually happens when your camera is cooler than the outdoor temperature and is sometimes unavoidable. Keep your camera in sealed bags till they reach the same temperature as outside in order to avoid condensation.
Final Thoughts On Photographing Fog And Mist
There’s a lot you can do with fog and mist. It can be mysterious, magical, foreboding, gloomy. It’s up to you how you want to convey your vision and what emotion you want to evoke in the viewer.
What’s sure is that incorporating fog and mist into your photography, done properly, will have a significant impact and will make a way for your work to stand apart from those who didn’t get up early enough.
For More On Taking Beautiful Photos Of Mist and Fog
- How to Capture Misty, Magical Photographs: 3 Essential Tips on Timing, Tools, and Technique take a look at this post by Sheen Watkins
- Landscape Photography Guide – see this great guide by the team at Photzy.
- How To Process Fog & Mist Pictures In Lightroom – see a great tutorial by Mikko Lagerstedt


1 Comment
Very Helpful article for the photo making tips. It’s Very useful for me in photo graphics. We are a lot contribute the web design agency in london.