Why Should I Use a Light Box?
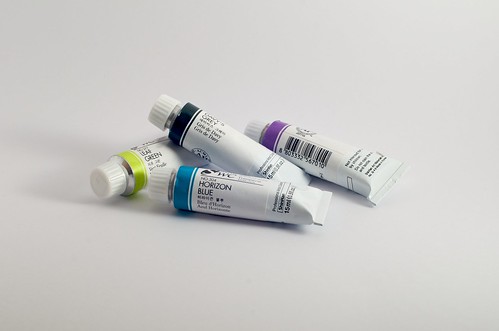
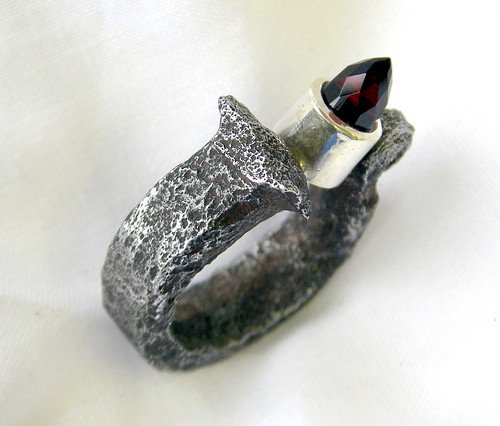
When photographing small to medium products, it is a good idea to use a light box. This will allow you to have complete control over the subject’s background and lighting. A soft background and even diffused lighting will highlight the product beautifully and has been proven to produce more sales and a higher perceived value.
Many common light sources are inherently flawed for this type of photography since they tend to produce uneven lighting, unwanted shadows and incorrect white balance. Your camera’s flash will often overexpose the very front of the subject and slightly underexpose the rest of the image. There will usually be small and very bright reflections if the product is at all shiny, such as a piece of glass. Also, very dark shadows are often created due to the very harsh and direct nature of the light.
Bright, direct sunlight is a bit better for photographing a product, since the white color temperature will usually be more natural. However, like light from the in-camera flash, there will be small bright reflections as well as harsh shadows. The exception to this is the sunlight on a cloudy day, since the light is soft and diffused. This light is simply not predictable though and limits you to short windows of opportunity for taking photos.
Room lighting is perhaps the most problematic of all. First, most rooms have lights that are of varying color temperatures. This can make getting the white balance right nearly impossible. Also, there is usually just not enough lighting which will cause the product that you are shooting to be underexposed.
Where Can I Get a Light Box?
There are commercially available light boxes of varying sizes and prices, most of which are relatively inexpensive. However, if you are on a very tight budget and/or simply have a handful of product shots to get; it is very easy to make a light box yourself for only a few dollars.
The supplies you will need to make a light box are minimal and include a card-board box that will accommodate your product, a white and semi-transparent fabric, tape and a large piece of non-reflective paper.
You will need to set the box on its side and cut a large square out of all three sides, leaving a few inches around the cut-outs. Be sure to leave the top flaps in place. Next, cut your semi-transparent white fabric to fit the cut-out areas and tape them to the box on the outside. The final step is to tape the large piece of non-reflective paper from the top back to the bottom front. There should be a gentle slope to the paper. Be sure to not wrinkle the paper as the wrinkles will likely show in your photos.
How to Light the Light Box
Your last step is to light the box, which can be done several ways. The best light sources are two adjustable lamps with 100 watt daylight bulbs. The daylight bulbs will mimic the color temperature of sunlight, which will create the most natural white balance and will minimize the need for post-processing. If you don’t have two adjustable lamps with daylight bulbs, there are a few more options that might work well. Flashes on wireless triggers or even halogen work lights can be used. If you decide to use halogen work lights, be sure to set them far enough away from your light box to maintain safety. They get really hot and are a fire hazard. Whatever you do, don’t use the on-camera flash as already mentioned. Instead, if part of the subject isn’t properly illuminated, move the light sources around until it is.
Use a Tripod
Since you won’t be using the on-camera flash or a bright direct light source, your shutter speed will need to be pretty slow. So, holding the camera while shooting will certainly produce camera shake. A tripod is truly essential to prevent this. If you don’t have a tripod, then set your camera on a steady surface that will line up well with the product you are shooting in the light box. This method will certainly work, but is not ideal since it won’t give you the precise control over the angles of your shots like a tripod will. If you are going to be doing a lot of product photography, investing in an inexpensive tripod is really a good idea. Also, a remote to trigger the shutter is a good idea since touching the camera at all might cause a bit of shake.
Camera Settings
Since there will be a lot of white in your product photos, the camera will likely have a hard time with proper exposure. Your photos may end up a bit underexposed. To fix this, experiment with some exposure compensation at +1 and +2.
Also, some cameras have a hard time with auto-white balance under incandescent light, and will cause it to be too warm. If this happens to you, try setting manual white balance to 3200k. If this is still too warm, then reduce the white balance to 3000k. Another way to adjust the white balance is to simply add more blue until your shots look correct to you.
A long shutter speed is necessary due to the flash not being used. It may be a good idea to set your camera to aperture priority mode in order to get your preferred depth of field and let your camera decide the right shutter speed.
Post-Processing in Photoshop
If after following all of the above tips your photos still need a bit of adjustment, there are a few tips that may come in handy. First, go to Image>Adjustments>Levels and choose “Auto Levels”. This will fix a very large portion of problems right away. Generally it will correct any issues with tone, depth and color in your photographs. Sometimes auto levels can be a bit off though and cause the image to be just a smidge too magenta, red or green. If this happens you can manually adjust the color balance a bit until it looks right.
Next, you can use the band-aide tool to remove any spots and small imperfections such as dust and background wrinkles. If the imperfection is along an edge or a seam, then the clone stamp tool, which duplicates whatever area you select will be better.
Share your own attempts at light box photography in the comments!
Rachael Towne is a photographer and creator of Photo Luminary.


6 Comments
Could you discuss where the light sources should be placed? In front? To the sides? Above?
Works well for me – just completed a couple of small product jobs for two clients using a very similar light box with strobes.
In PS I mask the subject and just use the white “dropper” in Curves on the white curved background to remove any colour casts. Depending on where you click onto the background, you can remove more or less of the shadows – depending upon the final effect required.
Thanks Rachael for writing up a great tutorial. A lot of folks ask whether a DIY is worth it compared to buying them an online vendor. We focused on that in our post at: https://www.seeyoubehindthelens.com/2012/01/diy-light-tent-is-it-worth-it.html Nice to see Lightstalking retweet this too – missed this the first time!
I too would like to know Where you focus the lights to get the best use out of the light box. Do you focus them directly on the item being photographed or through the sides of the material on the box.
Very useful thanks
Created two photos – see website davidsphotographs.com/
First was produced by added effect with Topaz lens
Second one as shot with your ideas
I plan to use a lightbox to photograph a bottle. I wander what size should I get, or to say it differently what is the relationship between the size of the object inside the box and the box?
if the bottle is 30cm high, should I get a 40 60 or 80cm box?