var tve_frontend_options = {"is_editor_page":"","page_events":[],"is_single":"1","ajaxurl":"https:\/\/www.lightstalking.com\/wp-admin\/admin-ajax.php","social_fb_app_id":"234010690138279","dash_url":"https:\/\/www.lightstalking.com\/wp-content\/plugins\/thrive-visual-editor\/thrive-dashboard","translations":{"Copy":"Copy"},"post_id":"480034","user_profile_nonce":"04876fb9ff","ip":"64.227.14.160","current_user":[],"post_title":"Auto Modes And Exposure Compensation","post_type":"post","post_url":"https:\/\/www.lightstalking.com\/auto-modes-exposure-compensation\/","is_lp":"","post_request_data":[],"conditional_display":{"is_tooltip_dismissed":false}};
var advanced_ads_pro_visitor_conditions = {"referrer_cookie_name":"advanced_ads_pro_visitor_referrer","referrer_exdays":"365","page_impr_cookie_name":"advanced_ads_page_impressions","page_impr_exdays":"3650"};
var essb_settings = {"ajax_url":"https:\/\/www.lightstalking.com\/wp-admin\/admin-ajax.php","essb3_nonce":"f6325c5592","essb3_plugin_url":"https:\/\/www.lightstalking.com\/wp-content\/plugins\/easy-social-share-buttons3","essb3_stats":true,"essb3_ga":false,"essb3_ga_ntg":false,"blog_url":"https:\/\/www.lightstalking.com\/","post_id":"480034","internal_stats":true};
Real photographers only shoot in manual mode. I am guessing there is a pretty good chance you have had that said to you at least once in your photographic journey. Here’s the thing, they are wrong, very wrong.
Real photographers use all the tools available to them in order to get the shot. If the conditions suit, that might be manual exposure, however, there are plenty of times when they will shoot aperture or shutter priority or even program mode.
Why would they do that? The answer is twofold. Firstly auto modes can nail the exposure quickly and efficiently 90% of the time. Secondly, for the other 10% of the time, there is exposure compensation. Today we are going to look at why, how, and when you should use exposure compensation.
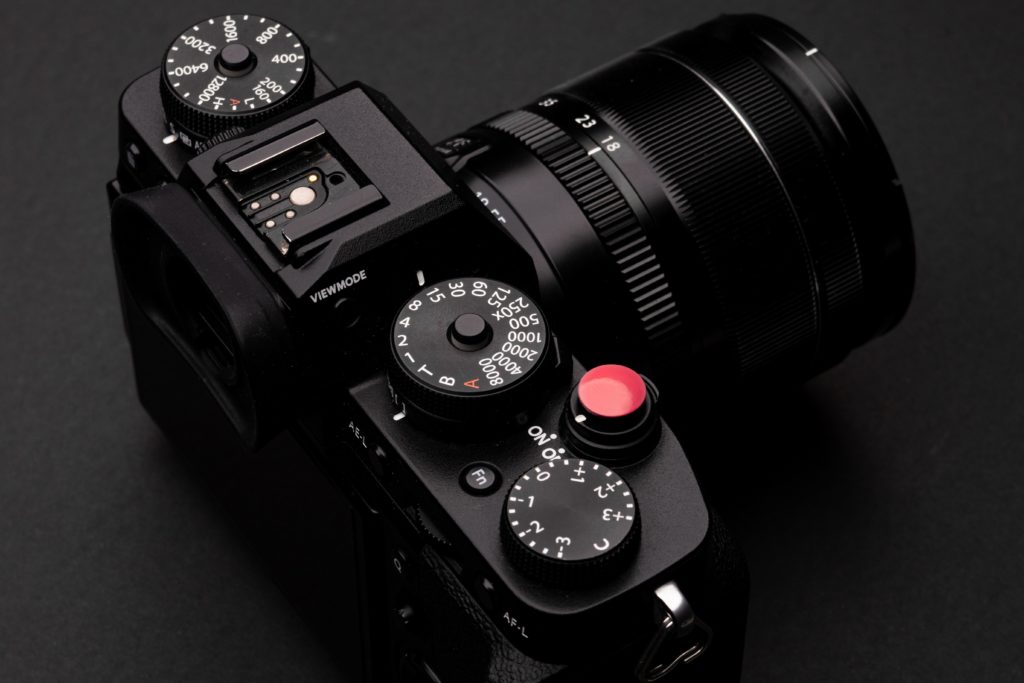
For exposure compensation to truly work, it needs to become an instinctive part of your workflow. Some cameras make this easy, others not so much. For example, my Fuji X-T2 has a large chunky compensation dial on the camera’s top plate. It’s a conditioned response to simply move my forefinger from the shutter button to the dial and add in some compensation.
My Panasonic camera, however, requires patience and ambidextrousness in extreme. The compensation is done through the press of a button on the back and turning one of the command dials. This necessitates removing the camera from the eye. This does not exactly fit with instinctive shooting.
That said, with practice, you can make exposure compensation work for you on any camera. Select your favorite auto mode and just go out and shoot in difficult light. Keep working on the exposure compensation until you finally have it in your muscle memory.
There is one other vital element to shooting with exposure compensation, the histogram. Let’s look at why.
Reading The Histogram
The reason we shoot with auto modes is that they nail the exposure, most of the time. They give you the correct exposure for the lighting conditions. That’s not the same as the correct exposure for the look that you are trying to achieve.
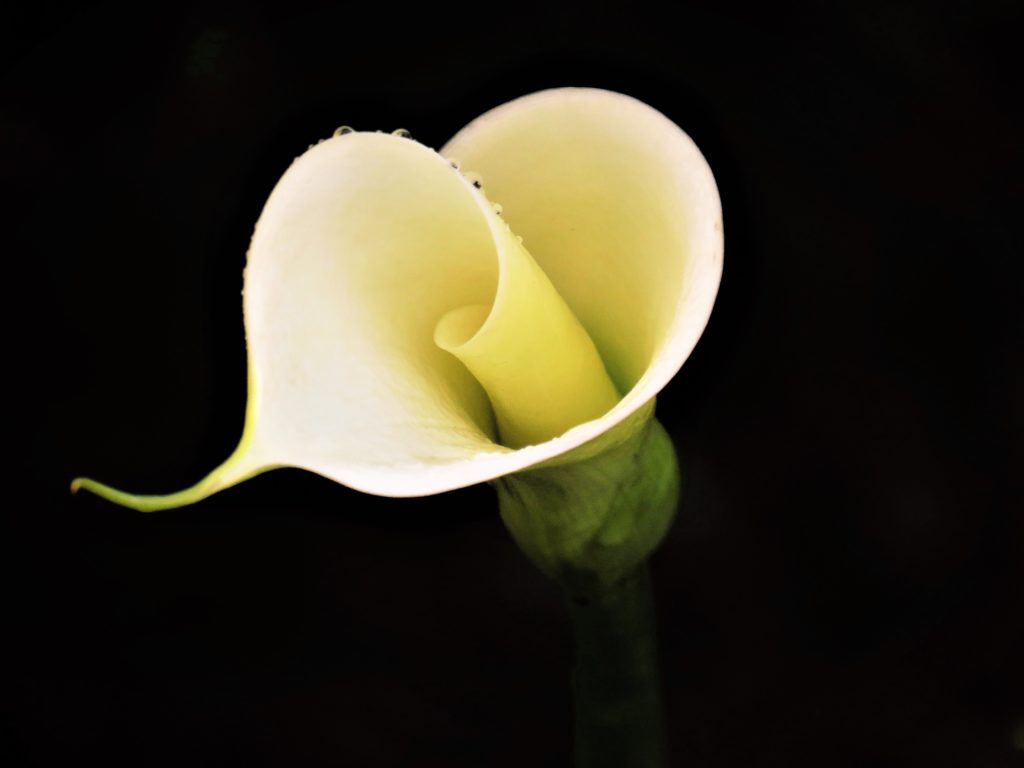
We might be shooting to throw dark shadows around a person in street photography. We may be looking for a high-key style in a beach portrait. There are many times when the correct exposure may not be the right exposure.
This is where the histogram becomes so important. We can see instantly where the bulk of our exposure lies and whether we have the leeway to compensate for it.
Most cameras these days have the ability to show a live histogram in both the viewfinder and the LCD screen. Make sure that this is switched on if you want exposure compensation to become instinctive. Also be aware that histograms, both the live version and the review version, do not give a 100% accurate indication, especially if you are shooting RAW. RAW files will often have a little extra dynamic range beyond what the camera’s histogram is saying.
The beauty of using the histogram when using exposure compensation is that we can see just how far we can push the image in order to achieve the desired look. Cutting the exposure will move the histogram left, darkening the image. Increasing the exposure will push the histogram right, lightening the shot.
Most exposure compensation dials will allow you to adjust exposure in 1/3rd stops. Some that use a button/command dial system may default to 1/2 stop increments but this can usually be changed in the menu system. It’s well worth going to 1/3rd stops for finer control.
So let’s look at how exposure compensation works in different modes.
Exposure Compensation In Different Modes
Exposure compensation is an incredibly flexible tool that works differently depending on the auto-exposure mode that you are in. Whilst the basic operations are similar for every camera, the nuances of how compensation works will vary. Let’s look at the basics.
In shutter priority, you set the shutter speed and the camera sets the aperture. When you dial in compensation, the camera will adjust the aperture. If you are shooting 1/125th at f/5.6 and add 1 stop of compensation, the camera will open the lens to f/4. Once exposure compensation reaches the widest aperture of the lens, it will, on most cameras, start to increase the ISO in order to maintain the shutter speed.
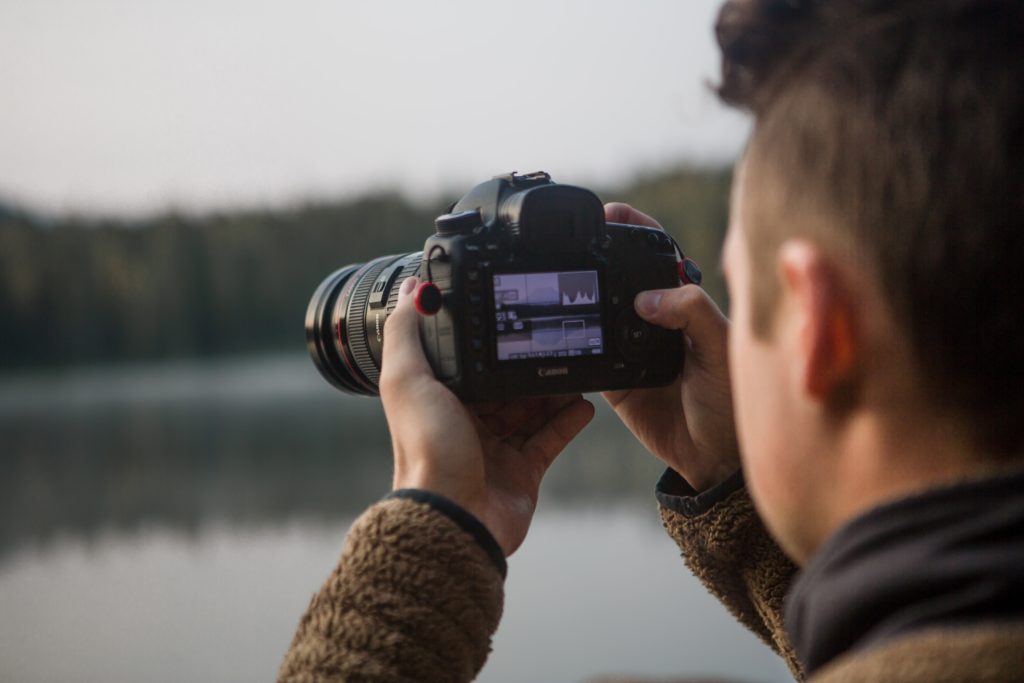
There are many scenarios where you might need to use exposure compensation. By Kevin Mullane on Unsplash
In aperture priority, you set the aperture and the camera selects a shutter speed. When we dial in exposure compensation, the camera changes the shutter speed. Again, if we are shooting 1/125th at f/5.6, adding one stop of compensation will move the shutter speed to 1/60th. Most cameras will recognize the focal length of the lens and not allow the shutter speed to drop to a point where camera shake might be incurred. Instead, they will increase the ISO. Most cameras will warn you of this.
Now a little bit about exposure compensation in program mode. This is where cameras will vary between manufacturers. Most will use a combination of aperture and shutter speed changes, avoiding ISO increases as far as possible. Like in aperture priority, they will attempt to avoid the shutter speed getting too low. Unlike in shutter priority, they will change shutter speed once the minimum or maximum aperture has been reached.
Beyond the basics, some cameras will allow you to define limits in your exposure compensation, in particular ISO increases. This is done through the camera’s menu system and will vary from model to model. Check your camera’s manual.
Auto modes are far from being “amateur” modes. The PAS part of the PASM dial is a powerful tool that experienced photographers use all the time. A proper understanding of the exposure compensation dials enables these modes to be as powerful as straight-up manual exposure.
It takes study and practice but once you have mastered exposure compensation, you will realize how amazingly useful it is.
var advanced_ads_cookies = {"cookie_path":"\/","cookie_domain":""};
var advadsCfpInfo = {"cfpExpHours":"3","cfpClickLimit":"3","cfpBan":"7","cfpPath":"","cfpDomain":"www.lightstalking.com"};
var beloadmore = {"url":"https:\/\/www.lightstalking.com\/wp-admin\/admin-ajax.php","query":{"post__not_in":[480034],"category_name":"camera-craft","posts_per_page":3}};
var tve_dash_front = {"ajaxurl":"https:\/\/www.lightstalking.com\/wp-admin\/admin-ajax.php","force_ajax_send":"1","is_crawler":"","recaptcha":[],"post_id":"480034"};
var TVE_Ult_Data = {"ajaxurl":"https:\/\/www.lightstalking.com\/wp-admin\/admin-ajax.php","ajax_load_action":"tve_ult_ajax_load","conversion_events_action":"tve_ult_conversion_event","shortcode_campaign_ids":[],"matched_display_settings":[],"campaign_ids":[],"post_id":480034,"is_singular":true,"tu_em":"","evergreen_redirects":[]};
(function() { var po = document.createElement('script'); po.type = 'text/javascript'; po.async=true;; po.src = 'https://www.lightstalking.com/wp-content/plugins/easy-social-share-buttons3/lib/modules/conversions-pro/assets/share-conversions-tracker.js'; var s = document.getElementsByTagName('script')[0]; s.parentNode.insertBefore(po, s); })();(function() { var po = document.createElement('script'); po.type = 'text/javascript'; po.async=true;; po.src = 'https://www.lightstalking.com/wp-content/plugins/easy-social-share-buttons3/assets/modules/pinterest-pro.min.js'; var s = document.getElementsByTagName('script')[0]; s.parentNode.insertBefore(po, s); })();(function() { var po = document.createElement('script'); po.type = 'text/javascript'; po.async=true;; po.src = 'https://www.lightstalking.com/wp-content/plugins/easy-social-share-buttons3/assets/modules/subscribe-forms.min.js'; var s = document.getElementsByTagName('script')[0]; s.parentNode.insertBefore(po, s); })();(function() { var po = document.createElement('script'); po.type = 'text/javascript'; po.async=true;; po.src = 'https://www.lightstalking.com/wp-content/plugins/easy-social-share-buttons3/assets/js/essb-core.min.js'; var s = document.getElementsByTagName('script')[0]; s.parentNode.insertBefore(po, s); })();
let ccwpDOMLoaded=!1;
let ccwp_loaded = false;
let resources_length=0;
let resources =undefined;
let is_last_resource = 0;
ccwpUserInteractions=["keydown","mousemove","wheel","touchmove","touchstart","touchend","touchcancel","touchforcechange"];
ccwpUserInteractions.forEach(function(e){
window.addEventListener(e,calculate_load_times);
});
function calculate_load_times() {
// Check performance support
if (performance === undefined) {
console.log("Performance NOT supported");
return;
}
// Get a list of "resource" performance entries
resources = performance.getEntriesByType("resource");
if (resources === undefined || resources.length <= 0) {
console.log("NO Resource performance records");
}
if(resources.length){
resources_length=resources.length;
}
for(let i=0; i < resources.length; i++) {
if(resources[i].responseEnd>0){
is_last_resource = is_last_resource + 1;
}
}
let uag = navigator.userAgent;
let gpat = /Google Page Speed Insights/gm;
let gres = uag.match(gpat);
let cpat = /Chrome-Lighthouse/gm;
let cres = uag.match(cpat);
let wait_till=300;
let new_ua = "Mozilla/5.0 (Linux; Android 11; moto g power (2022)) AppleWebKit/537.36 (KHTML, like Gecko) Chrome/109.0.0.0 Mobile Safari/537.36";
let new_ua2 = "Mozilla/5.0 (Macintosh; Intel Mac OS X 10_15_7) AppleWebKit/537.36 (KHTML, like Gecko) Chrome/109.0.0.0 Safari/537.36";
if(gres || cres || uag==new_ua || uag==new_ua2){
wait_till = 3000;
}
if(is_last_resource==resources.length){
setTimeout(function(){
console.log("ccwpTriggerDelayedScripts timeout : "+wait_till);
ccwpTriggerDelayedScripts();
},wait_till);
}
}
window.addEventListener("load", function(e) {
console.log("load complete");
setTimeout(function(){
calculate_load_times();
},100);
});async function ccwpTriggerDelayedScripts() {
if(ccwp_loaded){ return ;}
ccwpPreloadStyles();
ccwpPreloadDelayedScripts();
ccwpLoadCss();
ccwpScriptLoading();
ccwp_loaded=true;
}
function ccwpPreloadStyles() {
let e = document.createDocumentFragment();
var cssEle = document.querySelectorAll("link[rel=ccwpdelayedstyle]");
for(let i=0; i <= cssEle.length;i++){
if(cssEle[i]){
cssEle[i].href = removeVersionFromLink(cssEle[i].href);
let r = document.createElement("link");
r.href = cssEle[i].href;
r.rel = "preload";
r.as = "style";
e.appendChild(r);
}
}
document.head.appendChild(e);
}
function ccwpPreloadDelayedScripts() {
var e = document.createDocumentFragment();
document.querySelectorAll("script[type=ccwpdelayedscript]").forEach(function(t) {
var n = removeVersionFromLink(t.getAttribute("src"));
if (n) {
t.setAttribute("src", n);
var r = document.createElement("link");
r.href = n, r.rel = "preload", r.as = "script", e.appendChild(r)
}
}), document.head.appendChild(e)
}
function ccwpScriptLoading(){
var jsEle = document.querySelectorAll("script[type=ccwpdelayedscript]");
jsEle.forEach(function(t) {
t.type = "text/javascript";
if(t.src)
{
t.src = removeVersionFromLink(t.src);
}
});
}function ccwpLoadCss(){
var cssEle = document.querySelectorAll("link[rel=ccwpdelayedstyle]");
for(let i=0; i <= cssEle.length;i++){
if(cssEle[i]){
cssEle[i].href = removeVersionFromLink(cssEle[i].href);
cssEle[i].rel = "stylesheet";
cssEle[i].type = "text/css";
}
}var cssEle = document.querySelectorAll("style[type=ccwpdelayedstyle]");
for(let i=0; i <= cssEle.length;i++){
if(cssEle[i]){
cssEle[i].type = "text/css";
}
}
}
function removeVersionFromLink(link)
{
if(ccwpIsValidUrl(link))
{
const url = new URL(ccwpFormatLink(link));
url.searchParams.delete("ver");
url.searchParams.delete("time");
return url.href;
}
else{
return link;
}
}
function ccwpIsValidUrl(urlString)
{
if(urlString){
var expression =/[-a-zA-Z0-9@:%_\+.~#?&//=]{2,256}\.[a-z]{2,4}\b(\/[-a-zA-Z0-9@:%_\+.~#?&//=]*)?/gi;
var regex = new RegExp(expression);
return urlString.match(regex);
}
return false;
}
function ccwpFormatLink(link)
{
let http_check=link.match("http:");
let https_check=link.match("https:");
if(!http_check && !https_check)
{
return location.protocol+link;
}
return link;
}