I'm sure you've seen many beautiful cinematic shots with backlighting on social media and elsewhere. They are powerful, magical, romantic, and if done well, pretty mysterious and artistic.
Backlighting is a common term in photography with an obvious meaning. To put it simply, it's a type of lighting coming from behind the subject.
This is just a general definition of backlighting. In fact, this type of lighting covers a number of different techniques and it allows you to capture beautiful images with silhouettes, rim lighting, or starbursts. This article will cover all you need to know about backlighting even if you're an absolute beginner.
Read on to get your creative juices flowing!
How To Use Backlighting Effectively?
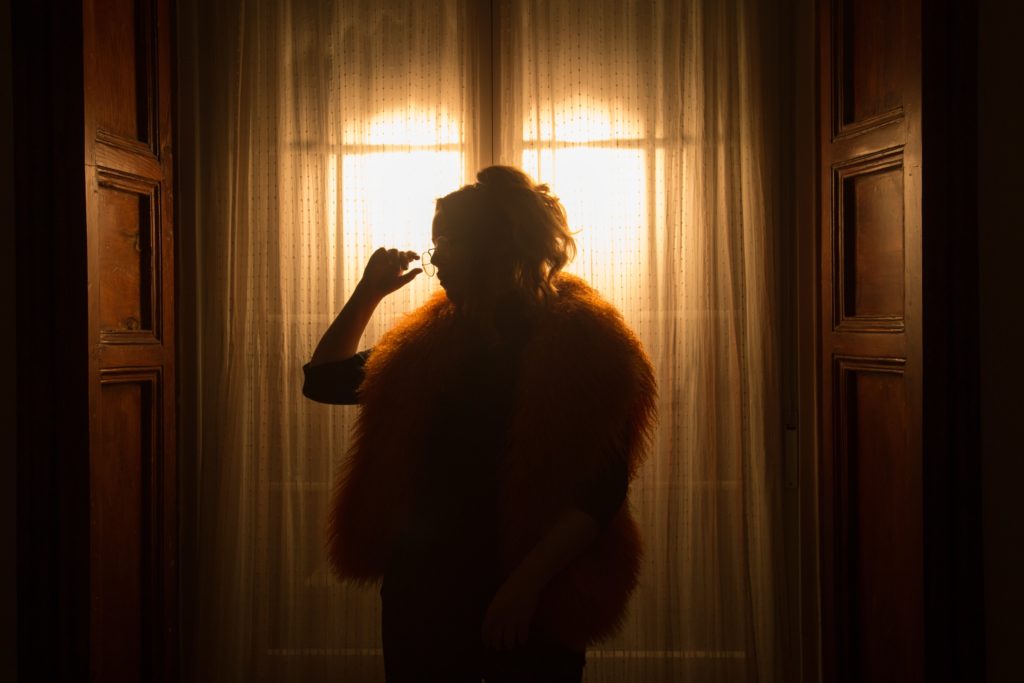
Use backlighting if you want to achieve a lot of drama if your portraiture. By lighting a subject from behind, you can easily create separation from the background. This is useful in both indoor and outdoor photography and it's not actually limited to portraiture.
Backlighting can be used in still life and product photography too if you're after something unusual. Make sure to master backlighting using both natural and artificial lighting since the results and the mood is pretty different.
Backlight Setup: Three-Point Lighting Setup
This is, in fact, a very simple lighting setup. You don't need much gear and props to create backlighting.
The most common placement for your backlight can be achieved by placing it on the same side as your key light, and then moving behind the subject so that the backlight is aimed toward the fill light.
Alternatively, you can use a simple window light as the key light along with reflectors. You don't need to use reflectors if you don't want to see any details on your subject. See the diagram below.

How To Properly Expose A Backlit Subject
You need a properly exposed image in your backlit photography. But is it hard to achieve it? Not really – just follow these tips to create optimal exposure and dramatic effect.
Use Spot Metering
Normally, we use matrix/evaluative metering, which suggests the best-fit exposure value for the entire scene. Spot metering is usually a better fit for backlit subjects because it is selective and your focus point will be properly exposed.
Expose For The Background
The other option is to underexpose your subject and expose for the background. For example, if you’re shooting outdoors, expose for the sky and not for the subject. This will result in a beautiful scene with silhouettes and a dramatic sky.
Use Exposure Bracketing
This is a great option that will allow you to see what works best in post-processing. Use bracketing to take different exposures of the same scene.
Tips For Great Backlighting
Use The Correct Camera Settings
You need to switch to manual mode on your camera. Start with a wide aperture such as f/2.8 to f/5.6 and an ISO of around 100 or 200. Your shutter speed can be between 1/100 and 1/640. Once you’ve taken some test photos, adjust your settings accordingly. The settings can vary a lot depending on the scene.
Position Your Light Source Adequately
Camera position and source of light position are tremendously important!
If you’re shooting a model, you can place the light directly behind them. Feel free to experiment with the distance between the light and the model.
Don't forget to adjust the height of the light if you’re using a flash or other artificial source of light.

Consider The Time Of Day And Weather
It's usually not a good idea to shoot portraits at midday because the light is pretty harsh. Of course, this doesn't mean that you can't experiment with harsh lighting.
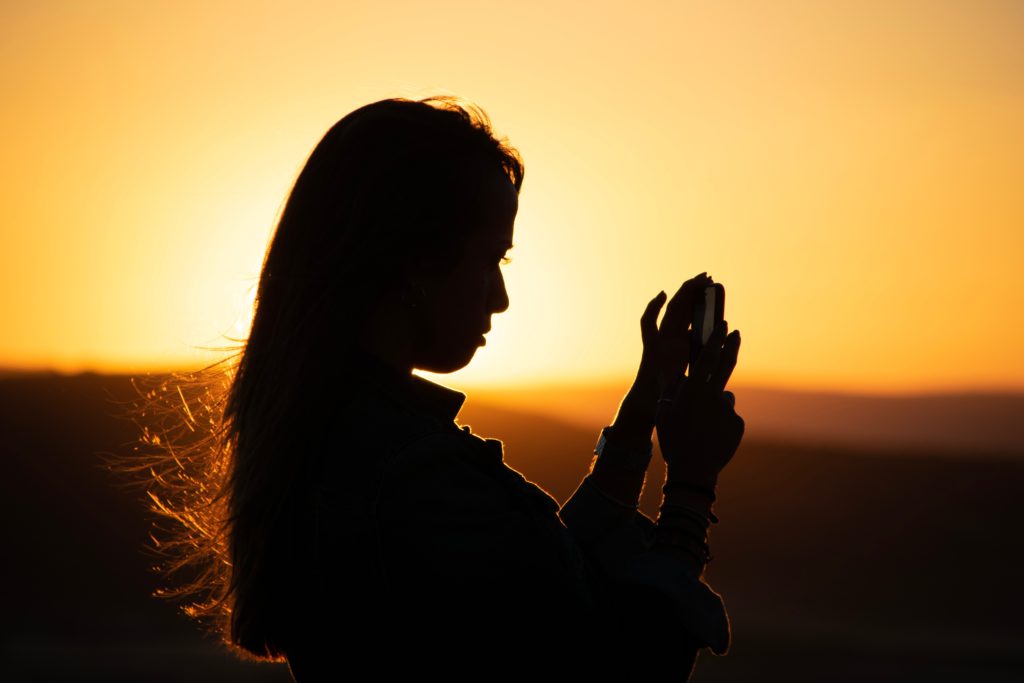
Backlit portraits are typically shot during the sunset when the colors are warm and the light is soft.
The sun covered with clouds is also a great source of light for more subtle backlit portraits.
No matter what lighting conditions you prefer, just make sure to shoot quickly, especially during the sunset when the colors and the nature of light change from moment to moment.
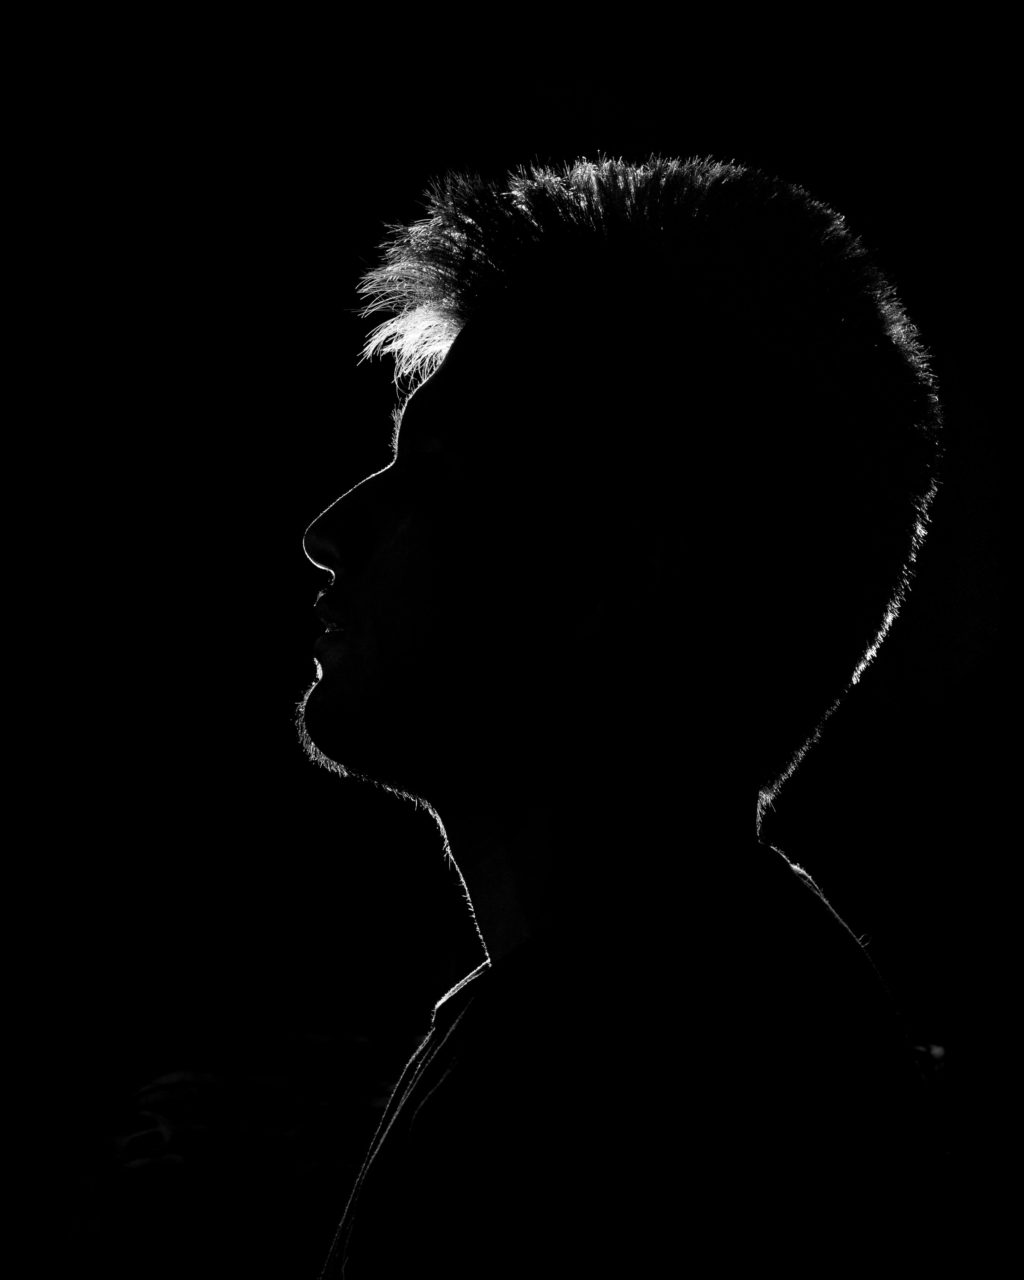
Use Rim Light In Your Portraits
What is a rim light effect?
If you place your light source directly behind your subject (which is easy to do during studio shoots), you will create a powerful rim light effect. It is a glowing line of light that contours your subject and it looks magical even though it's not hard to achieve it.
Just place the flash placed behind the subject, and use a low ISO, high shutter speed (anything and a moderately narrow aperture such as f/8. Tweak the settings until you achieve the desired result.
The rim light is great in product photography too – glasses and bottles look very elegant when they are illuminated in this way. It's easier to achieve rim lighting with artificial light.
Use Fill Flash Along With Your Key Light
Sometimes you'll encounter situations when you don't want plain backlighting in your portraits. You might want to modify it for softer effects.
The easiest way to achieve this is by using a flash as a fill light to soften the effects of the main light source such as a backlit window or sun going down.
Fill flash will allow you to show more detail on the subject while still having dramatic effects of backlighting. You will often see this kind of setup during fashion shoots on the beach during the sunset. It's advisable to have a flash diffuser to soften your fill light.
Capture Backlit Sunset Portraits
Using a key light and fill flash is not mandatory in backlight photography – sometimes all you need is a beautiful backlit sunset portrait. Many wedding photographers master this type of portrait because their clients love them.
Sunset provides a rich palette of colors, which means that you won't have to enhance colors too much during editing.
Create Magical Silhouettes
Silhouettes will make you think about composition, colors, and shapes a lot more than traditional side-lit or front-lit portraits. This can make you a better photographer and a keen observer.
You will learn how to use negative space effectively and you'll probably understand much better the power of minimal composition.
Silhouettes will help you create a more graphic image that explores, in an artistic way, the relationship between positive and negative space.
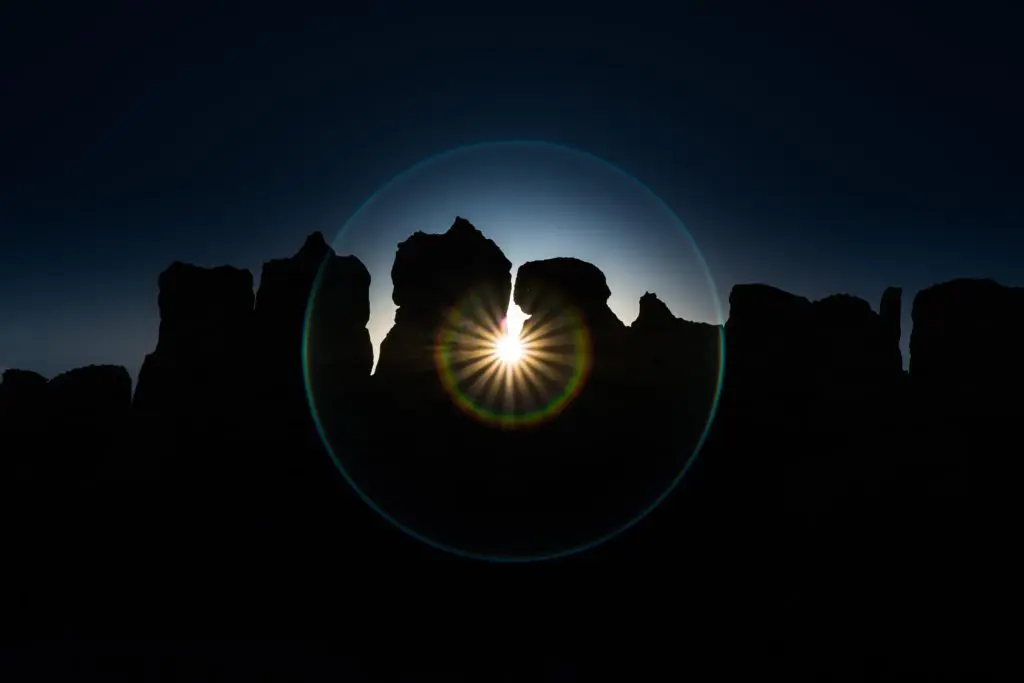
Play With Starbursts
Ever heard of starbursts?
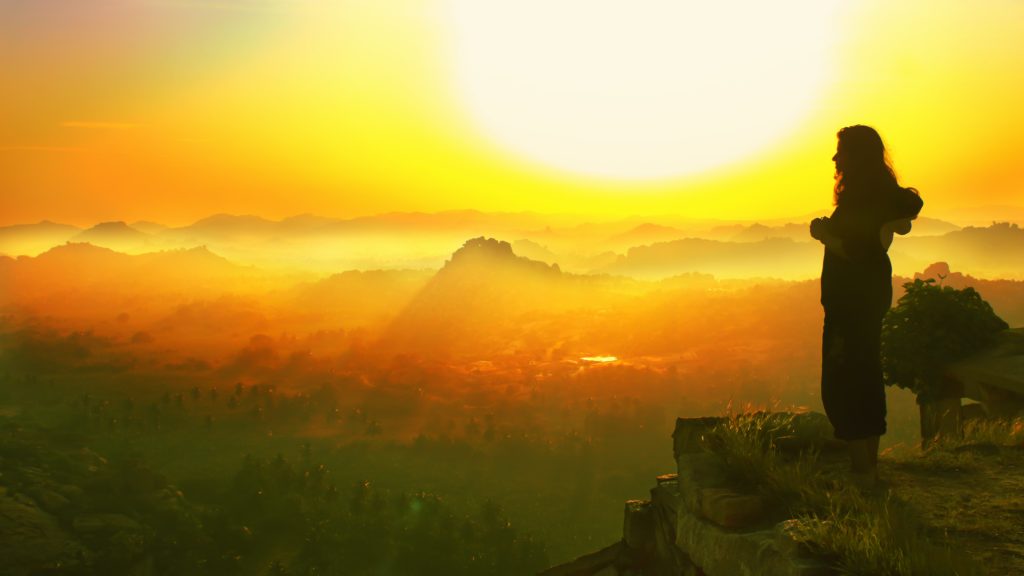
A starburst or sunburst in photography refers to capturing the sun so that you can actually see the sun’s rays in a star-like shape. They can enhance your backlit portraits in a creative way.
Starbursts aren't only fun but they can create a strong visual interest in a photo. Use them carefully and in moderation because they shouldn't overpower your subject.
How to capture sunbursts? Well, any aperture from f/11 to f/22 should work. It depends on how powerful you want the starburst to be. Also, different lenses create different sunbursts. Make sure to test a few lenses until you get the optimal results.
One thing to have in mind – in order to achieve a good starburst, you need a clear sky and direct sunlight. So, forget about starbursts in cloudy weather.
Conclusion: Creative Backlight Photography
As you can see, there are many ways to create a backlit image. If you don't have studio lighting, you can experiment with natural light and capture stunning backlit shots during the golden hour and sunset. Just make sure to understand what camera settings to use and how to properly position your subject and your camera.
I wish you good luck with your backlit photography!
Further Reading:
- 13 Tutorials On Different Lighting Techniques For Portrait Photography
- Portrait Photography Ideas And Techniques For Shots That Will Be Cherished
- Do You Make These Mistakes When Using Backlighting?
- 4 Quick Tips To Improve Your Natural Light Portraits
- 8 Easy Backlighting Tips
- Master Backlighting Photography In 8 Easy Steps


