Although some photographers may not be a great fan of photo retouching, there are times when one may have to smoothen textures in portraits either at the request of clients, or to hide blemishes, spots, marks and wrinkles on the face. Photographers no longer need to use photoshop or other software for this process, but can stay inside Lightroom.
Here are some tools and methods in Lightroom that will help you get smoother skin in a matter of a few seconds or minutes.
Using the Basic and Detail Panels:
1. Decrease Clarity only in the Basic Panel: This is the easiest method to make the skin look softer. Decrease the clarity (drag it to negative value) to something between -15 and -50 depending on the effect you are looking to achieve. But be careful, this method will affect the entire image. It is best suited for close up portraits that already have a fairly good skin but requires only a minor retouch.
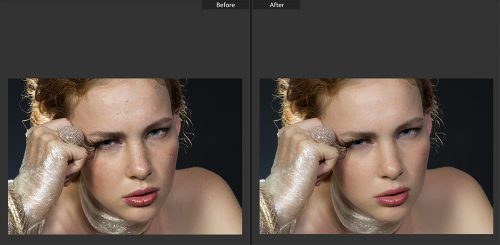
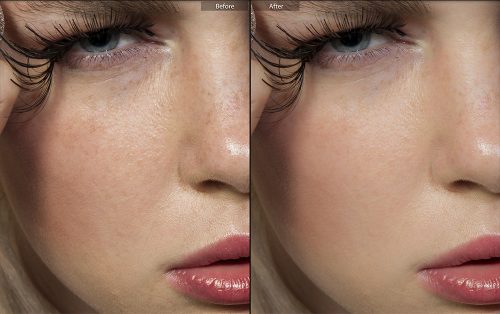
Image from Pexels by Engin Akyurt
2. Advanced Sharpening Techniques: If the image from the method above looks very unreal, use manual sharpening settings. In the detail panel, keep the sharpening between 50 and 100, radius between 1 and 2. Increase the detail slightly to around 10; See how this looks and adjust the sliders back and forth till you get the desired look.
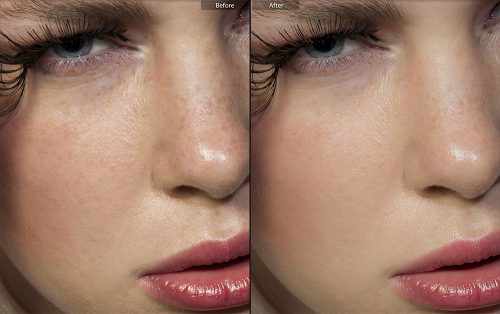
3. Using Both Basic and Detail panel: In the “Basic panel” set the desired Exposure, contrast between -10 and -25, whites and blacks as required, clarity between -15 to -50. In the “Detail Panel” Sharpening 50-75, radius around 1.5 to 2, detail 10 and masking around 20. Luminance 15- 20, detail 50. Make adjustments till you get the desired look as every skin has different levels of textures.
Using the Adjustment Brush Tool:
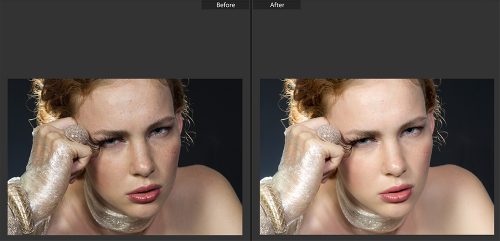
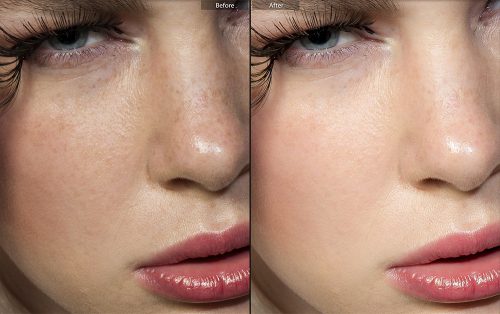
4. Adjustment Brush Tool (default): Select the adjustment brush tool (just below the histogram, keyboard shortcut K) and under effects, select “Smooth Skin” or “Soften Skin.” Choose the brush size depending on the area that you need to work on (the [ and ] keys help you to increase or decrease the size of the brush). To see the areas where you are brushing, press “O” and brush over the areas on the face that need softening.

By default, you can see that the settings for the “Soften Skin” brush is set to “Clarity = -100” and “Sharpness = 25.” If you think that the skin is overly smooth, try changing this setting. The more negative clarity value, the smoother the skin will be. This can look unreal sometimes.
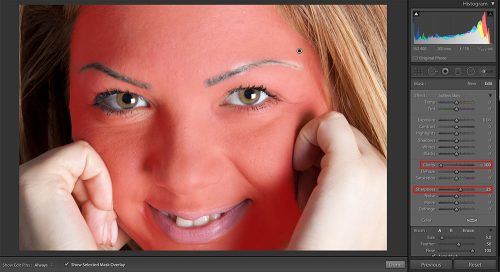
Image from Pexels by Claudio Scott
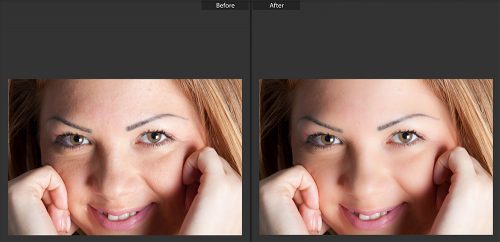
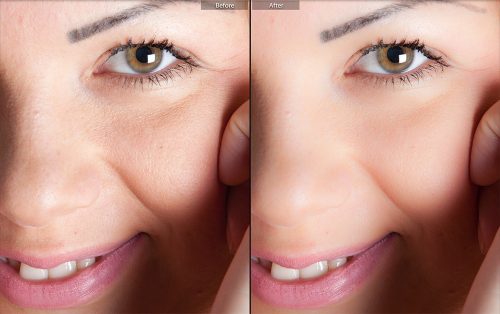
If your brushing spills over, do not worry, use the “Eraser Brush” to erase off unwanted brushed area. Pressing the “Option” key in Mac and “Alt” key in Windows makes your brush an eraser.
Note: Your brush has two circles; one the brush size (outer circle) and another the feather value (inner circle). Choose this according to the way you work. There is also a flow value which is the amount of brush effect. Use this to apply the desired amount of brush effect.
5. Adjustment brush tool (manual settings): In this method, select the adjustment brush tool. Brush over the area that needs skin smoothening. Manually change the brush settings. You may have to decrease contrast a bit, bring down clarity, and increase / decrease the sharpness a bit depending on what you are looking to achieve. Use the noise slider if required. Drag the sliders till you get the desired effect of the brush on the skin. Look at the results below. They look much better compared to the default brush settings.
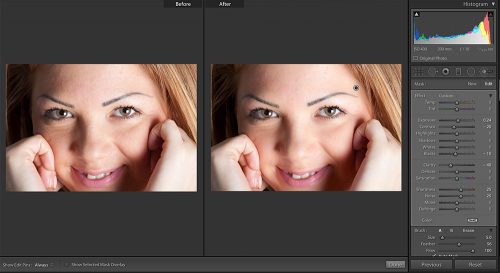
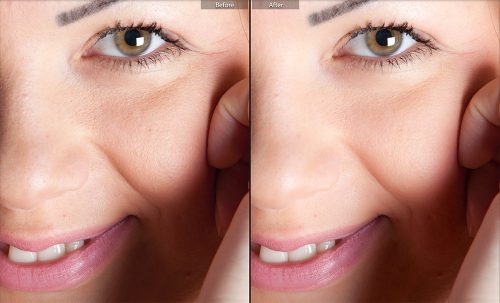
Note: If there is a brush setting that you like, save it as a preset for future use.

Using the Spot Removal Tool:
6. Spot Removal Tool: If the skin is fairly smooth, but you only need to get rid off some spots and blemishes, make use of the “Spot Removal” tool and choose the “Heal” option (Keyboard shortcut Q).
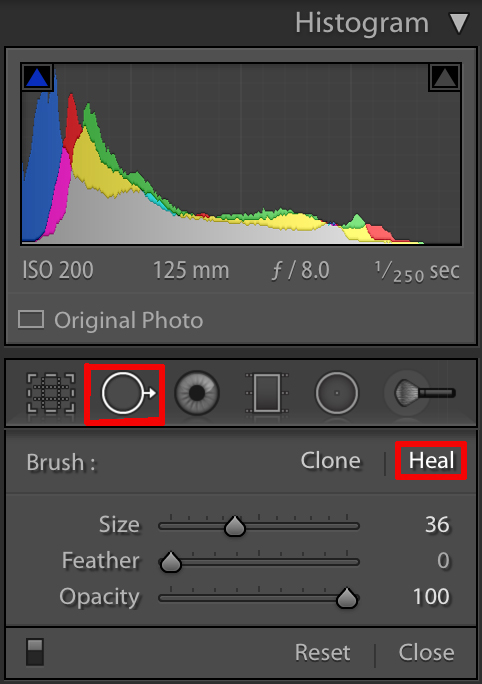
Adjust the size of the brush to a bit bigger than the spot and click on the spot. A second circle appears and Lightroom will automatically choose an area to match and heal. Most of the time, it blends this seamlessly. If that doesn’t work, grab the second circle with the mouse and drag to a smooth area to match and heal. Repeat this process for all spots and blemishes.
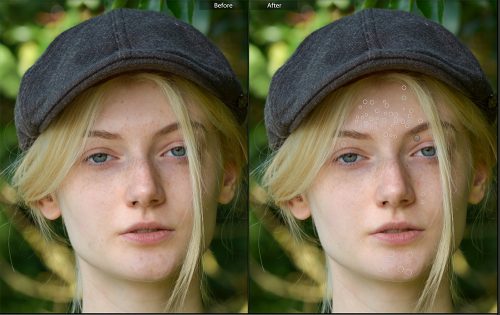
Image from Pexels by fsHH
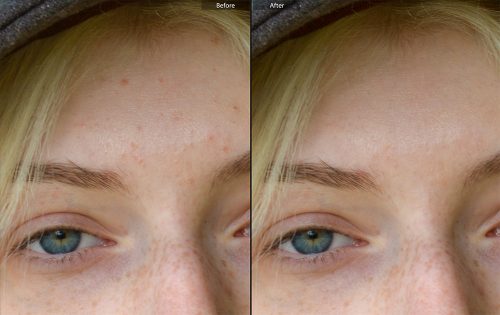
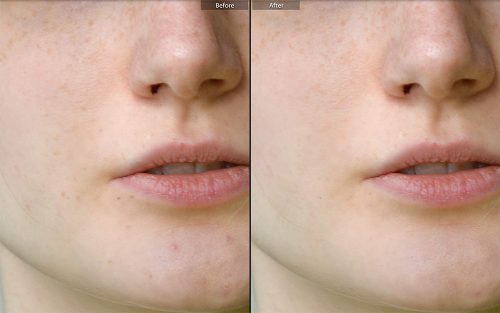
You can play around with the feather and opacity settings depending on your need. But feather value of -0 and Opacity 100, usually works just fine (just like in image above).
Now, skin smoothing and image editing, in general, is a huge topic that cannot possibly be covered in great detail in a blog post such as this. To continue to discovering new techniques with Effortless Editing by Josh Dunlop.

