I suppose many of you are wondering – what are the most important camera controls beginners need to master?
I am sure that like me, there are one or two of you that bought their first camera because you were attracted to all the buttons and dials it had. There was a sense of wonderment about what they all did. A desire to learn how each finely crafted mechanism changed the look of your image.
When you got that new camera home, like me you probably began to feel a little daunted about those buttons, could you really learn and understand them. Well the answer is yes you can and, with apologies to more experienced photographers, today I am going to look at 7 of the most important controls beginners need to master.
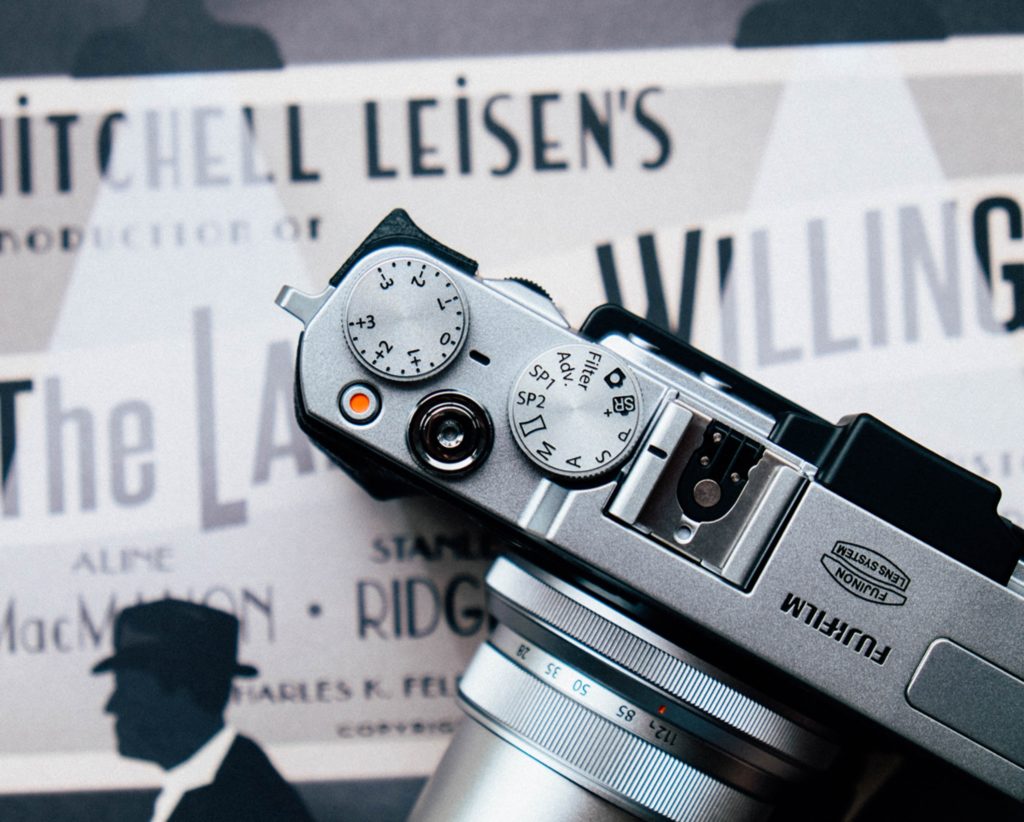
PASM The Master Control
I call PASM the master control because it’s probably the most important thing to learn. PASM stands for Program, Aperture Priority, Shutter Priority and Manual. These are the four main exposure modes that your camera has and are key to the way you want your images to look.
For run and gun everyday shots you can stick with Program mode. If you want to control bokeh and depth of field, Aperture Priority is the way. If you are looking to convey motion in your shots, then shutter priority is a must and if you want the ultimate control, go to manual. There are many articles here on Light Stalking to help you understand each of the PASM modes.
Exposure Compensation
Exposure compensation is the second control you need to master. This is because it can hand you a form of semi manual control when in any of the auto modes. It works by allowing you to add or subtract exposure from your images, lightening or darkening them.
This is important because the auto exposure modes, namely P, S and A will determine the exposure for you. Often that exposure is not quite what you had hoped for. By using exposure compensation, you can make your images lighter or darker without having to switch to manual mode.
The beauty of exposure compensation is that it works appropriately to the mode you are in. For example in Shutter Priority, because you set the shutter, exposure compensation will change the aperture.
Shutter Speed
This control will usually be a large dial on top of your camera or either the front or rear rotating dial on the right side of your camera body. You will use it when in Shutter Priority or Manual exposure modes. As it’s name suggests, it controls the amount of time that the shutter is open and exposing light to the sensor. It is one of the three points of the exposure triangle and a vital control to master.
Slower shutter speeds will give you more motion blur in your image and let more light on to your sensor. Faster shutter speeds will freeze action and reduce the amount of light reaching your sensor. The main counterbalance to shutter speed is aperture.

Aperture
This is the diaphragm that you can see inside your lens. Like shutter speed it controls the amount of light reaching the sensor. On your camera it will be controlled one of two ways. Most commonly through a dial on the front or rear of the right side of your camera’s body. Alternatively it will be controlled by a dial around the circumference of your lens.
The lower the aperture number, the more light will pass through to the sensor and vice-versa. The aperture scale is measured in f/stops and its main counterbalance is shutter speed.
As part of the exposure triangle, aperture is responsible for the amount of the scene that is in focus, both in front of and behind the main subject. This is known as depth of field and is one of the most important camera controls beginners need to master.

White Balance
Camera sensors do not see light as we do. They are very sensitive to the temperature (color) of light. All cameras have a built in color meter that helps determine the right color balance for your sensor. Unfortunately this is not always correct as it can be fooled by large blocks of one single color or light that is very warm or very cold. As such we can use presets for white balance. These include Cloudy or Shade, Sunny, Flash and Tungsten.
We can also dial in a predetermined white balance using the degrees in Kelvin scale. If your image is very blue looking it means the color temperature is high, from 6000-8000K. By dialling in a figure in that ballpark, you can neutralise your color balance.
You can also set white balance manually by reading the light off of a white card. This technique is very useful for mixed or complex white balances.
Focus Mode Selector
At the bottom, front left of the camera (with the back to you) will be small three way switch. It will have the letters S, C and M on it. This switch allows you to change the focus mode. By default it will be set to S or single shot mode. This means the camera will lock and hold focus until you release the shutter button. It’s best suited to static or slow moving subjects.
The C mode is continuous focusing. In this mode the camera will continue to refocus on a subject so long as the shutter button is half pressed. It is best suited to fast moving subjects.
The M mode is manual focus and will require you to turn the front of your lens in order to focus on a subject. Your viewfinder and LCD screen will have various focusing aids in which to help you with this.
ISO
I have left ISO to last, despite being the third point on the exposure triangle. The reason for this is that cameras make a pretty good job of setting the best ISO according to the conditions through Auto ISO.
ISO is the sensitivity of your camera’s sensor to light. The higher the ISO the more sensitive but equally there is image degradation called noise. As a rule you should set the ISO as low as possible to get the shot and use shutter speed and aperture to get the correct exposure.
On most cameras, you will set ISO through a combination of button and dial. On some cameras there may be a dedicated dial for ISO.
Learning and understanding these seven important controls first will help you on your way to becoming a good photographer. For each of these controls, I have linked a pertinent Light Stalking article to enable you to get a deeper understanding of the camera controls beginners need to master.


