Converting color images to black & white is easy. All it usually takes is a click but when done mindfully, it can take an image from average to awesome. Let's see an example.
Here's a photograph of an early fall morning landscape in color. The lines, color and sky have a nice appeal. However, take a look at the same moment converted to black and white. The feel is completely different and in this case, the sky and bridge stand out a bit more.
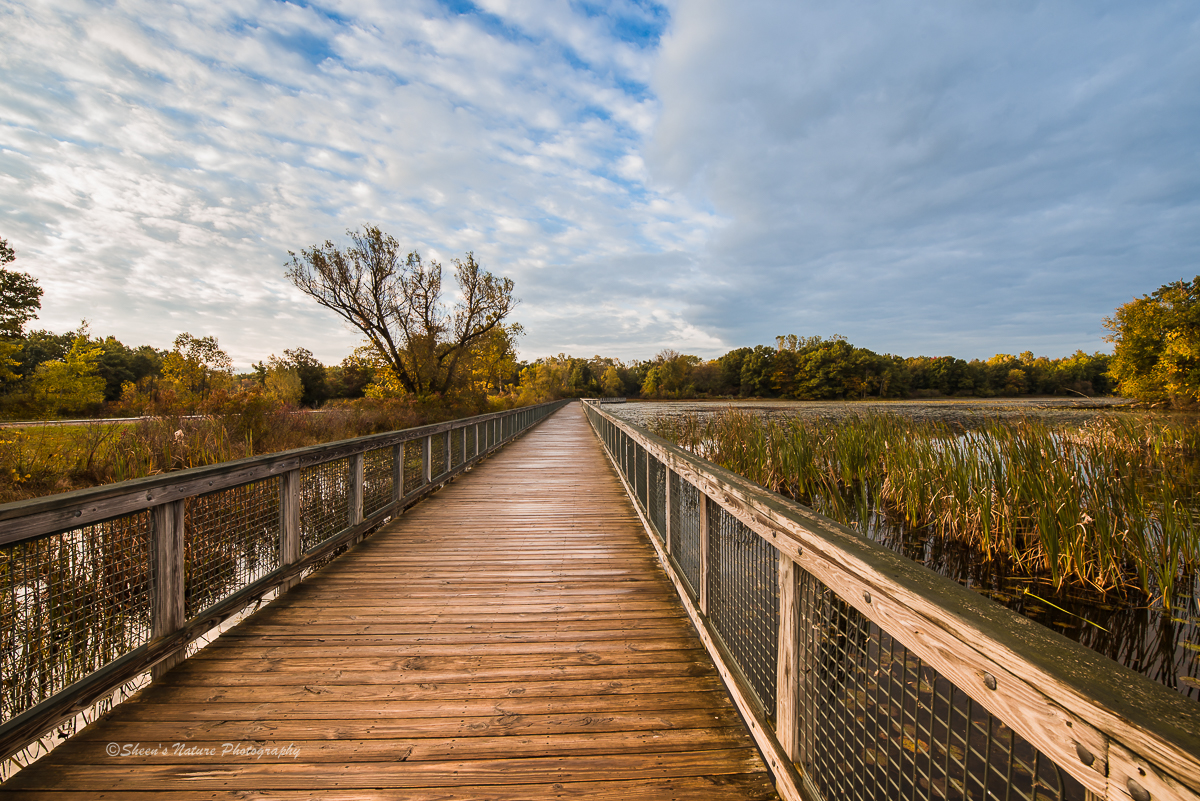
The photograph in color.
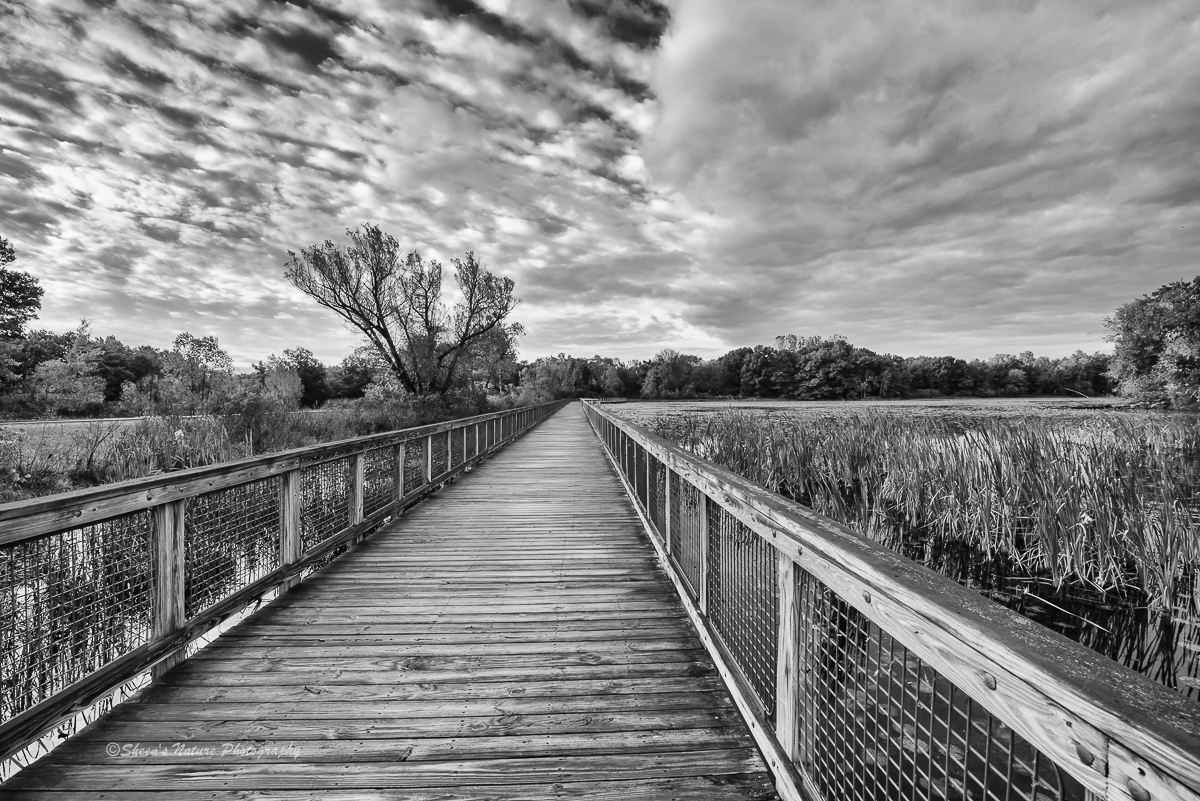
After being converted to black & white. Photo by Sheen's Nature Photography
Why Convert to Black & White
The visual benefits of black & white are quite simple:
- Versatility – black & white works across landscape, nature, wildlife, people and street photography. Landscapes that looked nice in color, change to amazing as the subject such as clouds, water, add movement and mystery.
- Eliminates distractions – color and tones may distract from the original focus area. Imperfections, misplaced objects in many cases are no longer noticed. Photos of children at play in a playground…..
- Adds drama and mood – when going to black & white, light and shadows are more vivid and the subject may pop a bit more. Black and white is an effective scheme in conveying moods with highlights and shadows. A bride in a wedding dress becomes more elegant. Stark contrasts in a city scape convey hard, busy and cold.
- Timeless feel – just like some of our favorite old black & white movies and TV shows stand the test of time, the same is true with quality black and white images.
- Saves a potentially boring or distracting image – many times we capture images and the feeling or impact of the subject just doesn't stand out like it did when we were in the moment. Take a few seconds using the 3 tips below to switch to black & white and see the impact.
One of Light Stalking's writers, Jason Little's black and white image below of leaves covered in water droplets effectively illustrates a different, creative twist on the typical green leaves after a rain.
To get started, Lightroom offers 4 simple methods to convert from color to black & white. Once you've worked with these, you'll want to manipulate your images even further using the many tools in Lightroom. These include: A. Built-in Lightroom presets B. Converting the Treatment Panel to Black and White C. Working with the HSL/Color/B&W panel and D. Third party plug-ins and presets.
While a photographer could set their camera to black & white and create b&w images straight out of the camera, you should prefer shooting in color to capture detail and provide post-processing flexibility.
1. Using Built-in Lightroom Presets
In Lightroom, there are a number of black & white (in addition to other) presets available underneath the navigation panel. By scrolling the cursor over the selections, the image will change in the panel. If there is a preset that you like, select it and it will appear in the full screen. Further editing can be applied using the tools in the right panel.
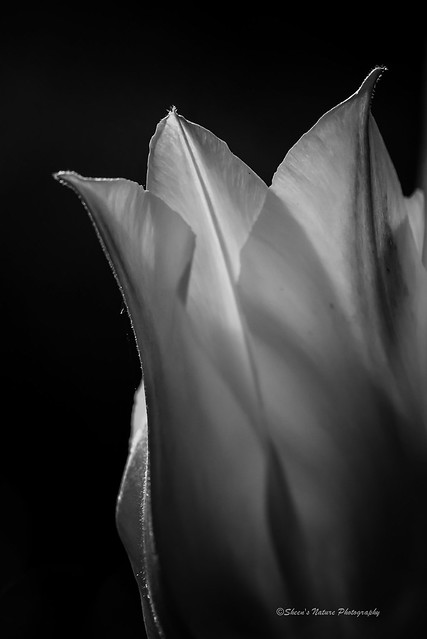
Photo by Sheen's Nature Photography
2. Using the Treatment Panel
With one click, selecting Black & White will convert from color to black and white. From here, adjust the WB, Tone and Presence sliders to get the desired outcome. You can also pull out the color by moving the Saturation Slider under presence to the left.
3. HSL/Color/B&W Panel
Working with the saturation sliders, pull all the colors to the left (or -100). This will take out the colors. Further editing for effects and impact can be done by adjusting Hues, Luminance and working in the other panels. If there's an adjustment that becomes a favorite, you can name and save it as a preset for future application.
The Barn below post processing edits included taking all of the saturation sliders to -100. As a complete black and white, it was missing something. To add a little punch and character to the barn, the red and orange saturation sliders were moved to -7 and -10 respectively.
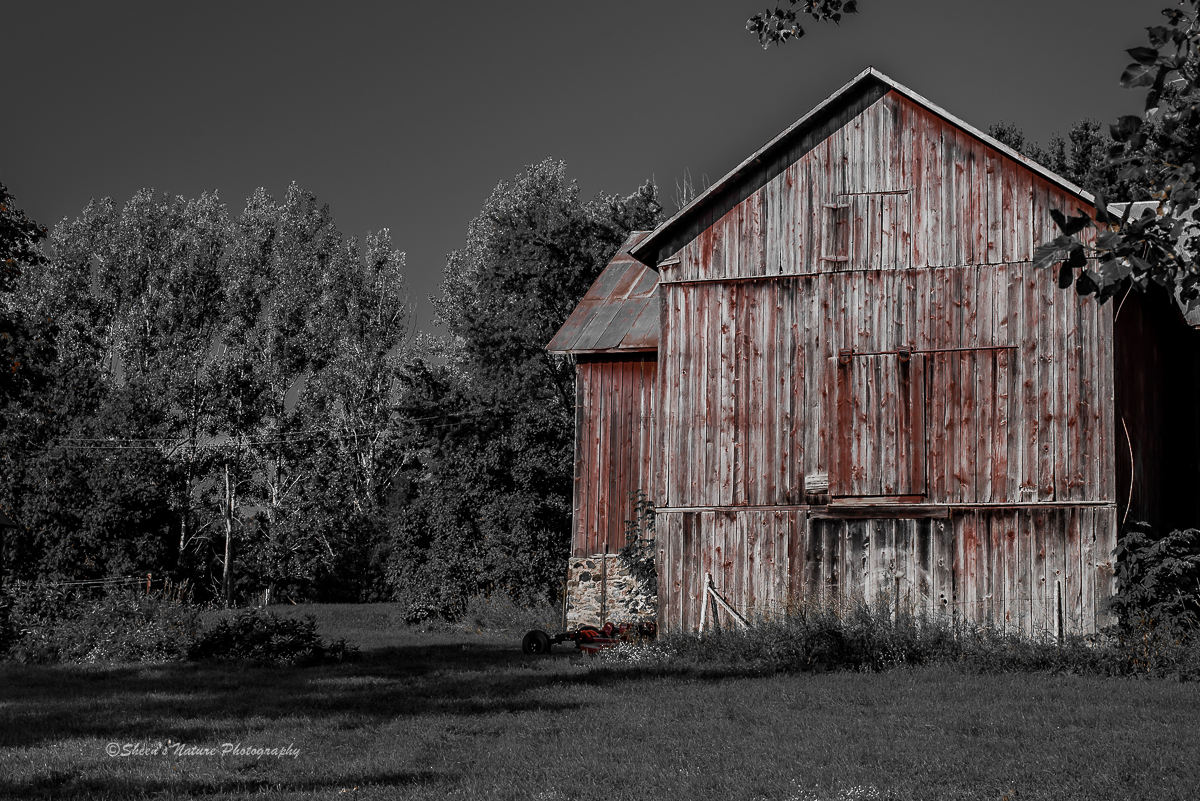
Photo by Sheen's Nature Photography
4. Plug-ins and Presets
There are a number of fee (many with a free trial) and free black & white plug-ins. While I use Google Nik Software Silver Efex Pro, the options are wide open. Here's a list to get you started:
Topaz for Black & White Effects – Fee
Google Nik Software Silver Efex Pro Module – Fee
Pretty Presets Black and White Collection – Fee
BW Retro Presets and Film Collection for Lightroom and Photoshop – Fee
Noir Collection – Black and White File Presets Lightroom – Fee
Silver Shadows II – Fee
Presets Galore – Free
Contrastly Presets – color and black & white – Free
Inside Lightroom Black & White Presets – Free
With all of Lightroom's black & white presets, features and plug-ins the creativity options for the photographer are numerous. For that image that has great quality, composition and interest but missing that little something extra, convert to black and white and see what happens.




20 Comments
Thanks for this. After years of using Picasa I’m finally making the switch to LR so have bookmarked this
Hi Patrick! Glad you found the article useful – I think you’ll really enjoy LR!
These photos are absolutely exquisite.i love black and white photos.this person has a beautiful eye for photos .
Hi Patricia – thank you for your kind comments! Glad you enjoyed the article:)
I wish you had compared the methods
Sheen-
Thanks for the article and links to presets. It certainly helps that your bridge picture had great composition, saturation and constrast before the conversion. It’s hard to pick which I like better. I love both.
I’ll be checking out your blog.
Mike
Mike, thanks for your comments! Glad you enjoyed,
Sheen
Here is a very naive question! How does one access the program ‘light”?
Do I need to order it as a disk to load into computer or can it be ordered and just sent to my computer? And how much does it cost? Thanks!
Hi Elizabeth, the program Lightroom is offered by Adobe. They are now offering it as a bundle with Photoshop (creative cloud) for $9.99 per month. Just google Adobe Creative Cloud and you’ll get the details.
Have a great one!
Thanks Patricia, your article is excellent. In addition to Lightroom I also use onOne’s Perfect Photsuite9, which I use for much of my B&W images. It is a product which I find very versatile.
Thanks Michael and appreciate you including Perfect Photosuite9,
Hi. Thanks for this article and for suggestions about LR presets.
Hi Francesco, you’re very welcome!
Your simple conversion takes beautiful to elegant in B/W. Do you have a website to visit for more of your work?
Hi Chuck! Thank you so much. I have a couple of sites. My Facebook photography page is https://www.facebook.com/sheensnaturephotography and my website is http://www.sheensnaturephotography.com.
I also have a couple of other postings (Flickr and smugmug).
Have a great week!
Sheen, love the black and white option and nothing says it better than the first photo you showed with the colour comparison; as a colour photo it was average as a black and white it was spectacular. In the film era you had to make a choice now I shoot in colour but do up a second set in black and white.
Thank you Glenn, agree that is great to have the flexibility to process in both!
I had always known that there were a few tricks yet to be discovered with LR. Thank you Sheen for pointing them out to me.
Andrew, thank you, glad you found this helpful. Have a great day!
Yes this tip is useful? here is another way that I use out of software for converting https://www.decoenligne.org/conversions-couleurs/