The market for photographer’s gallery sites is quite a crowded place. Among the top dogs are Zenfolio, Photoshelter and Smugmug. All of these sites offer very similar content for fairly similar prices. Having just signed up for a Smugmug site, today I will give you a brief overview of what they have to offer.
Signing Up
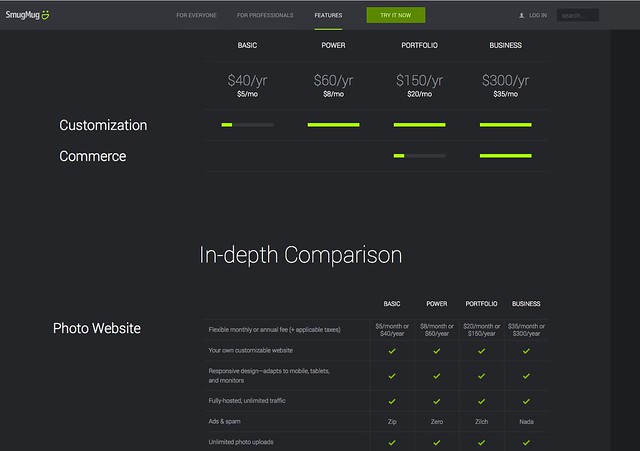
As with all of these sites, Smugmug offers a 14 day trail. This is a fully comprehensive try out, allowing you to set up a live website featuring all the features from all the packages offered. One neat idea in the trial is the way Smugmug shows you which features you have used and from what package price plan they belong. For example if you add your own custom domain name, Smugmug will tell you that this feature is available on the Power plan and above. There are four plans in total, Basic for $5/Month or $40/Year, Power $8/$60, Portfolio $20/$150 and Business $35/$300.
Which Plan to Choose?
If you are looking for a site simply to show of your photos to friends and family, then the Basic plan will more than suit your needs. In this you get unlimited uploads, a good degree of customization, social media sharing, the ability to get prints and gifts made from you images and SEO analytics.
The next step up is the Power plan. This adds in the ability to use custom domain names, creating your own designs and right click protection among other things. The Power plan is probably best suited to the enthusiast that wants to promote their work to a wider audience without the need for selling images.
In order to sell your work, you need to step up to the Portfolio plan. This adds in a significant range of e-commerce options including one click shopping with the images being sent to digital labs around the world, setting prices in most of the major global currencies, selling digital and video downloads and creating custom price lists. In addition to this you can also add custom watermarks to protect your work.
Setting Up Your Site
One of the things I have found with Smugmug, is that it is very user friendly. Initial set up is done from your Settings page, this allows you to add your custom domain, for which there is an easy to follow guide. Under the stats section, not only can you view Smugmug’s data on your visitors but also easily add your site to Google Analytics and StatCounter. Again there are quick guides showing you how to do this. Under the business section of the settings you can define which products that you wish to offer and set prices. The price are set as a percentage mark up on the base price and can be tuned to individual products or set globally.
Selecting a Theme
Once you are ready, you can start to upload photos and set a theme for your site. Smugmug uses a hierarchy Folders, Pages and Galleries each or which can be added to a webpage. You can place several galleries inside one folder and link to that, create individual pages such as an About page or blog and embed photos from galleries into those pages.
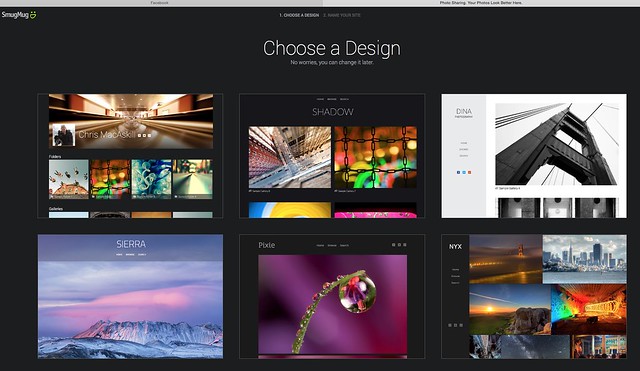
There are a selection of different themes, each of which has a preview, showing how your site will look in that theme. In the Power plan and above you can modify those themes or create an entirely new one to suit.
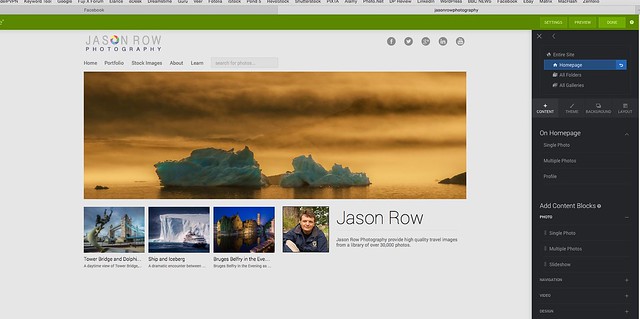
Creating or modifying is relatively simple to understand, with a little practice. Initially you set the global look of your site, adding the site title, menu hierarchy and content boxes. To the right of the customisation page you can select which pages you want to modify, from Global, Galleries and Pages. Beneath this are the design tools, split into four tabs.
The first tab is the content tools. Here you simply drag and drop different content types such as multiple images, text boxes and logos onto the page. As you drag green boxes will show on the page defining where the content can be placed. Each individual content box has icons on the top left to define it’s setting size and positioning.
The second tab deals with changing the look of the theme or changing the theme. You can change colors add background photos or textures.
The third tab allows you to define a background for the entire site, while the fourth tab deals with the layout of the theme. You can pick from a number of different layouts and modify them to get the best look for your site.
In Conclusion
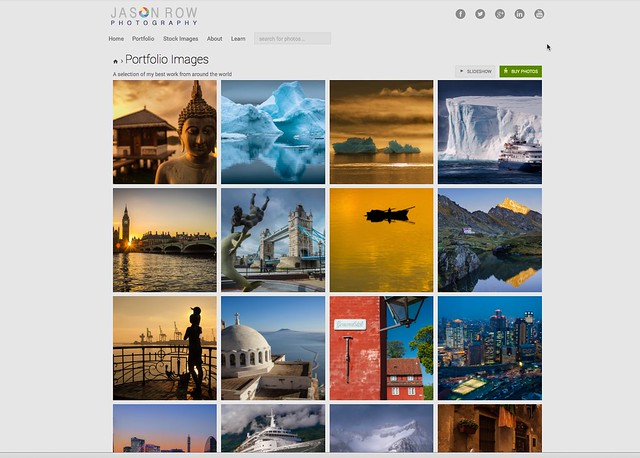
Overall, my experience with Smugmug has been a good one. I am currently working a new site and have found the learning curve to be fairly shallow. There are still a few issues I have to work out with formatting the layout of my site, but I am sure this should not be a major issue. My initial impression are very good, and having used the two week trial to get a fairly decent looking site up and running, I finally went with the Portfolio package. You can find my Smugmug site here, it is currently a work in progress www.jasonrowphotography.co.uk



1 Comment
Hi Jason, thank you for this interesting article. I’m always interested to hear how these “off the peg” website operate and see how they look. It’s a shame that the link you provide at the end of your article is broken and doesn’t lead anywhere as I would have liked to see what a “real live” site looks like.
Anyway, I’m probably getting ahead of myself here since I have to run my photographic project(s) on a shoe-string and at this stage this simply means setting up a free WebPress portfolio blog to publish my work on the web.