Low-light and night photography follow the same basic fundamentals of photography but there are some techniques that are more prevalent and worth learning. You will mainly be working with slow shutter speeds, making it challenging for you to avoid blur from camera shake and vibration. Figuring out exposure and focusing are the other challenges in this kind of photography. This article will give you an introduction to the basic elements of low-light and night photography, and some additional tips. If you need a more general overview, then you should start with our Light for Landscape Photography guide first.
Essential Gear for Shooting in Low-Light
You don’t need lots of new and expensive equipment for low-light and night photography. You may need some additional kit but it’s not particularly costly and chances are you may already have some of it, like tripod and remote shutter release.
Camera
You will need a camera that allows you to keep the shutter open for long periods of time, ranging from a fraction of a second to several seconds. If your camera has the “Bulb” setting, that’s even more helpful because it allows you to keep the shutter open for as long as you want, which can be for seconds, minutes, hours and even days! Shooting hand-held in low light requires the use of high ISO, and most of today’s cameras have high ISO capabilities that help you in doing it.
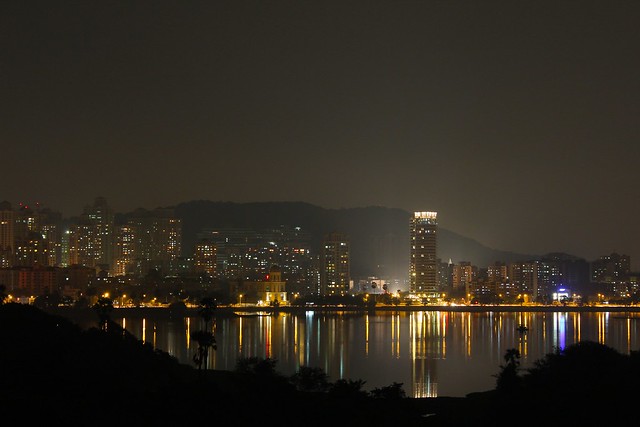
Photo by Ritesh Saini
Low-Light Lenses
The lenses you already have for daylight photography are also usable for low-light conditions. An important factor is the speed of your lens. A fast lens (f/2.8 aperture or faster) allows you extra stops of light which lets you use faster shutter speed (be sure to know your exposure triangle). It has an added advantage of a brighter viewfinder which helps you to see your composition better in low light.

Photo by Ritesh Saini
Tripod
It is impossible to stay completely still, more so when you have to stay still for longer durations. A thumb rule for shooting handheld says that, for shake-free images, photograph at a shutter speed which is equal to the inverse of the focal length at which you are shooting. There are many factors that affect this rule, e.g. image stabilization in the camera (or the lens, as the case may be), the bulkiness of your lens, and of course your ability to stay still. If you don’t want to leave much to chance, invest in a good quality, sturdy tripod.

Photo by Ritesh Saini
ISO Considerations for Low-Light Photography
ISO or the light sensitivity of the image sensor in the camera, along with the shutter speed and the aperture (together called the exposure triangle), determine the exposure. Lower ISO means that the sensor is less sensitive to light and requires more light to create a usable exposure. Photographing in low light requires high ISO (e.g. 400, 800, 1600). Remember that high ISO brings with it more noise in the image, so you need to find the correct balance between bumping up the ISO and acceptable noise in the photo. Whenever you are using a tripod, use the lowest ISO you can.

Photo by Luke Ma
Getting Your Exposure Right
Measuring exposure is a complex part in low-light and night photography because the light might be too low for the TTL (through the lens) light meter to operate properly. Also, with bright artificial light and dark natural light in the same scene, the level of contrast will be beyond the dynamic range of the sensor. A typical example is a cityscape at night.
For calculating exposure, you may use the spot meter in your camera, or you may use a hand-held meter. If you don't have either, the easiest way would be by experimenting and learning through experience. You can do it by photographing different subjects at different exposure settings. Making a note of such exposure settings can help you make your own ‘light chart’ to work from.
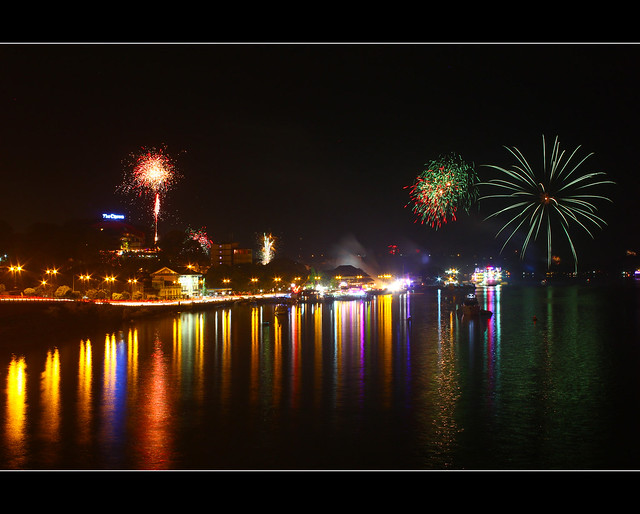
Photo by Ritesh Saini
The following chart gives a rough starting point for various low light scenes. You will have to experiment to get the right exposure for your scene.
Subject | Recommended settings |
|---|---|
| Floodlit buildings at night (front on to camera) | 1/4 sec @ f/4 |
| Floodlit buildings at night (angled to camera) | 1 sec @ f/8 |
| Funfairs (to freeze motion) | 1/125 sec @ f/2.8 |
| Funfairs (to blur motion) | 1/15 sec @ f/8 |
| Fireworks | 5 sec – up to 1 min @ f/8 or f/11 |
| Lightning | 10 sec – up to several min @ f/8 or f/11 |
| Star trails | 4-8 hours @ f/8 |
| Moon (clear night) | 1/250 sec @ f/16 |
| Floodlit sports events (to freeze motion) | 1/125 @ f/5.6 |
| Floodlit sports events (to blur motion) | 1/30 @ f/11 |
| Car-light streaks (busy road) | 10-20 sec @ f/22 |
| Landscapes (under full moon) | 4 min @ f/11 |
| Landscapes (under partial moon) | 8 min @ f/11 |
| Street scenes (with sidewalk lights) | 1/4 sec @ f/8 |
| Cityscapes (closeup) | 2 sec @ f/11 |
| Cityscapes (wide-angle) | 8 sec @ f/11 |
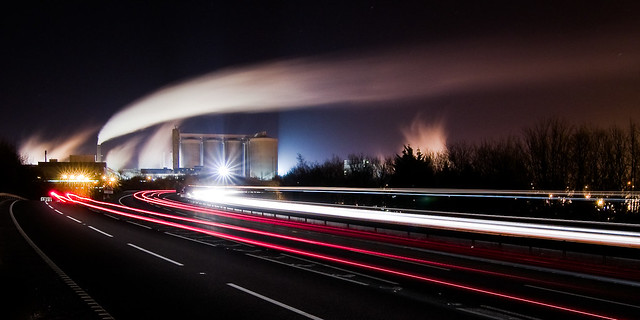
Photo by Andrew Stawarz
Other Useful Tips
- In DSLR cameras, it helps to use the mirror lock up facility while shooting long exposures to eliminate vibration.
- It also helps to have a cable release or a wireless remote to avoid camera shake while depressing shutter release button on the camera. An alternative is to use a self-timer.
- When taking hand-held photographs in low light, keep your arms close to your body for extra stability.
- To focus properly at night or in low light scenes, find a light in the scene such as a streetlight or a lit window that is the same distance away from the camera as your subject. Focus on it and then reframe to your original composition. If autofocus isn’t working well in a scene, it’s often easier to focus manually.
- If using a hand-held meter, it would help in low light conditions to remove the white dome (invercone) to effectively make the metering cell five times more sensitive to light. This is assuming the invercone is removable, of course.
- When shooting at night, you may want to use flash as your primary light source.
- Make sure you remove any UV or Polarizing filter from your camera because it blocks some light and induces unsightly lens flares from streetlights etc, unless it has an anti-reflective coating
- In high contrast scenes where low levels of natural light are complemented by bright artificial light, you will have to decide whether you want to expose for highlights or shadows. In night photography, it is acceptable to clip the highlights in the center of a streetlight, for example, to retain the image quality in mid to dark tones.
- If you are using film for photographing, you should read about reciprocity failure in low light and long exposures, and how to compensate the exposure for it. Reciprocity failure is not directly relevant in digital photography.
- Shoot in RAW if you can.
- Start your night photography session with a fully charged battery. Better yet, bring a spare. Long exposures consume power quickly.
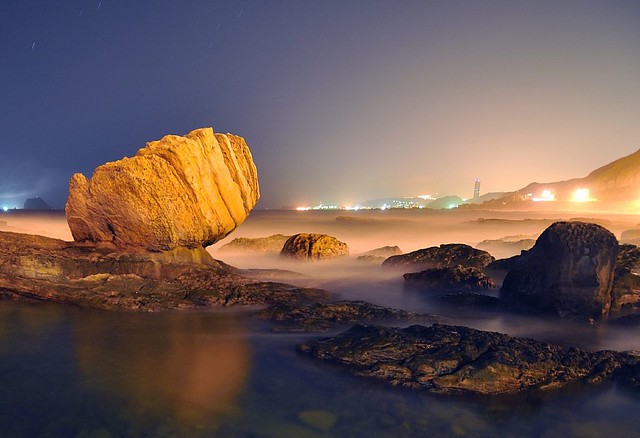
Photo by Matthew Fang
Useful Links for Low-Light Photography
Want to photograph fireworks, or star trails, or the Milky Way perhaps? Check out these cool how-to articles right here at Light Stalking!
- How to Photograph Fireworks
- How to Photograph Star Trails: The Ultimate Guide
- How to Photograph the Moon
- How to Photograph the Milky Way
Here are links to some night photography Flickr groups to keep you inspired!
Reference(s)
Chris Weston, The Essential Lighting Manual for Photographers, Rotovision (for the light chart)


3 Comments
Cool tips. One thing still escapes me: When taking night photos in a desert environment with a lot of red sandstones, the rocks tend to come out bland and unsaturated. However, I’ve seen a lot of others’ work where the sandstones appear dark red and have natural [albeit underexposed] sunlight still falling on them with Milky Way, lunar, or long-exposure star trails in the background sky.
Could it be some compositing of the astro background with another exposure on either side of the darkness?
Thanks!
You are correct in that a lot of those are composite images. People use the ease of photoshop to avoid the long process of waiting for the optimal conditions. However, if you can manage to have the heavens align and take your shot on a super clear(dry) night when the half-fullish moon is low enough on the horizon to not wash out all of the stars, but yet high enough to light the landscape it is possible to get those beautiful, starry, and well lit desert pics. Its much more satisfying and generally yields something much more beautiful in the sense of how it came to be.
Hi
Just getting back into photography — Some very nice work here! Very usefull- thks
Andy