This is a guest post by Tom Dinning who, besides being a professional photographer, teacher and mini-celebrity in the Light Stalking community, has also shared some very popular tutorials in the forums and in other posts.
Recently I had a browse through my files to see if there was any consistency with the times of day I choose to take photographs for my own pleasures. To my surprise, there was an even split between early morning, mid-morning, midday, late afternoon and evening. Its good that I'm not a creature of habit.
I though it might be a good exercise to examine each of these times of day in terms of the photo's taken and the issues that arise during the preparation stage and the recording of the images.
So here's the first.
I'm not good in the morning so the first preparation for such an event is to psych myself up weeks in advance for a possible 4am start. The next bit of preparation is to prime Christine for the awakening for fear she may be expecting something more than a gentle kiss goodbye. She's even grumpier than me in the morning.
Since I want everything to be just right for such a monumental occasion I check the sunrise times well in advance. I'm also interested in the time for first light, since I want some preparation time when I arrive at my destination. My preference for the coastline means I need to check the tides. Low tide is best where I live. It allows access to the beaches. It's also more visually interesting since there will be many isolated pools along the beach for those nice reflections. All the information you need with regard to sunrise, first light and tides can be obtained through the Bureau of Meteorology (BOM) website (in Australia) or the equivalent in your country. While you're there, check the weather. You don't want to be caught out in the rain, but a few clouds add interest to the sky.
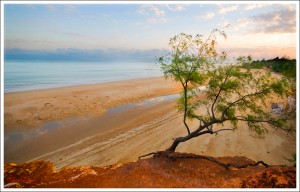
Casuarina Beach NT
Checking the equipment the night before is part of the routine. Clean your sensor. Those funny little spots will show up against a clear sky at small apertures. Charge your batteries and take a spare. I'm not big on long focal lengths but that's just me. I find myself using wide to mid-range (anything between 14mm and 70mm). A tripod is essential since you will probably be shooting at shutter speeds slow enought to write in your diary while taking the shot.
Getting there before the first glow of light needs a torch if you have some interesting ground to cover. It helps to find your way, locate things in the kit bag, provides a reading light for your camera knobs and dials if you haven't learnt to find them in the dark yet, and, if its a big enough torch, it will fend off the dogs and muggers ( and the odd croc in my part of the world).
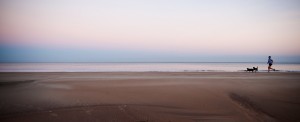
Casuarina Beach NT
It's always good to check out the scene from a vantage point and grab a few shots to start with but usually I visit the spot a few days before so I know what I'm in for. Moving around in the dark in unfamiliar territory is risky for an old bloke like myself.
Shooting from water level creates great foreground for the shots. Look for items along the beach that might serve as points of interest. Watch how the light reflects from the water. Look for points of contrast as focal points in your frame.
This can be a time of solitude as well. Encompass that feeling and get it in the frame. Simplicity and the light is all you need to work with.
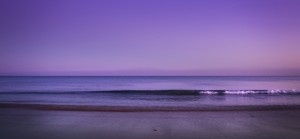
Casuarina Beach NT
Keep your shutter speed long enough to blur the movement of water. If the clouds are moving as well, all the better. You can get some great textures in the sky.
Reflections work well. Seek out the pools left behind. Walk around the pools to find the best angle. Get the best depth of field possible for these shots and make sure the foreground is sharp. If the auto-focus isn't working its because it can't find enough contrast in the scene to focus on. Switch to manual. When the going gets tough on focusing, I set the manual focus to about 2m and the aperture to about f:18. This seems to take care of most situations.
As the light intensity increases, life and focusing will get easier. But there will be another issue to deal with. Exposure.
That sky will be about 6 or 7 f:stops over the ground exposure level. Your sensor will probably have a fit. Bracket and deal with it when you get home and have had your first cup of coffee.
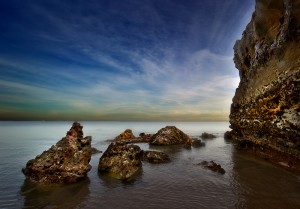
Outcrop facing East. Nightcliff beach NT
In spite of the sand in your shoes and camera, wet feet from the incoming tide, the odd dogs dropping you stood in, a grumpy spouse to return home to and the need for a Granny Nap during the day, it should be worth every minute of your timely effort.
If it's not, take up knitting.
This is a guest post by Tom Dinning.



9 Comments
Tom, I am really looking forward to this series (it’s actually one of the few tutorials I haven’t seen anywhere). Already some great examples and writing. Thanks so much.
I shall have to try and get up early, feeling very inspired…
Thanks for this inspiring post, Tim! Like Chase, I am looking forward to the series.
I love the way you tell the story.
very helpful tips 😀
Unexpectedly came across this website in the middle of the internet, and wondered why the images looked so familiar to me. Then I realised: I LIVE THERE! What a shock! 😀
Haré una salida para tomar fotos siguiendo la propuesta: Disparar con la primera luz.
Ya lo estoy disfrutando.
Existe un lugar no muy lejos de aquí con grandes posibilidades fotográficas.
Gracias, desde la Patagonia norte de argentina
Use the Photographer’s Ephemeris for desktop or iPhone to calculate things such as dawn and sundown and direction of the sun and passage of the moon.