Every landscape photographer knows that skies often look washed out or flat due to overexposure, missing clouds or too many thick white clouds. However, there is a way such photos can be rescued and made more beautiful.
In case you want to fix an overblown or flat sky, you can use an interesting and rather creative solution – instead of darkening the sky, you can replace it.
In order to do this, you need to have an additional image of the sky (with clouds or with more vibrant colors) that you will use to replace the flat sky in the original image. This means that you’ll be creating a composite image in Photoshop!
The following simple steps will walk you through this process:
Creating A Composite Image In Photoshop
1. Carefully choose two photos that have somewhat similar lighting and tonal range. The final result (composite image) won't look good if you choose photos that don't match at all in terms of colors and lighting.

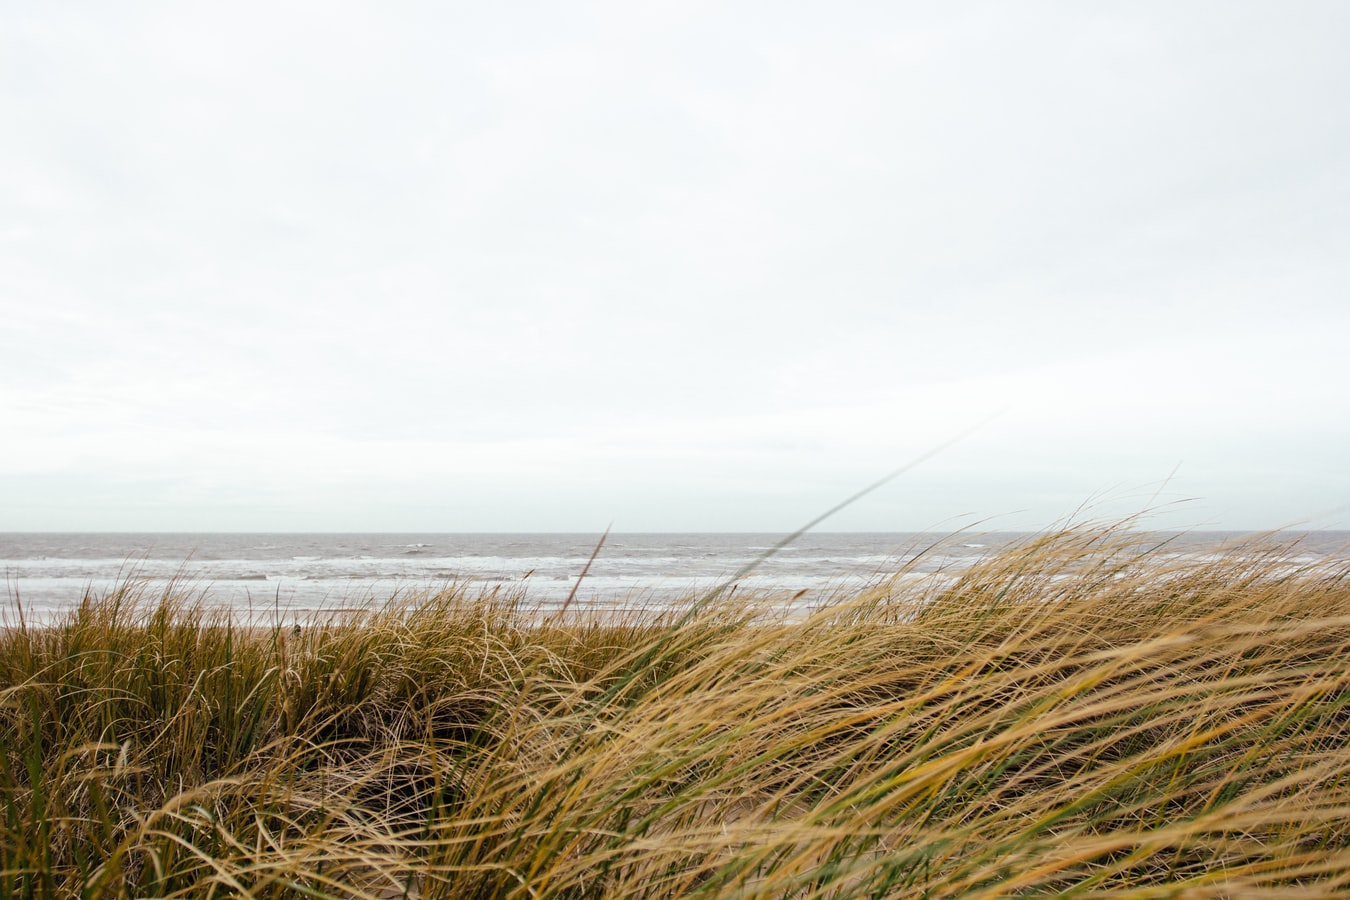
2. Open the photo with an overblown or flat sky in Photoshop and duplicate the background layer.
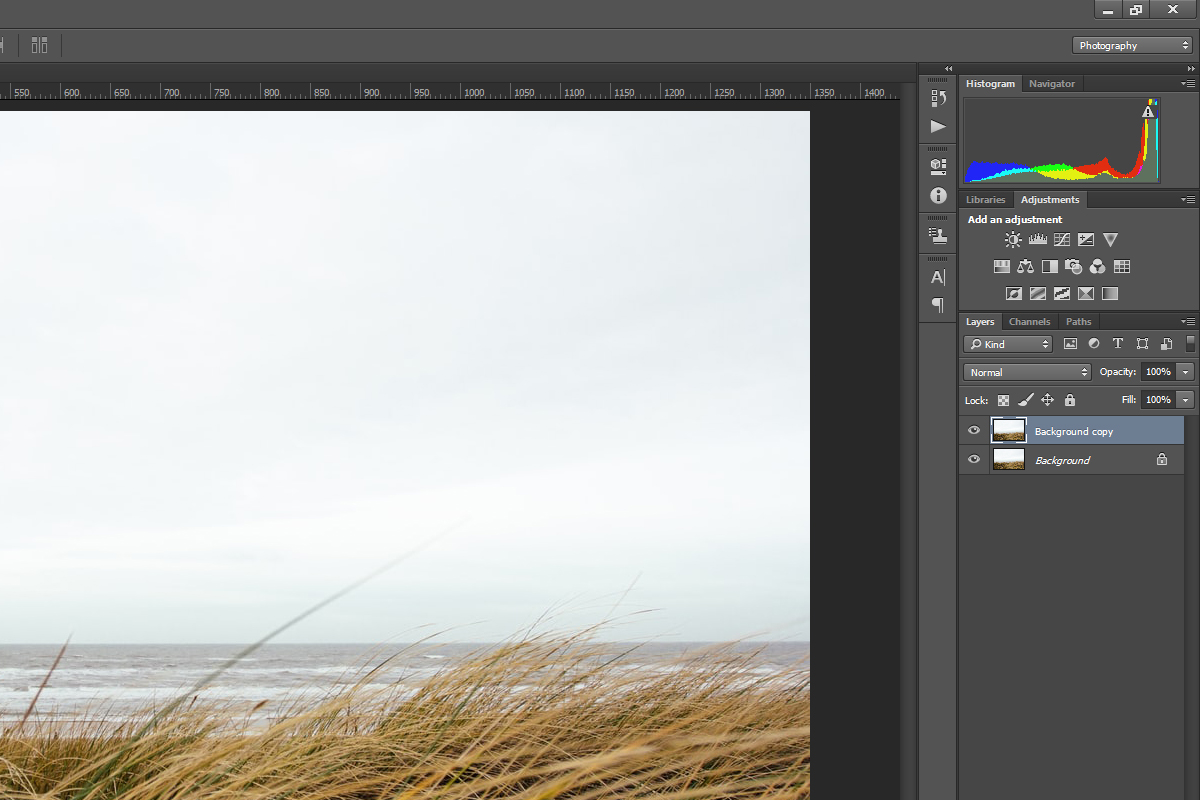
3. Once you have done that, add a layer mask to your background copy layer.
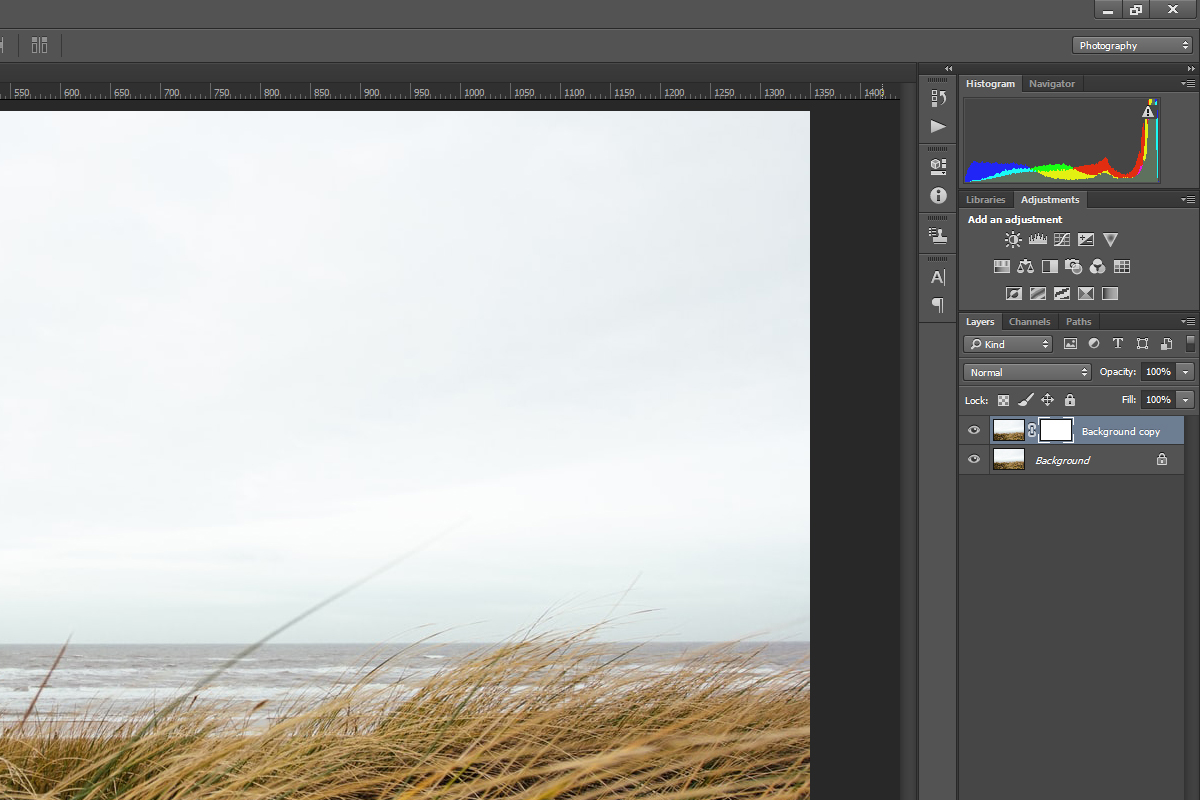
4. Now it's time to add the second image in a new layer.
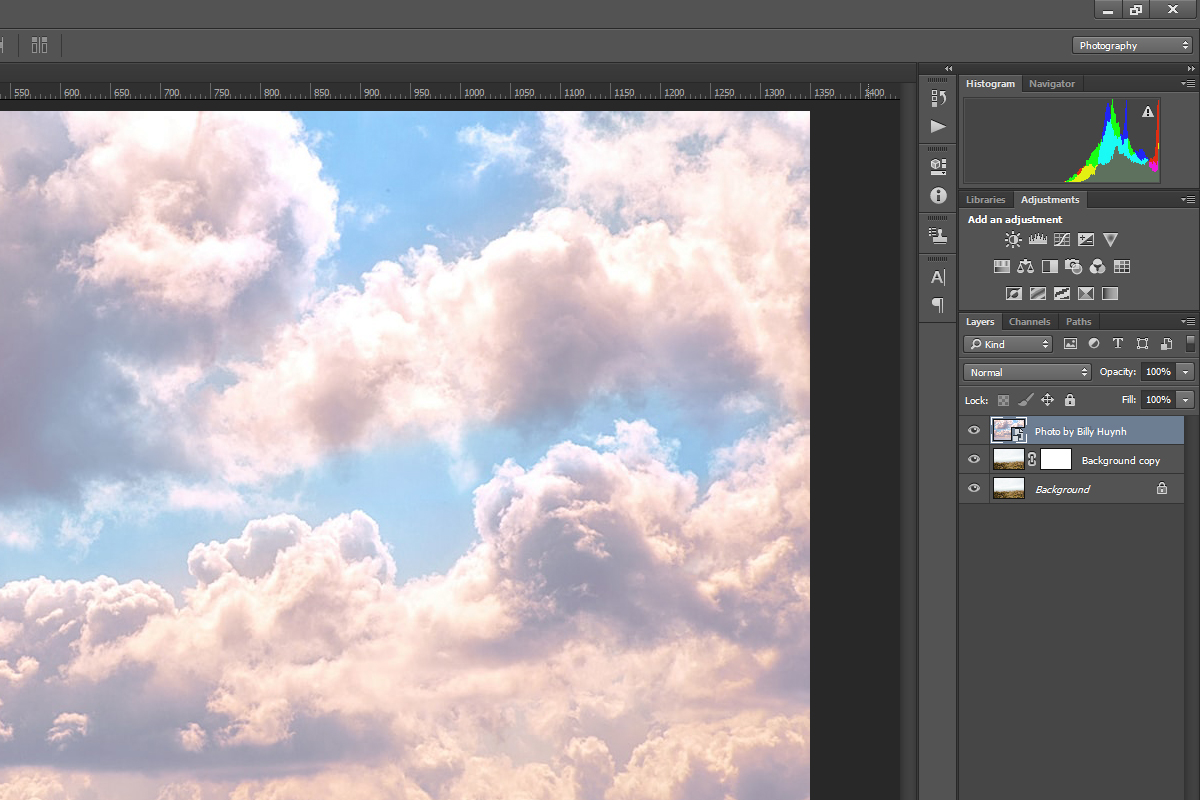
5. You will have to change the order of your layers – the layer with the second image should be in between the background and the background copy layers. You should also hide the background copy layer and move the layer with the second image so that it covers only the sky of the background layer.
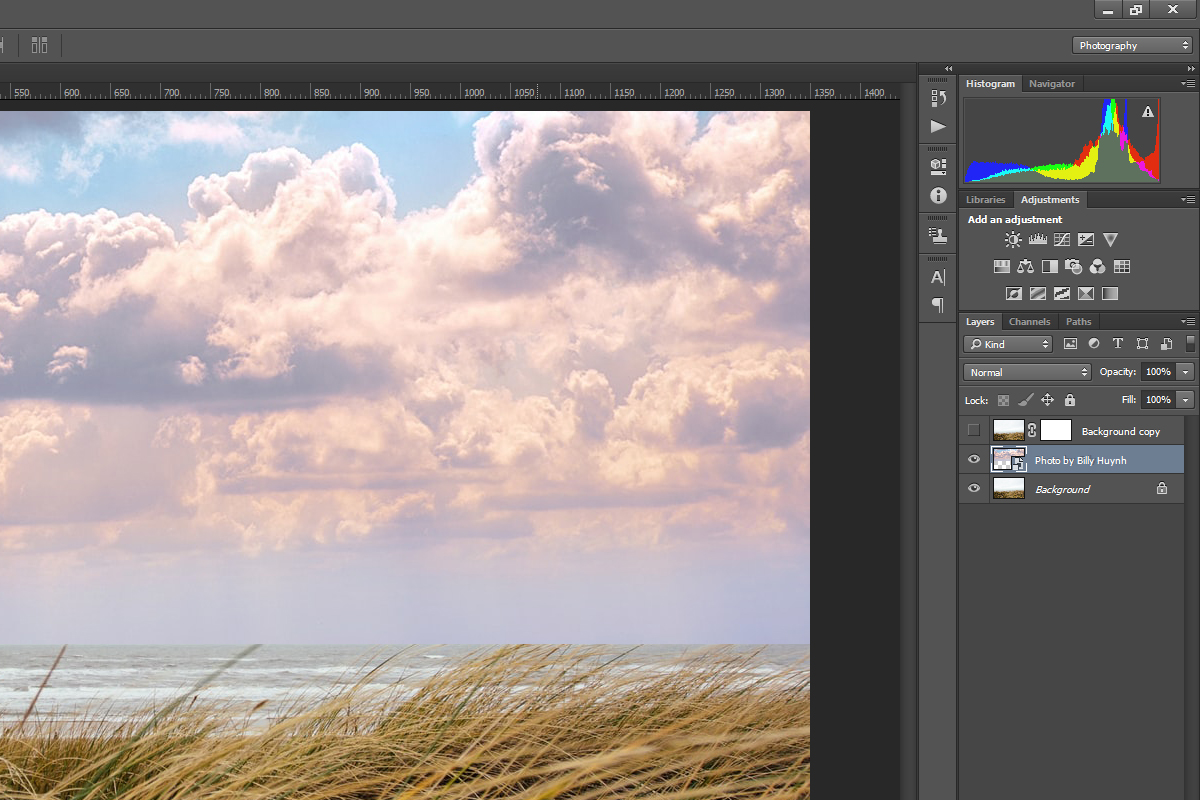
6. Now make the background copy layer visible again and select its layer mask. Then select the gradient tool in the toolbar.
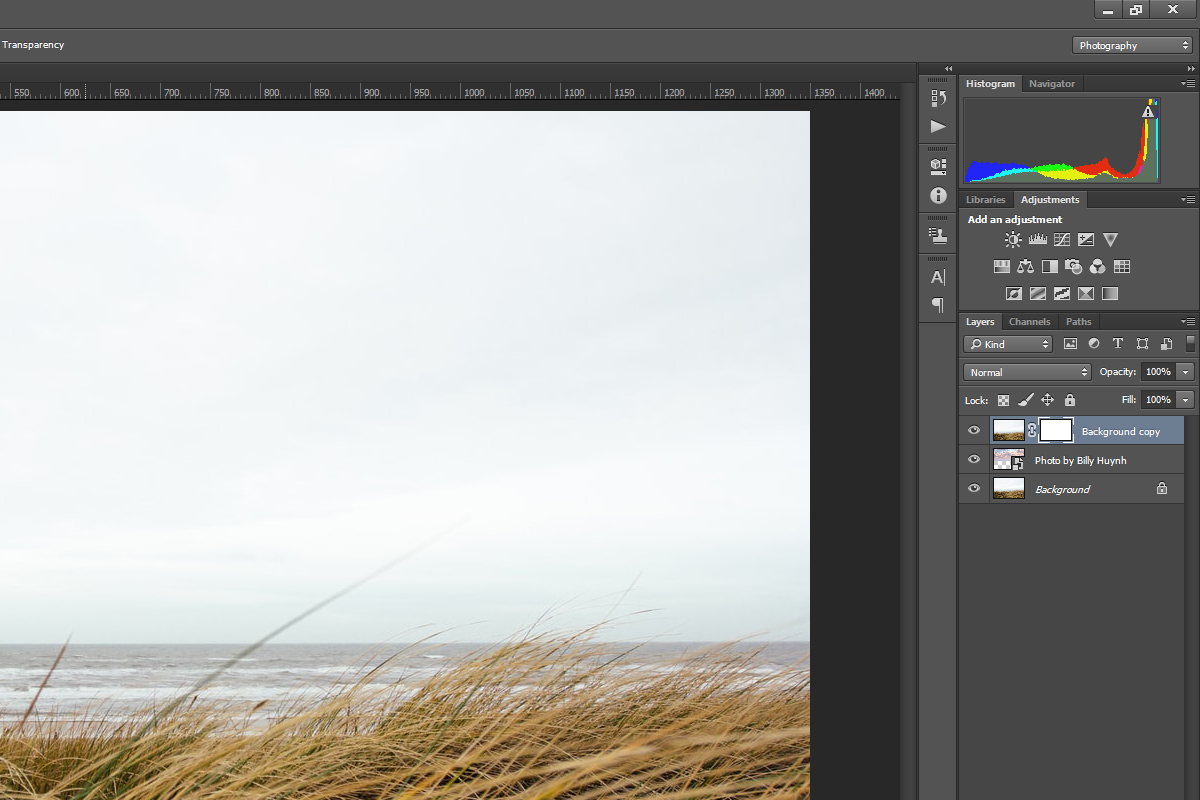
7. Apply a linear gradient to the layer mask of your background copy layer. You should make sure that the bottom part of the gradient is more transparent than the top part – in this way, you'll be able to make a seamless transition between the photos. If you're not happy with the result, keep changing the direction and opacity of your gradient until you get it right.
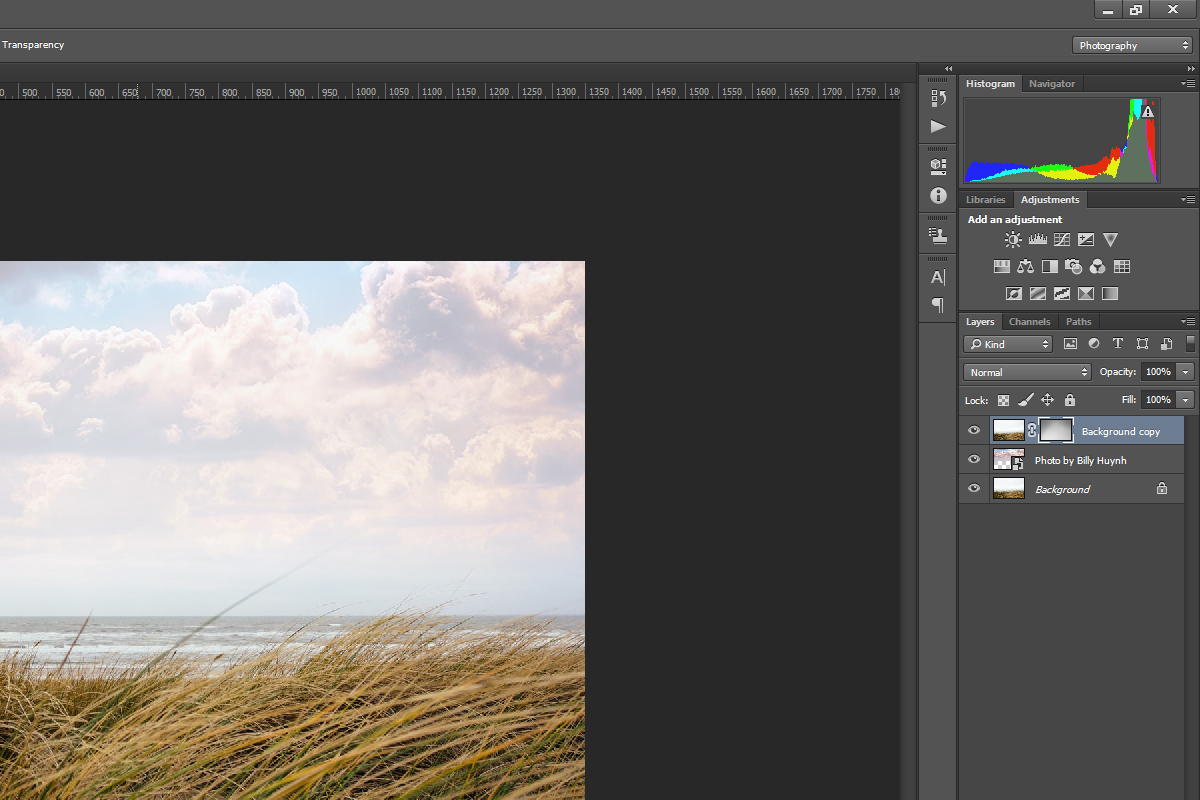
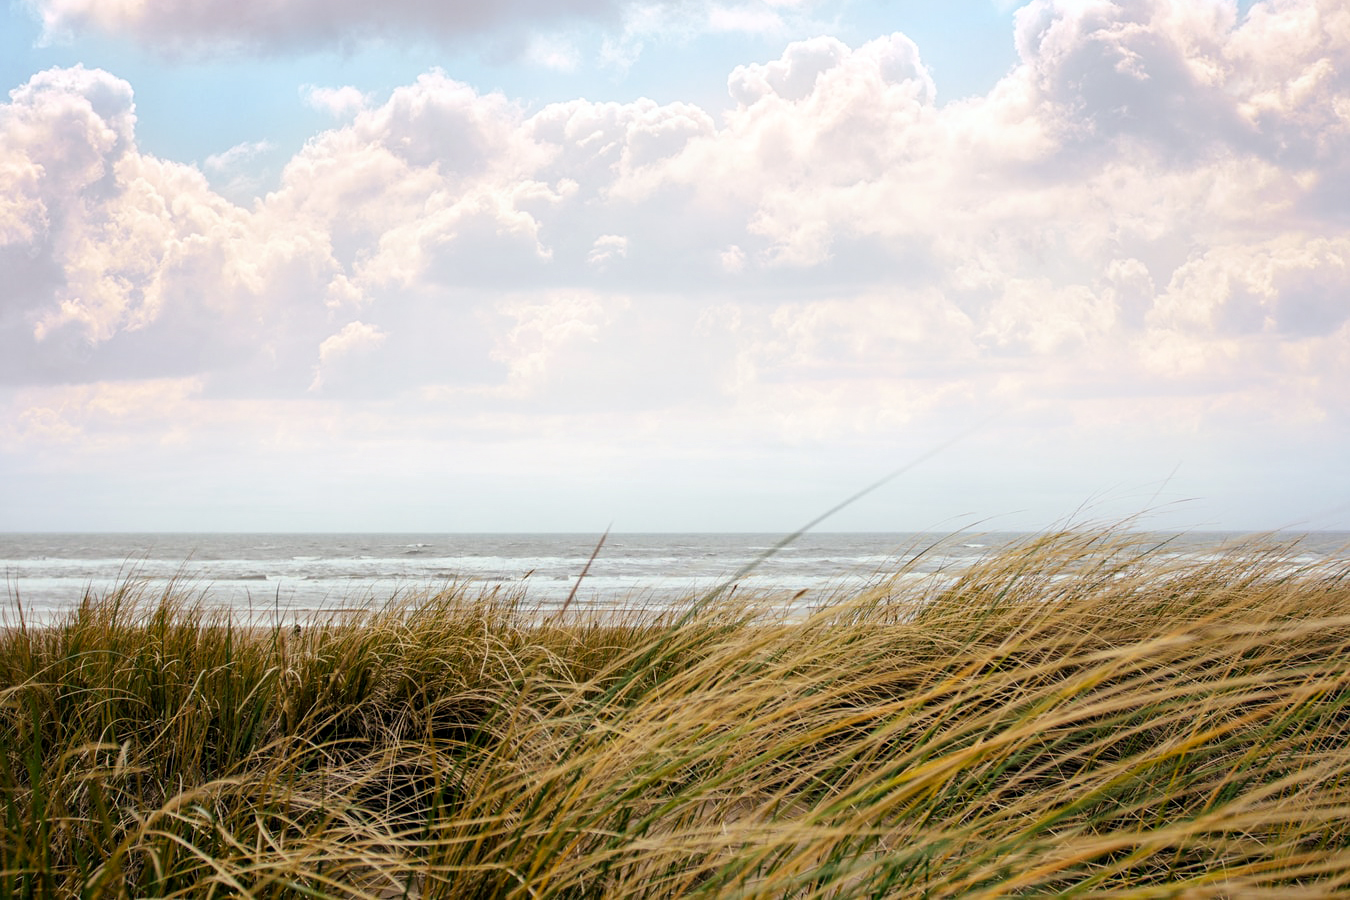
8. After you have created a composite image that you like, you can flatten its layers and keep editing it. You may want to adjust the curves or colors – it all depends on your preferences!
We hope that you found this tutorial useful and easy to follow.
In case you want to learn more about editing landscape photography, feel free to check out the following links!
Further Resources:
- How To Create A Mystical Effect In Your Landscapes With Photoshop
- 3 Quick Photoshop Tips To Improve Any Landscape Photo
- 5 Lightroom Edits That Will Rock Your Outdoor Photography
- Enhancing The Sky In An Image With Photoshop
- How To Fix Blown-Out Whites In Photoshop
- Fix An Overexposed Sky In An Image Using Photoshop
Shareable Images for Pinterest


