‘The best laid plans of mice and men' as the old adage goes – how many times have you set you camera up to take that spectacular scene in front of you only to realize it could look even better with a filter over your lens? You rummage around your camera bag only to remember the said filter is still sitting on your desk at home. In this tutorial, we are going to look at how to recreate some of the more popular photographic filters using Photoshop. It should said that although these techniques will help improve your image they are no substitute for the real thing.
Recreate a Graduated ND Filter in Photoshop
This is a very easy and fairly effective filter to recreate in Photoshop.
With you image open goto Layer – New – Layer. Give your layer a name, for example Grad and click OK.
Check that the new layer is selected in the Layers Palette on the right of the screen and then from the tool bar on the left click on the Gradient Tool. If you do not see this, right click the Paint Bucket tool and you should see the Gradient Tool.
At the top left of the screen click on the gradient editor and selected the Neutral Density grad at the bottom right of the Presets. You can make any minor adjustments using the sliders, you can also change the color of the grad to suit, for example an early morning sky.
When happy with the grad click ok.
- Add a New Layer
- Select the Gradient Tool
Now click at the very top of the image, and drag the filter down about two thirds of the image. You may need to experiment a little depending on where your horizon is.
Obviosuly the image is way too dark now but with the Grad layer selected in the Layers palette, change the blend mode from Normal to Overlay. You can now use the Opacity Slider to reduce the effect to suit.
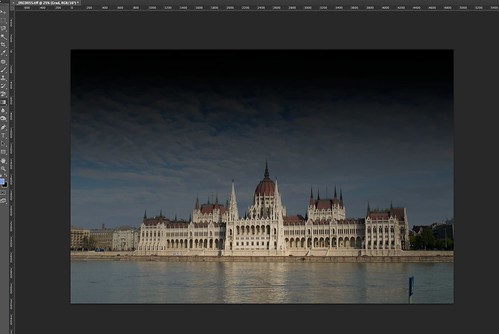
Drag the Gradient to suit
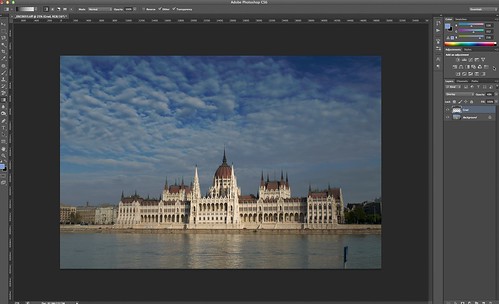
The Final Result
Recreate a Polarizing Filter in Photoshop
Whilst it is not possible to entirely reproduce the glare and reflection reducing properties of a polarizer in Photoshop, it is possible to enhance red channel of an images to darken the blue skies and vegetation to get that polarized look. You will need an image that already has a reasonable blue sky to do this.
With the image open duplicate the layer from the Layer and give it a suitable name.
From the Layers palette, click the Channels tab at the top and select the Red Channel. Now select the entire layer, using Select – All and then Edit – Copy
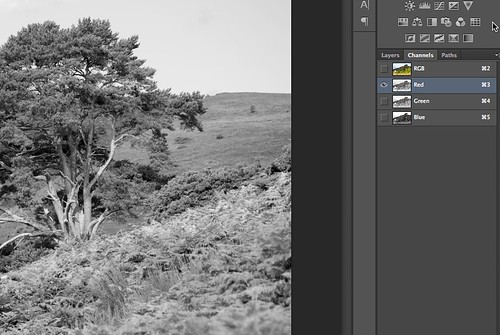
Select the Red Channel
Now we need to convert the image to Lab color. This is done by going to Image – Mode – Lab Color.
Do not flatten the image.
We now return to the Layers palette and select the Lightness Channel. Using Edit – Paste we will now paste the Red Channel onto the Lightness Channel and return the image to RGB via Image – Mode.
Now we need to back off the reds a little. To do this go to Layer and Layer Mask – Reveal All. From the Layers palette, click on the upper layer and select only the mask, to the right of the image thumbnail. Next, from the menu select Image – Apply Image. In the pop up box make sure you select the following:
- Layer – Background
- Channel – Red
- Invert – Is Checked
- Blending – Multiply
- Opacity – 100%
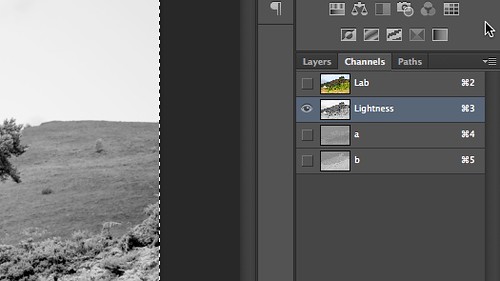
Copy to the Lightness Channel
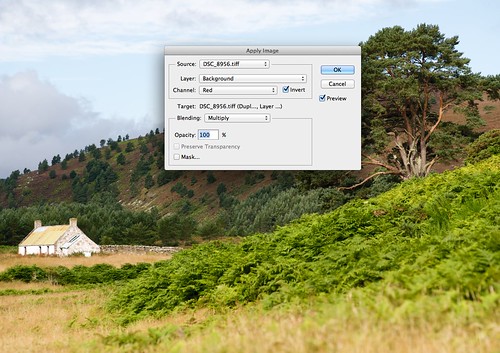
Apply Image Settings
Click ok to see the final result. To see the difference, switch the upper layer off using the eye icon on the Layer palette. The effect is subtle but effective and in my opinion better looking than the more commonly used Gaussian Blur technique.
Recreate Soft Focus in Photoshop
This last effect will appeal to the portrait photographers amongst us, simulating soft focus in Photoshop.
With the image open, duplicate the layer from Layer – Duplicate Layer.
Now we will use the Apply Image tool we used in the previous section, go to Image – Apply Image. Our settings this time are:
- Layer – Background Copy
- Channel – RGB
- Invert – Unchecked
- Blending – Screen
- Opacity – 100%
- Duplicate the Layer
- Apply Image
With this done, we will now duplicate this layer to create a third layer.
Now we will apply a Gaussian Blur from Filters – Blur – Gaussian Blur. Use around 25 pixels as your radius.
Now with the uppermost of the three layers selected in the Layer Palette, change the blend mode to Multiply. Select both the top and middle layers and then in the menu goto Layers – Merge Layers.
You can now use the Opacity tool in the Layer Palette to back off any excess blurring.
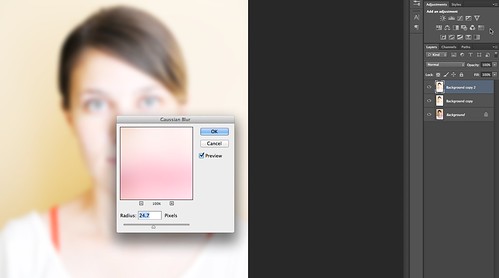
Add Gaussian Blur
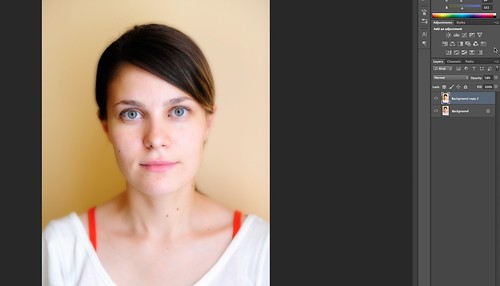
The Final Result
So there you have it, three useful techniques to simulate on-lens filters in Photoshop.


4 Comments
As far as the grad filter goes, why not just buy one or two to keep in your kit? Don’t be afraid of actuall, physical filters.
They can save a shot, and add variety to your images without any computer or software involvement at all.
Mike, the tutorial was for when you forget your filters, not for people who are afraid of using them.
I find this a very useful tutorial thanks for that.
Jason these are good technic thanks