Since moving to a subscription service Adobe’s updates to Lightroom and Photoshop have been coming thick and fast. Perhaps their frequency makes us a little blasé when it comes to actually looking at what the changes are. Recently, Adobe, with little fanfare, gave us Lightroom Classic CC 7.3. (And is currently at 7.3.1) Concealed behind that innocuous numbering though was quite an update. One that had the potential to change the way we work in Lightroom. The headline addition here was profiles, although it's not so much an addition as a total revamp of them. Let’s take a look at what we are getting.
What Are Profiles?
For some years now Lightroom Profiles have given us the possibility to emulate certain in-camera picture styles. They were known as camera calibration profiles and they worked in conjunction with your camera’s RAW output to emulate the different film modes that your camera offered.
For example with my Fuji cameras, in JPEG mode I could shoot in a number of film simulation modes such as Velvia. If shooting RAW these would not be applied in camera. By using the Camera Calibration tab in the develop module I could apply a specific Fuji film profile to my RAW files or use Adobe’s Standard profile.
The thing about these profiles were that they were buried deep down in the Develop Module and only offered the Adobe defaults plus profiles associated with your camera’s picture modes. That all changed with Lightroom 7.3.
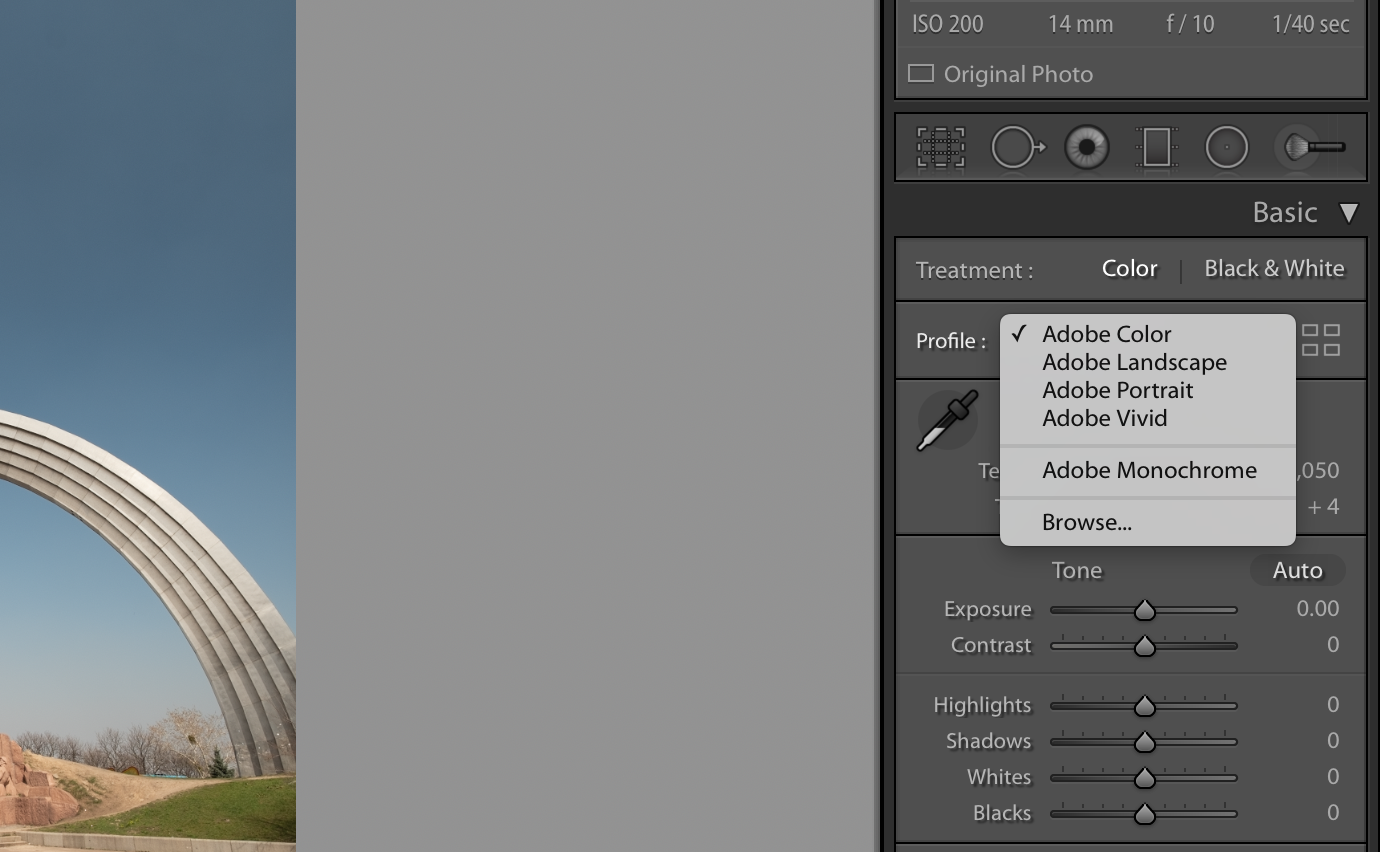
Profiles: What’s New?
Firstly they are easy to find. They profiles are now found in the “Basic” tab at the top of the Develop Module. This is a clear indication that Adobe expects them to be an integral part of your post-production workflow. Clicking the icon to the right of the profiles tab will open up a browser that allows you to preview a thumbnail example of each profile.
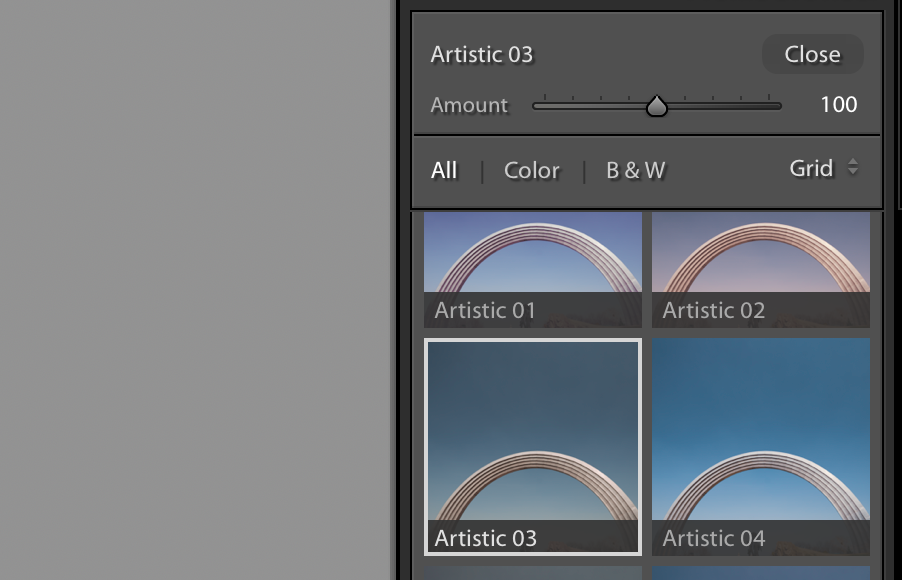
The big news is that there are now many more of these profiles in 7.3. There are now several Adobe RAW profiles, the existing profiles for your camera, and a number of others broken down into groups such as Artistic, Modern, and Vintage. You can add a favorites star to any of these profiles.
Each profile has a slider that allows you to control how much effect it has on your image. The default value is 100, this is how the profile developer intended it to look when applied to your image. However, if you feel the effect is too much, you can back that slider down below 100. If you feel the effect is not strong enough, move the slider right to increase the intensity of the effect.

Why Use Profiles Over Presets?
One of the advantages of profiles is that they do not affect any exposure or contrast work you might have already done on the image. When you apply a preset, it will change any adjustments you may have already done to those found in the preset.
For example, if you have edited the blacks and whites of an image to gain contrast, applying a preset that has blacks/white adjustments will override your previous setting. Profiles do not do this, they behave more like a Photoshop adjustment layer sitting over the original image.
Over time, most photographers workflow will develop to include both profiles and presets. Profiles to create the overall look of the image presets to add specific adjustments such as sharpening or a vignette.
What Else Is Useful in 7.3?
The way presets are recorded has changed. They are now .xmp files which give them some extra flexibility. There are some reports of incompatibility issues with older presets in Lightroom 7.3 but I am sure fixes will be found for that.
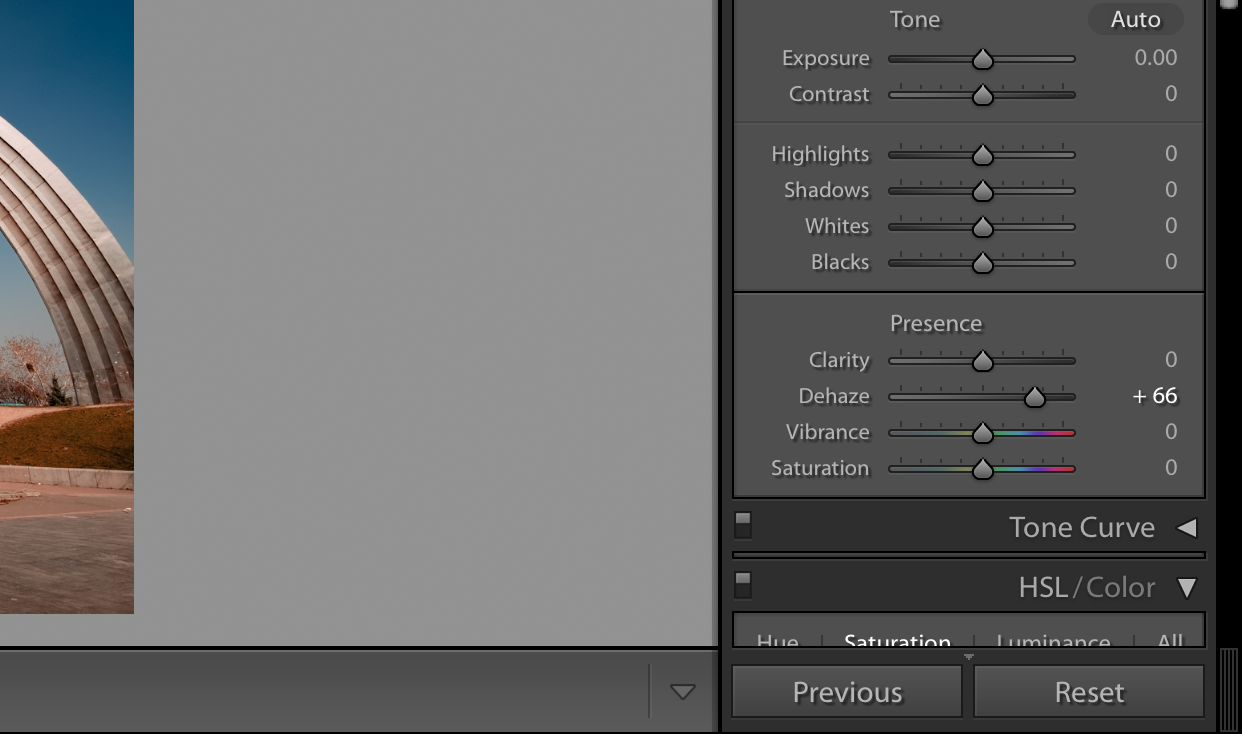
Another big change and a welcome one is the move of Dehaze from the bottom of the Develop Module to the top in the Basic Tab alongside Vibrancy, Saturation and Clarity. Dehaze is a powerful tool that often got neglected due to its low visibility in the Lightroom Interface.
There also were some minor updates to camera and lens profiles to bring compatibility to more recent equipment.
As we said at the top, Lightroom updates come and go to the point where we often do not really notice them. Lightroom 7.3, however, has been one that you should take note of, mainly because of the power that profiles bring to our editing workflow. As well as the included profiles there are already companies producing others, both free and paid. It won’t be long before pretty much any style we wish to achieve will be achievable through a profile.


2 Comments
Also, the way presets are imported, especially how preset folders are created has become quite a complicated process.
Bye Bye Presets