To avoid confusion, today's article is about the new Lightroom CC, not the older traditional Lightroom CC which is now named Lightroom Classic CC. This new incarnation of Lightroom is designed to be much more integrated with Adobe Cloud and Adobe’s smart device apps. Early in 2018, a small update was made to Lightroom CC that allowed users to add copyright details upon import and offered better stability across all Lightroom CC products. In this article, we are going to give you a basic overview of how to use Lightroom CC. We will import an image, do some basic editing to it and output it.
Importing Our Image
There are two basic ways to import an image into Lightroom CC. You can either synchronize a Lightroom Classic collection – this will give you access to all the images in that collection – or simply add a photo. We will create a new album and add some photos to it.
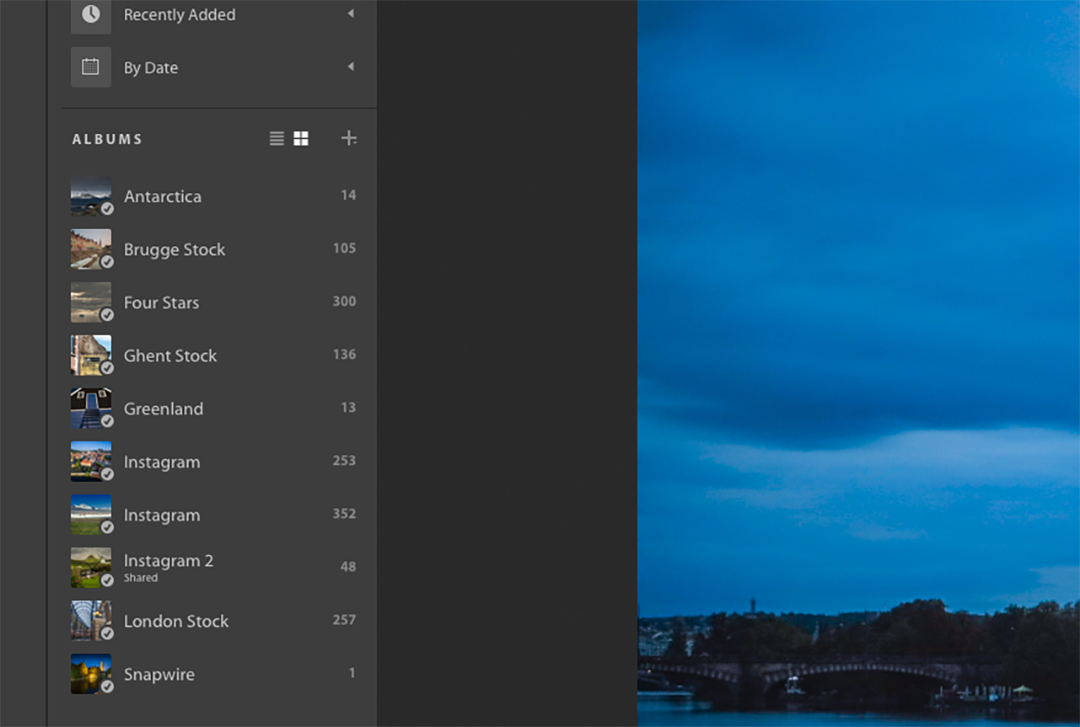
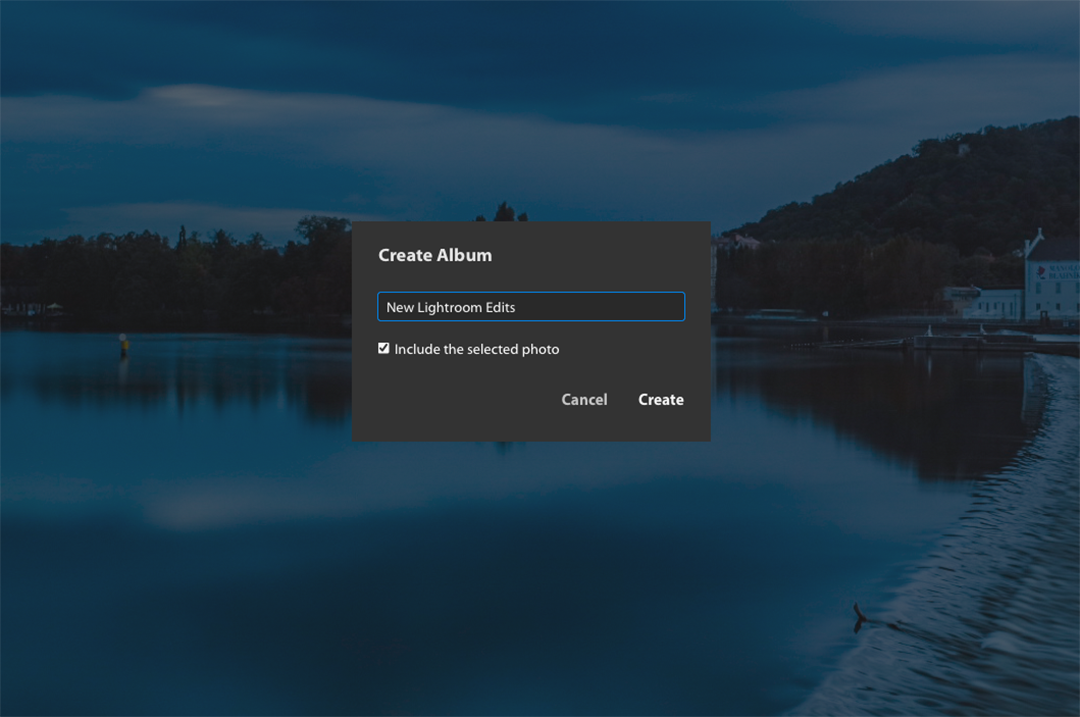
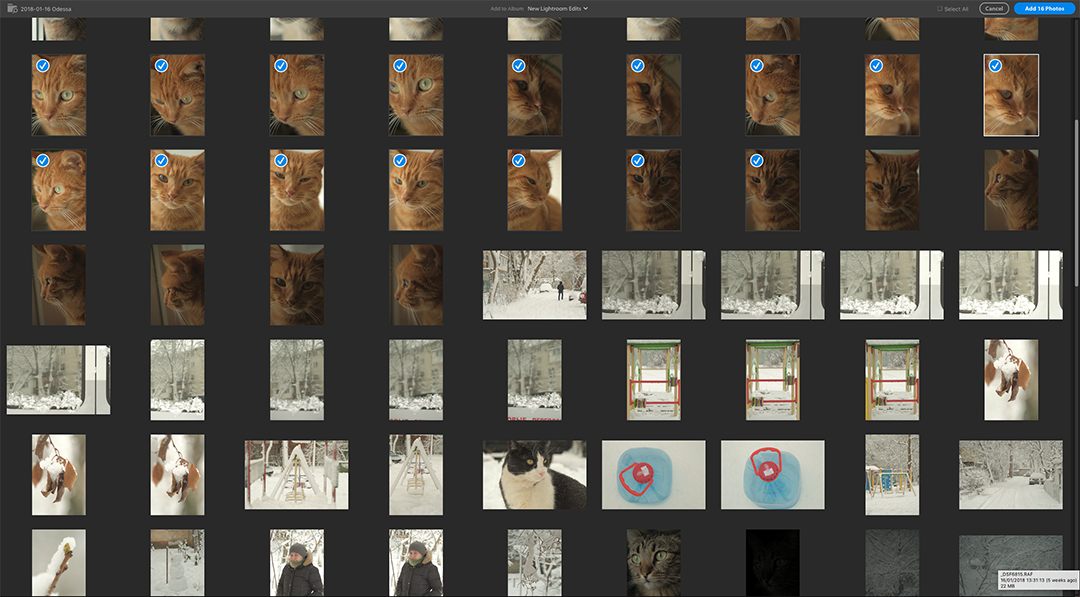
From the left of screen on the Albums tab click the Plus icon and click Create Album. Give your album a suitable name. Now click on the Plus icon top left of the interface. Finder or Explorer will open allowing you to navigate to your images. Clicking Review for Import will open a window displaying thumbnails of all images in the selected folder. You can choose to Select All – the default – or select images individually. Click add photos and they are now added to the album we have created. A filmstrip of thumbnails can be seen at the bottom of screen with the selected image full size in the main display. If I wish to see the images in a traditional grid view I can just click one of the grid icons bottom left of the interface.
Editing The Image
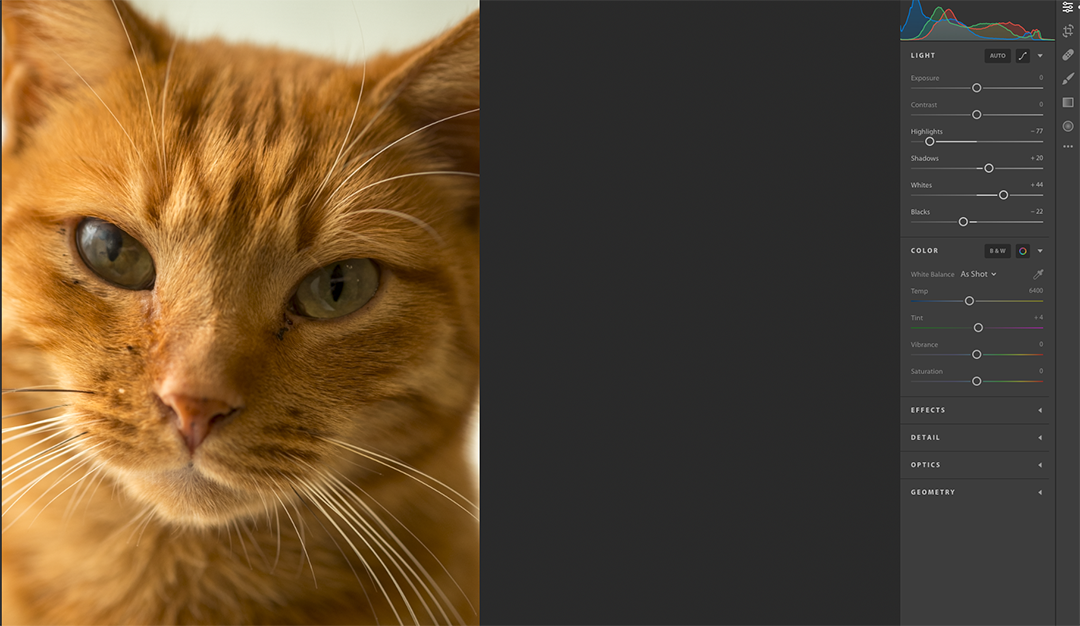
Today I am going to do some simple, basic edits, to Ryzha, our favorite ginger cat. Double-clicking the image I want to work on in grid view will bring it up full screen again. To start editing I am going to click the editing tools icon which is the upper icon on the right toolbar. A window opens that allows us to edit Light, Color, Effects, Detail, Optics, and Geometry.
We will start with Light which is the basic exposure adjustment tab. Before doing so I will click Command (CNTR on Windows) O. This will display the histogram.

My initial edits are to darken the blacks by sliding them left and brighten the highlights to the right limit of the histogram. This adds some extra contrast to the image. I have also reduced Highlights to darken the white background a little and increased Shadows a touch to add some light to Ryzha’s right side. If I would prefer some finer control, I could use the Curve tool accessed by clicking the Curve icon to the right of the LIGHT tab.
Next to the COLOR tab and I will increase the color temperature a little to boost his ginger fur but I will not add any saturation as he has plenty already. In the EFFECTS tab, I add just a little Dehaze to boost mid-tone contrast. I also moved the Vignette slider to the left to bring attention more towards his face.
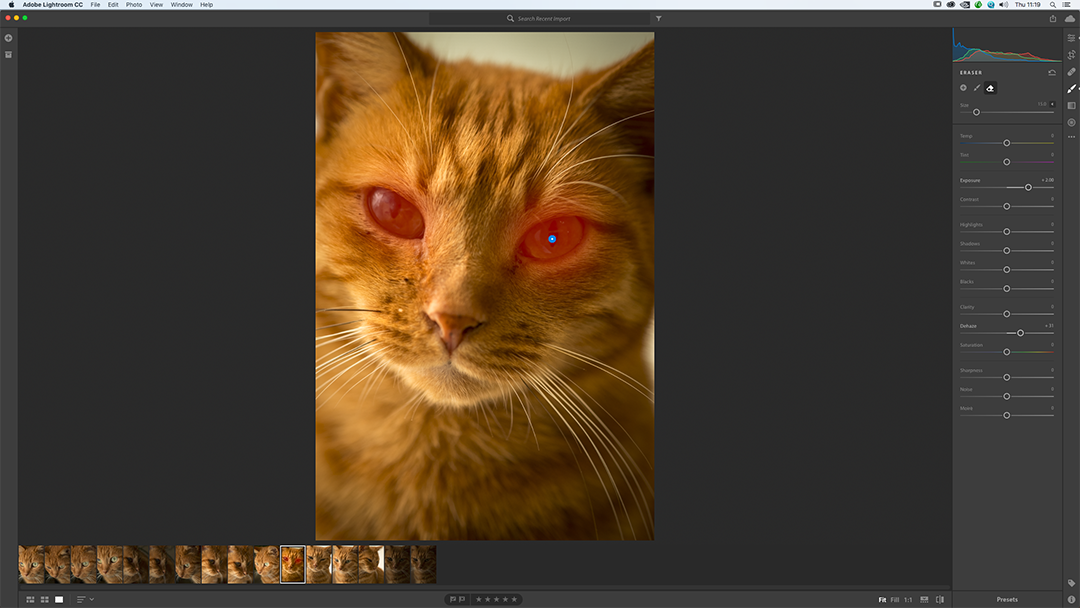
Moving down to the BRUSH tool, fourth down on the toolbar, I am going to brush in a little extra exposure and Dehaze to his eyes. Setting a suitably sized brush with the mouse scroll wheel, I brush over his eyes with the Exposure and Dehaze dialed in. If I place my brush over the initial marker, I can see a red overlay showing the areas that the BRUSH tool is affecting.
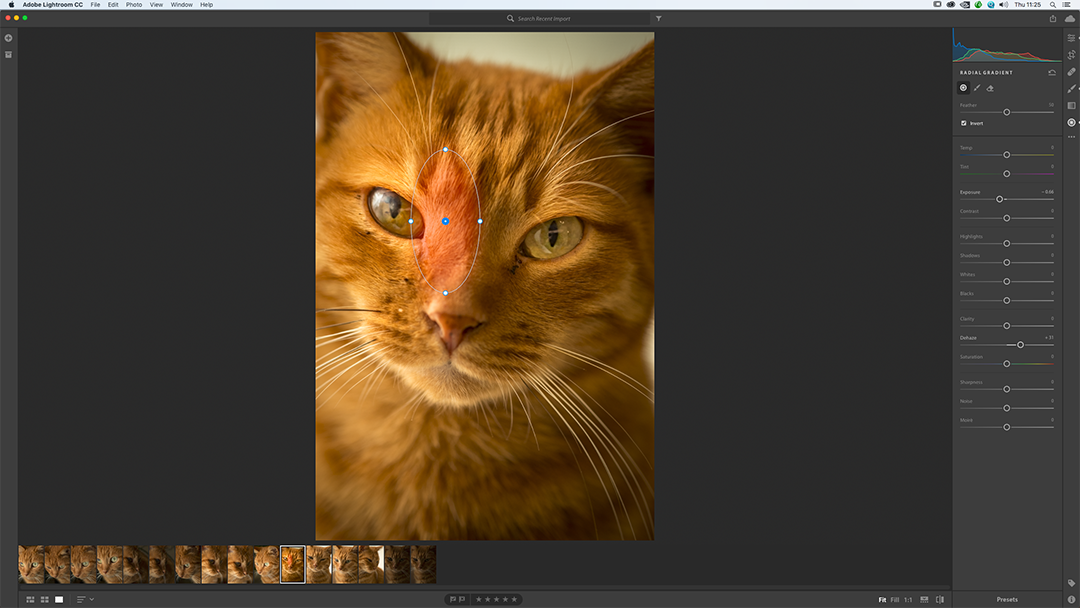
Lastly I am going to use the RADIAL GRADIENT tool to pull back a little exposure in the fur near his right eye. To do this I reduced exposure to-0.66 and added a little more Dehaze.
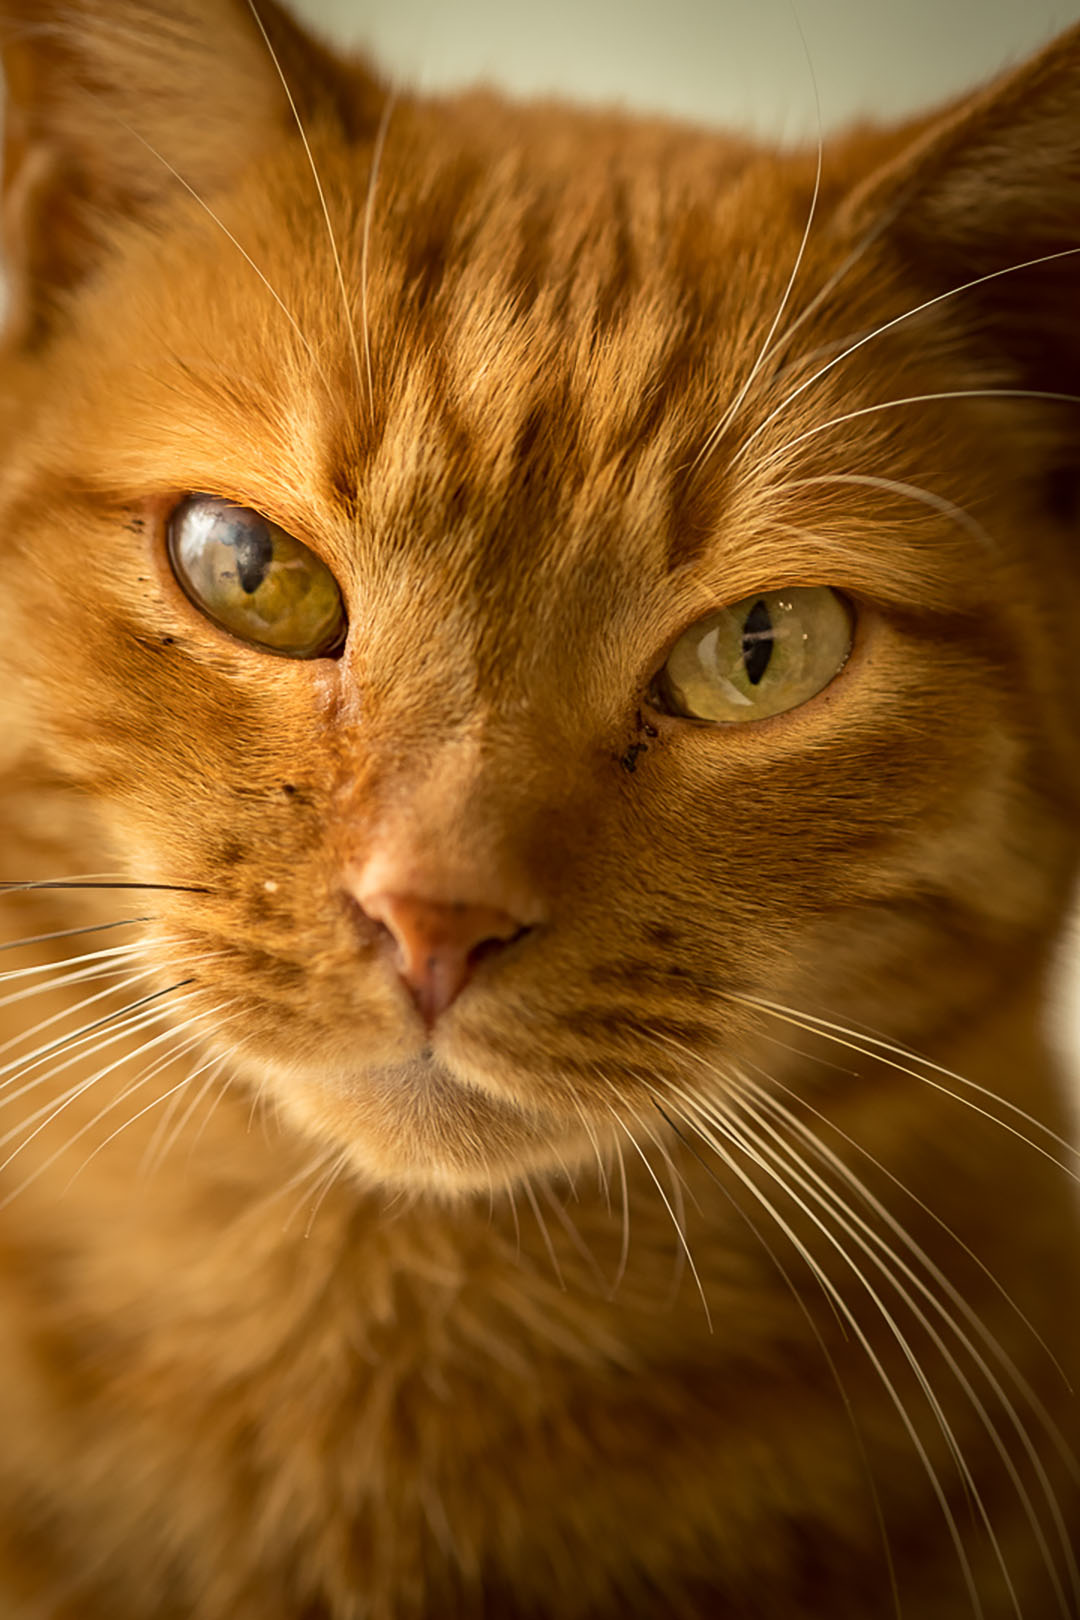
So with our handsome cat looking even more handsome, lets show him to the world.
Exporting The Image
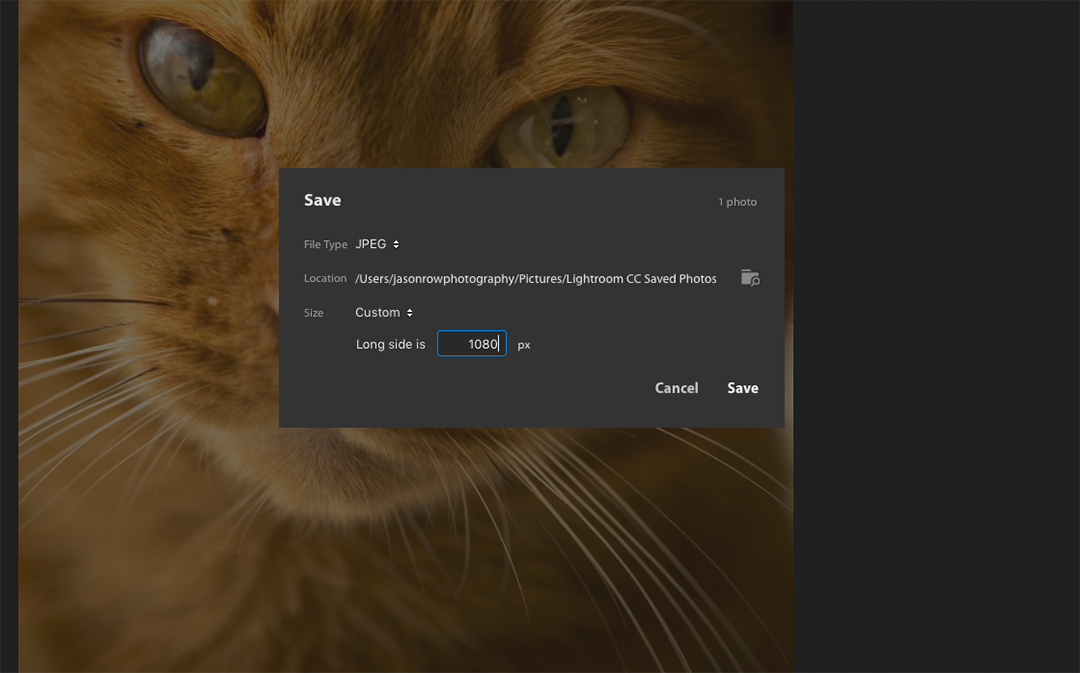
In recent years you may have noticed that exporting has become sharing. Lightroom CC is no different. Top right of the interface is the share icon. Its pretty simple, you can Save As or you can upload to Facebook. We will choose Save As and a new window pops up. From File Type we can choose JPEG or Original plus Settings. These are the settings we have applied in the edit. We can choose the location to save to and we can choose the size. Size choices are Small, Full Size or Custom. If we choose Custom we are only given the longest size as an option.
The simplicity of Lightroom CC belies its depth. Many of the tools we are so familiar with in Lightroom Classic are available to us. Some areas are somewhat dumbed down but this version of Lightroom is designed for photographers on the go working from small laptops or tablets. For its intended purpose, it is a useful and powerful addition to our photographic arsenal.


2 Comments
But I can’t do layers or Photomerges?
Lightroom has never done layers in any incarnation. However Lightroom CC is only available as part of the Adobe package that includes Lightroom Classic CC and Photoshop. Both of these do photo merges and Photoshop does layers.