Technology is constantly evolving; that is an inescapable fact of life. Film has been usurped by the digital sensor. Screens are now the primary means of showcasing our photos, relegating prints to an afterthought for most people. But just like there will always be those who shoot film, there will also always be people who treasure printed photos.
If you are someone who is interested in printing your own photos or if you are looking to upgrade your current photo printer, allow me to make an easy recommendation: the Epson R2000 photo printer.
Let’s take a brief look at features and tech specs before moving on to the stuff that really matters — performance and output.
Epson touts the R2000 as having features that were previously found only on their “pro” line of photo printers (such as the Epson Stylus Pro 3880), including:
- Epson’s water, smudge, and fade resistant UltraChrome Hi-Gloss 2 pigment ink
- MicroPiezo AMC print head
- Fine art and roll paper (including canvas) support
- CD/DVD printing
- Wireless, Ethernet, and USB 2.0 connectivity
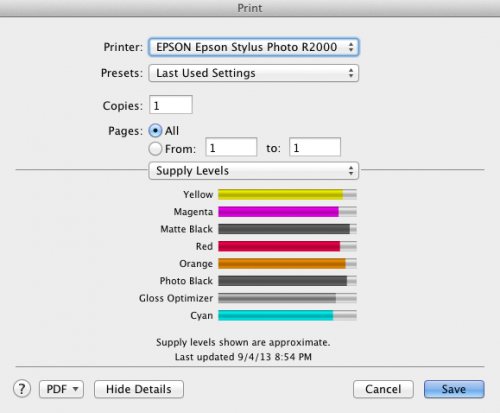
- 8 individual ink cartridges
- Black ink auto-selecting (adapts to glossy or matte paper)
- AccuPhoto HG technology designed to retain details in highlights and shadows
Some important technical specifications include:
- Maximum Print Resolution: 5760×1440 dpi
- Print Area: Maximum width: 13 inches; Maximum single sheet: 13×19 inches; Maximum printable area: 13×44 inches
- Paper Handling: 4×6, 5×7, 8×10, A4 (8.3×11.7), US letter (8.5×11), legals (8.5×14), 11×14, 12×12, 11×17, A3 (11.7×16.5), 13×19, 8.3-inch and 13-inch wide roll papers
- Ink Palette: Photo Black, Matte Black, Cyan, Magenta, Yellow, Red, Orange, Gloss Optimizer
- Interface: USB 2.0, Ethernet, 802.11n Wi-Fi, PictBridge port
Unboxing
Upon opening the box you will find the R2000 printer, a power cable, one set of 8 ink cartridges (Photo Black, Matte Black, Cyan, Magenta, Yellow, Red, Orange, and the Gloss Optimizer), CD print tray, roll paper holders, single sheet guide, printer documentation, and printer driver software.
There are a number of trays, hinges, doors, and flaps, all of which are taped down. I spent a few minutes removing all this tape.
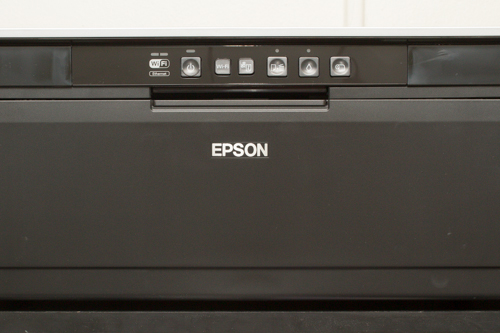
The printer is 24.5 inches wide and weighs almost 28 pounds. I would classify the build quality as good, but not outstanding. While I haven’t had any problems to this point and honestly don’t foresee any, the external design/materials are somewhat on the delicate side.
The buttons along the front of the printer aren’t what I would call responsive. I’ve found I have to be pretty firm with them.
Installation
As mentioned above, there are 8 separate ink cartridges that must be installed in the R2000. After shaking each cartridge for a second or two, freeing them from their plastic casing, and removing the tape that covers the nozzles, inserting each one into their respective slots in the cartridge bay is a snap — literally.

Once the cartridges have been installed, the priming phase is supposed to begin. The QuickStart guide, however, omits specific instructions concerning how to initiate this phase; I had to refer to the manual to fill in the blanks.
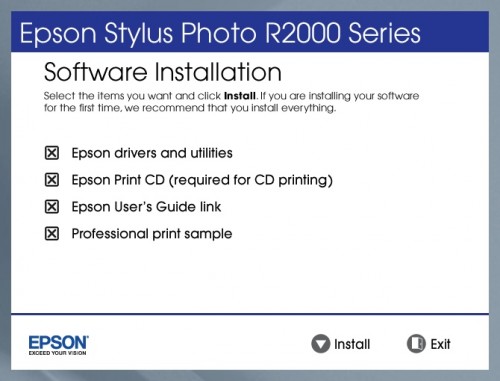
Software installation is simple if you’re a Windows user. Just insert the CD and follow the onscreen instructions. If you’re a Mac (OS X 10.7 or later) user like me, the CD is useless; you have to go Epson’s online support page and download the print driver from there. It’s still a simple process, just a bit more involved.
WiFi functionality has been very reliable thus far. Just know that even if you intend to use WiFi, you'll need a USB cable (not included) for initial setup.
Print Driver
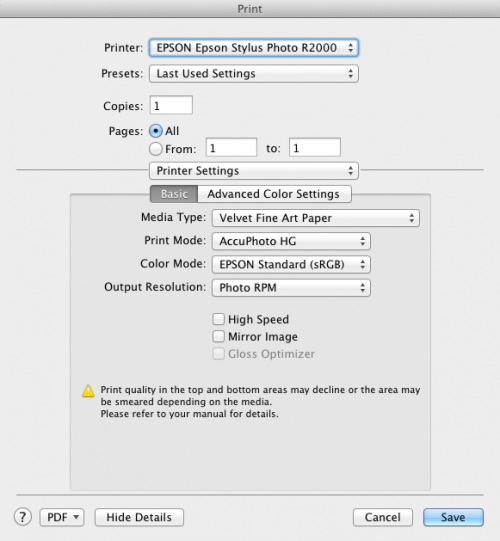
The driver for this printer deserves praise, as it is both comprehensive and easy to understand. As you prepare to print you will choose the media type (photo paper, matte paper, fine art paper, plain paper, CD/DVD, with expanded options under each heading) and paper size (including numerous borderless options); output resolution (ranging from Economy to Photo RPM); and color management options. At every turn you are presented with an array of options to help you fine tune your print job.
Printing
This is what matters most, isn’t it? Well, printing is where the R2000 absolutely shines.
The printer’s “warm-up” stage (during which time the cartridges are charged) exerts a noticeable rocking motion; actual printing, however, is quiet, smooth, and steady.
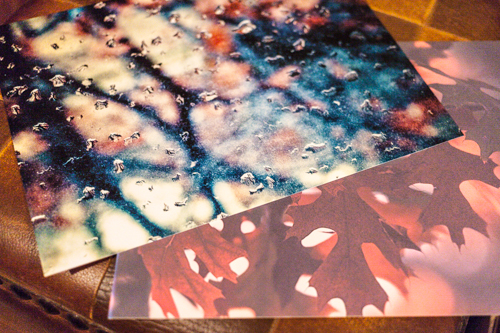
While pigment-based inks are generally considered to yield great detail and longer photo life at the expense of vibrance, I have not found the R2000 to be the least bit dull. In fact, the colors it produces — particularly on glossy prints — are nothing short of impressive, with rich colors and good dynamic range. The luster and velvet fine art prints are equally beautiful, though more subdued, of course.
I made at least one 5×7, 8.5×11, 11×14, and 13×19 print; resolution was spot on at all sizes. I have not printed a panoramic as of yet, but the way the R2000 handled my 13×19 print gives me confidence that it will perform just as well with even larger prints.
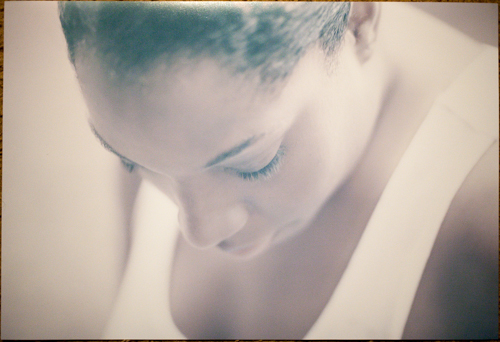
As far as black and white prints, the Epson R2000 is less capable than the printer above it, the R3000, but it is by no means bad. The R2000 uses only one black cartridge at a time (either Photo Black or Matte Black, depending on what paper type is selected), while the R3000 adds two “light black” cartridges to the mix.
To print black and white with the R2000, you can use the Epson print driver to choose the grayscale option in the print set up screen, or you can convert your images to black and white print them under color management. In short, I would say the biggest challenge is getting black and white prints that are perfectly neutral. Using Photoshop can help you tone your black and white images for more accurate and predictable output with the R2000.
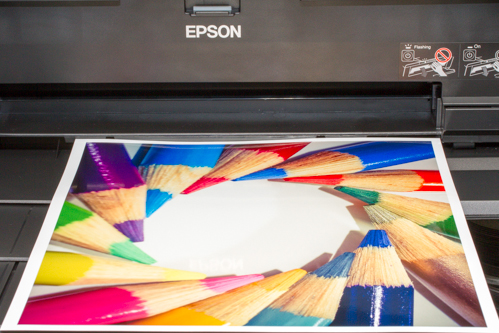
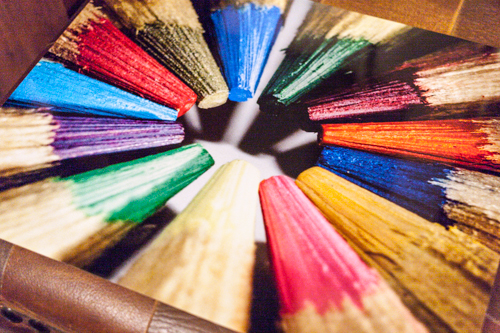
Each of the photos included in this review (none of which are truly representative of how wonderful the prints look in person) was printed on one of Epson’s excellent photo papers and the R2000 is capable of handling all photo paper types. The Gloss Optimizer is used to further improve the quality of glossy, satin, and luster prints, coating the image to prevent bronzing and gloss differential, aberrations associated with pigment-based inks.
Final Thoughts
The Epson R2000 excels at color printing on a variety of papers. Colors are especially vibrant and punchy on glossy media and are accurate across the board; I manage colors via the print driver and the R2000 matches my monitor perfectly. Though black and white printing may not be this printer’s strong point by default, with a little post processing work it will output pleasing black and white prints.
This printer will open up new avenues of creativity and freedom, allowing you the opportunity to make frame-worthy from the comfort and convenience of home. Considering price, features, and most of all print quality, the Epson R2000 is more than the proverbial bang-for-your-buck printer. The quirks and annoyances associated with the printer really are insignificant when you consider all it does and how well it does it.


