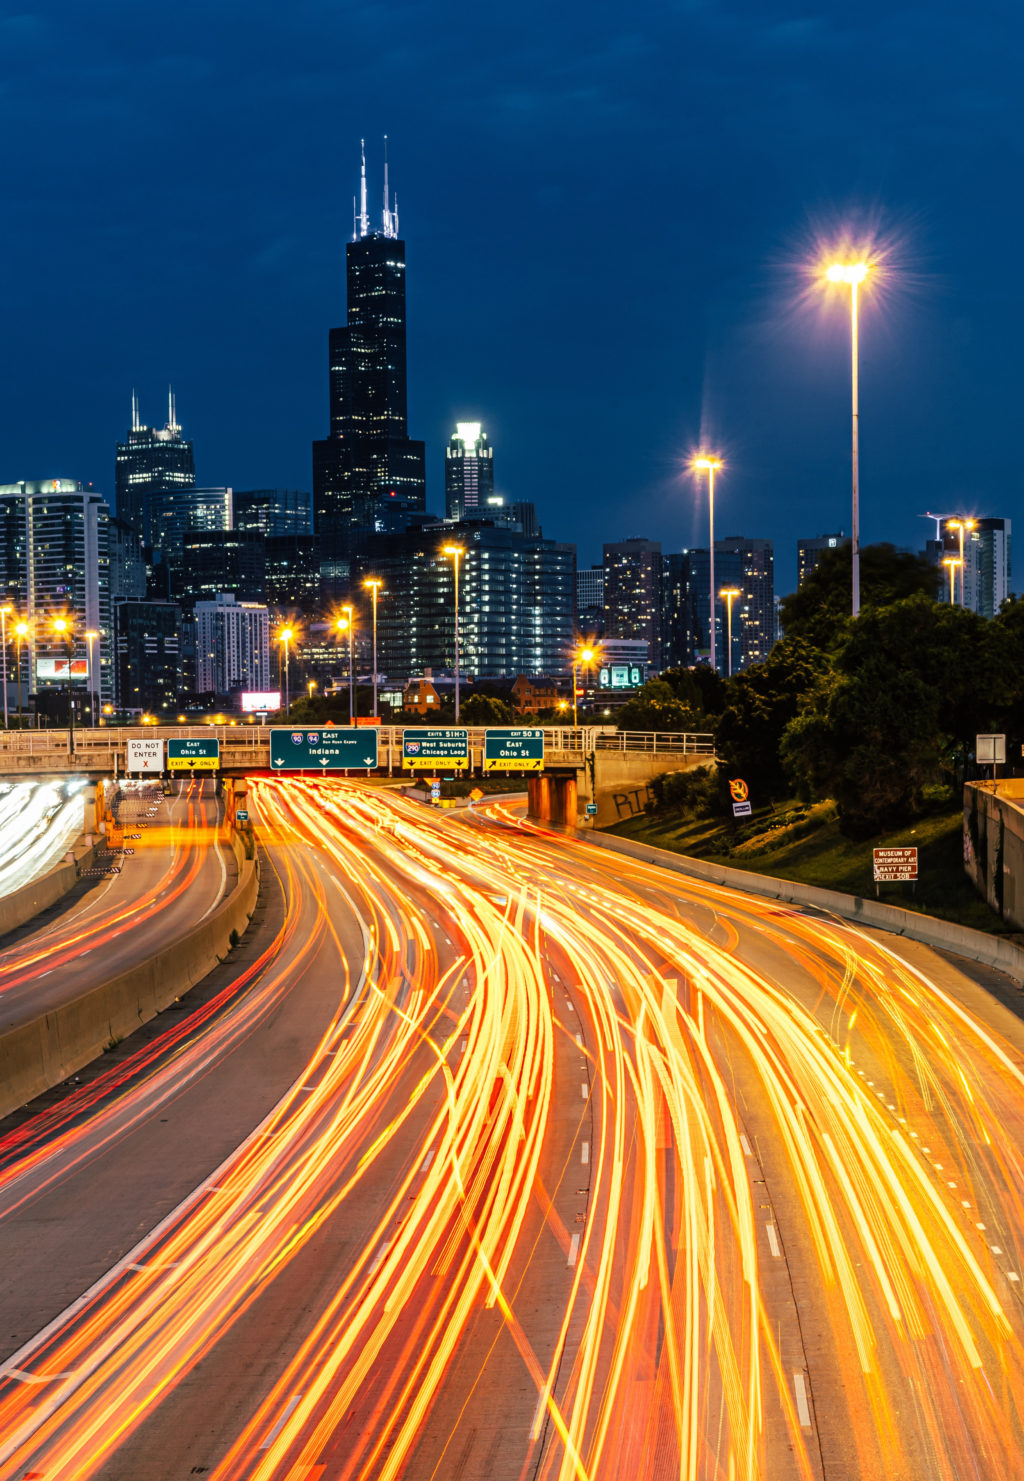
Blue hour after sunset is one of the most beautiful times to photograph the hustle and bustle of city life and this provides opportunities for photographers to create stunning light trail photographs. Although it may be a rush hour in the evening for commuters, it can be a time for photographers to find a good spot to play with creative compositions that include light trails. Moreover the contrast of the colours – the blue colour in the sky and the warm orangish yellow hues of the traffic lights can make the scene look lively!
Want to dig deep on blue hour photography? We have something pretty special coming up. Join the early bird list to hear about our free six part video series on blue hour photography and get early notice of our full upcoming course. Join here.

When Is The Blue Hour?
Blue hour is the time before sunrise and after sunset, and usually lasts only for about 10 to 30 minutes. The time varies for different locations, with the weather, atmospheric conditions and time of the year. In the evening, the blue hour occurs at the end of civil twilight in to the nautical twilight. So photographers need to take this small window of opportunity for their photography as it brings in the cold blue colours along with saturated tones.

Here are some apps to keep an eye on the blue hour. It is easy this way!
Tips To Photograph Light Trails In The Blue Hour To Get Stunning Results:
Find a Good Location:
For photographing light trails, you will need an interesting view with the sky, where you can compose the light trails to work with the scene in front of you. Cityscapes with long roads or even rural areas with winding roads will help get interesting blue hour photographs.
- Observe the location during the blue hour before the day of the shoot so you get an idea of the traffic during the time and this will help you decide the location, composition and exposure times. Make sure there is an interesting subject that can make the image look interesting.
Keep an Eye on the Weather and Time:
Make sure the weather is good for blue hour photography. You usually need to avoid days that are heavily overcast. Also, the blue hour only lasts for a few minutes, so plan using one of the apps and reach the location well ahead of time and set up your camera for a stunning composition. You will not have enough time to fiddle around with the settings when the blue hour happens. Do not pack up early, but wait till the city lights go on and get a few shots that show life in the city!
Get the Settings Right:
In order to photograph light trails, you will need to make long exposure shots for a few seconds to minutes. The exposure time depends on how long you want the trails and how much traffic is available at that time. The longer the exposure time, longer the light trails and the more traffic, more the number of trails.
- You will need to shoot raw in manual mode at the lowest iso value and aperture between f/7 and f/16 depending on your lens' sweet spot.
- A tripod and a cable release is necessary. Use manual focus as cameras can struggle with autofocus in low light. Focus one third into the scene to get everything in the scene acceptably sharp.
- Depending on the above values, set an optimum shutter speed to get the exposure right. Shutter speed needs to be a few seconds in order to record some light trails.
- If you need even longer exposures, you can make use of a mild neutral density filter that will help to extend the exposure time.
Choose the Right Perspective: In order to get an interesting shot of the light trails, it is better to shoot from a slightly higher perspective than the vehicles. This will help to capture the trails interestingly and use them as tools to guide the viewer into the scene.

Want to dig deep on blue hour photography? We have something pretty special coming up. Join the early bird list to hear about our free six part video series on blue hour photography and get early notice of the course. Join here.
Look For Interesting Roads:
Instead of straight roads that just lead to a point, you can choose winding roads that will take the viewer through a visual journey along the light trails. This will make the image stand out and be visually appealing.
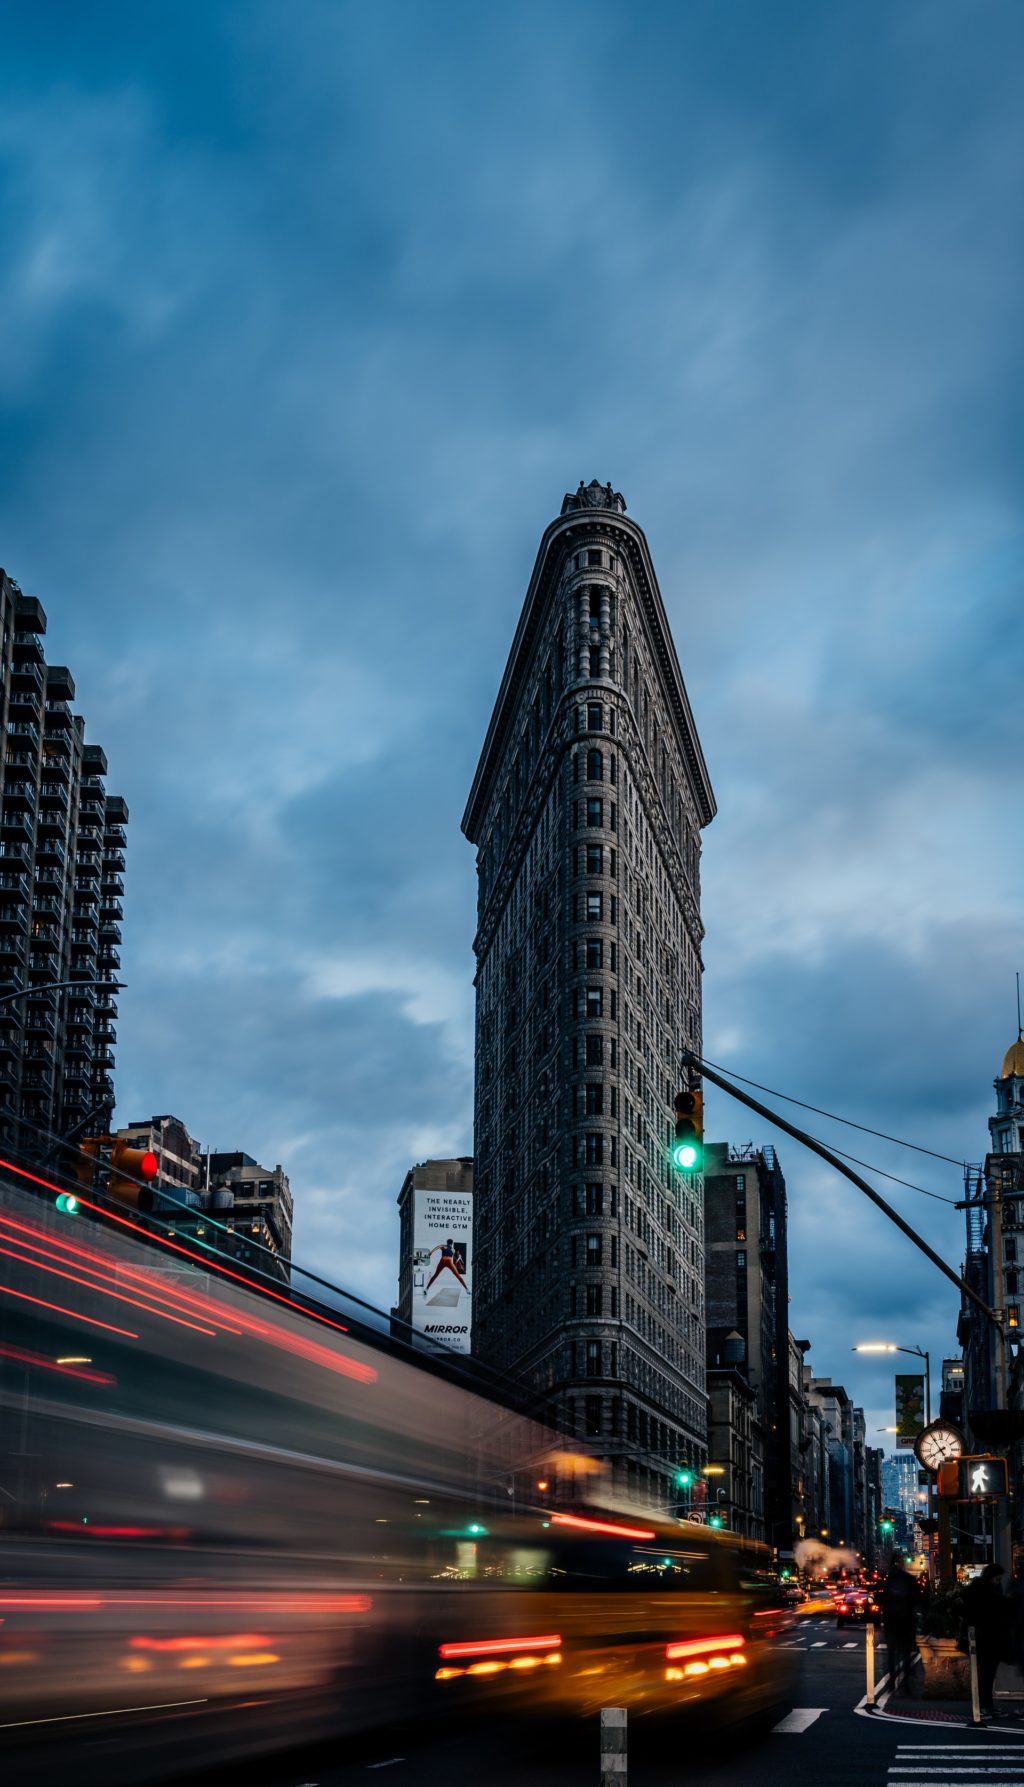
Do Not Shy Away From Lower Perspectives:
You can even set up your camera for a lower perspective down from the ground level to capture light trails from taller vehicles like buses and trucks. These can make for interesting compositions and add a more dynamic mood to the image. Be extra careful when doing this as busy streets can be quite dangerous for you and your gear if you are not careful.
Long Exposure is Your Friend:
For light trails and interesting blue hour photographs, you need to make long exposures. The exposure times depend on the ambient light available in the location. So depending on what you have visually planned, you will need to take a few test shots to get the exposure right and to get the trails that you desire.
- Making use of ND filters can help capture very long trails and movement in clouds if there are some in the sky. This can result in a very dynamic image of the blue hour!
- You can also make use of stacking/blending techniques to get very long trails in the image.
We hope these tips will help you capture stunning blue hour photographs. Light trails during the blue hour can be striking and can add visual appeal to even a boring landscape or cityscape. So if you have not yet photographed during the blue hour, make sure you go out and try interesting light trails.
Further Resources:
- Why You Should Be Photographing Your City At Blue Hour
- How to Shoot Stunning Blue Hour Cityscapes
- How to Photograph the Blue Hours With Amazing Results
- Bite Size Tips: Long Exposure Light Trails
- How to Photograph Spectacular Light Trails
Want to dig deep on blue hour photography? We have something pretty special coming up. Join the early bird list to hear about our free six part video series on blue hour photography and get early notice of the course. Join here.


4 Comments
I never thought about using my ND before reading this , many thanks Dahlia good reading 😉
Thank you Patrick 🙂
More than twenty years ago I shot some images of Trafalgar Square in London at a traffic junction. I was blown away by the traffic trails I was able to record on my then film camera, it was magical.
The ND filter is a good tip, but you can also use one to remove cars from roads if you do a super long exposure in the daytime.
Hi Ross, thank you for the tip 🙂