Water comprises of around 71% of the Earth’s surface, so chances are you’ll be photographing a decent amount of water in your career as a photographer. Whether it be sea and lake water or rivers and waterfalls, water can be seen in so many different forms.
I’m not talking about the physical state of water (i.e. a solid, liquid or gas), but in terms of whether it is stable (e.g. a lake with no wind) or it is rushing (a waterfall). So let's look at the types:
Smudged water
You’ve probably seen waterfalls looking creamy and the sea looking like it is made out of fog, all flat and calm. It's fairly easy to achieve this effect during set times of the day or night. The key thing here is to use long exposures in order to give time to the water droplets and motion to become smudged.
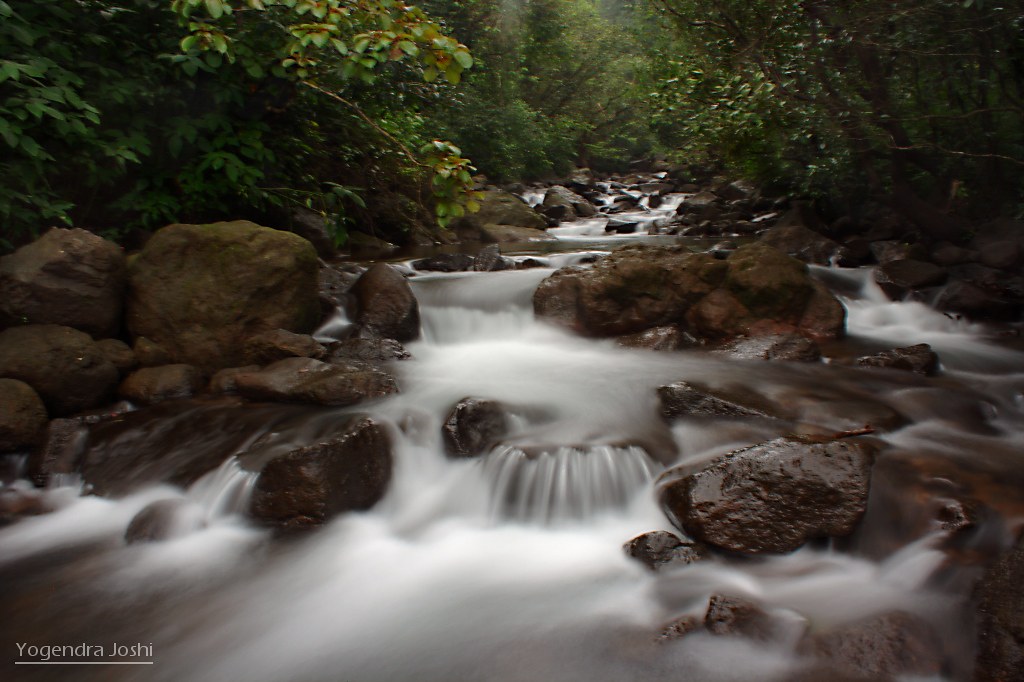 Photo by Yogendra Joshi
Achieving the same during the day, however, can be tricky. Particularly if it's around noon. So here you have 2 options:
Neutral density filters
You can use a neutral density filter (or more than one) in order to keep your aperture at around f/8 to keep diffraction away, and yet reduce the amount of light reaching the sensor thus allowing for longer exposures. Additionally, you can use a circular polarizer filter on top of the neutral density filter to reduce even more light. This also allows for the water to be more transparent by removing the reflections on the water surface created by the sun.
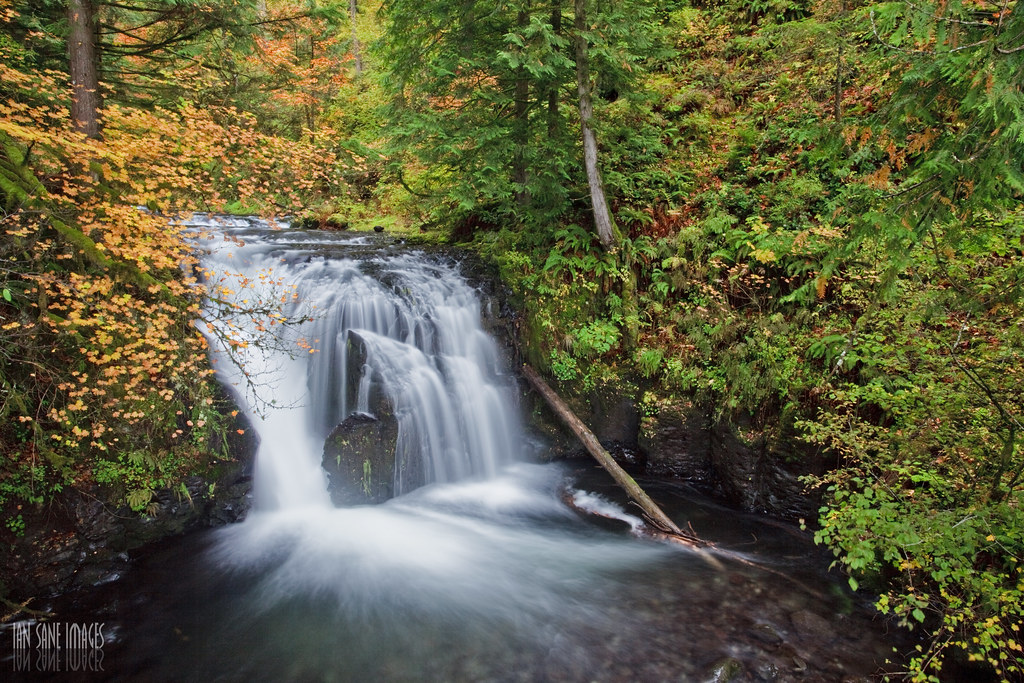 Photo by Ian Sane
Multiple exposures
If you can’t get your hands on neutral density filters or circular polarizer filters, you have one option that might achieve the similar result: Shooting multiple exposures with the same scene and stacking them afterwards in Photoshop.
The idea is to close up the aperture as much as possible. Set the ISO to 100 or lower if possible. Overexpose the image as much as possible without getting any clipping (or slight clipping in areas that aren’t important, but not too much). Usually, that will result in shutter speeds from around 1/10 to 1 or 2 seconds.
Shoot around 20-30 shots as fast as possible, meaning reduce the interval between the shots to the minimum. You’ll end up with seemingly identical photos with slight difference in the water.
Load them into Lightroom, select them all and turn on “AutoSync”. Do your Lightroom edit as you would do to a similar photo of this nature. After you are done, while all the photos are still selected, press right click, select “Edit In..” then choose “Open as layers” in Adobe Photoshop.
 Photo by Mick C
Once the layers are loaded in Photoshop, select them all, head out on the menu line, click “Edit”, then click on “Auto Align Layers”. After that's done in the layers panel, press right click and select “Convert To Smart Object”.
Next on the menu line, click on “Layers”, then choose “Smart Objects”, then “Stack Mode”, and choose “Mean”. There you go, your image will look as if it was shot with one long exposure.
Freeze water
If you want your water to be frozen in time, without any smudges, you’ll need a fast shutter speed. It needs to be really short, something in the area of 1/1000 or faster. You’ll probably need to open up the aperture and boost the ISO a bit, but usually these are scenes with lots of light so no need to worry too much.
That should be enough to freeze all that water droplets in mid air.
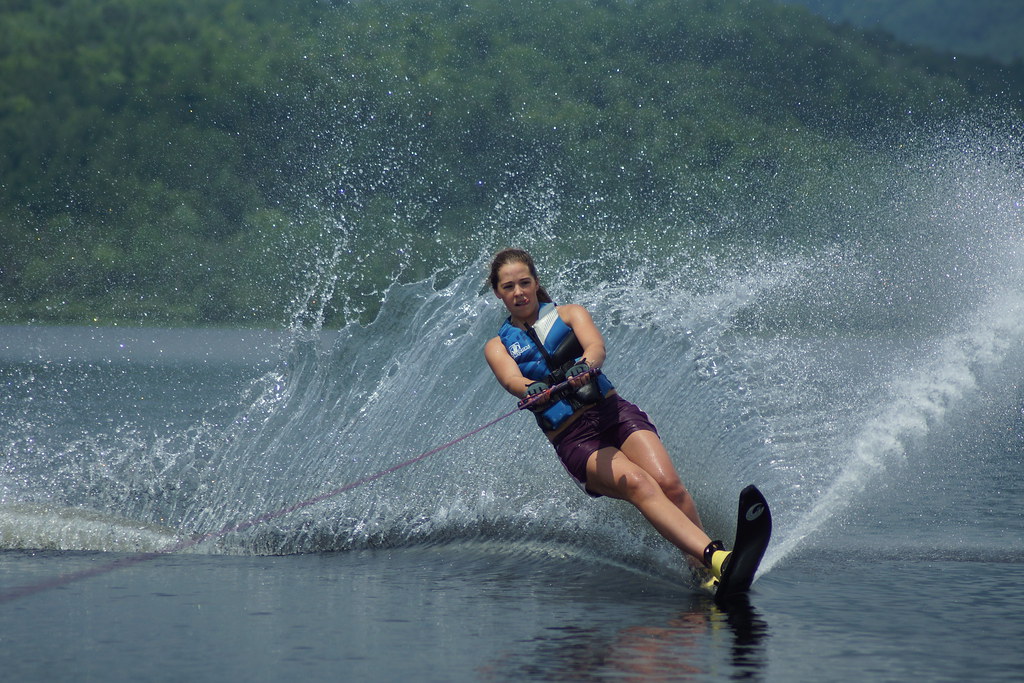 Photo by Lisa Donoghue
Reflections and Polarizers
Polarizing filters are useful when photographing water, they can reduce reflections and also isolate reflections. For example, you have reflections from the sky which hit the water at a different angle as something right near to the water would. With a circular polarizer filter you can reduce one of the reflections, thus effectively enhancing the other.

Mirrorlike reflections can be done with or without the use of circular polarizer filters, however for that you need a water body that is really calm in order for the water surface to be clear and flat.
When you use long exposures to get a flat and ghosty surface, the reflection has the tendency to bend towards the way the water moves, so you won’t get a mirrored reflection, instead you’ll get blurred and bent one.
Summary
Water is heaps of fun to photograph, however it can pose unforeseen problems with just the slightest change of weather. If you are prepared and creative enough you can utilize every scenario for a great photo, especially if you have a stunning scene with decent light.
Frozen and creamy water can look cool if you do it right. Just practice, think outside of the box and you’ll be just fine.
And be careful with your gear, water and electronics = not such a good combo.


