Star photography can include just photographing stars, the Milky Way, or even photographing star trails. Photographing these heavenly objects at night requires a lot of planning and some extra resources than what you would require for daytime photography.
There are some things that you should be doing and not doing when it comes to star and astrophotography in order to get a stunning final image and that is what we will be discussing in detail in this article.

Here is What You Should be Doing When Photographing the Stars:
The photography tips below should help you get started with star photography.
Grab your Milky Way Photography Blueprint for free right here.
Find The Right Location:
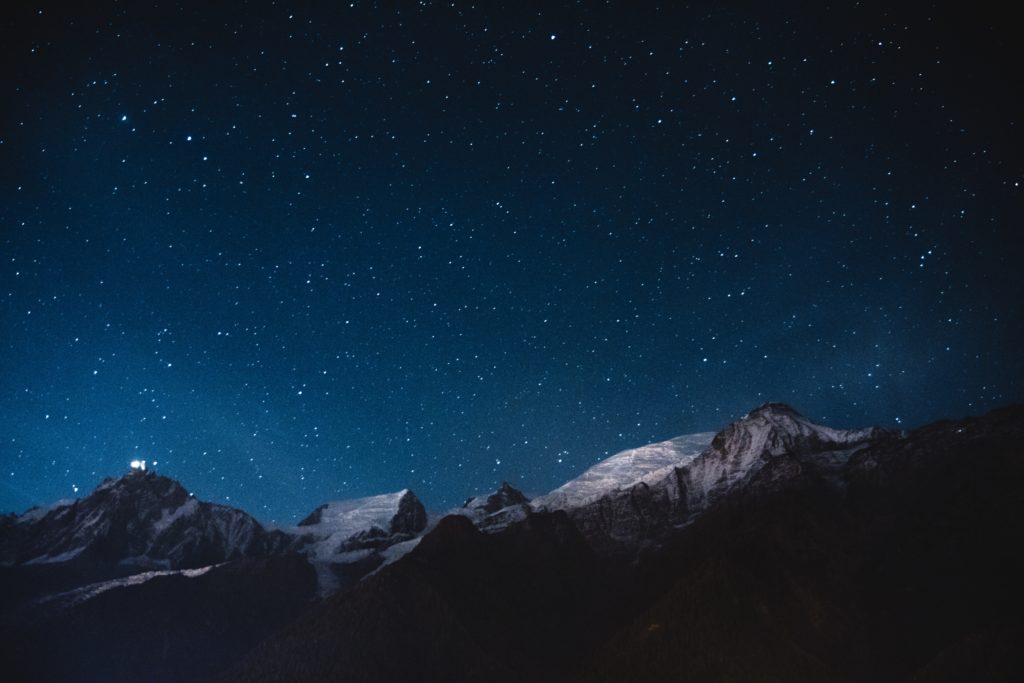
- You have to be in an area where there is least light pollution. Depending on how huge and how much light the city has, it is better to be about 20 to 50 or 70 miles away from the nearest city. Websites like Light Pollution Map and the Dark Sky Finder can be used to find dark skies or locations nearer to where you live.
- Scout your location and visit them during the day if you can, to look for possible compositions because star photography with a beautiful foreground can look ethereal.
- You need to have clear skies although occasional clouds are fine. Plan your shoot by checking the weather forecasts for the location you will be shooting.
- It is good to arrive at the location before sunset so that you get a better understanding of the landscape around and can also minimize the risk of accidents in the dark.

Patience is Key:
Photographing the stars requires a lot of patience because you may not get it right the first time. You need to take into account various environmental factors and try different settings to get it right. Moreover, different locations and scenarios require different camera settings and hence patience and practice is the only way that will help you get the best star shots.
You Need to Keep an Eye on Moon Phases:
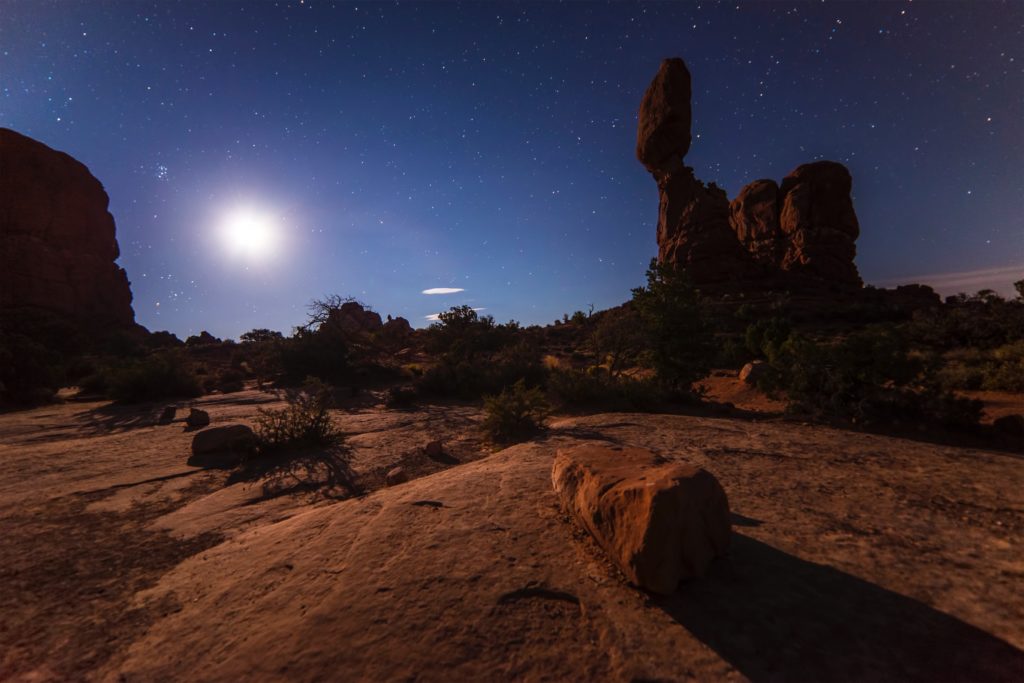
Keep an eye on the moon phase and the best time would be to shoot during a new moon or on a night when the moon is not up in the sky or maybe a night when there is a crescent moon so you can use the ambient light to illuminate the landscape. Light from a brighter moon can make the stars look faint and the sky can lose its contrast.
Shoot at the Right Time of the Year:
If you are looking to shoot the Milky Way, you need to be shooting them during certain times of the year when they are above the horizon. The months between April and October are the best times when the Milky Way is above the horizon in the night sky and it is during the summer seasons of July and August, that the Milky Way appears as a bright band across the night sky. During other times, it is close to or below the horizon at night.
You Need to Use the Right Gear:
Here are some gear suggestions for star photography:
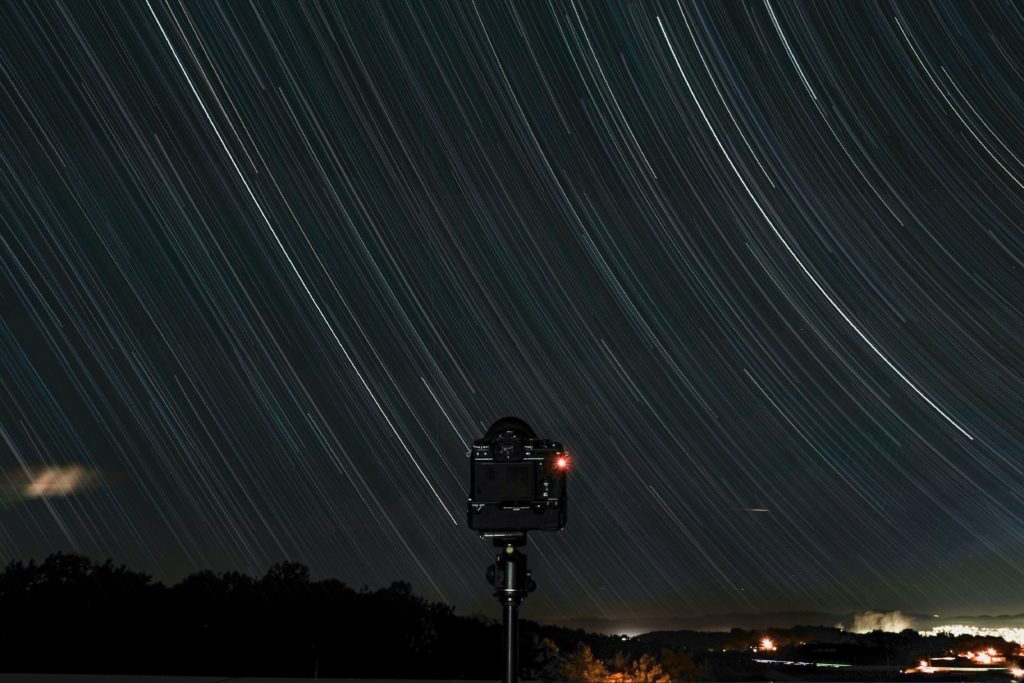
- Have a sturdy well-built tripod for star photography as you will be dealing with long exposures and sometimes under cold and windy conditions. Any small camera shake can ruin your image.
- If you can use weather sealed camera and lens, the better as it can withstand the cold and moist weather conditions.
- You need a camera that has manual mode functionality and can shoot in bulb mode, so that you can have more creative control while adjusting the iso, aperture, and shutter speed manually. It also needs to respond well in low light and high iso and be capable of shooting raw.
- You need a fast and wide-angle lens with focal lengths between 14mm to 24mm and an aperture of at least f/2.8 so you can capture a wide scene of the foreground and the sky and shoot at lower iso values as the f/2.8 aperture will let in more light into the lens.
- For those beginning with a kit lens, you should not be put off by the kit lens as it is good for a start. Try at iso 1600 and depending on what your camera records, you can step up the iso.

- You need to use the manual focus functionality of the lens as you do not want to lose focus each time you take a shot.
You Need to Have the Right Accessories:
- Some accessories you will need to have are a flashlight if you will be light painting the foreground and to help you find your way through the dark, a red headlamp for any work in the dark and a compass to know the directions.
- Make sure you have extra fully charged batteries and some formatted memory cards to get you through long shooting sessions.
- Keep the batteries as warm as possible as they can discharge quickly in cold weather conditions. It is advisable to have a battery pack for emergency situations as a backup.
- Have a cable release or a remote shutter release if you have one as this can be greatly helpful.
- Use an intervalometer for time-lapse photography if your camera does not have an inbuilt one.
You Need to Get the Help of the Right Tools:
- Have a smartphone with apps like the Sky Guide app or Star Walk 2 to locate the Milky Way or if you photograph star trails, you can use these apps to locate the North Star for the Northern Hemisphere and Southern Cross for the Southern Hemisphere.
- Make use of tools like Stellarium, an online program that helps you locate the stars that are in the field of view in the location where you are. It also helps you to see what the sky will look like for a particular location and shows you moon phases and the light pollution of the location as well.
- The Photographer’s Ephemeris helps you to plan shooting for night photography with the location of the moon, Milky Way, etc.
- Use Photopills for iOS and Android that helps you to calculate events for any genre of photography. You can easily calculate the exact date and time for when and how the Milky Way is over the scene you imagined.
- 500 Rule Calculator for iOS is a useful tool for photographers who need to calculate proper exposure time for star photography and avoid star trails
- 600 Rule Calculator for iOS is another tool for photographers to calculate proper exposure time for star photography, but this could create some star trails. So it is better to use this setting when shooting for web images.
- Pin Point Stars for Android helps to calculate the best exposure times for star and milky way photography
Get Your Camera Settings Right:
- First off, turn off image stabilization once your camera is on the tripod. This is something many of us forget to do.
- Make sure that the focus is set right. Do this by manually focusing on the brightest star or a distant light. Zoom in on live view to check that the focus is point sharp. Take test shots to check for sharp focus and make adjustments if necessary. You can always make a temporary mark on your lens for this point if you’re happy with it, but checking it during each shooting session is important.
- If you have a foreground that you want to include in your frame, you can focus one third into the scene manually. Illuminate the foreground with a flashlight during this process so you can see the area to get the focus right. You will need to take a test shot to check if the compositions are what you wish to have in the final star pictures.

- Calculate maximum exposure time based on the 500 rule in order to avoid star trails. This is relatively simple – you divide 500 by your focal length and use that number as your maximum shutter speed for a full frame camera. If you are using a crop camera sensor body, take the crop factor into account and divide 500 by crop factor times focal length. If you will be shooting the northern lights along with the stars, then you will need to have a faster shutter speed if the aurora activity is high so you can capture the details of the aurora patterns.
- If you will be shooting for web images and will not be bothered about printing the images large, you can use the 600 rule where you divide 600 by the focal length of your lens
- Use a shutter release or timer delay feature in your camera to release the shutter so that you avoid blur due to camera shake when releasing the shutter.
- When using a DSLR, use the mirror lockup feature to avoid blur due to mirror movement.
- White balance can be set to tungsten or daylight to get the right sky colors, or even set to auto. Remember, you can always change this while post-processing as you will be shooting raw.

Illuminating The Landscape for Star Photography:
If you want to have foreground details in star photos, you can accomplish it using the following methods.
- Bracket shots and combine them while post-processing
- Take two shots – one exposed for the foreground and another exposed for the sky and combine them while post-processing. This is helpful in situations where the foreground is quite far from the camera.
- If there are nearby (not too close) elements that you will be including in the frame, light paint them for a few seconds during the exposure, so that their details are recorded. Make sure not to use very harsh lights as these can create overexposed areas in the frame.
- Or use a quarter moon to illuminate the landscape, but make sure that it is in a direction opposite to the direction you will be photographing so the resulting landscape photography opportunity can be j.
Be Ready for the Weather Outside:
Dress appropriately for the weather as some clear nights can be extremely cold. Wear warm clothes and have warm drinks to get you through the night. You can use warm fabric to keep your gear warm as well. Also, keep bug sprays in hand, you never know when you may need them.
Post Process Your Star Images:
- Always shoot raw so that you have greater flexibility when post processing and it helps to adjust white balance if you did not get it right in your camera.
- Do not forget to post process your images as your straight out of camera image will lack the contrast and original colors. Some basic adjustments like exposure, contrast, highlights, shadows, whites, black, clarity and vibrance should get your image to how you need it.
- Slightly increase the whites and decrease the blacks. Adding some clarity can help define the stars, but don’t push it too much. Adding a bit of sharpening will also help get some crisp details in the stars.
- Make use of the noise reduction function if there is evident noise in the image.
- Besides the above, if you are looking for more colors in your image, make use of the split toning and HSL panels to get the colors you need.

- If you are doing star trail photography, make use of apps like StarStax which is free or photoshop so you can get the work done in a few minutes.

Now that we have seen all the things that need to be done for star photography, you also need to know what you should not be doing when it comes to star photography.
Here are some things that you should not be doing when photographing the stars:
- Firstly, if you are looking for a heavenly looking star image, do not stay in a town or city where there is light pollution as these will only blind the effect of stars. Stay away from cities and head out to a rural location where the skies are very dark.
- As you may know, if you are in a perfectly dark location, you can see the milky way and other constellations with your own eyes. Make sure that you turn off all the lights including the lights from your mobile and camera’s LCD in order to get a clear view of the sky. This will help you and any other photographers who are with you to see and photograph stars under a clear dark sky.

- Do not use flimsy tripods as they can shake during the slightest of breeze and make your pictures blurry. Use a sturdy tripod that can withstand harsh and windy conditions, so you can reduce camera shake in extreme weather conditions.
- Do not breathe on your lens especially during cold conditions as this can make things worse for you. Try your best to keep the camera and lens warm by wrapping with warm fabric if possible.
- Do not expose spare batteries to the cold as they can lose their charge, instead keep them in your coat pockets close to your body to help retain their life.
- Do not use autofocus for star photography as the focus can change while releasing the shutter and cause blurry images. Also with autofocus, you will never know if the focus was right on the stars and it can change with each shot.
- Do not increase the iso beyond the limit that your camera can handle as the noise becomes highly evident and can render the image unusable. It is best to stay within 1600 to 3200 and not more than that.
- When shooting pictures of stars for star trail shots to combine while post-processing, do not use the noise reduction feature in your camera as the time interval between shots will double thereby creating breaks in star trails
- When making a single exposure star trail image, do not turn on noise reduction option of any kind as it may double the exposure time or even more. Also, do not use high iso in this case as the image can be overexposed. Start with the lowest iso.
- Do not go above the maximum recommended camera shutter speeds because as you go towards a slower shutter speed, you will see evident star trails especially if you will be printing the images. So stay by the 500 rule or the NPF rule.
- Do not use your camera’s inbuilt flash to light up the scene as it can blow out your foreground and make the sky look very faint. Instead, use an external flash to illuminate any foregrounds or subjects in a controlled manner (soften the light) for a shorter period of time.
- Do not shoot the stars or the Milky Way on a full moon night, or on nights when the moon is high up in the sky as it can wash out all the details of the stars and reduce the contrast in the sky. New moon nights, nights with no moon or crescent moons are the best days to shoot stars at night.
- Do not photograph just the sky as it can look boring and let the viewer wander all around the frame with no resting point. So make sure that your night sky photography has something included like trees, mountains, buildings, ruins, barns, etc., to complement the sky.

- When including foreground elements for star photography, do not place or light the foreground elements in such a way that they become the focal point in the image. Your focus is the stars or the Milky Way and so, compose and illuminate the frame in such a way that there is visual balance between the foreground and the sky.
If you are into night sky photography or star photography, do you have any tips to share with us? If so, please let us know in the comments section below. If you have not tried star photography, then you must give it a try as the night sky is an amazing subject to photograph. It isn't so tough as you think – start with the basic gear that you have.


