When you are starting to get into taking photos, there can be nothing more boring that reading and learning the theory behind it. The exposure triangle, ISO, aperture, shutter speed, the rule of thirds – all of these things can be very tedious and take away from the fun of learning photography, especially if you’re more of a doer than a theory learner.
But what if there were a few things you could learn in less than 10 minutes that let you cut straight to the important practical parts of the theory (at least for camera control) without having to spend hours, days, weeks and months learning it? What if you could use the 80-20 rule to break the back of the easiest parts of photography theory – at least in relation to how to control your camera?
Well that’s what we will try to do today. Remember these three easy facts and you will know the basics of camera use. They hold true for any sort of camera from the most basic iPhone camera to the most expensive DSLR (though the DSLR will give you more control over each part).
If you want to go deeper into how each of these tips work (and if you want to, you can go very very deep), we will give you the relevant article to learn more after each one or you can read about the exposure triangle here which is far more detailed.
Let’s jump in. If you learn these three things, you know the practical application of the fundamental rules of how a camera works.
Note:If you are looking to get a detailed overview of the camera craft you should know for images that you can show off (and perhaps more importantly, the mistakes to avoid) then you should see our guide – Photo Hacks – Get the Most Improvements in Your Photographs in the Shortest Possible Time
Turning Up the ISO Makes Your Photographs Noisy
In very general terms, for most cameras, you will want to keep your ISO below 400 (more expensive and newer DSLRs usually tend to have better ISO performance).
Background: If you want your image to look smooth (as opposed to noisy or grainy), then you will want to choose a low ISO setting (probably under 400 on most cameras). Now the other side of that is that low ISO is not as sensitive to light so low ISO will also make your images darker. If you want the noisy and grainy effect in your images, then you should turn up the ISO setting – over 400.
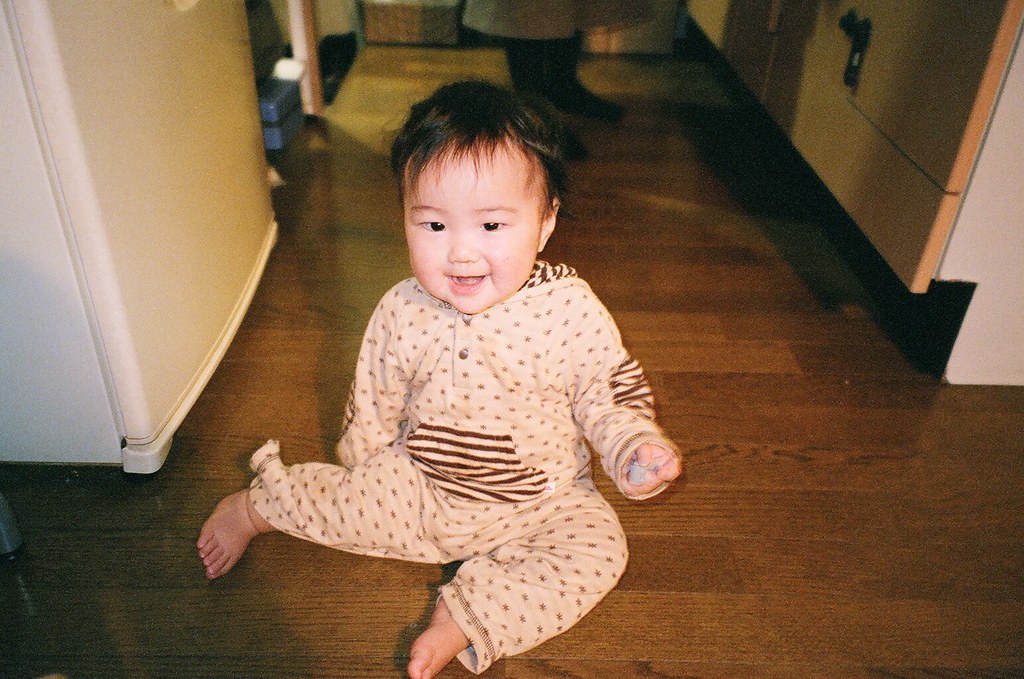
In the image above, note how the texture on the fridge door and floor is noisy or grainy – that is the direct result of the image being shot at ISO 1200.
Note: Modern DSLRs tend to have much better ISO performance than older models. Full frame cameras also tend to be better ISO performers.
Opening the Aperture Makes Your Background Blurry
To get this effect you will want a small number for your aperture and to get close to your subject.
Background: This is a very cool way to make a person in your photos stand out from the what is behind them and it works better the closer you stand to the person and the further away the background is. (Between f1.8 and f5.6 for example). It is often used by people photographers and it is something that you should learn how to do. On the other hand, opening the aperture of your camera lens also lets in more light so you have to use either your ISO setting or your shutter speed setting to compensate. If you want as much of the picture in focus as possible then you want to close the aperture (f16 to f22 for example).

The image above throws the background into blurriness by shooting with a narrow aperture (f/4) and getting close to the subject.
A Faster Shutter Speed Freezes the Movement in the Photo
Keep the shutter speed faster than 1/400 of a second (on most lenses) will freeze the action.*
* This does depend on the focal length of your lens, but unless you’re shooting with a zoom lens you should be ok. For specific settings for your specific lens, take a look at our story on shutter speed.
This is very useful if you are photographing moving things. The faster the movement, the faster the shutter speed will need to be to freeze the movement. Photographing your kids in good light will need a fast shutter speed to freeze them, but shooting a Formula One car race will need a very fast shutter speed. On the other hand you can get some very cool effects (not to mention, more light onto the sensor) by slowing down the shutter speed. Just take a look at our stories on panning, long exposure and motion blur.
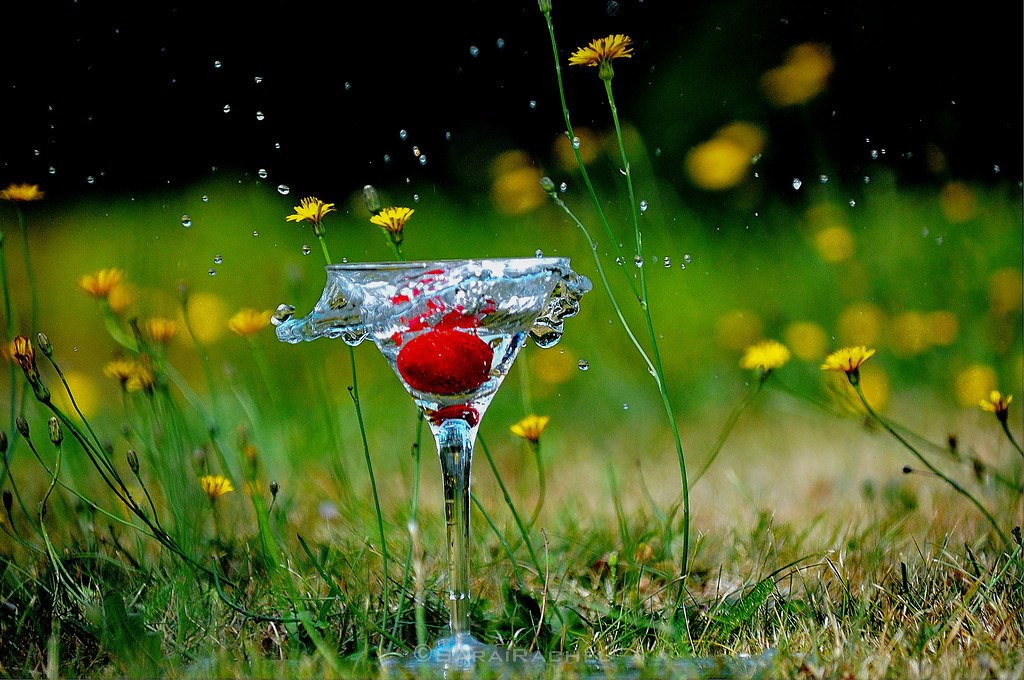
Notice in the image above how the very fast action of a splash has been frozen by using a fast shutter speed of 1/1000th of a second.
Putting These Three Ideas Together
Now, the real trick with these ideas, is that they all build on each other. To get a “perfect” exposure you will have to learn to control each of the 3 camera controls talked about in this story.
As we said earlier, these three easy facts make up something photographers know as the “exposure triangle” and it is something that photographers can spend a lifetime perfecting. These controls on any camera are the most important when deciding how you want your images to look. Changing one of the camera controls mentioned above means you will need to also change another of them to keep the same exposure as they all affect each other. Playing with how they interact is where the true control in photography lies and where the fun really starts.
To take it to that next phase, you might want to take a look at Photo Hacks – Get the Most Improvements in Your Photographs in the Shortest Possible Time. It will help you with the practical parts of camera craft that result in better results as well as the mistakes to avoid.


