Adobe Lightroom 4 has some significant changes within its develop module that gives us photographers several new impressive tools when post-processing images. Adobe came out with a new image process version (2012) which is basically the image processing engine behind Lightroom and Photoshop's Adobe Camera Raw plug-in. This new process version provides many significant updates, including more options when making local adjustments and the new highlights and shadows sliders (which essentially replaces the recovery slider in Lightroom 3). Because of these new powerful features in Lightroom 4 we can now, with much greater ease, recover those photos which we may have thought were unusable.
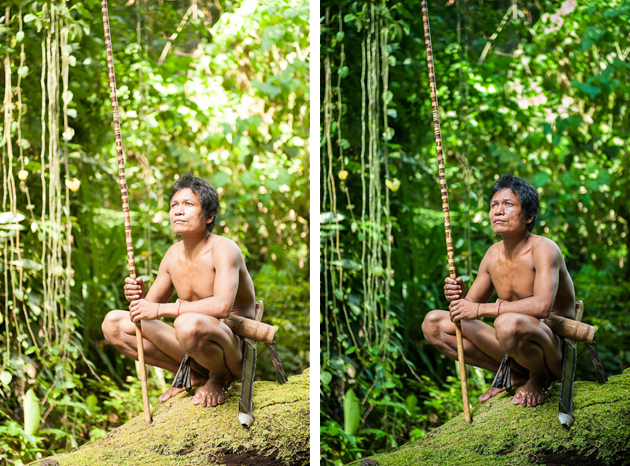
The photo above was shot in RAW, but with all the wrong settings on the camera. It was over-exposed, the white balance was awful, and the original image is lacking contrast. This was a test shot taken while adjusting my camera settings, but it serves as a great way to show how easy Lightroom can bring back the original color and exposure of an image.
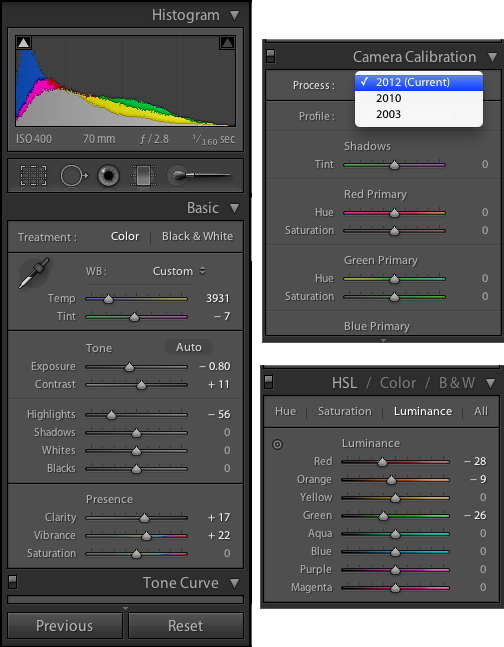
Above you will see all the general adjustments I made for this photo within Lightroom's Develop Module. The first thing you will want to do is make sure you are using the 2012 process (this is the default for new photos within Lightroom 4, but you will have to select this option if you were using an earlier version of Lightroom to process your photos).
After selecting the 2012 process, I was able to bring down the exposure and use Lightroom's new Highlight slider to recover some of the stronger highlights. You will notice though that if you completely blow out your highlights in a photo it will be difficult to recover. Look at Tumihay's left cheek just under his eye. This part was a blown highlight and was not recoverable.
I then adjusted some selective luminance and the overall white balance to get a more natural color. With these few adjustments I was able to get the image to something that would be acceptable to look at. I went on to do a few local adjustments to this image as well, just to darken certain areas of the background a little further (I did not show the local adjustments above). However, 95% of this image was corrected with the general sliders of Lightroom's new Develop module (with emphasis given to recovering highlights).
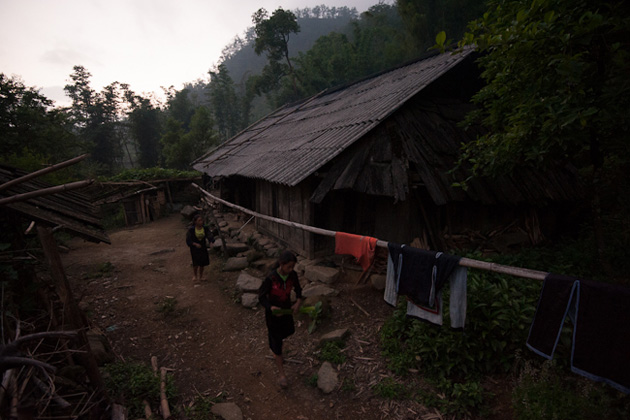
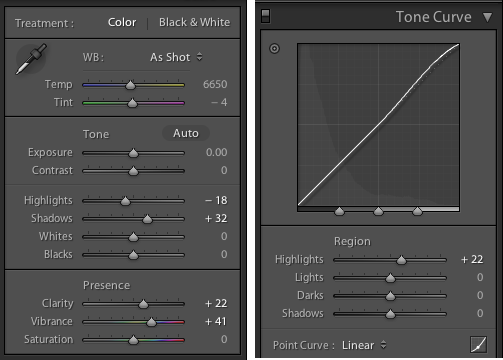
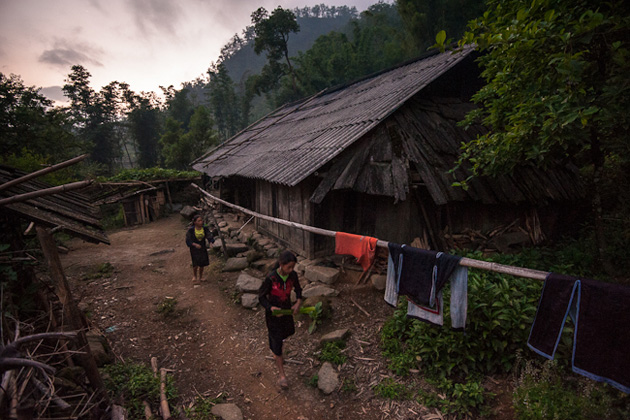
This next photo was also shot in RAW, but it was slightly underexposed to prevent the sky from being blown-out. Lightroom's Shadow slider tool allowed me to bring back a lot of the detail that wasn't visible in the original RAW file. I also brought down the highlights slightly to bring some additional detail back into the sky. This new Shadow slider tool allows you to bring back a lot of detail in the dark portions of your images without compromising much quality. Again, the Shadow and Highlight slider tools are only available in Lightroom 4 when editing using the 2012 process.
Jacob Maentz is a freelance travel, culture and documentary photographer currently based in the Philippines. You can visit his website here, read his articles on his blog, follow him on Facebook or Twitter.



4 Comments
The real beauty with LR4’s highlight and shadows adjustments is you can take tricky lighting situations you or the camera may otherwise struggle with and, in many cases, make a photo that is use-able with minimal effort. I have found it has allowed me to take some of my old “if only” photos and make them look more like I had envisioned.
I’ve been using CS4 for a long time as a lot of my work requires the use of layers. However, I just purchased LR4 for processing travel/landscape/culture (non studio) photos. Generally seems to be pretty good once you get your head round importing and exporting files etc.
Am I right in thinking the general consensus is to use new highlights and shadows tools rather than the recovery slider?
I have noticed with the new controls there is less noise.
One of the issues I had with CS4 is that I couldn’t open RAW files from my new 7D which I use for wildlife and sports. I’d appreciate some advice on workflow from anyone, convert to dng and process in CS4 or LR4 then render with LR and edit in CS4?
Nice, post. Looks like to have now go through the old archived photos’ that, at the time were so, so and have a play.
I shoot with a Nikon D80 which is notoriously bad in low light and/ or high contrast settings. I often find myself shooting Baptisms in a dark auditorium with only the subjects lit by harsh bright white Likos. The shots before the subject is wet are spot on, but when they’re coming up from the water, the reflections throw the exposure off, and lot’s of highlights are blown out. The time from before to after takes about four frames. Using LR3 I had hundreds of shots I couldn’t use. Using LR4, I’ve since been able to recover most of those same pictures. To me 80 bucks is a small price to pay to get that kind of results. MUCH cheaper than a new camera.