Effective post processing brings the image taken in the field to life on the computer screen. There are a number of tools available, each having features that appeal to an individual's personal preferences. Lightroom and Photoshop are two tools that are widely used. Both bring tools that do the same thing and they each have their individual strengths. What determines when Lightroom, Photoshop or both should be used?

Photo by Ryan
Both Lightroom and Photoshop are developed by Adobe, the global leader in digital and media solutions. However, the decision of which one to choose has been virtually eliminated with the release of Adobe Creative Cloud, you get both products together for $9.99 per month. Automatic updates and upgrades occur when available.
For a long time as a photographer, I worked with only Lightroom. The file organization system and powerful workflow approach in processing and retouching images was intuitive after I went through guided training using Adobe's Lightroom Classroom In a Book which offered exercises using their training RAW files.
Photoshop is a whole lot more than just a photo processing program. The large range of Photoshop users create and edit videos, produce 3-D images and utilize it's features in graphic design.
As a photographer, I won't tap in to all of the functionality simply because I don't have the need. Because of this diversity, the learning curve is steep. I started with Adobe's Photoshop Classroom in a Book which I needed to understand how to navigate and access the tools. The learning process continues!
Time saving tip #1: Take advantage of a tutorial either the one's mentioned above or one of your choice. Even if you're good at software applications, there's so much functionality in both that you'll be productive much quicker versus searching menus, panels and tools.
Time saving tip # 2: You've been through the tutorials, worked in the applications for a period of time and just need to ‘see' how it's done versus reading and practicing. You tube videos and tips across the web abound! A go to favorite: Julieanne Kost, Principal Digital Imaging Evangelist at Adobe has many short, feature-specific YouTube videos. She's never let me down!
Both Lightroom and Photoshop can exchange and use files between applications. Understanding the key differences, key similarities will help determine when to use one or both tools.
Lightroom Core Features: Built for Photographers
Note: the listing below highlights some of the major features and is not designed to be comprehensive.
Import directly from your camera – connect your camera to your computer and Lightroom will import your RAW or JPEG images.
Presets – From importing to exporting and steps in between, Lightroom has the ability to create and save a series of your favorite steps using “presets” that can be used over and over again to speed up processes with a single click.
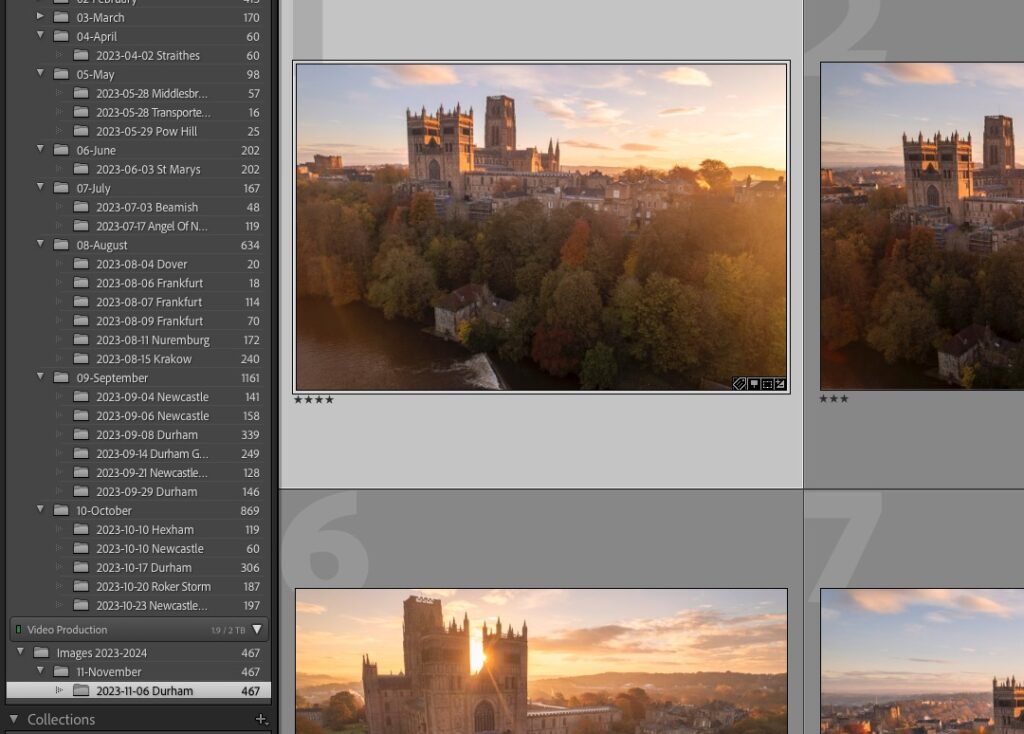
File Management – Lightroom uses a structured, organized approach in managing files. From uses of keywords, flags, presets, it's easy to save, locate and manage files.
Image data base & Catalogue – Lightroom 1) saves your original images as they came in to your camera 2) Any edits applied the image are automatically saved in a separate file that is linked to the image. This is referred to as a catalogue. The good news is that this occurs in the background. You pull up the image and the catalogued file which has all of your edits (which can be changed over and over if you choose) is automatically included.
Workflow – There's a History panel that lists in order, all the adjustments applied to the image. You can scroll through the changes to see the impact or use the before after comparison feature.
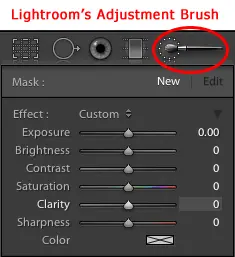
Intuitive Slider tools – Lightroom uses sliders to make global and local adjustments. From temperature, tints, exposures, highlights, color, sharpening and noise adjustments. Just press the mouse, hold the triangle and move the slider the right and left and the adjustments immediately appear.
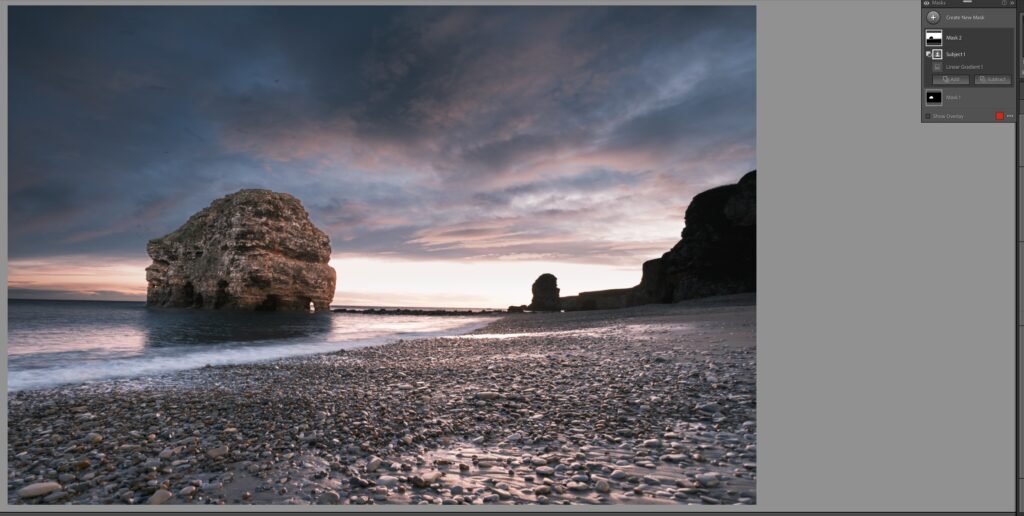
Powerful editing & adjustments – Image editing can be done globally and locally using sliders and selections. Global adjustments occur to the total image using the tools and moving the sliders. Local adjustment tools (brush, graduated filter, radial filter), allow targeting a small or large subset within the image and making specific adjustments such as exposure, highlights, saturation, sharpness, etc. It may be pulling out shadows on a face, whitening teeth, smoothing skin, adjusting the exposure of the sky. Cropping, healing & cloning areas for undesired spots, straightening, red-eye reduction is fast. You can copy all the changes made to an image and apply to other images also.
Books, slideshows, prints and web design – powerful tools exist within Lightroom to create books, presentations, prints ready for a print service or connected printer and web design.
Exporting – Ready to upload to Facebook, Flickr or a cloud-based app? Exporting includes a wealth of options that are easy to use. From a simple pure export to using Publish Services, users can control every aspect of what's included.
Backing up files & catalogues – The time spent in post processing is extensive. Always recommend backing up your work on a scheduled basis. I do a complete copy (command/copy) of the directory to an (command/v for paste) external hard drive. This copies the catalogue files (the files that has the adjustments made to the image) and the original files.
Photoshop: Digital Editing & Enhancement for Photographers, Graphic Designers, Web Designers and Videographers
Note: the depth of features and capabilities of Photoshop is vast with individual photographers having their go-to favorites. The listing below highlights just a few of the key features within Photoshop that cannot be executed the same or at all within Lightroom.

Photo by Sheen's Nature Photography
The image above was initially processed in Lightroom. To bring out the detail of the Cormorant, I edited the image in Photoshop. When the masking layer was created, the overall exposure was reduced which softened the almost too distracting background but also made the bird too dark. While in this layer, I selected the Cormorant and used the brush to erase or ‘mask' the exposure adjustment. The result was the bird in his element, details enhanced by softening the background.
Complex editing – Photoshop has multiple selection tools that can be used to target and make adjustments. From removing an object, like a tree or person, to cloning an area from one part of the image to another, the targeted editing tools are very efficient.
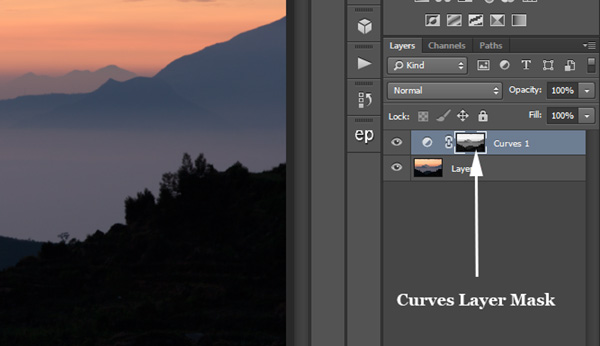
Layers and Masks – Adjustments to an image occur using layers. You can go back in to a given adjustment layer and make modifications without changing other edits. Masks are used to hide or pull through what's underneath.
Blending & Composites – Add intensity such as making a copy of an image then creating an overlay with the original. Vibrance is controlled by using Opacity from 0 to 100% strength. Change out a sky. Align and blend two family photos and pull through the faces that have their eyes opened.
Image manipulation – There are numerous tools within Photoshop that go deep into image processing. Lift a smile using the liquify tool, add text, select and edit pixels, customize your gradient fills.
One thing I kept hearing about before jumping in to Photoshop was destructive editing, which meant that once you did something it was done, no point of return. Within photoshop, there are edits that once done, may not be reversed…sort of. There are steps that you can take to protect the original image within Photoshop. If you're working with Lightroom then take the image into Photoshop, the original Lightroom file that you imported in to Photoshop stays intact. The edited Photoshop file is saved using a different file type such as .TIF or .PSD that can be read by Lightroom.



9 Comments
Very fine post indeed.
What I miss in LR is the ability to glue a panorama together. But rumours say it comes in next version. I’m soooo looking forward to that 🙂
If I need to do heavy retouch in PS I usually open from LR as Smart Object in PS. Then the RAW file is within the PSD file. So if a different exposure level is suddenly needed I can easily do that without starting all over again.
It’s all about worflow.
Thank you Benny! Glad you enjoyed and shared some of your tricks of the trade!
I have to say, when presented with a multi-hundred dollar upgrade option to the newest release of PS, I looked for other options. Yes, their Lite version would fill the bill for much of my requirements, but I was nervous of what I would miss downgrading as it were to “elements”. Then I found Corel. Remember those guys? Yes, they are still around and I have to say for the money, I couldn’t be happier. It seems to do everything I expected and used in PS and at a fraction of the cost. Since then Adobe has released it’s cloud service which seem intriguing but at the point I’m quite satisfied – with quick tutorials, and scads of youtube “how to’s” is a great platform.
Thanks for your comments Steve. Yes, I remember Corel from my PC graphics days in business. While I started with LR and evolved into PS too, your insight of other options and what you like about it is valuable to our readers. There are multiple choices available for sure!
How about neither? I firmly believe that photographers should actively support other options, rather than let the big corporations control everything; diversity is essential in all aspects of life and if you value something you should go that extra mile to support the smaller companies.
I was an Aperture user and am now looking at alternatives and assumed it would be LR but I found Capture One Pro and am a convert, but there are others like https://www.acdsee.com/en/products/acdsee-pro-3-mac . So don’t just follow the herd, check out the alternatives and ensure healthy competition, not bloated monopolies.
Hi Lee – thanks for sharing your preference. You are correct, multiple options should keep providers of post processing software focused on delivering new features and functions that’ll make it easier and better. Competition is a good thing!
I hate using Lightroom. I download the trial every time there’s a new version and learn how to use it, but it’s so slow and awkward. I still use Bridge CS6 because it’s the fastest and has the fastest low-res JPG export around. (Also, I’ve been using that since before it was released and that was long before Lightroom existed.) Bridge CC had the super-fast JPG export removed. It’s night and day, exporting JPGs of 1000 RAW photos in Lightroom could take hours. With Bridge CS6, it’s less than a minute since it generates them from the previews.
Still for culling and keywords, there’s something even better. I use “Phiewer” on a Windows 8 tablet. I use either a Surface Pro (if I may also want full Photoshop editing), or a Dell Venue 8 Pro (if I just want to cull/keyword before I get back to the workstation). Small Windows tablets with full USB support for accessing camera memory cards directly can be found for as little as $59. Phiewer applies the star rankings, labels, and keywords to the RAW photos’ XMP sidecar metadata, so I’ll use that to edit everything straight on the memory card right away. Then when I open the folder/SD in Bridge (or import into Lightroom or AfterShot Pro), all of that metadata is preserved and sort-able. I can turn on the checkmark for the “crop” keyword and instantly see all the photos I intended to crop. It’s a far more efficient workflow than having to spend so long importing photos into Lightroom and then start editing afterwards.
Sheen, I am 80 years old, but that doesn’t mean that I am computer illiterate. I appreciate all of the information that you furnished above. but I guess I am an old dog that doesn’t have the need to learn new tricks. However, I like to keep things simple. I don’t intend to do anything extra to my photos, such as manipulating layers, changing backgrounds, etc. I just like to be able to present my images as close as possible to what I saw. You have seen my work so you know what I produce. I simply download my RAW photos to FastStone Image Viewer. There I can convert them to JPGs. If I want, I can do some light editing and cropping there, too. However, I prefer to open the JPEGs in PS for my final editing. I also use two plug-ins; Topaz DeNoise and Focus Magic. Occasionally I might use PhotoMatix for HDR projects. For my organizing I find that FastStone works for me in that regard, by saving my work in various folders. Looking forward to our next get-together.
Hi Bob – thanks for sharing your tips and tools! Your processing flow with the use of image viewer into PS definitely works as your images are always look as if you can step into nature. I started with LR, added in Google Nik Software and then went to CC where I have both LR and PS. So many options for us – look forward to seeing your workflow in person soon!