Most photographers would agree that whenever possible getting the shot right in camera should be the goal. However, there are going to be times when this is impossible or when mistakes are made.
Perhaps there is a distracting element in a scene that just can't be avoided, or the horizon is a bit crooked in an otherwise gorgeous landscape shot. Also, this tool is very useful for removing elements from a photo for the purpose of placing a new object in the forefront.
While not a perfect tool, the Content Aware Fill feature can save lots of time and effort. These edits which could take hours of painstaking work with the Clone Stamp and Healing tools previously, can now be accomplished in mere minutes.
How to Use Content Aware in Photoshop CS5 and CS6
I'm going to walk you through three different examples of how to use content aware fill, to give you a good sense of what can be done with this tool.
Example 1
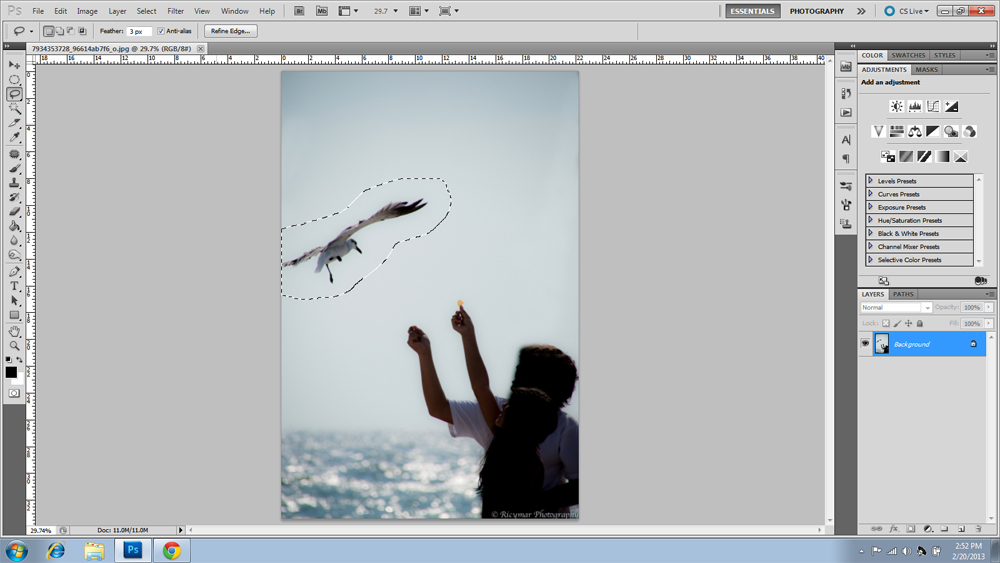
First, we are going to remove an unwanted element from a photo. I chose this particular photo since there is a very obvious subject that can be extracted from the background. Not all subjects are going to work well with this tool, but it is very good at replicating fairly predictable patterns.
You can download this photo from Flickr, or use a photo of your own to practice on. After practicing with a variety of photos, you will likely be able to predict which photos will work well with this tool. Sometimes you will likely have to use the more time-consuming Clone Stamp or Healing Brush tools.

Sand Key Beach Park by Ricymar Photography(Thanks Everyone!!!!), on Flickr
First. you will need to use a selection tool, such as the lasso tool, to isolate the area that you would like to remove. In this case, I am removing the bird from the sky. This will end up making the viewer wonder what these people are trying to feed, but it is a good example of what the Content Aware Fill feature can do.
If there are any shadows around the object that you would like to remove, be sure to include them within your selection so that all visible evidence of the unwanted element will be removed. That isn't an issue in this photo though.
Next, go to Edit>Fill and make sure to choose Content Aware in the drop-down menu.

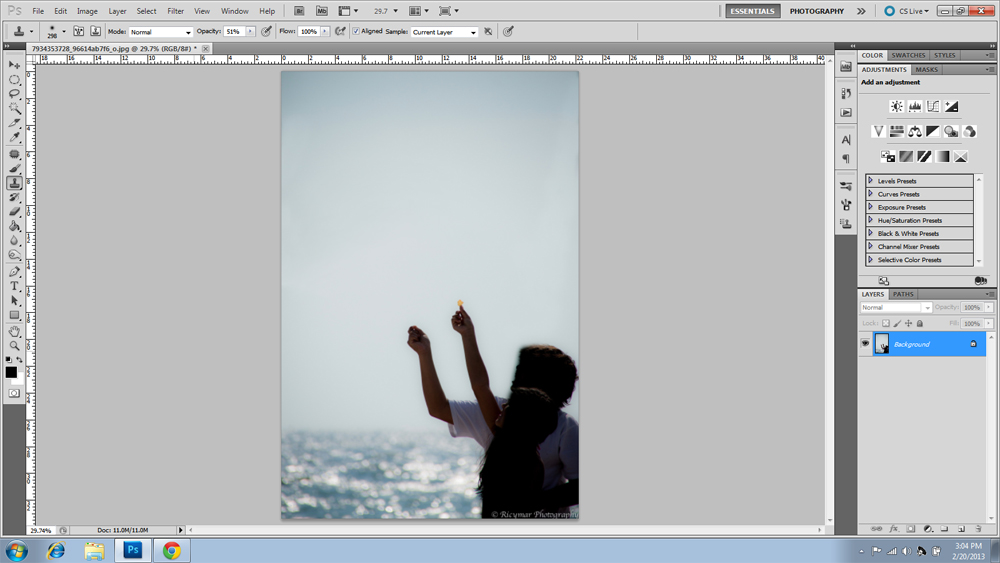
Now there is no evidence that the bird was ever present in this photo.
Example 2
In this photo, we are going to straighten the horizon line. Instead of cropping the white edges that are left after we straighten the photo, which might remove wanted elements, we will instead fill those areas in with Content Aware Fill.
You can download this photo from Flickr, or if you have a photo of your own with a crooked horizon you can use that one to follow along as well.
The first thing we are going to do is straighten the horizon. Select the ruler tool as shown here.

Draw a line across a small section of something that should be straight. In this case we will use the water line. Here is a small portion of the water line selected with the ruler tool.
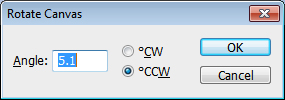
Go to Image>Image Rotation>Arbitrary
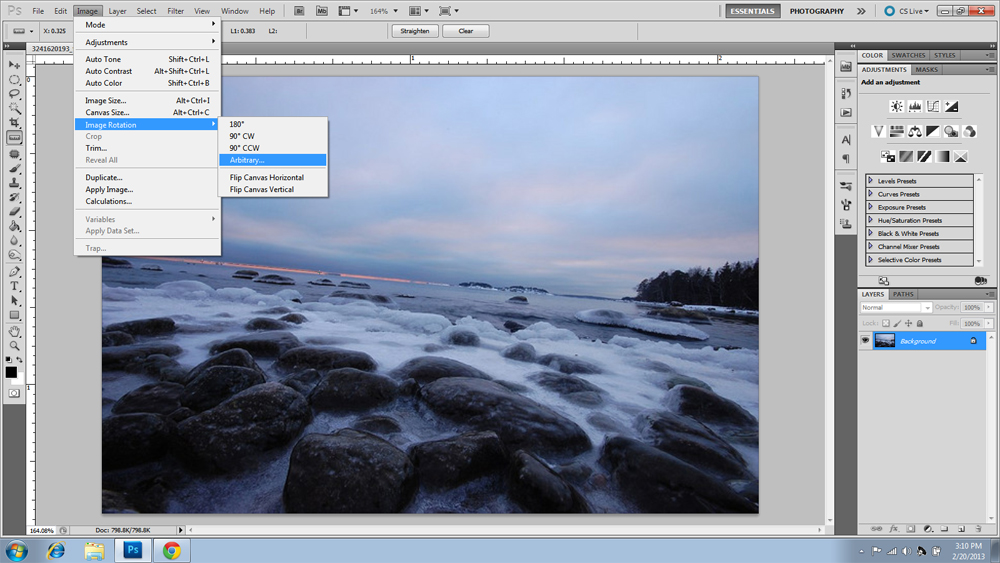
The angle and direction of the rotation will be automatically entered. Click OK.
Here is where the photo is at. The horizon is straightened, but there are now empty white areas around the image.
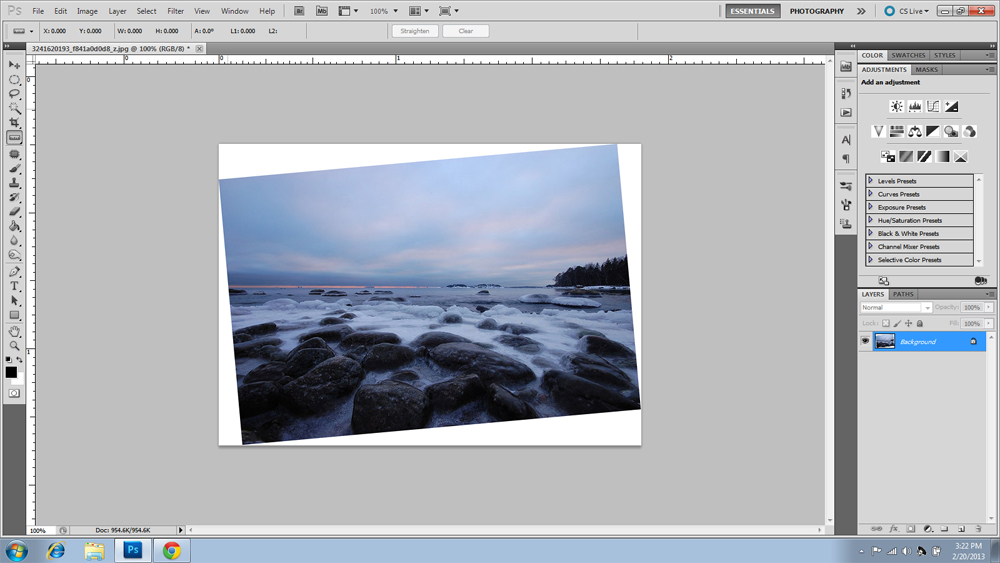
Use the Magic Wand tool to select the white area around your photo. In this case a single click was able to select the entire border. Sometimes, you may have to click each side depending on the placement of the corners. If so, be sure to select the multiple selections option as shown here.

Go to Select>Modify>Expand Selection. Choose a value between 5 and 15 depending on how large your photo is. This will prevent any edges from showing in your result.

Now go to Edit>Fill and choose Content Aware from the drop-down menu.

As you can see, Content Aware Fill did a wonderful job of filling in the missing details.

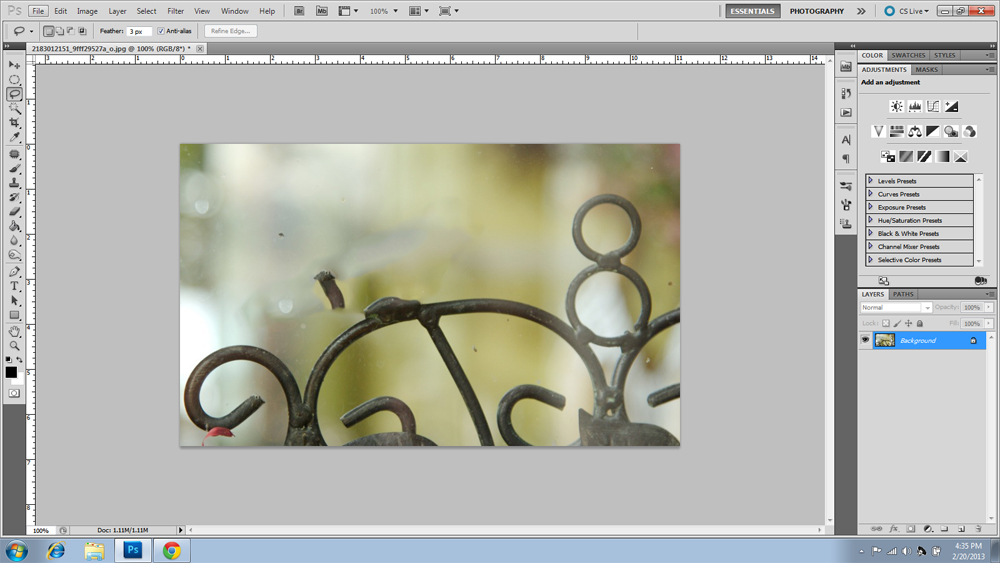
Example 3
In this photo we are going to remove the wrought iron bird from the fence, and then use the clone stamp and/or healing tools to perfect the removal. This might be helpful to someone who would like to replace an object or element with something different.
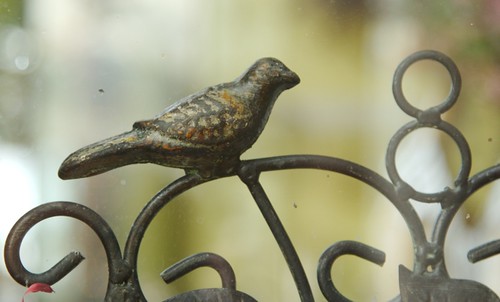
Wrought Iron Bird by kellinahandbasket, on Flickr
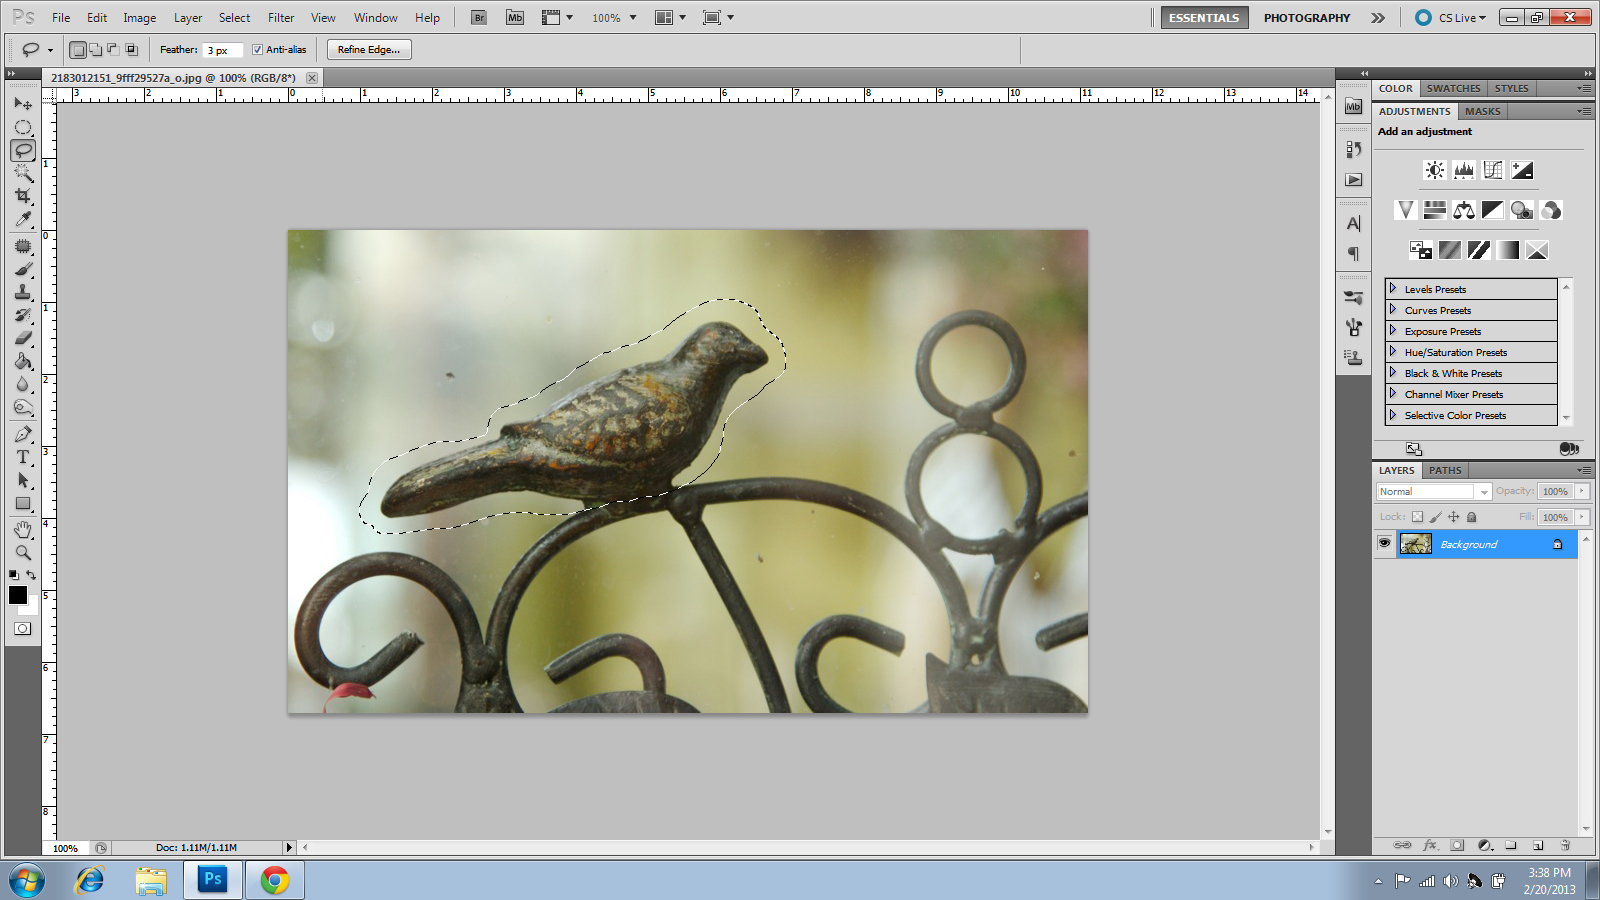
Select the areas to be removed with the lasso tool, making sure that the selection is a bit larger than the subject to be removed. Like the magic wand tool, you can select multiple areas by clicking the icon as shown here.

Here is our example showing the selected area.
As in the previous 2 examples, go to Edit>Fill and choose Content Aware in the drop-down menu. In this example, the tool did a pretty good job with filling in some of the content, but not so good with a few areas. At this point a bit of work with the Clone Stamp and/or Healing Brush tools will finish the job.
Here is the final result of example 3:


13 Comments
Thanks Rachael … a very useful set of worked examples
Thanks from me as well Rachael very good tutorial..
Recently I saw a drain pipe removed from a very textured cement (stucco) wall. It was important to have the selection around the pipe to extend beyond its edges and include some of the wall
Thanks Rachael for your very good and very useful tutorial. I find that this tool is powerful if used judiciously, as you point out. Sometimes when I remove or patch something, I have to use the clone stamp at various opacities to smooth the background bokeh.https://www.jdavecarrphoto.com/photo15156260.html
What a helpful article that is. I had heard of Content Aware fill-in but had not discovered how to use it.
You’re a lifesaver Rachel! Just started a new job last week and I had to look this up real quick, thanks for the easy and clear directions.
Thanks Rachel, I keep forgetting this one hehe.
Thanks so much……….
very clear and easy to understand…
it worked perfect!
Very helpful tutorial, but how to remove the sky behind the ironwork without erasing the ironwork itself in the photo?
Thks.
Joe
For that you’re gonna have to use the pen tool in order to separate the layer, not the content-aware fill tool.
When I select something and then click ‘delete’, it deletes right through the image. How can I set PS cc 2014 to give me the option to delete with content aware?
thanks for the helpful examples. CS6 is rather complex
I’m having a lot of trouble removing telephone poles and electric lines running in front of a house or along the side of a house. Please… can someone help with this? Everything I’ve used distorts the image. Thanks