Fascination with the night sky to some degree, is almost universal in human beings. Simply looking at the unknown has intrigued humans for millennia, something that has only grown stronger with better knowledge of the Milky Way and its billions of stars, not to mention other galaxies. Photographers are no different, which is why learning how to photograph the Milky Way is almost a rite of passage for those who are serious about the craft.
While the physical gulf between us and the stars is, in any currently feasible mode of manned travel, insurmountable, we’re generally content to simply stand out in the darkness and scan the skies unassisted by anything fancier than a basic telescope. Other than that, we have historically relied on all the breathtaking photos of space provided to us by the experts.

If you want to take your milky way photography to the next level then you will probably want to go beyond our short blog post and into the minutiae of shooting and post-production. Take a look at our Milky Way Magic Toolkit.
But we no longer have to leave all the fun to full-time astronomers; given the wide accessibility to and technological sophistication of digital DSLR or a mirrorless camera, anyone can photograph the universe. And one of the easiest astrophotography subjects to capture is also one of the most impressive: the Milky Way Galaxy.
Let's look at exactly how to capture the Milky Way for stunning results.
Click here to download your free Milky Way Photography Cheat Sheet so you can get great shots like these.

So, you want to capture photographs of the Milky Way?
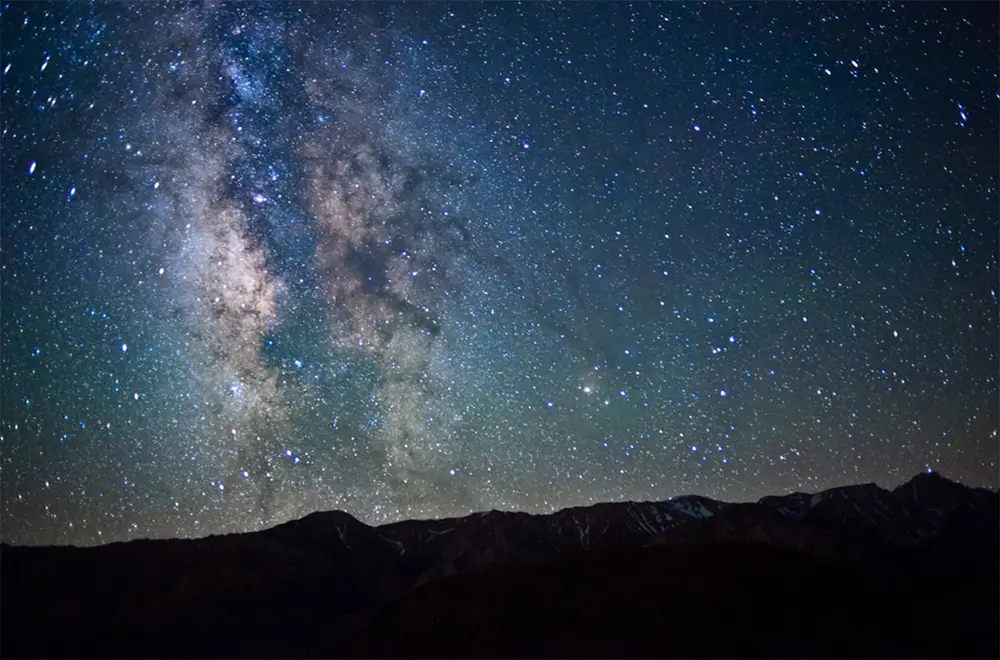
Obviously, we can’t photograph the whole galaxy since we live inside of it; that famous white streak that dominates so much of the night sky is actually the light of billions of stars whose distant light, from our point of view on earth, seems to blend together, sporadically obscured by dust and gas clouds. In reality, all we are seeing is a small, edge-on view of the galaxy’s plane. Small, but impressive.
Astrophotography is a complex genre and it is something that can go into the complexities of using telescopes, trackers and specialised cameras like the CCD camera and other expensive gear.
In this article, we will look at the basics of how to capture a photo of the Milky way using a digital camera and lens that you already have in hand. This could be a DSLR camera, mirrorless or another camera that allows for manual exposure. Image quality really matters in astrophotography!
Note: If you want to shoot the best details of the Milky Way, having a good lens for astrophotography will be great when you gain some experience or wish to take up this genre in particular and so is a camera sensor that responds well to low light.

Here’s how to photograph the Milky Way for yourself in 12 steps!
- Find a dark sky
- Know when and where to look
- Use a digital full frame camera with high iso capabilities
- Use a fast wide-angle lens and choose the right focal length
- Use a tripod
- Use live view to focus manually and rotate or move the focus ring till you get pin sharp stars
- Start with iso 3200, but use a lower iso where possible
- Set a long shutter speed
- Set a wide-open aperture to get as much light as possible
- Compose your shot
- Get a satisfactory exposure for the best image quality
- Post-process the shot
Let's look at each of these steps in more detail with tips on how to photograph the Milky Way!
1. Look For Dark Skies
Just waiting until nighttime won’t do. A dark sky free of light pollution is the first and most important requirement to even seeing the Milky Way, let alone photograph it. If you live in a big city, it can be difficult to see the Milky Way because of light pollution and poor air quality. Be prepared to travel a considerable distance (several miles / hours depending on how large the city is), otherwise, you run the risk of city lights making their mark in your shots.
Remote locations like national park areas, forest areas and other camping sites can be great for dark skies. You can make use of the Dark Site Finder website or Light Pollution Map or apps like Dark Sky Map to find dark areas near where you are.
The moon can have a similar impact on your Milky Way photos; shooting during a full moon will wash out your images. Try to shoot during a new moon or on days when the moon rises really late.
2. Know When And Where To Look To Capture Milky Way Images
The part of the Milky Way that is most easily visible to the naked eye, the Milky Way Core, isn’t visible all year round, especially for those in the Northern Hemisphere, where February through October is the optimal time or the Milky Way season, but the best months will be between May and August when the Milky way is high up in the sky. You will find the Milky Way in the southern half of the sky, rising from the east. Here is a link to download the Milky Way Calendar if you are interested.
Residents in the Southern Hemisphere may have a slight advantage in this regard, as the galactic center (central parts of the Milky Way) can be seen overhead.
In other seasons, the core of the Milky way will not be visible, but you can still photograph the fainter parts of the Milky Way if you have clear sky and atmospheric conditions.
If you are unsure of where and how to locate the Milky Way in the night sky, we have discussed a few apps later in the article that will help with locating any object in the night sky including the rising and setting time and also for planning a shot of the night sky against a foreground using augmented reality features.
3. Use A Digital Camera With Good High ISO Capabilities
Camera settings matter a lot! You’ll be shooting at night with very little available light; you want your camera’s sensor to be able to handle the shooting conditions without introducing an excessive amount of noise.
Full-frame cameras (DSLR or mirrorless camera) are preferable but certainly not a necessity for shooting Milky Way. Recent cameras perform very well in low light and there are a lot of affordable ones to choose from if you are a beginner photographing the stars.
4. Use A Fast Lens For Milky Way Photography – Wide Focal Length Preferrable
You should work with a lens with a maximum aperture of at least f/2.8; the faster the better. It’s not that you’re totally out of luck if your fastest lens is f/3.5 or so, but you’ll have more of a challenge on your hands since the lens won’t be able to gather as much light and you will need to increase the iso.
The same principle applies to focal length; go as wide as you can preferably in the 14 – 24mm range. You may be seeing only a fraction of the Milky Way, but it’s still monstrous in size. The wider your lens, the more of it you can capture. Zoom lenses like the 15-35mm f/2.8 or fast lenses like the 14mm f/2,8, 20mm f/1.4 or 24mm f/1.4 are good choices.
Always experiment with focal length – there is no one right solution! Also, it's good if you can use a full-frame camera for this type of photography.
5. Use A Tripod For Long Exposure
This really isn’t optional. Bells and whistles are nice, but sturdiness is your number one concern. You will be shooting long exposures of about 15 seconds and longer, so a sturdy tripod that can hold the camera-lens system without any shake, even in slightly windy conditions, is a must for great images of the Milky Way. A remote shutter release or a cable release will help with further minimizing camera shake.
6. Use Live View And Focus Manually For Milky Way Shots
When doing night photography, to avoid the headache of trying to focus at night in the dark, use your camera’s live view feature to zoom in and manually focus on a bright star. Alternatively, you could use the distance markings on your lens (if it has them) to set hyperfocal distance.
7. Camera Settings – Start With ISO 3200
Referring back to the first point, a high ISO is essential to collecting enough light to render a bright image of the Milky Way. Under typical conditions, ISO 3200 is a good starting place. Based on how well this plays with other Milky Way camera settings, you can go higher or lower from there. Sometimes depending on the camera lens combination and atmospheric conditions, you may have to go up to iso 6400 to capture as much light and on a camera with better performance, even a lower iso 1600 may give an overexposed shot.

8. Set A Long Shutter Speed
Shutter speed is one of the crucial camera settings in astrophotography. You need a longer exposure time for Milky Way images and this is how you will capture more light and create a sufficiently bright exposure. There is just one problem, though. The planet doesn’t care if you’re new at astrophotography; it’s going to keep on rotating, which means if you leave the shutter open for too long, you’ll end up with star trails. There’s nothing wrong with star trails when that’s what you’re aiming for, but they aren’t really desirable for photographing the Milky Way.
To get pinpoint stars, use the “500 rule”, which calls for you to divide 500 by the focal length of the lens you’re using. So, if you have a 24mm lens on a full-frame camera, you will set your shutter speed to 20 sec. (500/24 = 20.83). If you’re working with a crop sensor camera be sure to account for the crop factor (typically 1.5 for Nikon and Sony, 1.6 for Canon).
As an example, using the same 24mm lens on a Nikon crop, you’d end up with an effective focal length of 36mm (24×1.5 = 36). Applying the 500 rule will yield a shutter speed of 13 sec. (500/36 = 13.89). There are those who debate about whether to use the 500 rule or the similar 600 rule; without delving further into the mathematics of it all, it really is more a matter of visual perception.
In short, stick with the 500 rule, especially if you intend to make poster size prints. If, after you’ve gotten more comfortable and done some experimenting, you find the “600 rule” works better for you (should be fine for web images) then definitely go with that.
Always take a test shot, check if the exposure settings are good and there are no trails. With experience, you will learn what settings work best for astrophotography for your photography gear.
Recent cameras with their highly developed sensors may sometimes require a more advanced calculation for exposure time called the NPF rule. You can read more about this rule in detail here and Photopills app allows you to make this calculation easier.
9. Set A Wide Open Aperture
No camera settings are complete without the right choice of aperture! Remember, it’s all about collecting as much light as possible; depth of field isn’t the primary concern here. In case of any significant softness, you’ll want to stop your lens down. This is why it’s so important to use a fast lens in the first place; if you know your lens is unacceptably soft at f/1.4, stopping down to f/2 will sharpen things up without having a severe impact on the lens’ light gathering ability.
10. Compose Your Shot
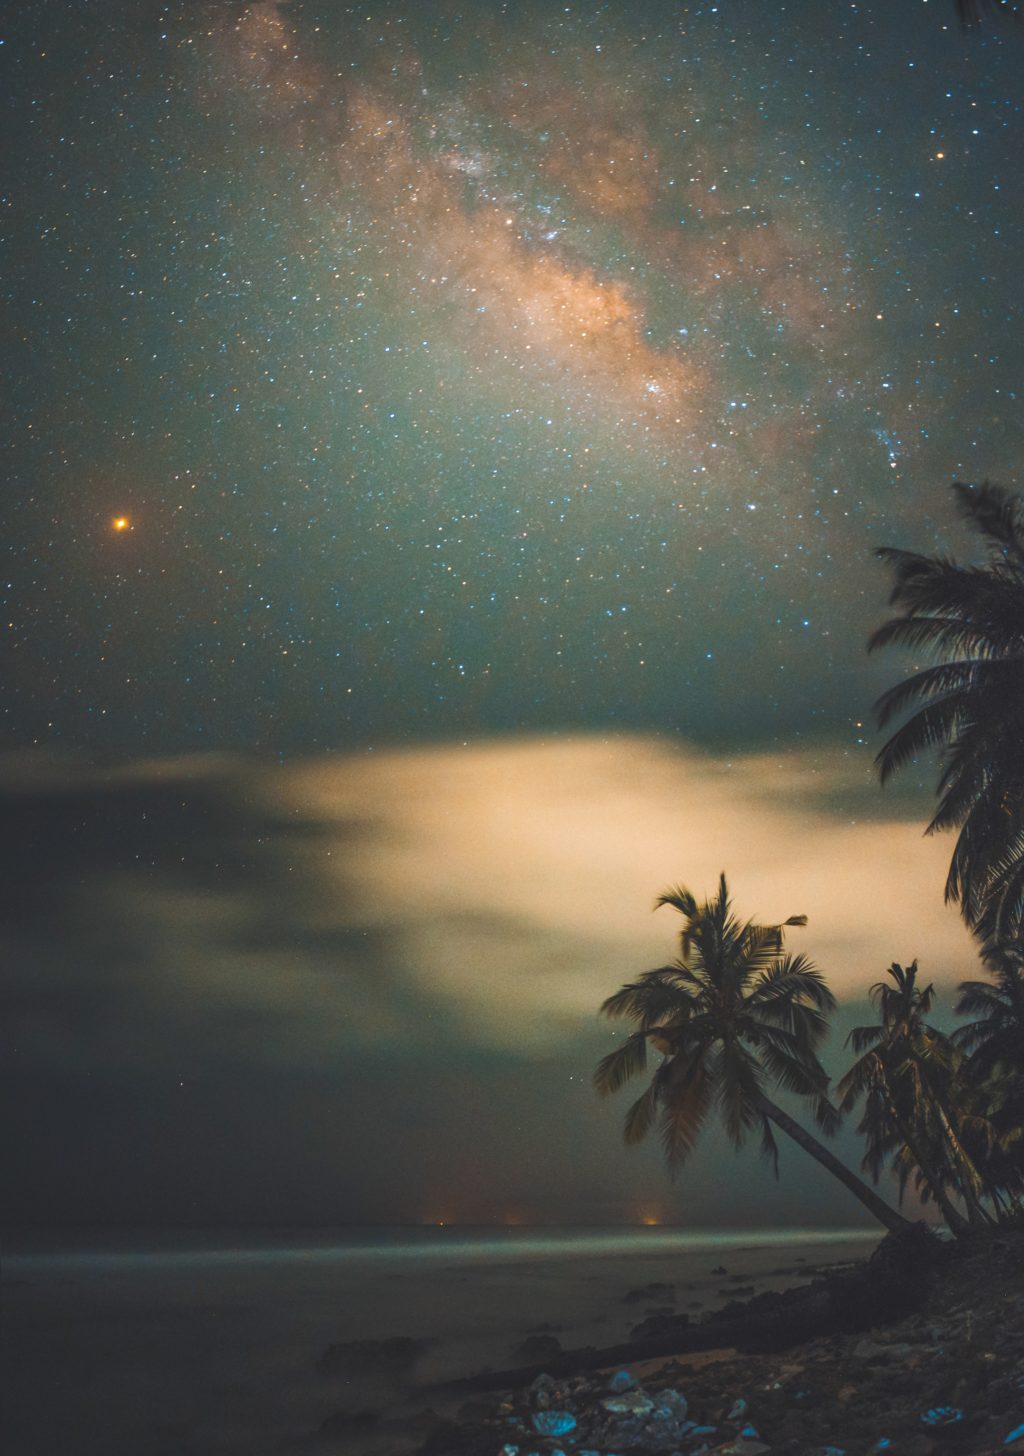
Once you are confident about all the camera settings it's time to press the shutter button. There’s no right way or wrong way to compose your shot, but you can create a sense of depth by framing this as a standard landscape shot with the Milky Way serving as the background. Just because it’s dark out doesn’t mean you should forget about the foreground, though; you can add interest to your scene by including hills or mountains, trees, rock formations, or even a person. Experiment all you want.

11. Get A Satisfactory Exposure
It’s very likely that your first shot won’t be an exposure you’re satisfied with (if you’re not happy with the focus or composition, adjust those camera settings before moving on to worrying about exposure). If the exposure isn’t “right,” you’ll have to identify the problem and work from there. When you notice there’s too much noise, simply decrease the ISO.
Finally, when you spot the shot is overexposed, check your surroundings for light pollution; decrease shutter speed; stop down the lens; or decrease ISO. If it’s underexposed, make sure you’re using the widest aperture on your lens; increase shutter speed (but beware of star trails forming); increase ISO.
12. Edit Your Milky Way Images
There will be a lot of variation at this final stage and, again, there is no one right way to handle the post-processing of your shots. Here are some steps that you can follow:
- The two most important things you can do to make post-processing a little easier is to shoot raw and get the best exposure you can in-camera.
- You may need to apply some sharpness and noise reduction. According to some sources, the color temperature of the Milky Way is around 4840°K; if you find it too much on the yellow/orange side, adjust the white balance until you have a neutral scene.
- You will definitely need to increase contrast; it’s okay to be a bit heavy-handed here, so long as you’re not losing shadow detail.
- If the photo editing software you are using allows curve adjustments, make use of it, as you can be more precise with your work. The curves tool also allows you to bring out more details and colours in the image.
- Assuming you got a good in-camera exposure you shouldn’t have to play with the exposure slider too much.
- Work with the colours in the frame. You can even make use of the HSL panel to work on specific colours.
- Use the adjustment brush tool to work in specific areas that need local adjustments. For example, bringing out details in foreground areas.
- Sometimes you may have to remove plane or satellite trails in the image or even other unwanted objects. Make use of clone or spot removal tools in your post-processing software for these tasks.
Image Blending When Post Processing
In order to get perfectly exposed foregrounds or sharp foregrounds and backgrounds, a few types of blending methods can be followed when post-processing. Of course, you will need to take the shots separately when photographing the Milky Way.
- Blending Images Exposed For Foreground and Sky: One way to get well-exposed foregrounds in a Milky Way shot is to take 2 shots and blend them when post-processing. One shot exposed for the sky and another for the foreground. Then blend them so you get the details in the foreground correctly exposed. Some photographers even blend images taken at different times of the day (foreground during twilight and then the sky exposure at night) in the same location.
- Focus Stacking: If you are looking for sharp details of all elements in the frame right from the foreground to the background, depending on how close the foreground elements are, you will need to go down the route of focus stacking. Take multiple images by shifting the point of focus slightly starting from the foreground and then moving your way back till you get the focus sharp on the stars/Milky Way. Stack these images when post-processing. Here is an article that explains focus stacking in detail.

Some Quick References For Milky Way Photography
How To Find Or See The Milky Way
Before you learn how to photograph the Milky Way, you need to be able to find it. To locate the Milky Way, you need to be in a location free from light pollution due to the city lights, you need to have a clear sky. May to August is the best time to photograph the Milky Way. A very easy way to locate the Milky Way is to use an app that can accurately show you the location of the Milky Way at any time or tell you at what time the Milky Way rises and sets.
- The Sky Guide app for iOS gives an accurate location of the Milky Way and alerts you of astronomical events.
- Sky View Lite is a free app to locate the Milky Way and is free for Android and iOS.
- For Android users looking for a good app, Star Walk 2 is the one to go for and it is free. The Star Walk 2 lets you see the position of the milky way for future dates and times which is a good feature of the app.

Here are some more tips to photograph the Milky Way!
Night Sky Photography Settings:
When photographing the night sky, there are a few rules to follow based on the camera that you use, to avoid star trails.
The most common one is the 500 Rule where you divide 500 by the focal length of the lens you are using and if you are using an APS-C sensor, take into account the crop factor.
The various rules used for calculating shutter speed for star trails are below:
Other settings that you need to take care of are:
- Have the camera in full manual mode on a sturdy tripod. Turn off image stabilization.
- Have a wide-angle lens between 14mm to 24mm to get a good view of the Milky Way in the frame along with the foreground. Of course, you can try to use a different focal length if you want to achieve a different effect.
- Always shoot in raw format.
- Set the aperture to the widest – at least f2.8, but if you have only the basic lens, use it at 18mm / f3.5.
- Start with the lowest ISO possible, about 1600. Depending on the result, you can decrease further or increase the ISO up to 3200, above which the image quality can start to deteriorate. Some older cameras or atmospheric conditions may require iso 6400.
- Put your lens on manual focus and focus on the brightest star in the sky. Zoom in on live-view and turn the focus ring till the star shows up as a bright point on the screen.
- Calculate shutter speed based on one of the rules above – 500 rule, 600 rule or the NPF rule.
- Use the mirror lockup feature if using a DSLR to avoid blur due to camera movement.
- Turn off long exposure noise reduction because an amount of time equal to the exposure time will be taken by the camera for this process which means the photographer will have to wait between each shot which will not be practical. You can reduce noise when post processing.

A Good Starting Point For Your Night Sky Settings:
This is a bit of a rule of thumb that photographer Jenn Cooper from the Canon Collective mentioned in one of her live courses. It is not meant to be set in stone. It is a good starting point for your camera settings, from which you can then make adjustments relevant to the specific situation.
| Camera Function | Setting |
| ISO | 2500 |
| Shutter Speed | 25 sec |
| Aperture | f/2.8 (or as wide as possible) |
If you use that setup, the first thing you will want to change (assuming it doesn't quite work for you) is the ISO.
How To Photograph The Milky Way:
In order to photograph the Milky Way, you need to be in an area where there is the least light pollution. Websites like Light Pollution Map and the Dark Sky Finder can be used to find dark locations nearer you.
To take a picture of the Milky Way:
- Look for clear skies and keep an eye on the moon. A new moon or a night when the moon is not up in the sky is the best.
- Have the camera on a sturdy tripod and turn off image stabilization.
- Use manual mode to have more creative control over settings.
- You need a fast and wide-angle lens with focal lengths between 14mm to 24mm and aperture at least f/2.8, to capture a wide scene of the foreground and the sky and photograph the Milky Way at lower ISO values.
- Manually focus the lens (as you do not want to lose focus each time you take a shot) on a bright star till it is point sharp. If you want to include a foreground, you can focus one third into the scene.
- Use a cable release one and mirror lockup feature for DSLRs, as this can help avoid blurry images due to camera shake.
- Use apps like the Sky Guide app or Star Walk 2 to locate the Milky Way if you are having difficulty locating it in the night sky.
- Calculate the maximum shutter speed based on the 500 rule or NPF rule in order to avoid trails as trails are not desirable when photographing the Milky Way. If you will be shooting for web images, you can use the 600 rule.
- Set the white balance tungsten or daylight to get the right sky colours, or even set to auto. You can change this while post-processing as you will be shooting the Milky Way raw.
- If your foreground does not have enough light to be illuminated properly for right exposure, you can use a flashlight to light paint foreground objects. These processes take some practice and patience to get perfect results and right white balance.

Here are some apps to calculate shutter speed for Milky Way photography:
- 500 Rule Calculator for iOS
- 600 Rule Calculator for iOS but this calculation could create some trails. So it is better to use this setting when shooting for web images.
- Pin Point Stars for Android helps to calculate the best exposure times for star and milky way photography
Find more star photography dos and don'ts here!
If you want to take your milky way photography to the next level then you will probably want to go beyond our short blog post and into a detailed guide like Milky Way Mastery by Josh Dunlop. Take a look at it here.
As you can see, you don’t need a whole lot of specialized equipment in order to be successful in astrophotography. In addition to having a passion for the subject, you’ll certainly have to invest a lot of planning, practice, and patience. The payoff, however, will be worth all the time and effort you expend.
Milky Way Photography Gallery
There's no doubt that Milky Way photography is among the most striking among the various subject genres and hopefully you have a much better handle on shooting it now. But what makes a good Milky Way photo shoot?
Well, a lot of that is up to personal taste. For many, it's a case of “you know it when you see it.” So with that in mind we decided to put together a small gallery of Milky Way photography that we think really has that wow factor.


94 Comments
How many photographs do i need to click? In other words, is stacking required to photograph milky way galaxy?
According to my instructor, one shot will do the job 🙂 No stacking needed.
Stacking can greatly reduce the noise in the image. Especially if you shoot at ISO 3200. I want to write an article on that and check out the results with my own eyes. Stay tuned.
By the time you get onto the next photo, the stars would have slightly moved some more after each photo. Can always give it a go and see how results go 🙂 No rules in photography really.
With a 16-35mm f4 and a Sony A7s ,do you think its possible to shoot the milky way? Especially since the A7s has a very high ISO capability, will that compensate for the lens’ aperture of f4?
No it shouldnt matter. The A7s has fantastic low light
Wait what, isn’t that the zeiss lens? It should be f/2.8, not f4. F4 is just the name right?
It is 16-35 f/4
I have shot the Milky way with a crop sensor Nikon and a 8 mm f3.8 fisheye so you’ll be fine. Just gotta bump up your ISO.
There’s a Nikon Nikkor 16-35mm f/4 lens. Great lens, but I’ve now replaced it with 14-24 & 24-70mm lenses.
Actually Sony makes 2 Fe 16-35mm lens. One is an F4 and the other an F2.8. Both are exceptionally sharp and work for telephotography.
Out of curiosity, are you using two seperate images for the “final product”? As in, is there one exposure for the milky way, and another for your foreground interest? If so, what are you using to put these images together? I presume PS?
That’s one method of doing it. However you can also capture it all in one shot. During the long exposure you can “paint” the foreground interest using a torch or some other light source during the exposure. The amount of time you need to paint the interest for will vary on the power and size of the light source as well as to capture the desired look you’re after!
Hi All, I live on the east in PA. where do I look for the milky way ?
Awesome info , I’m going to try it !
Up !
We all live within it 🙂 Just look up. But you need to be in a very very dark area with as little city light as possible.
there is an app for your mobile phone, SkyGuide for iOS and Stellarium Mobile for Android.
There is an app for your mobile phone, Stellarium Mobile for Android and SkyGuide for iOS.
I use StarWalk. I love it!
Texas. Wyoming. Utah…
Get the app on your phone called stellarium. This will show the location and movement.
Look to the south in the summer months
If you live in Pa, go to Cherry Springs State Park…. It hsa the darkest sky on the east coast. Amazing seeing all the stars and a great place to take photos of the night sky.
This is a great article, thank you. Can you recommend some sites that will tell what time of the night we can spot Milky Way in which lat-log coordinates?
Download Star Chart app from Google Playstore. It will give you real time details of the sky.
Hi All
Wow great photo’s,
Ok, heres my issue,
I only have a bridge camera, tiny tiny sensor,Fujifilm Finepix S8200, max time is 8 seconds however I can go to iso 12800 (noisy). Will I manage a milky way image with this camera by stacking a number of images?
If I can access dark skies?
Im unable to purchase a dslr due to disability.
Looking foreward to some excellent advice
Good one! but..Where do i go to take milky way photographs?
Please reply!
Find the darkest areas here!: https://darksitefinder.com/maps/world.html
Hi, i have a bridge camera, Nikon P510, is it capable to take good galactical shots and what shall be the recommended settings, if possible?
Thanks in advance
Hi i have sony A7ii with both lens FE85 F1.4 and FE16-35 F4. Which lens should i use to capture milky way?
You need a wider lens so that you can get the sky and foreground. so the 16-35 f4 will work. Just don’t forget to raise your ISO.
If you know how to make panorama pics with stitching multiple images together you can get a great shot with the 85, but it would take about 10 frames across, and at least 2 frames high, for a 20 shot image.
can we do it with a zoom lense?, if i got a70- 300mm lense with f/5.4 is it possible to capture such pictures?I have Nikon D5200
You can get a section of the Milky Way with the lens set at 70mm, but you’d have to set your shutter at around 7 seconds… which means you’d need a really high ISO with at f/5.4. Not sure I’d take the time with a zoom lens. Maybe you can rent a wider-angled lens.
Great article! Thank you so much for the info!
Hi all,i live in indonesia. Especially in Ponorogo,east java. In my town there are many spot for best milky way. So,this the great article for me,Thanks
I have a canon 550d with 10-18mm lens what’s the best setting for taking a picture of the galaxy
I’m planning to take photos this week of the Milky Way. I have a Nikon D300s. Going to go with the highest ISO ~3200 and a shutter speed of about 30 seconds using my 10-20mm Sigma F2.8 at 10mm and F2.8. I’ll dial up or down exposure comp first if it’s completely black outside (I live in the country and there is zero light pollution at night except for the wayward neighbor who may forget to turn off the driveway light). If the exposure comp doesn’t fix any issues then I’ll play with the ISO. To actually find the Milky Way I recommend getting the app SkyWalk2 (you’ll need to get the whole deep space package but it’s only 2.99 and worth every penny). The Milky Way IS THERE! it’s extremely difficult to see in most places though without some PS or LR assistance unless you are looking at the most prominent part of it (the widest cloud region). You could also just look for the constellation Sagittarius A and get the general location since this constellation is at the heart of the Milky Way. Good luck. (Oh I plan to shine a flashlight on a tree nearby to get something in the foreground
Thanks Toni for the tip about Sagittarius. I tracked the constellation in Stellarium and it helped me understand some things…
I tried yesterday to photograph the milky way with my new Batis F/2.8 lens but it was a failure (moon too bright and hardly and milky way). I got much better results 2 months ago with my 16-35 F/4. Now I understand that in October I was lucky enough to have a better slice of the milky way in the sky, and also a less disturbing moon. Will have to try again.
A trick that helps get sharp pinpoint stars is to focus the camera on a distant object during daylight hours using auto focus. Tape down the lens to keep it from moving and switch to manual focus. Now you’re ready to shoot at night without fussing. If you’ve forgotten to do this during daylight hours, a magnifying lens/hand lens/jewelers loupe helps focus using live view.
AF-S DX NIKKOR 35mm f/1.8G is the lens I am using.keep getting blurred images.the camera mount is a Nikon D5000 ,i cannot seem to go below Fstop 4 ,I have camera set at ISO 3200 and have tried iso 1600 with no success,exposure is at 25 sec.Any advice would be greatly appreciated.I am just a beginner.
Hi ! try cutting the shutter speed down to 10 secs. to compensate for loss of time bump up ISO to the extent you can live with .
Cheers
Will a nikon d70s work for this with a 18-70mm lens work for this? I know this is an older model and wodering if it will work. Thanks!
I have a 2.8 lens but my camera has a ISO max of 1600. Can I be successful?
What camera do you have that only goes to ISO 1600?
But yeah, you should still be able to get something with that.
Does anyone have tricks to get good focus on foreground objects at night? I can get the stars to show but it seems like my objects are out of focus
You should try taking more than one shot, one with the sky in focus and one with the foreground in focus. Then you should combine the two images in photoshop.
What type of lens would be best for this? None of mine can get what I need (I have a Nikon D5300).
The best lens for this is the wide angle Nikon 10-24 zoom. It is pricy at $800 but you can also rent them for the weekend pretty cheap.
A Great Post!
I hope I will be able to capture it with my Leica v lux 114.
I have Pentax apsc with a 16-85mm f/3.5-5.6. Can I compensate for the f/3.5 by using exposure compensation? The camera also has a gps and astrotracer capability. if I use that, what exposure would you recommend?
I will take photos of the Milky Way with a D500 with a Nikon DX 17-55mm f2.8 lens. Since I am using a DX lens with a DX camera, do I still have to account for the crop factor when figuring the length of exposure time?
Yes, multiply by 1.5 to get the actual focal length.
No need for crop factoring. Crop lens on a crop body is a wash. Look up what the field of view is for that lens. You are good to go.
I have a Canon T5i Rebel and a 50mm. How would i be able to take such beautiful pictures with this camera.
It’s almost like some didn’t read the article, it tells you how to take the pics and what settings to use. If you can’t figure that, go practice and read some more about your camera. I’m not a professional, hence why I’m reading this, but I understand my gear.
Hi I have canon 70d and tamron 16-300mm f 3.5. Will I still be able to shoot milky way.not sure about my cameras low light capabilities
Of course you can Malith, give it a try at 16mm f3.5.
I am going to Phoenix, AZ and Sedona the week of June 19th. The only camera I have aside from my phone, is a Cannon SX530. Is this camera going to be able to capture the milky way? I am not super familiar with how to use it other than the auto feature.
Thank you.
Hey Sara,
I think you will be able to get a decent shot of the milky way after looking at the camera specs, but remember you will need a sturdy tripod (use that timer delay to reduce shaking if you don’t have a remote shutter release), longer shutter speed (appx +/-20 secs), max out your aperture (f/3.4), zoom all the way out, higher ISO (before you get too much graininess in the picture), and I think you will need to post process a bit more. Also, not stated above, if your camera has high ISO noise reduction capability and long exposure noise reduction capability, turn those on.
Also, be aware that the moon will still be about “1/2 size” as it is waning during the evening of the 19th. The new moon (no moon visible) will be on the 23rd and so your best bet is to shoot on or close to that date. If you shoot on the 19th, the moon will rise at 0152 in the am. Your window will be from 2230 – 0030. Here’s a link to moonphase/time data…. https://www.timeanddate.com/moon/usa/sedona
Lastly, I recommend using PhotoPills App on your phone/tablet. You can see all data for the milky way ( as it has a planner). You can figure out at which bearing the milky way will rise, its path over time, and it’s orientation.
Sorry, that’s a long answer for the SX530…haha, enjoy your time and best of luck-
Las
I wish………..
Post processing is just impossible for me to learn. So damm complicated and confusing.
I am forced to shoot exclusively in jpg and I know I am losing a lot but all I get from a computer is error messages ????
Tried many times to follow tutorials and still end up with nothing but problems .
Hi Paul, try following video tutorials and learn along. Post processing is not impossible. Once you get the hang of it, you’ll love it. If you are getting error messages, check for problems with the software. You can also ask questions at the forums about any problems that you are facing. All the best!
I have D5300 with a kit lens 18-55mm 3.5f and a 50mm 1.8f lens.
Which lens is best suited for milkyway?
I am reluctant to use the kit lens as its inferior compared to the other.
Please advise
Hi Soumyo, in order to get a decent amount of the Milky way in the frame, you will need a wide angle lens. Of course the 50 mm is faster and has a wider aperture, but with an APS-C sensor, you will not get much of the milky way in frame. Try your kit lens. You can get reasonable images at 18mm f3.5. Try increasing the ISO a bit and experiment with various ISO and shutter values. Try and stay as much with the 500 rule, or you may start to see star trails. Hope this helps.
Can I shot in my sony a6000 with kit lens ?
Hi Nataneal, yes of course you can use the kit lens. Make sure that you are in a dark place with very minimal light pollution. Use the lens with it aperture wide open and try bumping up the ISO a bit if you need to.
Thank you for this quick tutorial. I took some incredible (for me) pictures of the Milky Way tonight using a Sony RX100-V (a fully manual point and shoot). The 500 rule was really key in helping me sharpen up my pictures.
hi, i have sony alpha 58 with lens sam11 18-55mm/ f3.5-5.6, it is okay to take milky way with this lens, because i try to capture in low light but having problem when i cannot press the button, maybe problem with the focus
In low light, the camera will struggle with focus. Try manual focus and focus at a distant light or a bright star. Leave the focus this way and then try taking the picture of the milky way. That should help resolve the issue hopefully.
You don’t necessarily need an ISO of 3600 or higher. I tried ISO 1600 and the photo turned out perfectly fine as well. Of course, if that doesn’t worker you can always go higher.
If you’re working with a crop frame and using crop frame lenses do you still need to figure in the crop factor when using the 500 rule? I understand if I was using a full frame lens I’d need to figure the crop factor.
Will an 18-200 nikkor lens on nikon D7100 be good in shooting the milky way?
This was mentioned in some of the answers, but since they’re buried way back, I want to repeat that if you’re just starting out trying this stuff (as I was a year or two ago) and you don’t feel you have the right lens (an ultrawide is best), you can and should RENT such a lens for your first efforts. I have found many/most camera shops will give you a whole weekend (starting late Friday with return expected Monday morning) for the price of one day. In my case, that’s run about $40-$50. Well worth it for a weekend of shooting (regular stuff/landscapes, too), and an economical price to play around/test/see how good you are at shooting the Milky Way. My suggestion here in Southern California? — Joshua Tree National Monument — huge, wonderful, and stars that will knock your socks off! (And it’s open all night.)
Gtreat article, Jason. About 12 months ago, one of my camera stores arranged an evening photo shoot at the State’s Observatory, for exactly this purpose. Never having done anything like that before, I went along. The experience was extremely enjoyable – the group were very pleasant people, all pursuing a common interest (photography) – and the night was a great success.
When I was a kid, I can remember spending many happy hours lying on my back on the tennis court, staring at the night sky. We didn’t have satellites shooting all over the place, of course, back on those days – but one thing we still had was a comparative freedom from pollution from other lighting. So it was still possible to get a good view of the night sky, from your own backyard. These days, you need to get out of the urban environment and find a nice dark spot. The Observatory was a perfect choice, it was deliberately located away from the city and – to be quite sure – in a valley, shielded from any light pollution from the city or anywhere else by the range of hills surrounding the Observatory.
You are quite right in emphasising the need for a fast lens and a high ISO – otherwise, when you put the photo up on the screen, you will find that all the stars have ceased to be round and have become luminous sausages instead. Which is a bit disconcerting.
Figuring what exposure is basically going to end up as being trial and error – but it only takes a shot or two, and you can nail the exact right exposure.
One thing I did find annoying – I was using my Nikon D810, and for some unexplained reason, Nikon did not fit that camera with a tilt screen. I think that was a serious mistake on Nikon’s part – one they’ve recognised and dealt with, in the D850 – but why the hell should I lash out with yet another $5 grand, to fix a problem they created? A tilt screen is a definite advantage, and leads directly to the possibility of using live view – and reduction in things like mirror slap that could cause camera shake. MOST important, when the object of the photo is millions of miles away.
Thanks for all the tips!!
Thank you ever so much for a valuable article. Appropriately formulated for a novice. Very helpful.
Concise and to the point. I plan to try tomorrow night.
Thank you very much for a valuable article. Just learned about the 500 rule, very helpful.
HOT TIP: If you’re bad with the calendar (like I am) and don’t even know where to look in the sky simply grab one of the free Sky Map apps on iPhone (Sky Guide) or Android (Google Sky Map) and type “Milky Way” into the search field.. Then just point your smart phone at the sky and watch as it shows you where the Milky Way is in real time! It’s like AR! (augmented reality). Then you’re free to grab your camera (or smart phone with pro camera app).
Thanks for a really good guide
I’m in the UK and I’ve had a few goes at shooting the Milky Way. I am at 51 deg N so the sky never really gets dark from about April to end of August. The sky may look dark to the south, but you end up with a photograph of stars in a blue sky. Interesting, but not what you want. I went out with my grandson in the middle of September a drove for ten miles to get away from the city lights, set the Nikon D90 with the standard lens to 18mm, ISO 3200 and 30′ shutter. I was shocked to see the Milky Way on the LCD screen I changed location and changed the shutter setting to 20′ and was well pleased with the results, but there was still a bit of light pollution. I’m hooked and the sky looks good for tomorrow evening so we’ll have another go. There is a known dark sky location about forty minutes away, so I’m aiming to get there. I wish I’d had this stuff when I was at the Grand Canyon a few years ago, because the sky there is really dark.
Very helpful article, thanks. I’ve been into amateur landscape and nature photography for decades but have only marveled at astrophotography. Well this weekend we are headed to Death Valley for a weekend of clear, moonless skies. Time to learn.
I have a Canon 60D and a 50 MM lens that has a aperture of 1.4.
I should be able to shot for 10 seconds right? I know playing with the time and the aperture will make a difference in the over all out come… but does this look like a good starting point?
Hey!
I have Nikon D5300 with Nikon AF-S DX 18-140mm f/3.5-5.6G ED VR Lens
and a Nikon AF-S Nikkor 50 mm f/1.8G Prime Lens
Is it possible to capture the Milky Way with any of these lenses?
Hi Parth, you should be able to shoot at 18mm f/3.5 with your 18-140mm lens. Just make sure you are in a location that does not have much light pollution.
I’m still got a little bit confuse here..if we taking photo in a very dark place, for like say. inside a cave the histrogram slanting to the left is very normal right for that circumstance,how can i determine the exposure for the picture either is correctly expose or not based on the histrogram?
Thank you for the valuable information. I’ve just been experimenting it. Always struggled with focus and don’t take anywhere near enough time to setup the shot.
The article was talking about star trails….. and when I calculated the numbers using the 500 rule, a 12mm wide angle lens is like 42 seconds…. star trails?
Hi Jason! Thank you for this article. It was digestible and started to help this kind of photography make sense to me. So you can really take a photo of the Milky Way in one single shot? In the shots you’ve taken could you see it with the naked eye and no telescope (when you were away from the city)?
That’s amazing!! I’m loving telescope-free photos at night right now. I took my first star photo on a trip to Horseshoe Bend near Page, Arizona and decided to leave the shutter open for 45 minutes to see what I’d get. It was a pretty cool star trail shot with a campfire in the canyon below. 🙂
Thank you for this beautiful article. I have Sigma 18-270 lens. Is that possible to shoot milky way with this?
Hi Romel, yes, you can shoot using the 18-270mm lens. It is best to shoot at 18mm f/3.5 so you are able to use the widest aperture possible. We have seen a lot of Milky way images taken with the 18-55mm kit lens at 18mm, f/3.5. Make sure you are in a location with no or very less light pollution when the skies are clear 🙂
What is the best setting for canon 650 d with kit lense 18-55mm f3.5 , thankyou
Shoot at 18mm, f/3.5. Start with iso 3200 and shutter speed 17 seconds. Preview your image and based on the results you can alter the iso (increase or decrease). Please check out this article https://www.lightstalking.com/500-rule/
Hi Jason, Many thanks for this great article. Love all the shots!
I can’t wait to get out and try it out for myself.
It’s so good of you to share the fruit of you hard work and experience with newbies like me 🙂
All the very best to you.