Lightroom is an immensly powerful image management tool and, as would befit such a program, its image export options are extensive. Whilst the dialogue looks pretty simple, hidden within its interface are a multitude of different options. Today we are going to delve into this interface and see what you can do with it.
Opening the Export Dialogue:
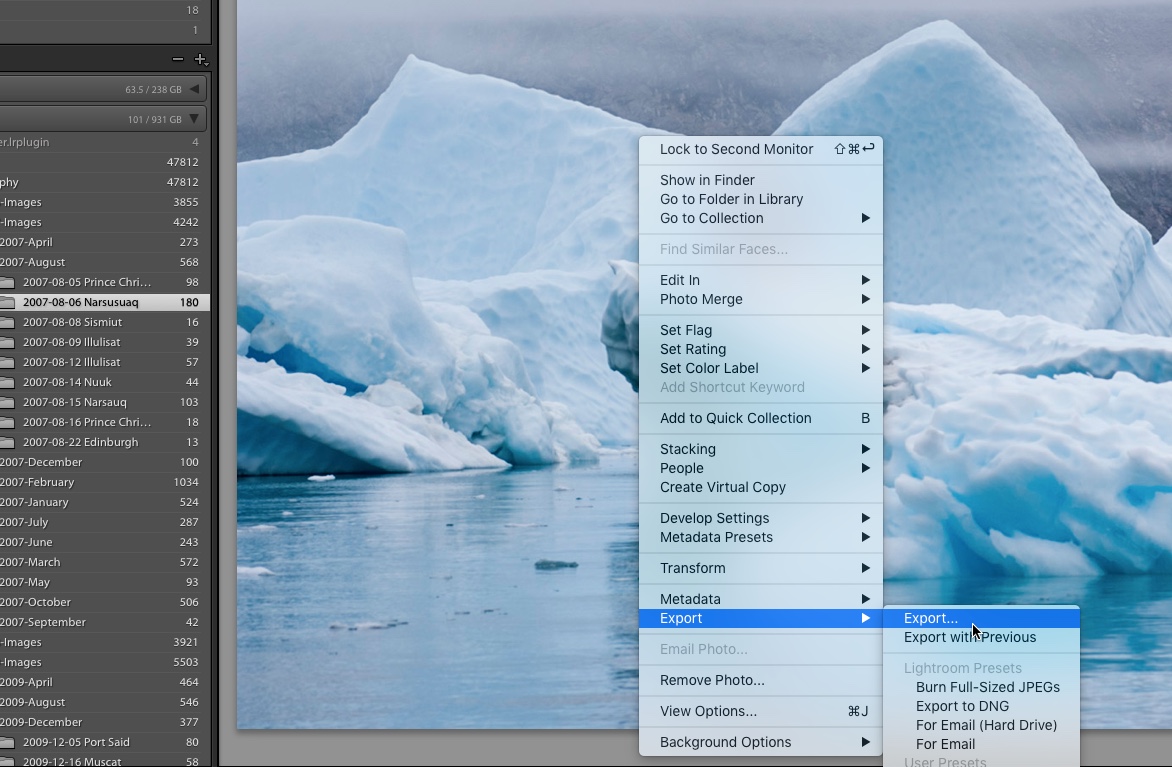
The two main ways to get to the Export window are via the main menu using FILE – EXPORT or by right clicking on an image in either the Library or Develop modules and selecting EXPORT. The window that opens features a number of options. At the top we can choose where to export to, Hard Drive, CD/DVD or Email. To the left are a range of presets and in the middle we have several individual sections (Note: You can check out our Lightroom presets over at Presetify). Lets look at them individually.
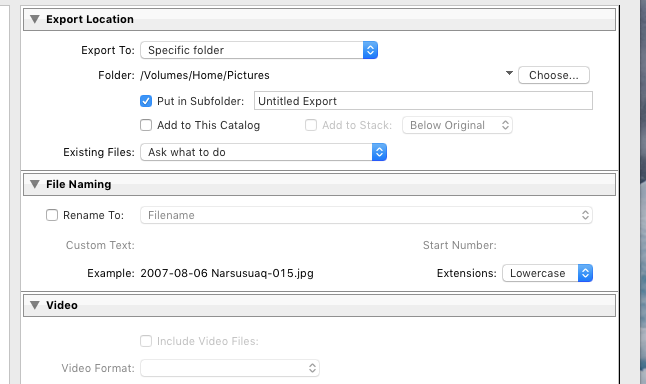
Export Location: From here you define where you wish the image to be exported to. The choices are Specific Folder – this allows you to preselect the destination folder. Choose Folder Later, this allows you to select which folder to export to, once you have selected your different export options and clicked the Export button and Same Folder as Original, which is self explanatory. At the bottom of this window you can choose what to do with file name conflicts. This is mostly applicable to saving images back to the same folder.
There is also a checkbox that allows you to add the newly saved original to the current catalogue
File Naming: This allows us to rename the file to either a range of presets such as Filename – Sequence or to create our own custom naming for images. You can also chose to have the filename extensions in upper or lower case.
File Settings: Probably the most important section, this allows you define file format, quality, size and color space. The Image Format drop down gives us options for JPEG, PSD, TIFF, DNG and ORIGINAL. DNG is Adobe’s Raw format and only applicable when exporting an original RAW file such as an Nikon NEF file. Original should be used if you want to export RAW files from the Lightroom catalogue to another location. Any corrections such as exposure or color will not be exported as the file will remain as an original RAW.
Each file format has a range of export options but probably the most important is JPEG. Here you can set Quality via a slider ranging from 0-100%, Color Space and you can also choose to Limit File Size, useful for web design output.
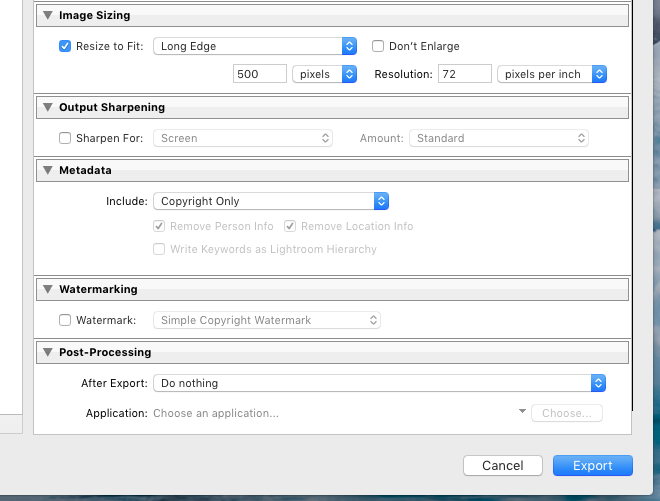
Image Sizing: Below this and requiring a scroll of the mouse, the Image Sizing section allows you to define the exact size of your output. Width and Height will lock dimensions to the value you put in the boxes below. For example if you set both W and H to 1024px then the longest legnth will be 1024 pixels. This is useful for outputing bathces where you have a mixture of portrait and landscape formats.
You can also choose to output by exact dimensions, long edge, short edge, megapixels and percentage (of original size) Resolution can be set to pixels per inch or pixels per cm
Output Sharpening: This gives you options for sharpening for on screen use or for print, gloss or matt. Be aware that if you use this option it will be in addition to any sharpening you have already done.
Metadata: This section gives options on the data that you wish to export with the image. You can choose to export all metadata such as camera and image info or just copyright or contact details. In JPEG files this will be embedded into the image, for raw it will be exported as a seperate file.
Watermarking: This allow you to add a simple predefined watermark or add your own custom designed ones.
Post-Processing: This allows you to define what happens once the file has been exported. You can choose from Do Nothing, Show in Finder, Open in Photoshop or Open in Other Application.
Presets:
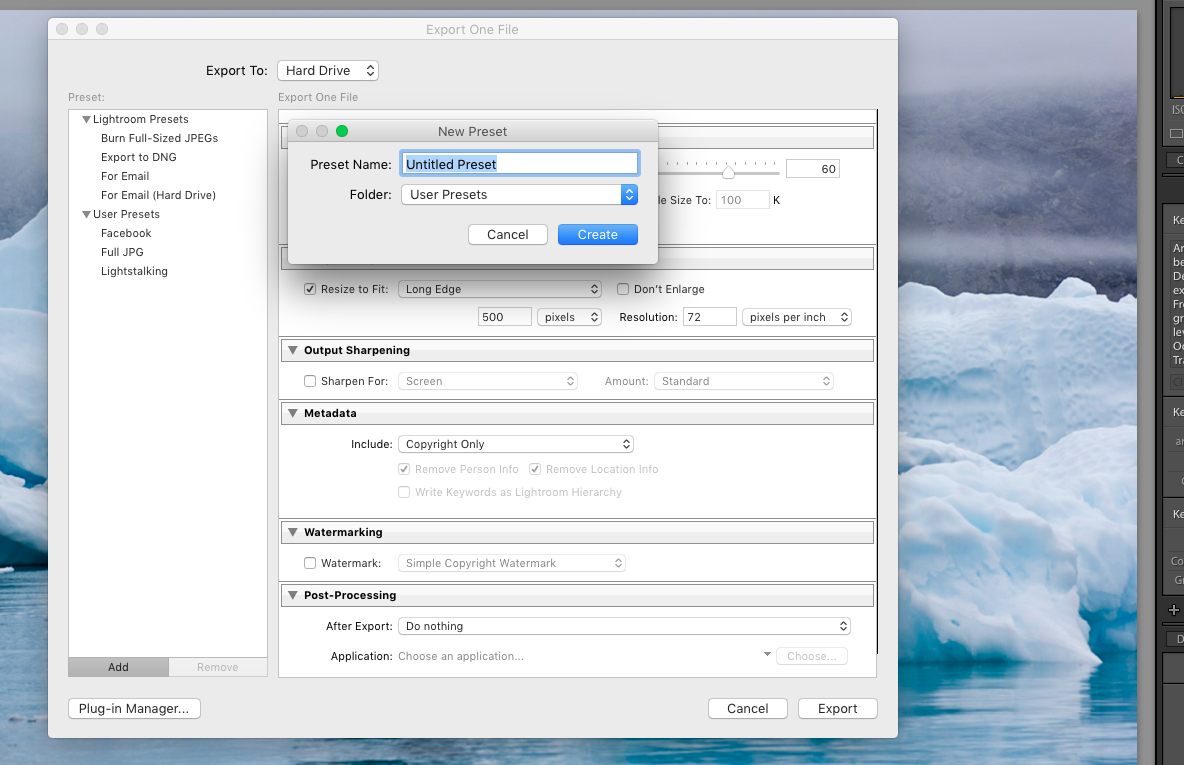
The window to the left allows you to save any of the selection you make as a preset. The easiest way is to make the export selections you require then click on Add at the bottom of the Preset window. Give your Preset a name and you will then see it appear in the User Presets section.
The top section of the Presets contains a number of predefined presets. Selecting For Email will open the image directly in your mail client as a new message. For Email Hardrive will give you a selection of different email optimised sizes.
Other Export Options:
As mentioned, the Export option can be accessed by right clicking on a image. You can also select multiple or all images to export. When you right click, the option below Export is Export with Previous. This will use the exact same settings and folder destination as the previous file and is useful if editing a lot of different images.
As well as the Export options, Lightroom also includes a similar dialgue called Publish Services. This is designed to send your images to sites such as Smugmug or Facebook using predefined export settings.
Lightroom is an extraordinary deep and powerful program and by understanding the many export options, you will find you can streamline your workflow to become much more efficient.


4 Comments
Where do you suggest exporting edited files? Do you keep them in the same folder alongside the original raw files? Or do you create a new folder, just for exports?
You only need to export edited files when you need to use them for something else, for example a website or for print. In that case you can export them to wherever is most suitable. In Lightroom the master file is not actually edited. What happens is a second, text based file is created telling Lightroom what corrections to apply when the image is exported.
What size do you recommend for Email
a few photos?
one photo?
“Any corrections such as exposure or color will not be exported as the file will remain as an original RAW.” This is not true. I copy original raw files out of one Lightroom catalog to another using export all the time and the edits are retained.