The eyes of a subject are the most powerful and ones that draws viewers attention in a portrait. Eyes speak a lot and express a lot of emotions. So it is important to have the eyes in sharp focus when capturing portraits.
Sharp eyes can be captured in camera if you pay attention to some techniques and details and can then be later enhanced during the editing process. If the eyes are not in focus, then no amount of editing can bring in the desired sharpness levels.
Choose sharp lenses, preferably fast prime lenses to capture portraits. You will need to choose the right aperture values and shutter speeds to capture sharp photos. Always have the focus right on the eyes, so that the eyes are the main focal point and are in sharp focus.
You will then need to take care of camera settings like shutter speed, iso, etc. The shutter speed needs to be greater than the reciprocal of focal length, taking into account the crop factor, but to be on the safer side, keep it faster than 1/250s or at least the reciprocal of twice the focal length to compensate for handshake and subject movements.
When choosing aperture values, if you are using very wide aperture values like f/1.4, you need to be very careful with focus. Manual focus works better when using wide aperture values, as long as your subject is not moving. Also use the back button focus feature as it will help you to easily lock and track focus in a single button. We would recommend you to take test shots and zoom in at 100% on the eyes to see if they are sharp.
Once you have captured the portraits, you can make some adjustments while editing, to enhance the eyes and make them pop. This will make them stand out even more and add character to your portraits. Sometimes a very slight error in focusing or soft eyes due to wide aperture values can also be rectified during the editing process.
Here are some tips to get sharper eyes when editing portraits in Lightroom. Lightroom has various features like brush tools and masking tools to help you precisely select certain parts of the subject's eyes like Iris, eyebrows, etc. You can enhance the features and also bring a pop of colour to the Iris and whiten eyes, etc., to make the eyes stand out in the portrait. You can also make use of the clarity and texture sliders to add some details to the eyes.
Here are some editing tips for sharper eyes in Lightroom:
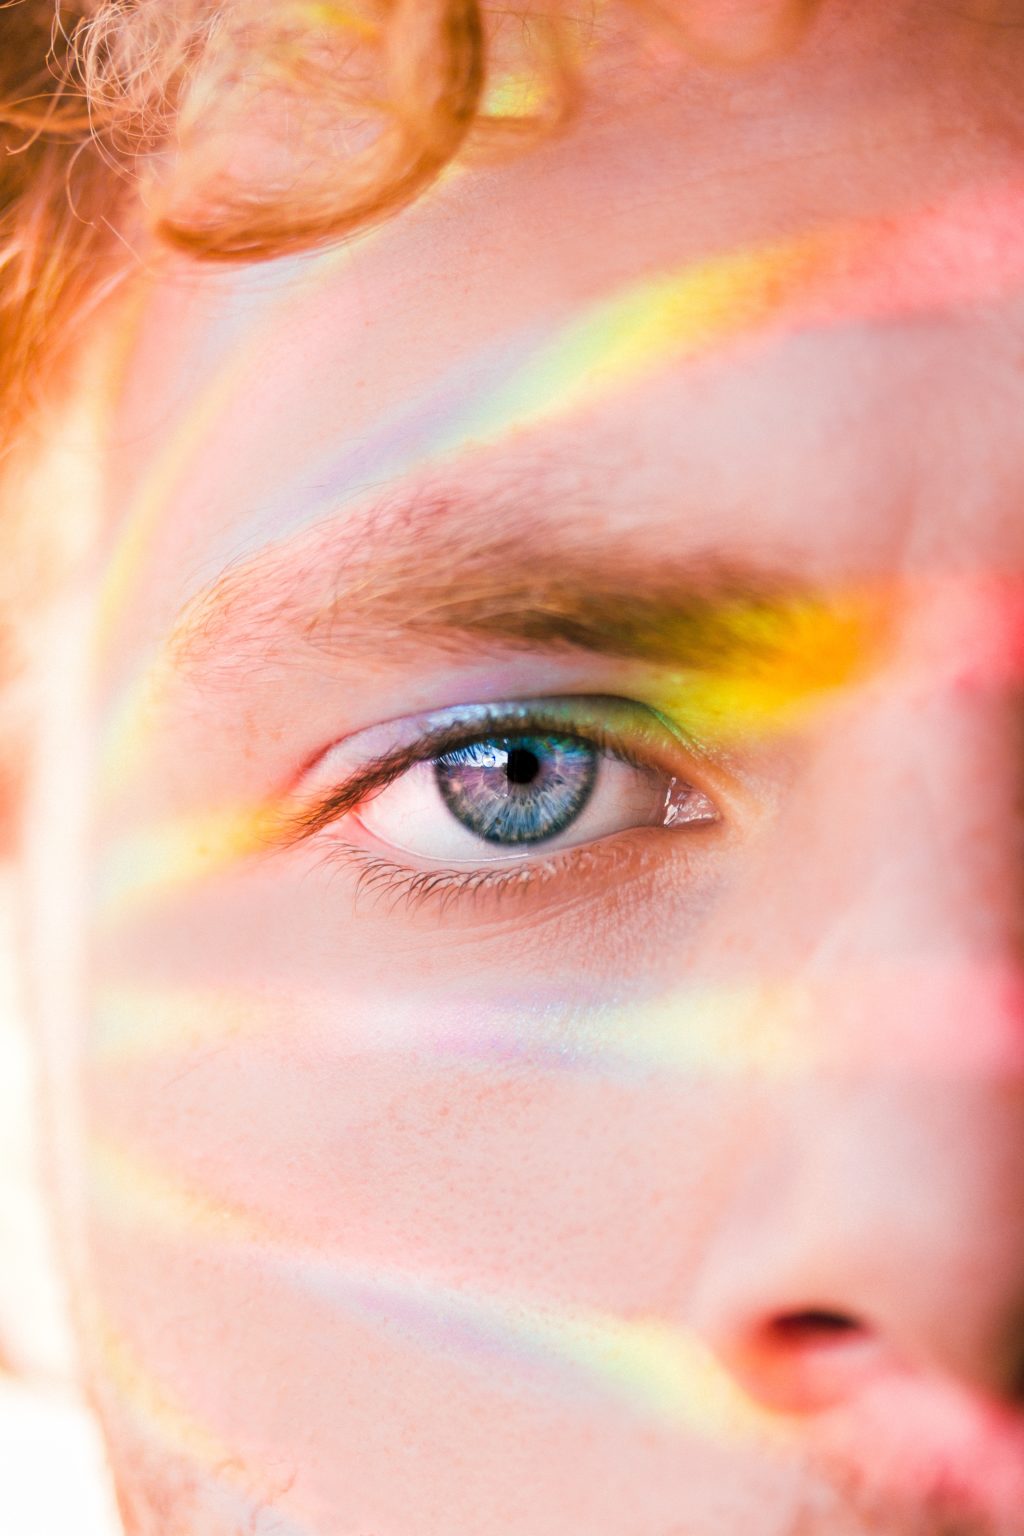
1. Enhance Iris Color And Increase Clarity
Portraits look better when the eyes are sharp and have the right colours and details in them. Sometimes a basic global edit on a portrait will not be sufficient and you will have to locally make adjustments to specific parts of the image to get the desired results.
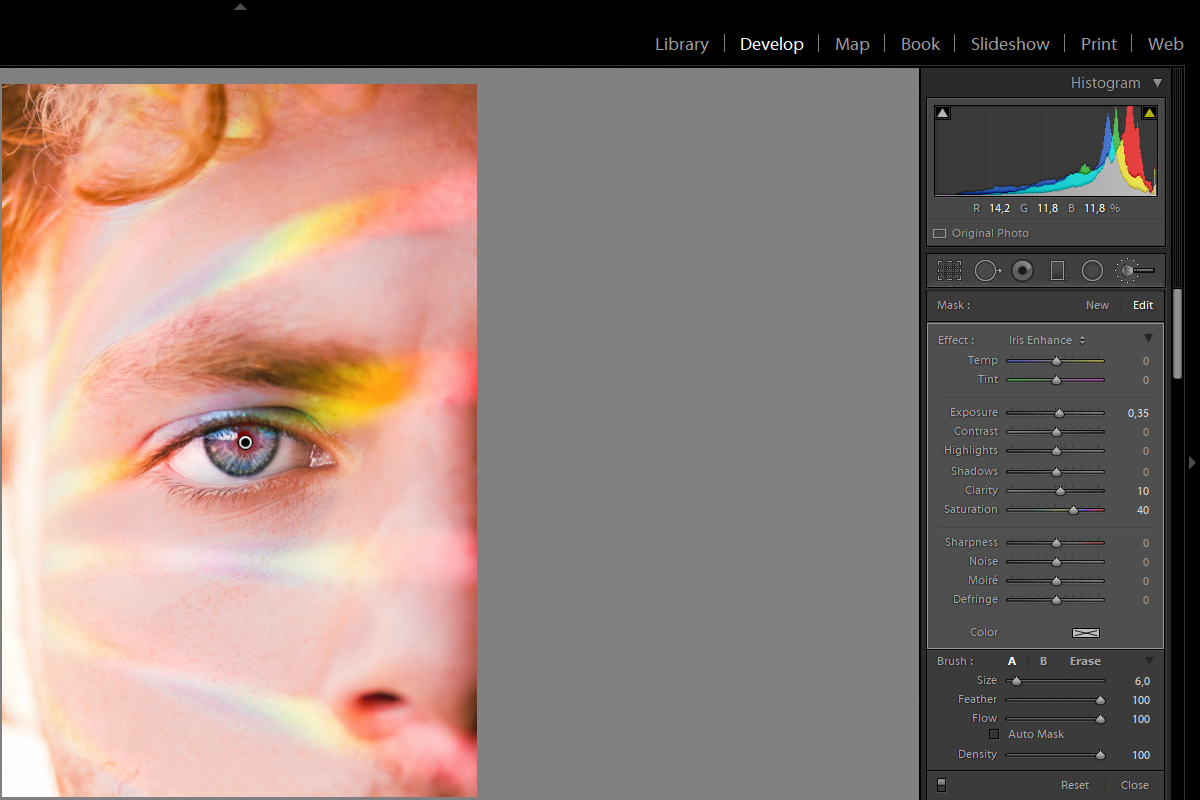
If the eyes in the portraits still lack details after making the basic adjustments, you can use the brush tool or masking tool to select areas of the eyes that require some extra adjustments. If the eyes lack details and colours, increase the vibrance and clarity of the iris to make it pop.
There are not specific settings that you need to follow. Drag the vibrance slider till you see the colour stand out but in a very natural way. The increase the clarity a bit till you see the details show. Do not overdo this part as it will make the eye look unnatural.
In some portraits, the catchlights in the eyes may look too bright and act as a distracting element in the portrait. You can select this area and decrease the highlights a bit to make the highlights less distractive.
If you are unsure what sliders to use to enhance the Iris, you can try the free brush presets that are available by default in Lightroom. There is an Iris Enhance and an Iris Pop. Apply one of these and then make necessary adjustments from there.
2. Darken The Limbal Ring
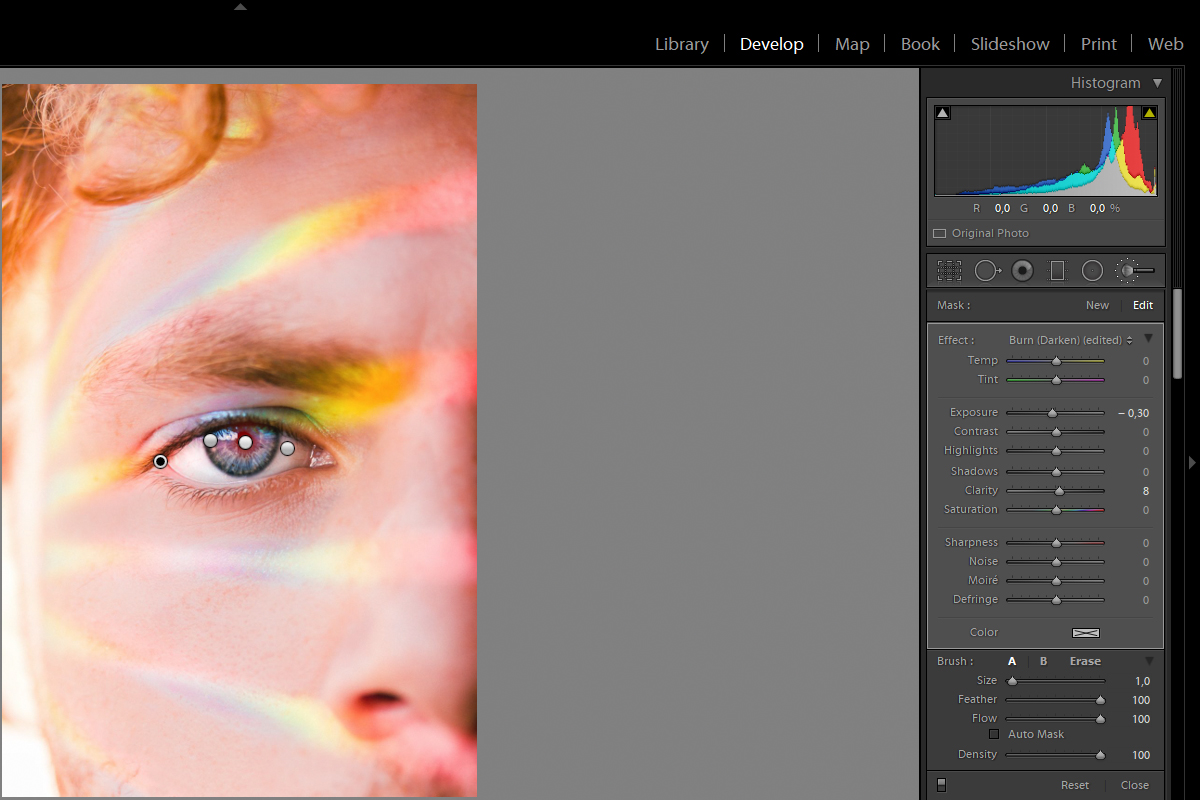
Humans naturally have a dark ring around the Iris called the Limbal ring. For some people it may look prominent while for others it may look a bit dull. Enhancing the limbal ring can male the eyes look attractive in a portrait.
In order to achieve this, you can choose the area around the iris using the brush tool and burn it a bit (darken). Zoom in the image to precisely select this area for adjustment. Do not overdo this process as it can look very unnatural.
3. Whiten The Eyes
Some people can naturally have slightly dull eyes or the eyes may look slightly duller in the photo compared to how they look in real. In these cases, if the dullness is taking away from the effectiveness of the portrait, making your subject look tired, then you can enhance it using the whitening process.
Use a small adjustment brush and select the white areas of the eyes. Dodge this area (brighten) a bit by slightly increasing the exposure till you get the desired effect. Overdoing this can make the eyes look unnaturally bright. If there are colour casts in the eyes, you can either work with the temperature sliders or decrease the saturation a bit till you see a natural white colour in the eyes.
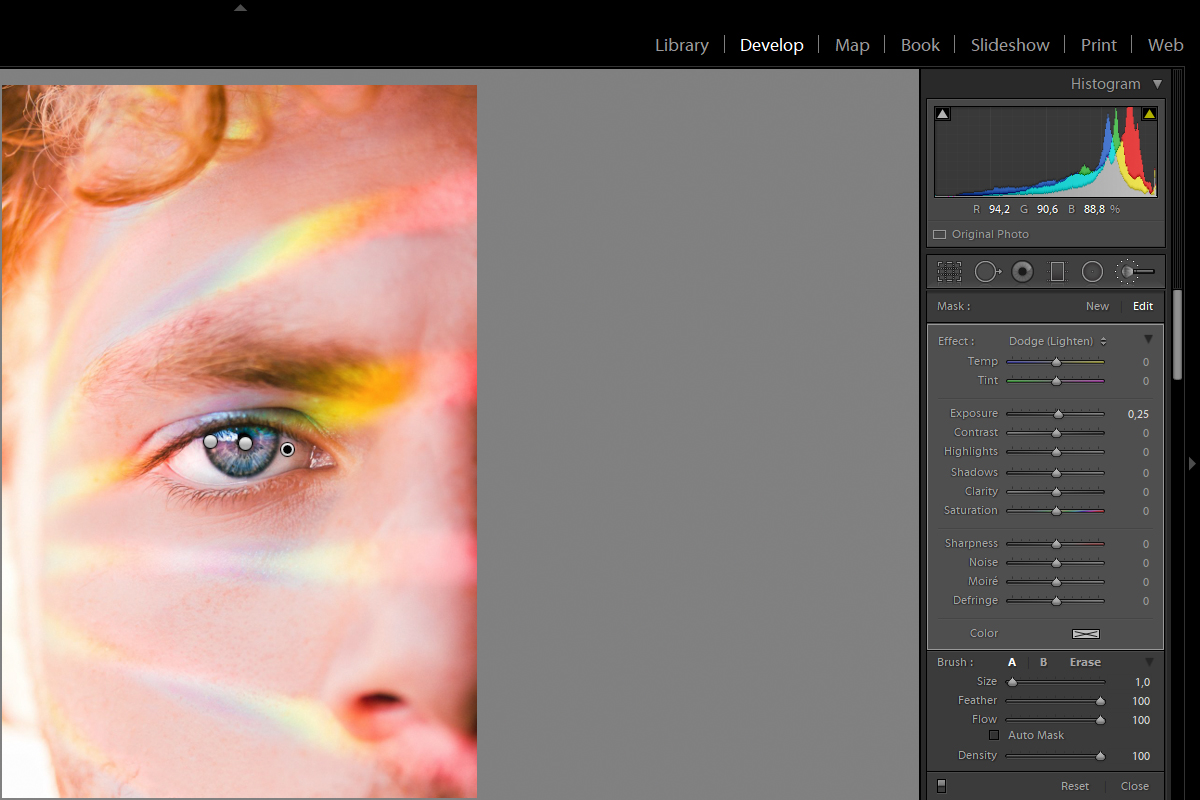
4. Adding Definition To The Eyelashes
The eyelashes are another important feature of the eyes that draw in attention and add more beauty to the portrait. Some subject may naturally have dark eyelashes, while others may have slightly thin lashes.
To enhance the eyelashes, zoom in on the eyes and using a thin brush, carefully select individual lashes. You can then slightly darken the lashes to make them look more prominent and add a bit of clarity to enhance the details on the lashes. Make adjustments to suit the individual portrait and do not over do the edits.
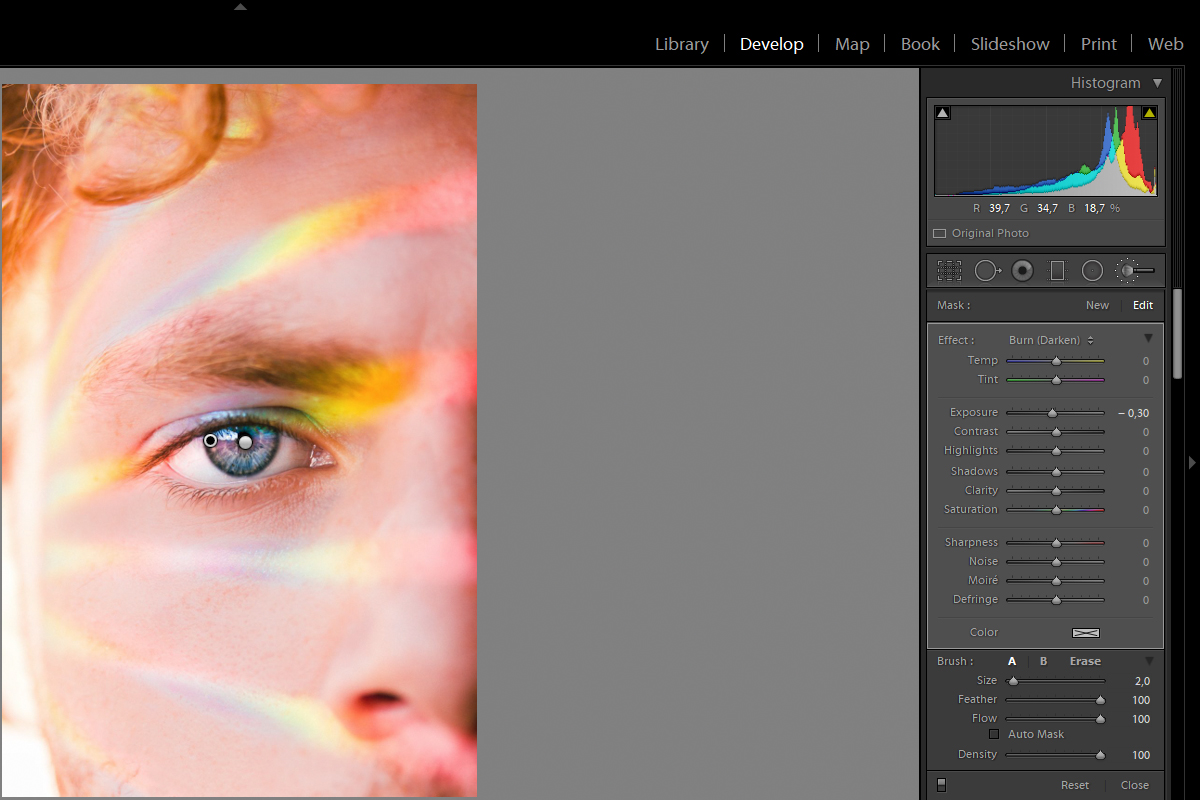
When you have made all the edits, you can give an overall review to see if any parts of the image need enhancing. Sometimes, the eyebrows will also need a slight tweak to match the enhanced eyes. In this cases, you will need to select the eyebrows and add some clarity to bring out the details.
If there are any visible marks in the eyes or thin blood vessels that are visible, they can be removed using the healing tool. This adjustment may be important when you edit fashion portraits.
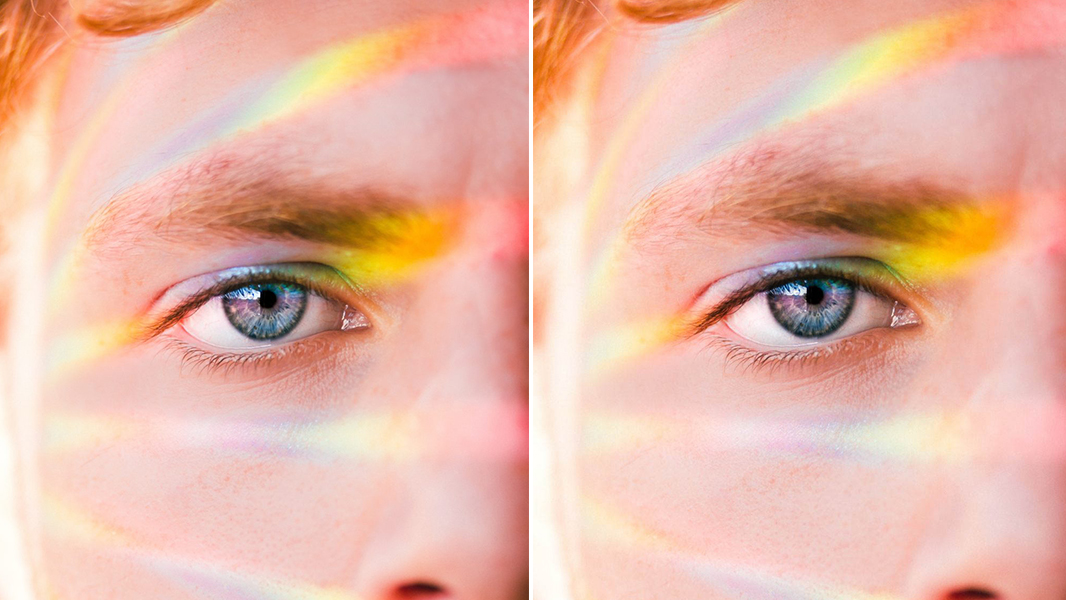
When making adjustments to the eyes of the portrait, be careful not to overdo any edits and make the portrait look unreal. A slight enhancement to eyes in portraits can take it up another level. So do not hesitate to make slight changes to bring that required contrast and colour that will make your portraits pop.
If you want to learn more about capturing and editing eyes in portraits, feel free to check out the following links!
Further Reading:
Take a look at our fantastic Portrait Photography page, where we've brought together every portrait photography tutorial and tip on the site (and several other sites) that we think will round out your skills as a portrait photographer.
Just a friendly reminder that this page is also a living document for portrait photographers who want a single online reference for the craft. It will change and be updated often, so bookmark it and come back as you need to.


