Self portraits can be a fun way of expressing yourself and your ideas, and also very rewarding if you enjoy putting yourself into a whole manner of weird and wonderful situations like I do. Sometimes it's good just to practice what you know, learn new techniques and hone your skills, and who's a more readily available model than yourself?
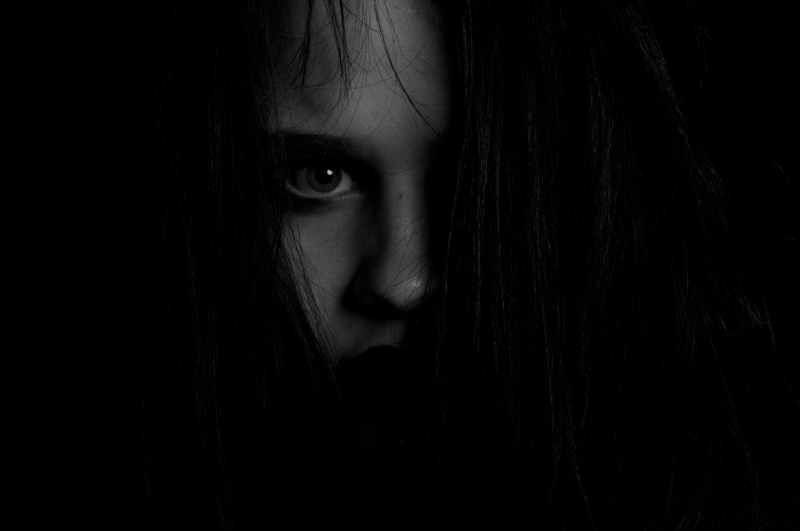
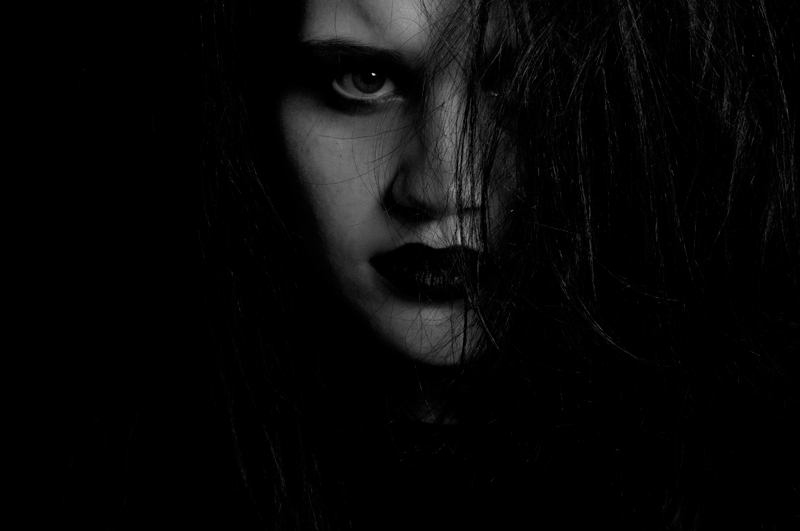
I recently took this shot of myself in the studio, taking my inspiration from the film ‘Tron' and various black and white portraits I've seen through the years. It's very basic at its core, even though it may not look it.
So how did I get this shot?
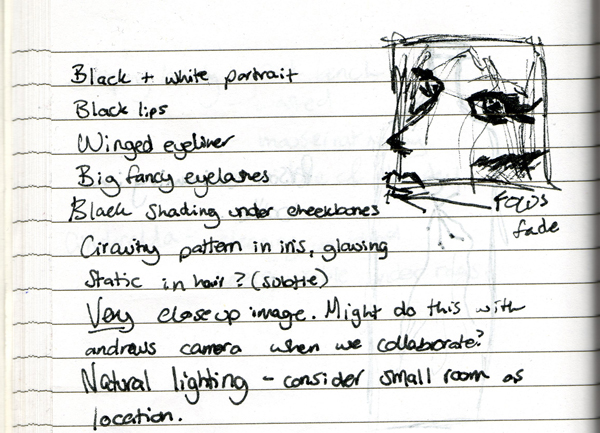
As they say, photography starts in the mind and it's true. I saw the shot in my mind's eye about a week or so before I actually got around to taking it. I jotted it down and it matured a little along the way.
My original plan involved an angled glance at the camera with one eye peeping out from a few strands of hair. The lighting would be natural window lighting, at around sunset (I have a room in my house that faces west). This is known as ‘the golden hour' or crepuscular lighting, and there are two of these golden hours every day – one hour after sunrise, and one hour before sunset. They give a wonderful quality of light as the sun is at just the right position in the sky to give a lovely golden glow.
Well, that was the plan, anyway. I ended up shooting it in the studio with one key light. I actually think that it suited the concept better that way, seeing as I was going for something with a slightly harsh edge to it. I ended up using my favourite light shaper – a massive beauty dish. It has a sheet of diffusing paper over it, but the light is still rather harsh (so, nothing like a softbox – read about some of the different kinds of light shapers in another article I wrote here!) I also positioned it pointing slightly downwards at my face. You can probably see the angle used by looking at the catchlights and the shadows.
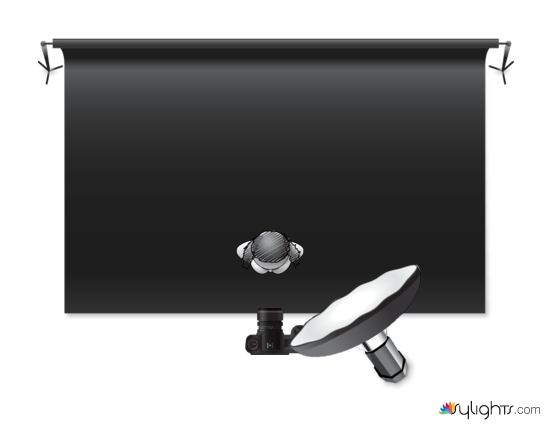
Lighting Diagram created with Sylights.com
I toyed around with a giant sheet of polystyrene as a reflector to fill in the shadowed side of my face, and I even tried a softbox at low power and a fair distance away (to cut the light further), but they didn't give me what I was going for. So, away they went. I experimented more with the beauty dish and turning my face at various angles to the light.
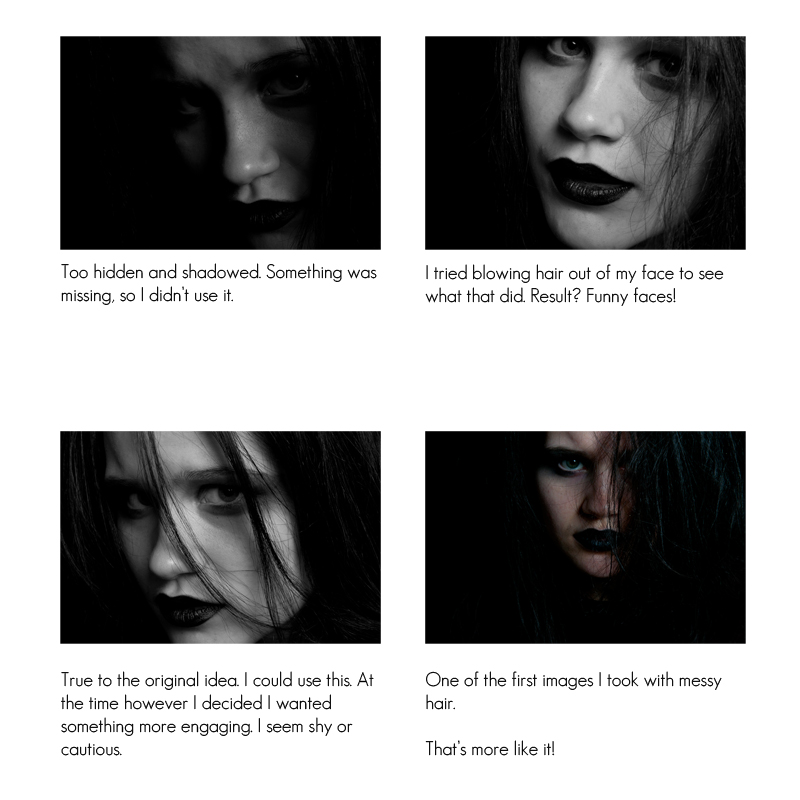
The light was also something else I fiddled around with until I found something I liked. I know some people use light meters and I've used them too in the past, but these days I usually don't in the studio. Instead I opt to go on instinct, basing things off of what I see and past experience.
Anything between f9 – f13 on the camera is usually good for studio work and depending on what effect you want, lights need to be played with. You may even find a combination you hadn't thought of before! I think I went with something around 1/16th on the monobloc flash in the end. What I'm trying to say is, there's no right or wrong way to do this. Do what suits you best. Just make sure that the shutter isn't faster than the flash. Around 1/125th or 1/200th will be fine.
After many failed attempts at getting the right angle and the right amount of hair in front of my face, I did what I often do during a self portrait shoot when looking for what works – I got a little silly. I messed my hair up over my face and took a few photos like that. So not only did I look like a KISS reject, I now also had hair that made me look like I'd just shoved my fingers into the nearest electrical socket.
Fitting I suppose, for a Tron themed shoot.
It was just as well that I did – I found I rather liked the extra texture it gave the photograph and it sparked (unintentional pun!) another idea, which is what you see in the final outcome.
My process tends to be a bit of trial and error sometimes. I like learning what works and what doesn't as I go along and I let myself be inspired and open to new ideas along the way. I frequently come back from a shoot whether it be of myself or a model with different photos than I originally intended to take.
Nothing has to be set in stone. It's important to play and enjoy what you do; let yourself be inspired by what's around you, get a bit silly if it helps! I try and make my photos interesting to not only the audience but myself – even while I'm taking them. I'm a strong believer that if you enjoy what you do, it'll show in your work.
But back to the photo. After a few hours, I figured I had enough shots to be playing with and packed everything up. From there it was just a matter of choosing the shot and playing around with it a bit in Photoshop.
This actually took minimal editing – I removed a few blemishes here and there in Photoshop and dodged and burned a few areas, put the pattern in the eye and then figured out the best framing for it. I usually try and get the framing done in camera so as to utilise the full sensor, but it's a bit more difficult when you're taking photos of yourself and I don't find anything wrong with cropping anyway! In my opinion it's just another way of fulfilling your creative vision, regardless of what some people might say.
I also used PhotoTune by OnOne Software a little to bring out some more detail in the photo such as the hair and on the skin. As I already mentioned, the final touch was the pattern in the eye – I used this one.
Et voila! One more self portrait! Do you take self portraits too? Let me know in the comments!
Article by Emma Brabrook – Emma is a photographer from the UK. You can follow her on Twitter, visit her Flickr, join her Page on Facebook or visit her Blog.




11 Comments
Yeah for self-portraits, Emma. And a nice article as well. My only gripe is when I take my own photo I never turns out quite looking as good as you do. Is there a lens for that?
Soft focus can only do so much, Tom.
Yet another way that women have the advantage. 🙂
Nonsense! I’ve seen some fantastic male self portraits! 😀
Great article, Emma! Thanks for the detailed notes.
~Aloha
Very nice. I appreciate your detailed notes. I have a self-portrait project going too– one a week for a year– posterous.com/Priscilla-Rathbone. Thanks for the inspiration!
Keep going! You’ve got some interesting shots 🙂 I tried a 365 project once but I couldn’t find the time for it once uni work picked up again. I’ll take up another project in the future though I’m sure 🙂
Love it! I’ve done a number of self portraits and learned quit a bit in the process.
Here are a couple that I thought turned out the way I wanted them to.
https://www.flickr.com/photos/ken-b-images/5213070827/
https://www.flickr.com/photos/ken-b-images/5411411214/
must give it a go!
Felicitaciones Emma, además del excelente trabajo, lo que más me gusta es la forma tan didáctica de comentarlo; maravilloso, un saludo desde Venezuela.
Thanks Emma.
Self portraiture means working with the most patient and cooperative model you’ll ever know.
https://peterbryenton.typepad.com/phi_one/2010/02/self-portrait.html
https://peterbryenton.typepad.com/.a/6a00d8341c640f53ef0120a8c2db56970b-pi