Co-authored by Dahlia Ambrose
If you're not familiar with time-lapse videos, you've probably already seen them but just aren't aware of it. With time lapse photography, you can take sequential photos captured over a period of hours and compress them into a video of only a few minutes in length – this allows you to see a slowly changing scene at a much faster pace and can open up a whole new world of photography to you. The results can be spectacular.
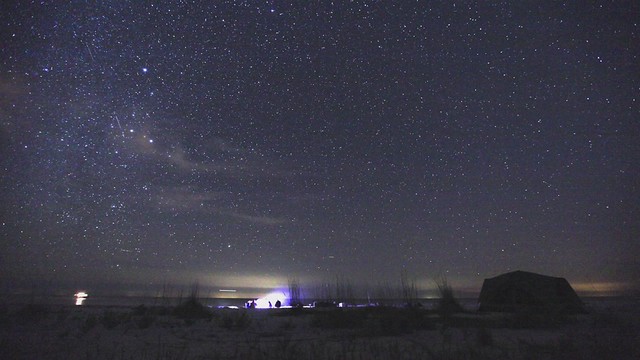
Milky Way Glowing At Night from Bilder David on Vimeo.
Updated by Dahlia Ambrose.
Note: Is timelapse one word? It’s actually a compound word so timelapse, time-lapse and time lapse are all correct!
In theory, time lapse videos are easy to do with your camera – you’re simply taking a few hundred photos, one after another, and then lining them up in post processing. However, to get a stunning, seamless timelapse video, there’s much more involved than spending a few hours behind the lens.
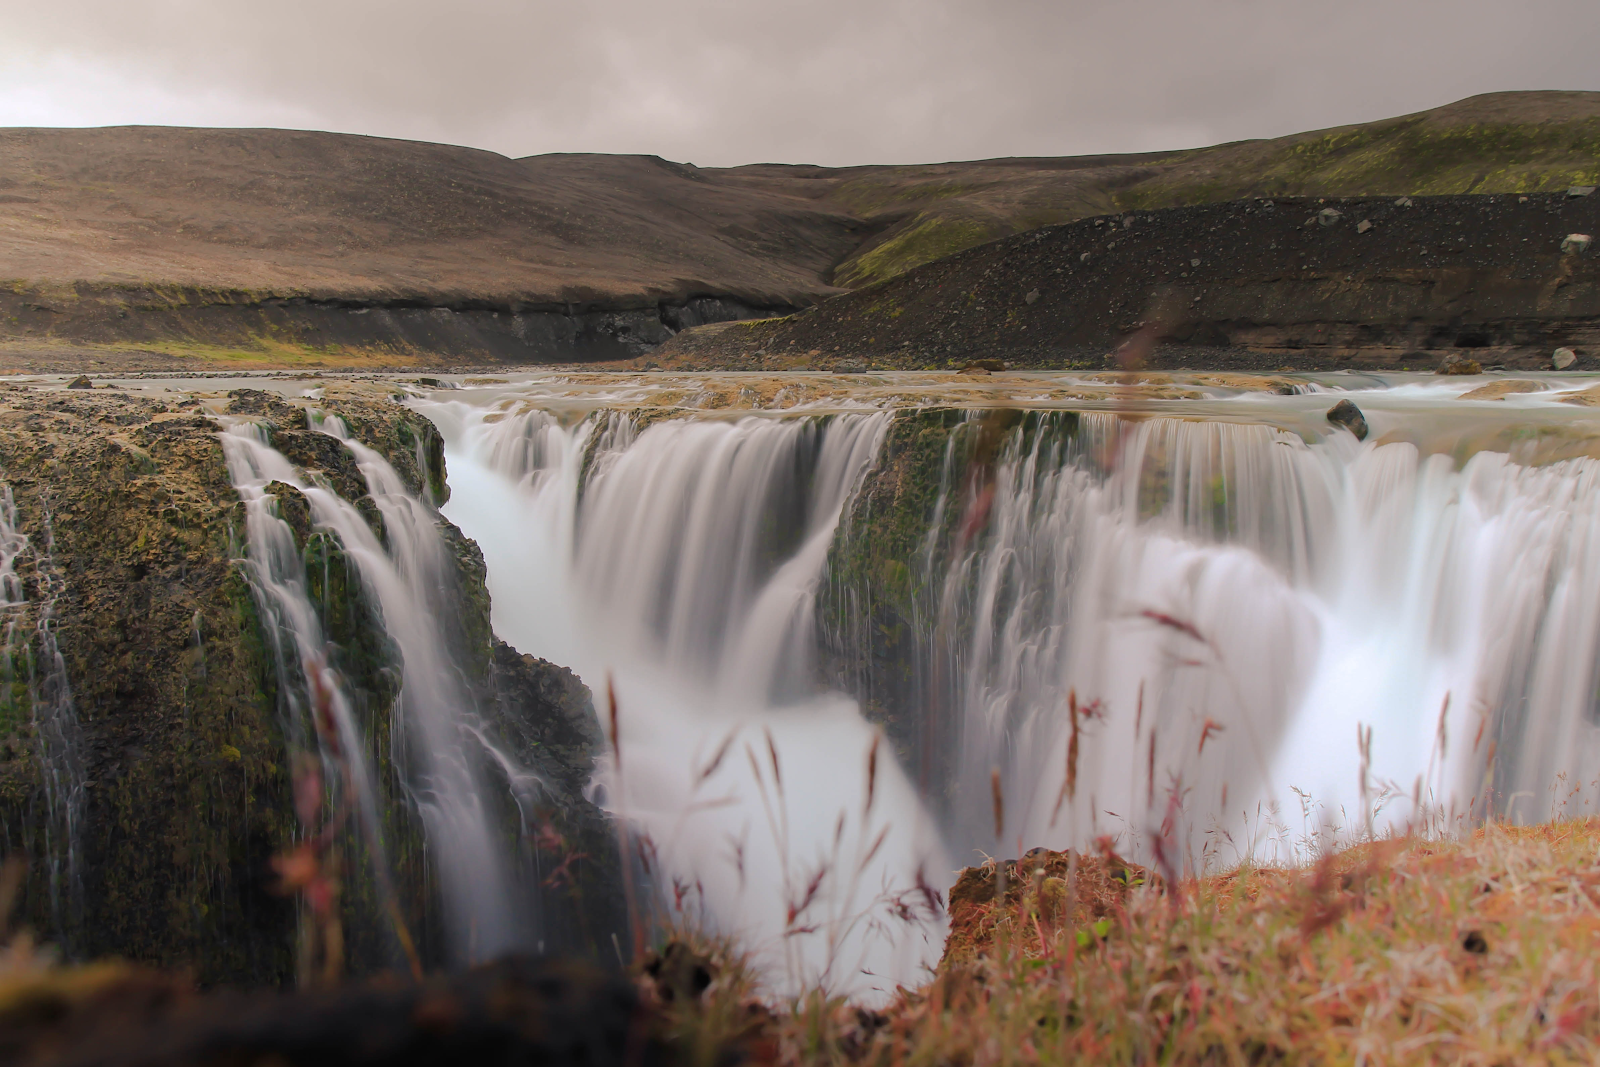
Click here to see Iceland, Eyjafjallajökull on Vimeo
What Do You Need to Make a Timelapse?
1. Intervalometer – This handy tool allows you to take a certain amount of photos spaced evenly in exposure – meaning that you don’t have to sit with your remote and take X amount of photos every second.
The amount of time of each exposure will vary greatly depending on your available light, but an intervalometer is needed to capture extended timelapses and keep your exposures uniform in spacing – i.e. the amount of time in between each image (or frame).
A fantastic asset to intervalometers is that you can input how long of a delay between each exposure you want. This is important if you’re shooting in RAW as it may take a few seconds for your buffer to catch up and be ready for another exposure – if you're in burst mode, your camera will periodically take breaks to catch up which can throw off the timing between each image and make your timelapse appear choppy, so adequate spacing for your camera to take a breather is needed.
Most modern cameras have built-in intervalometers so buying one isn't too much of a concern – check your manual and see if you need to pick up one of these.
The Best Alternatives to an Intervalometer:
As an alternative to an intervalometer, it is also possible to tether your camera to a laptop and let computer software do the work of the intervalometer.
- Sofortbild – is free (donationware) tethering software for the Mac that can be used as an intervalometer.
- There are also various tethering programs for different cameras that accommodate tethered time lapse photography. Check out this great post at DIY Photography about open source alternatives.
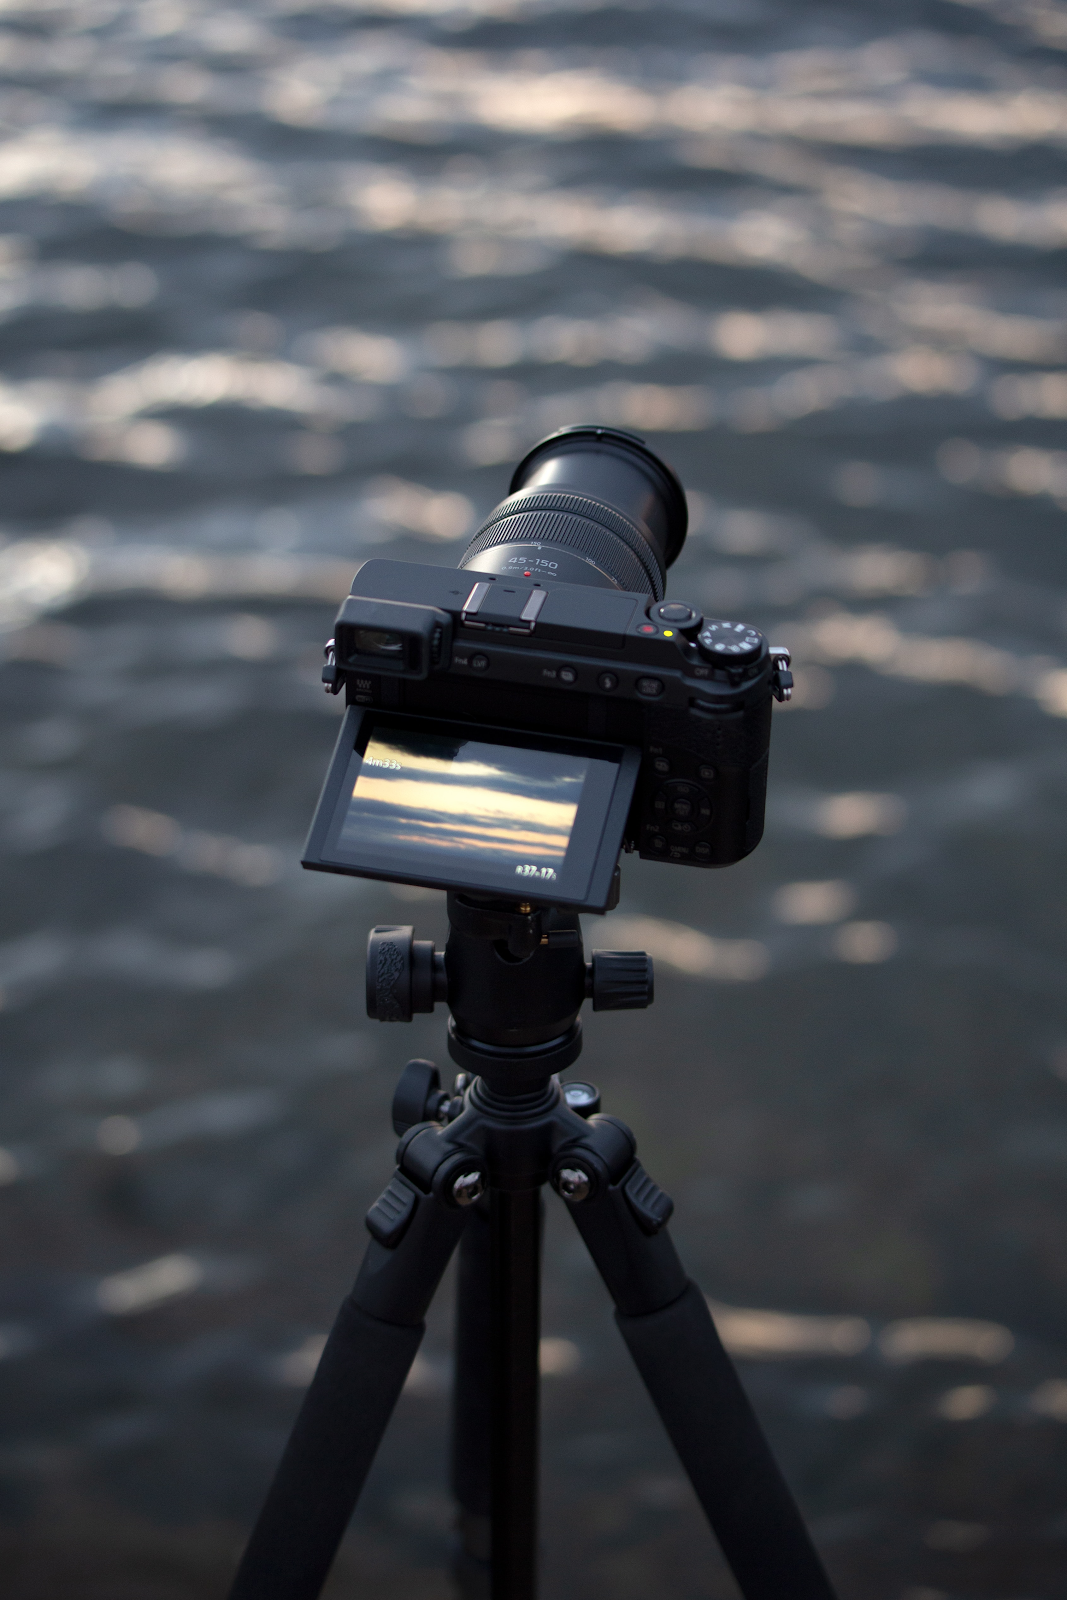
2. Tripod – You need something to stabilize your camera for many hours, and a tripod is a solid way to make sure your camera doesn't move between frames. Make sure you have a very sturdy tripod as you will need to shoot continuously for a few hours sometimes.
3. Polarising or ND Filters: If you are shooting scenes that have reflections or blown out areas, it is best to use a polarising filter to minimise unwanted effects as it can be quite difficult to deal with these while post processing. When shooting very bright scenes make use of the ND filter to get optimal exposure.
4. Cable Release: A very important factor to take care of in a timelapse is to avoid any blur due to camera shake as much as possible. So use a cable release along with mirror lock up feature if using a DSLR to avoid any blur due to camera movements.
The Best Camera Settings For Timelapse Photography:
- Use manual focus and shoot in manual mode
- Focus one third into the scene when shooting landscapes or use hyperfocal distance to get all parts of the scene in focus.
- Wisely choose aperture values to avoid flickering and at the same time have all parts of the scene in focus (more below on this).
- Use very low iso values to eliminate or minimise noise.
- Carefully choose the shutter speed and time interval for shots so as to avoid flickering, dropped frames, etc (more below)
- Use mirror lock up feature to avoid blur due to camera shake
- Turn off image stabilisation on the lens and camera body if they have that feature.
- Avoid live view and preview while shooting to help save battery life.
Techniques for Timelapse Photography:
1. Shooting Interval and/or Exposure Time:
As I just mentioned, large gaps between exposures prove to be a problem when trying to make a seamless timelapse video – too much time and it will seem choppy and lack that smooth quality most timelapse photographers aim for.
So how do you go about the exposure time and/or shooting interval for timelapse photography? A simple calculation will help and with practice and experience, you will know what shooting interval will work well for each timelapse. To calculate this, there are certain factors that you need to take into account:
The interval between each shot – this depends on the movement of elements in the scene. Bear in mind, shooting interval is always greater than exposure time, so that you give the camera time between each shot for the read/write process and buffer clear up.
For example, if your exposure time is 5 seconds, choose the time interval between shots as at least 7 to 8 seconds, so the camera has about 2 to 3 seconds to get itself ready for the next shot. Shooting interval = exposure time + time given to the camera in between two shots. This will also vary depending on if you are using any filters like the polarising or ND filters for longer exposures.
Some Tips On Choosing Time Interval Between Shots For Timelapse Photography:
The interval with which you shoot images for a timelapse is very important as it is this factor that decides how fast and smoothly the elements move or change in the final video. Here are some tips on choosing the time interval between shots for timelapse photography, but when there is doubt, it is good to do a small test shoot before going on to shoot for the final timelapse because faster moving elements shot with longer intervals can look awkward in a timelapse.
- Capturing the movement of the sun across the sky – 15 to 30 seconds
- Sunsets and Sunrises or Moonrise and Moonset – 1 to 3 seconds
- Slow moving clouds – 5 to 10 seconds
- Fast moving clouds – 1 to 3 seconds
- Normal movement of clouds – 3 to 5 seconds
- Stars – depends on exposure time as you will need to take into account if you turned on (or off) noise reduction
- Aurora – 5 to 30 seconds depending on the speed and intensity of light, but again this will vary if you turned on noise reduction.
How long will you need to shoot?
You may also need to have a rough idea of how long you will need to shoot for a particular timelapse, so you can plan your schedule better. This depends on three factors – the video system that you will be using, the length of the video that you are planning to create and the time interval.
If you will render your video at 24 frames per second, you will need 24 frames for a second length of video. So, if you are looking to create a 25 seconds video, you will need 24 x 25 = 600 frames
For example, if you are shooting a timelapse of a scene that has normal cloud movement, you will need intervals of 3 to 5 seconds – let us say an average of 4 seconds.
So the length of shooting time will be 600 frames x 4 seconds = 2400 seconds = 40 minutes.
You will need to program the intervalometer accordingly to shoot 600 frames at an interval of 4 minutes. Remember that your exposure time needs to be smaller than the shooting interval. Best to keep it lower than 2.5 to 3 seconds.
Just like any advanced photography techniques, timelapse photography comes with its own issues and the most important ones to watch out for are dropped frames and flicker.
Dropped Frames And Ways To Avoid It:
We have extensively looked at exposure time and time intervals and also discussed how important it is to choose the right exposure and interval values for a seamless timelapse video. Any errors/miscalculations in these values will lead to dropped frames that will look really bad in the final video. Here are two ways to avoid dropped frames:
- Always make sure that the frame interval is greater than exposure time. The best way to do this is to have the exposure time between 60 and 75% of the shooting interval.
- Another reason for dropped frames can be slow memory cards as their slow response may lead to longer writing times thereby missing frames in between, which means you will have dropped frames in your timelapse. Use a faster memory card with faster read and write speeds!
Flicker and the Importance of Manual Mode:
It’s imperative that you set your camera in manual mode and not change your settings, even when shooting lighting situations that change over a period of time – like sunrises and sunsets. By allowing your camera to adjust exposure automatically, you’ll most definitely get what is called “flicker” – which is the sharp change of exposure from one frame to another.
Click here to see a “before and after” example of timelapse flicker
By shooting in manual mode and not allowing your camera to change your exposure, you'll avoid this kind of flicker. Even in situations where the lighting changes dramatically from start to finish – such as sunsets – it’s best to keep it in manual if you want to avoid this.
Another cause of flicker is large gaps between exposures – it makes your video jump around and look disjointed. The best way to solve this is to minimize the gap between each exposure, but still long enough to allow the image to read to your memory card – this is a particularly important concern if you’re shooting in RAW. It can be a challenge to find a good balance, but the results are worth it.
Aperture Flicker and How to Adjust For It:
Besides flicker caused by changing exposures and gaps between photos, there are other causes to watch out for. If you use a small aperture – such as f/8 or higher – your shutter moves a lot from one photo to the next, going from its dormant wide-open state to the smaller size of your chosen aperture – the higher the f/stop, the more it moves. Each time your shutter moves, it never really goes back to the exact same place it did before due to slight miscalculations. For regular photography, this doesn't matter – but for time lapses, it can cause flicker.
To rectify this, you need to choose an aperture that keeps your shutter at a relatively open state – meaning that you're minimizing the distance your shutter has to go when you take a photo. The wider the better, but most photographers note that anything under f/8 is pretty good at eliminating aperture flicker. You could also use a manual lens with a manual aperture ring to avoid flicker.
Shutter Flicker and How to Adjust For It:
Another type of flicker to consider is shutter flicker – which is inconsistencies in exposure due to things moving too quickly – a.k.a. a fast shutter speed.
Most professional time lapse photographers will shoot at a slower shutter speed to ensure that shutter flicker doesn't occur – under 1/50th of a second to play it safe, although some push the limit to 1/100ths of a second with reportedly good results.
How to Obtain Optimal Exposure?
So obviously finding that “sweet spot” exposure can be quite a challenge in itself – shooting at a slower shutter speed than normal combined with a wide aperture can be quite problematic, especially during the daytime when light is abundant.
Note: If you’re unsure why this is problematic, read this tutorial on how your camera exposes a photo and what elements come into play to get an optimal exposure.
A common technique time lapse photographers use to reduce their exposure time is by using ND filters – this is almost a necessity if you plan on doing daytime timelapses without flicker as it will help slow down your shutter if needed.
Choosing the Right White Balance:
There’s another step in avoiding flicker- setting your white balance manually. Just like with an automatic exposure setting, your camera chooses white balance based on each image if not selected manually. This can cause some color flicker – where your image changes white balance from frame-to-frame.
Another benefit of setting your white balance is that you don’t have to change it in post process. Editing a handful of images can be done quickly – especially in RAW – but if you’re dealing with several hundred photos for a timelapse, you can easily lose hours just on adjusting your white balance.
Getting a Good Editing Workflow:
Don’t go into a time lapse shoot with the mindset of “I’ll just shoot in RAW and edit later”. When you’re dealing with hundreds of photos, any step you can skip in your editing workflow can literally save you hours of post processing time.
For example, you may be shooting a sunset and want your foreground and sky to be properly exposed (i.e. no silhouette images). Instead of blending the exposures manually in post processing and auto bracketing, it would be much wiser to use an ND grad filter – this will eliminate the amount of photos you take, and simplify your editing workflow considerably.
The best part about shooting timelapse videos with your DSLR or mirrorless is that you can use a wide array of specialized lenses, giving you unique and powerful perspectives not easily captured with your video camera. Check out this creative timelapse of New York City captured with a tilt-shift lens:
Click here to see The Sandpit on Vimeo
Some good applications to create timelapse are, timelapse assembler, LR timelapse and Lightroom.
How to Create a Moving Timelapse With Rails, Dollies, and Motion Control Systems
Once you've mastered the art of a stationary timelapse – meaning your camera and tripod don't move – you can add another element that will create a sense of fluidity by combining a slow-moving camera with a fast-moving subject.
Timelapse motion control systems basically attach your camera to a rail, and with each capture (or frame) it seamlessly moves your camera in a certain direction. The actual distance moved isn't very long – usually around 6 feet over the course of several hours – but the end result is a fantastic show.
Click here to see The Arctic Light on Vimeo
Some Tips To Keep In Mind:
- Have a checklist so you do not forget to take all the gear required with you out for the shoot.
- Scout for locations and get your compositions perfect before starting with the timelapse. Keep an eye on the weather reports as well before leaving for the location.
- Beware of moving elements in the scene and make sure they stay in the frame from start to finish – for example, sun and the moon.
- Adjust your camera for straight horizon and correct white balance.
- Have spare batteries and enough memory cards to get you through the shoot.
- Always shoot raw.
For more information on how to get started as a timelapse photographer, visit this fantastic beginner's guide on Timescapes.org. It also includes a list of video editing software to help you bring it all together.
This guide is simply an introduction to timelapse photography – once you get started, you'll undoubtedly find yourself presented with unusual circumstances to overcome. The helpful people at the Timescapes.org forum can help you considerably – Timescapes is considered to be the one-stop information source on professional timelapse photography, and their forum has a wealth of incredible tips and tricks, as well as inspiration.


19 Comments
For Canon users there is a hack (CHDK) that enables your to run programs on the camera. There is a wide range of time lapse scripts that allows you to make timelapse photography on P&S cameras.
https://chdk.wikia.com/wiki/UBASIC/Scripts
Cool tutorial Chris. It looks a bit complicated but you’ve explained it so it’s easy to follow. Thanks and I might try this one soon.
Cheers, aloha
Good tip on trying to do as much as you can in the field and less in post. I’ve done it the other way around a few times and saved the compilation but regretted the time-eatage in front of my computer.
-Ryan
wow fantastic guide….SuperB..
Great, accessible read. Thanks for the breakdown of main considerations, links to solid examples and just the right amount of depth for a broad, beginner overview. Very nice (and appreciated).
Thanks for informative tutorial, however there’s a slight mistake: “Sandpit” was not shot with a tilt-shift lens, the effect was produced in post-processing.
Hell Everyone
I just purchased the Brinno 200
32 Questions
a. how does one get it into time motion detection mode – Nothing In the instruction book — well mine will to engage motion mode
b. what soft ware are you using– I have real player to watch the time lapse–I cannot seem to slow it down Windows XP
c. when you purchase your Brinno- were the batteies already installed and shipped to you this way
Any input will help
Thanks
Peter
Great tutorial, inspired me to create this…
https://www.youtube.com/watch?v=lNAexJXIykc
hi,
I’m from Indonesian. thankyou for a Great Article. nice guide for any first step timelapse motion technic. Thankyou.
thanks for the article, a video of the the timelapse i tried out in 2012 … https://www.youtube.com/watch?v=uOhsn5YCWTE
For some types of photography, golden hours are best without a doubt but other types must be shot when they are happening. I shoot mostly raptors and the eagles decide
when to fish so they dictate the light I have to work with. I can get there before first light but if the subject does not show up until three hours later, what can I
do but shoot them in the available light and work on them in post? I think many of the articles on golden hours and blue twilight are simply pointing out that if you
sleep through them, you are missing out on what might be a great opportunity……………………. But as you say, they are not the only opportunity. If you are
doing nothing but landscapes you might be best to get the golden hours and go home, but other types of photography are not as limited and people would do well to bend
those rules. One other thing I have found is that if you are limited on lenses, like say a 400mm f/5.6 lens, you are going to fight the shadows at first light and
sunrise. You might even have focusing problems for lack of light. In those cases, shifting a few hours beyond sunrise can really help your shots.
By shutter travel are you talking about the iris blades moving?
Many thanks for taking the time and trouble to write this tutorial. It has helped me understand the whys and where fores much better.
Dean.
I’m going crazy with 7d and Pixel Tc-252 with image buffer before the next! Sometimes The 7d haven’t time to focus. I don’t understand if I have to work with manual focus, and at moment the delay and long times are mysterious for me! Yep, I have it for only one hour but make me crazy!
i am not a photographer but reading this post amazed a lot
Very informative and professionally done!
Hi, I’m looking for some advice on Timelapse cameras and wondered if you can help or point me in the right direction? One of my clients wishes to purchase a timelapse camera and would like me to recommend a suitable one to capture film or stills. They would purchase, maintain and store data then supply to us periodically to edit into sections or stitch together.
Is this something you’re able to offer any advice on please?
I see many recommending manual exposure but I don’t see how that will work in most situations. Even with a night-to-day / sunrise shot the light change is going to be greater than the latitude of the camera and the image will become overexposed to the point of being useless.
I am needed to shoot time-lapse of an interior film set that will periodically go from brightly lit to dimly lit. How can I capture that with a manual, fixed exposure setting? If I expose for the low-light, dim lighting the image will be blown out when the stage’s overhead practical lights are on. If I expose for the overhead practicals ( “work light” ) the image will be dark nothing at other times.
Just a quick edit recommendation: there is a line that says “A common technique time lapse photographers use to REDUCE their exposure time is by using ND filters” I think you meant to say ” to INCREASE their exposure time”.