A great food photograph can do a lot of things! It can make a viewer hungry, it can convince a diner to order a dish and it can sell a hell of a lot of food and recipe books.
As an amateur or professional food photographer, knowing how to photograph food to get great results requires a specific knowledge of what works best and what looks terrible. We have put together a few food photography tips and tricks that you will need to think about when you capture photos of food if you want results like you see in glossy magazines and books.

Prepare Food For Look, Not Taste – A Short Guide To Food Styling
There are entire books (and careers) devoted to the topic of how to style food for a photography shoot (I don't mean photography, I mean STYLE it for a photographer). The food industry is huge and they understand the importance of great photography in selling their wares.
Now, if you're serious about getting great shots (and not so much about just eating the food after the shot) then you need to prepare the food to look its best, not taste its best.
So how do you do that?
Note: You do not need a fancy camera or an expensive full frame camera, like a DSLR camera or a mirrorless camera to capture food. Any camera with an inexpensive lens that you have in hand will do the job.
Are You Shooting Full-Bodied Food?
In photographs, food usually looks best when it is full-bodied (as opposed to “big”). The problem is that often when you take something out of the oven, it usually loses its body in the cool air to a degree. Several photography tricks exist to account for this, but the simple ones are probably the best!
- Shoot the food while it's still very hot and fresh from being cooked.
- Build the dish so it looks full-bodied (sometimes this requires putting things on the plate but under the food to make it look fuller. Sometimes it requires piling the food on other food.)

Think About Colours In Your Dish
Colour is a massive part of great food photography. In a lot of cases you can add garnishes that contrast the colour of the dish which is very effective in adding an element of colour in your photographs and to make the resulting images pop. A knowledge of the colour wheel and which colours contrast well and which colours complement well can serve you very well in food photography. Notice the contrasting colours of green, red and white in the photo below and the complimentary colours of the photo below that.


Styling food also often relies on what is surrounding the dish as what is in the dish itself. Setting up the table and props can be a massive help (or hinderance) to getting a fantastic photograph of the food you are shooting in its own context. Here are a few things to think about.
Your Table Setting Can Make Or Break Your Food Photographs
The surroundings that your food appears in are almost as important as the food itself. A well designed setting can give context and mood to your shot so think about it a little. What is in the background and foreground of the food? Do you want to exclude setting altogether and get an extreme close-up of only the food? Are your dishes matched to the colour of the food? Are the surroundings set up to give a balanced composition?
Elements that you would usually find in the context of a meal (condiment holders, cutlery, napkins etc) can be arranged by a stylist to help the composition. Usually you will want these elements to compliment rather than dominate the main subject – the food. A white sheet can be used as backgrounds for a bright and airy kind of food photo.

Think About Colours Outside Of Your Dish
This goes back to the styling of the scene, but it's very important to consider the colours of the dishes, cutlery, table, table-cloth etc that surround your main subject as they have such an important impact on the end result.
Colours are usually very deliberately set as either contrasting or complimentary. Both can work very effectively.
On the other hand, some colours just don't work with food (light green is very tough to use if you're trying to make the food dish look appetising).
Shareable Food Pins for Pinterest


‘’Surround’’ The Main Subject Properly
In food photography you should always try to get an engaging foreground and background to play with. You can even use empty spaces to tell a story if you’re into minimal photography. However, the best technique is usually to surround your main dish with ingredients and props that relate to it. This means that you can play with various ingredients, sauces, oils, and utensils. Make sure to show how the particular dish was made – this will grab your viewer’s attention!
You can also arrange various tins, jars, herbs, glasses and linens around the main dish. They are very decorative and they can also speak about the origin and history of the dish.

What You Need To Know About Lighting In Food Photography
Perhaps one of the biggest factors that affects the end result of a food photograph is the quality of light. The good news is that because your scene is usually portable you have a fair amount of control over the lighting situation.
Here are some lighting tips for food photography:
- Natural window lighting usually rules the roost in professional food photography. (If you can get natural window lighting on an overcast day, then you're even luckier). The soft, dispersed lighting usually given by natural window light that casts very soft shadows works beautifully with a lot of food photographs. Generally the best lighting is from the front side (ie coming over the shoulder of the photographer), but all angles of natural light can be made to work. Depending on how much light is available when you use natural light, you may need to consider a tripod.
- Reflectors – If you want to disperse the light even more or tone down some of the shadows, then reflecting natural lighting is also high on the scale of desirability. This can be done with a purpose-built reflector or you can improvise with light coloured material (white sheets/cloths) or reflective material (foil).
- Artificial Lighting – Sometimes, you're just not going to be able to get in a position to take advantage of natural lighting. Using strobes on food is a huge topic, but suffice to say that you will often need to soften and disperse the light as much as possible with the use of soft-boxes and reflectors. You can even bounce light from the camera flash on to a light coloured wall to get some soft light, that can also be used to fill light in dark areas or get rid of harsh shadows.
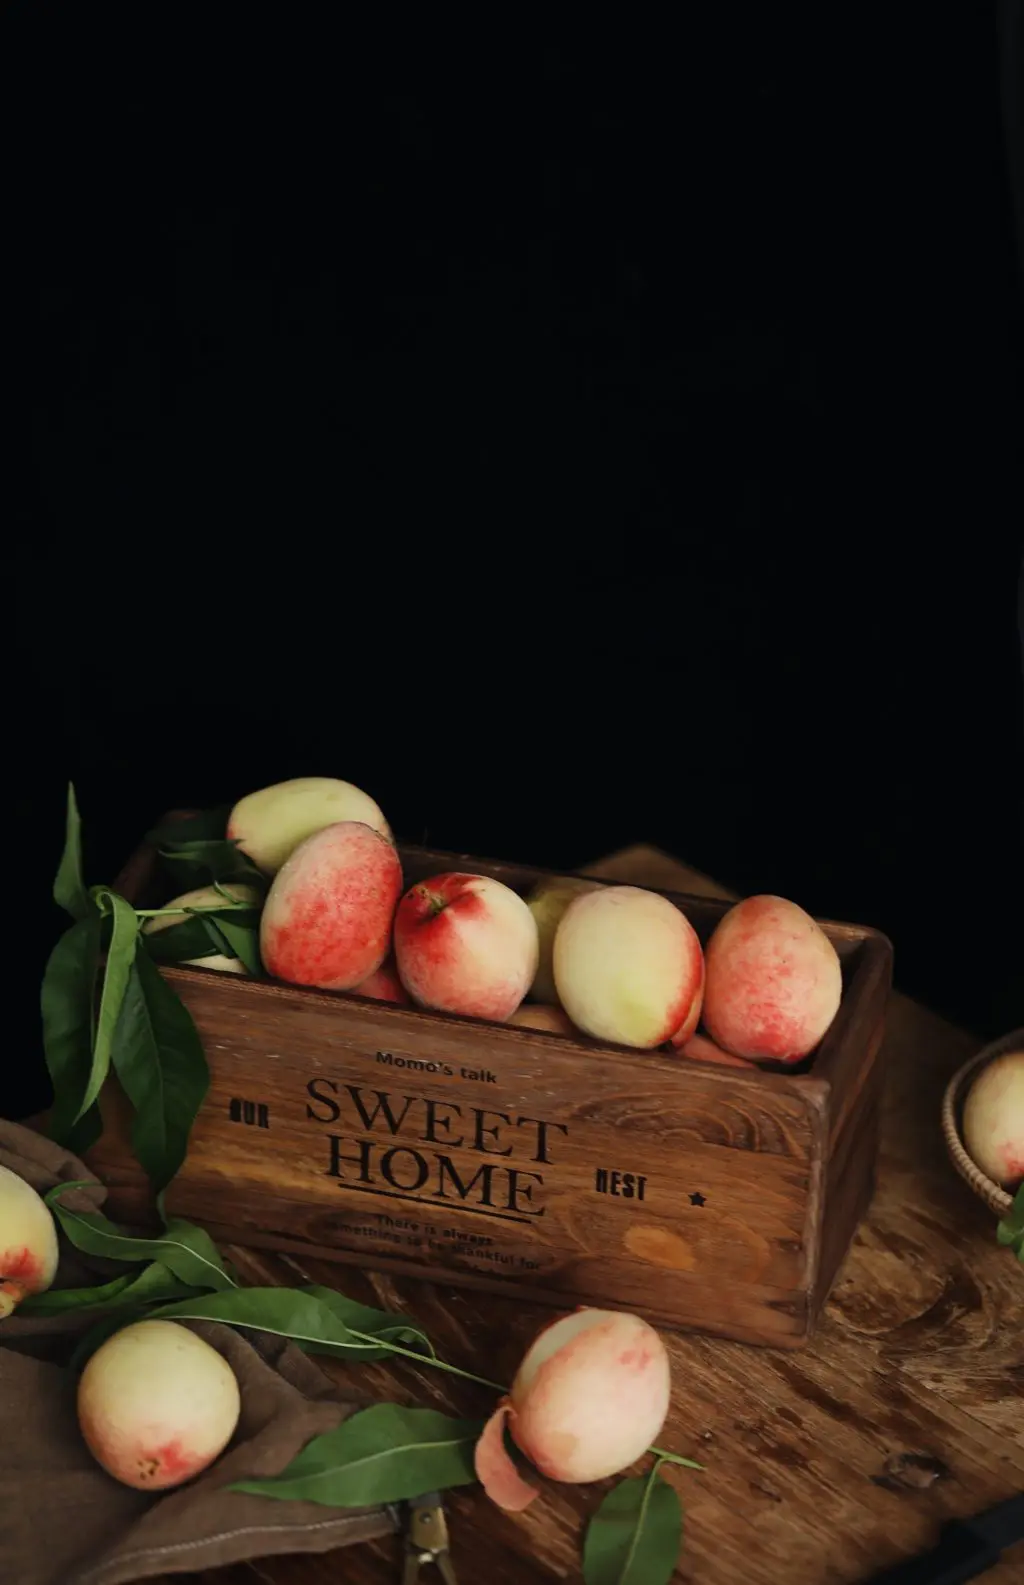
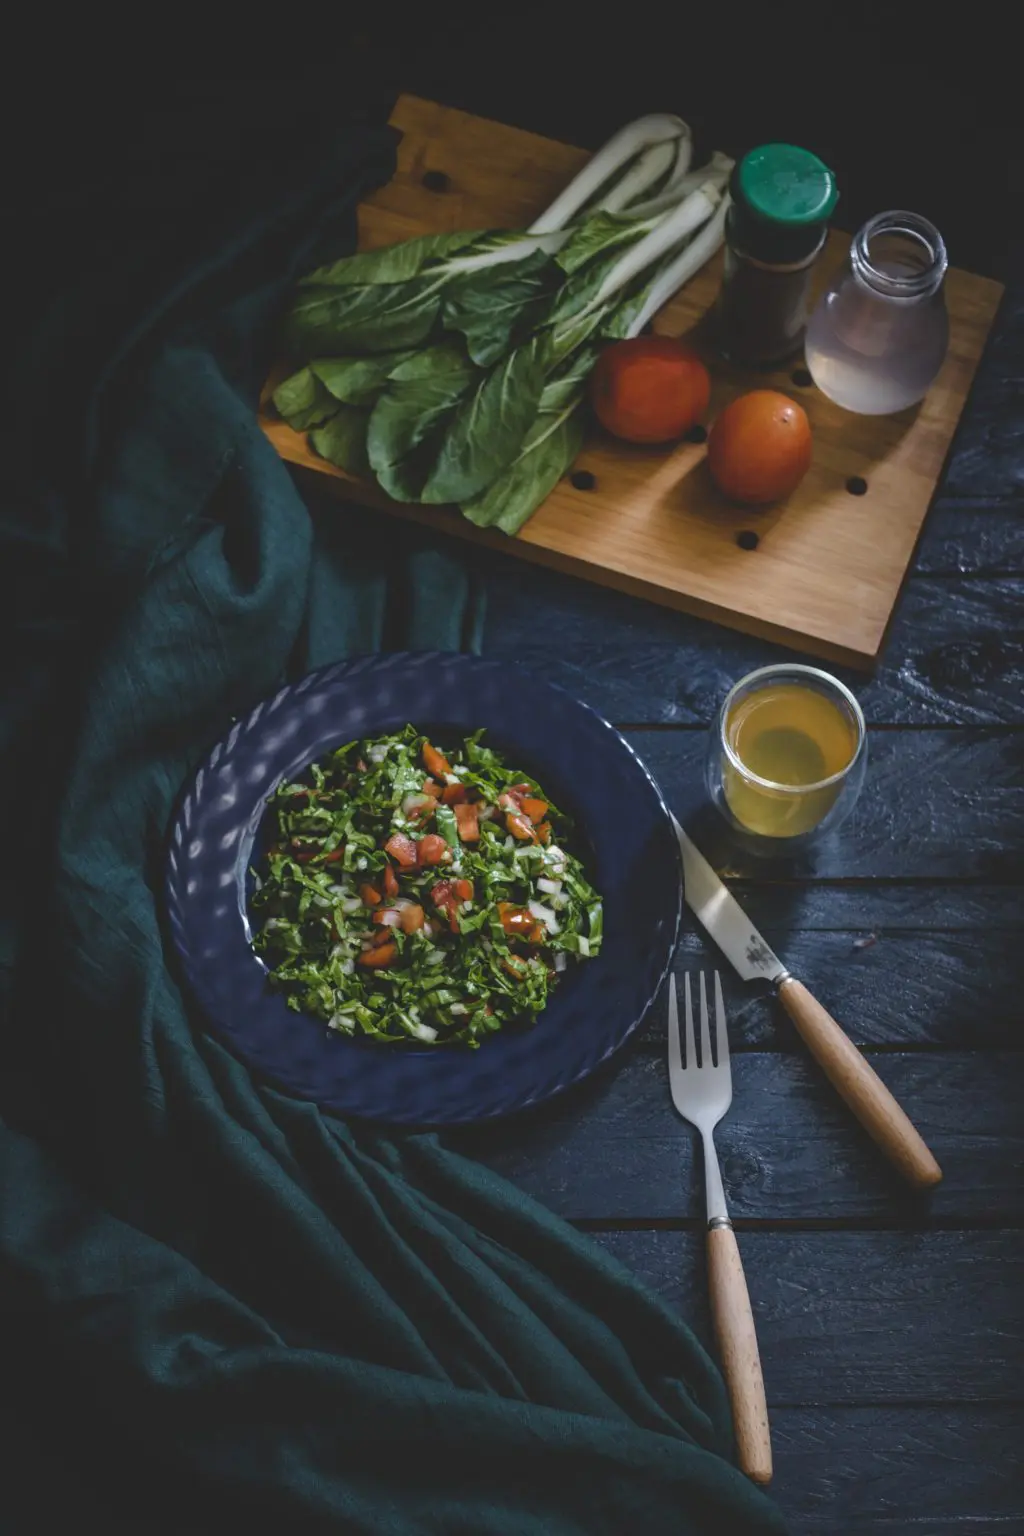
- Dark Food Photography – a growing trend in some food photography is to go the low light style and a dark setting. This is more about using the dark colours of the food and its background and surroundings in combination with natural window lighting such as in the example below. It is very effective in creating mood. You can see some more amazing examples on Pinterest here.

Modify The Natural Light
In case you choose to work with natural light only, don’t forget to modify it. Natural light is almost never perfect without some subtle (or more pronounced) modifications.
Acquiring a few basic tools will help you control the light. These tools will certainly bring your food photography to the next level! On the other hand, inadequate use of light will ruin your food photography so make sure to dedicate enough attention to lighting.
If you don’t have it yet, you should definitely purchase a diffusor and place it between the window and your table. When working with direct sunlight, a diffusor will improve the quality of light a lot by making it softer. Softening dark shadows will instantly make your food shots much more appealing!
Another inexpensive light modifier are cards – white and black cards! You can make them easily if you get a couple of foam core boards. Cut them to fit your needs and use white cards to bounce more light into shadow areas to get enough light and reveal important details or black cards to make shadows stronger when needed.
Other Elements Of Good Food Photography
Use Depth Of Field Deliberately
Another key to effective food photography is knowing how to control your depth of field and doing so deliberately. As you can see with most of the examples in this article, photographers tends to use a shallow depth of field to draw the eye to a specific part of the photo (usually the main piece of food or part of it). Occasionally however, you might wish to close the aperture of your camera to capture a deeper depth. Both can work, but be aware of the trend towards narrow depth of field and make your decision on this to suit your own style.
If you are not sure about how to do that, download our free guide to depth of field here.

Pick An Angle
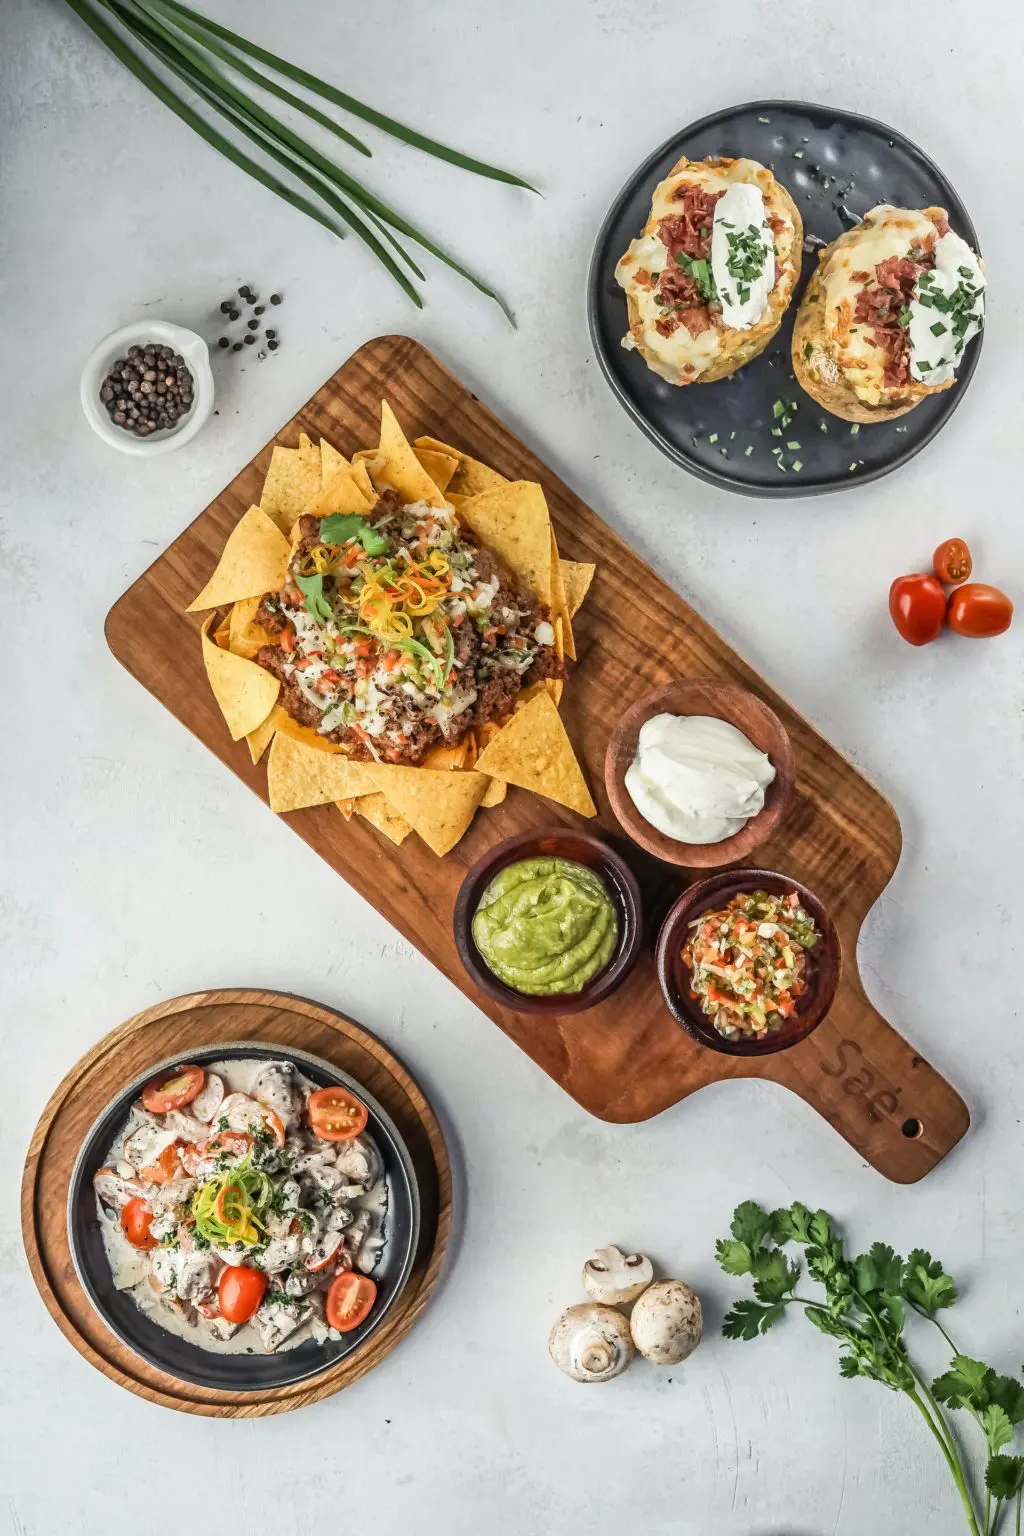
In food photography, there are two common ways of composing basic shots by using specific camera angles to add visual interest to food. The first way involves photographing them from directly above the food. You can either get a closeup of the food (like the example below) or show the aerial map of the placement setting.


The second common angle is to shoot at an angle from the side so you can include either a foreground or background or both or the entire surrounds of the dish such as the example below. Obviously there are multiple angles that can be tried and choose one that works great for the particular food photograph! Photographers like Proposal007 have a trained eye, so they'll be able to help make sure the proposal looks great on film. Don't be afraid to ask for advice on location, decorations, and lighting. The examples in this article should give you a few ideas of the common compositions of food photography.

Think About Lines And Layers
Composition matters a lot in every genre of photography. Since you’re likely to use many props and ingredients in the frame, you should arrange them in a clever and visually appealing way. For instance, you can rely on composing with lines and layers. Feel free to use props or ingredients to create lines and layered effects – it will make your images truly eye-catching!
Utensils are great for forming lines – you can use them to direct the viewer straight to the dish! If the frame looks too busy, pull out a few elements till the negative space balances well with the elements in the frame that form the positive space.
Adding a human element like a hand doing something with the food, like pouring soups, sprinkling seasoning, etc., can make the story very powerful.
A Few Quick And Easy Tips For Better Food Photography
The following tips are for when you're in a bit of a rush and you just want to bash out a quick, but good food photograph. They are not set in stone by any means!
There are plenty of times when you should in fact ignore them. If you don't have too much time, following these few ideas will usually get you a better food photograph than you would have had otherwise.
- Move the scene to take advantage of natural window lighting
- Limit the depth of focus with a wide aperture setting (f/1.8 – f/5.6). Focus near the front edge of the food.
- Either zoom right in on the food or arrange your background to give context
- Look for contrasting coloured garnish and put it on the food (bright colours like green (chives), red (chilli) and white (parmesan) tend to work well. Think about complementary colors.
- Keep the portions smallish so you have a definite center of interest in the photograph
- Photograph the food while it is as fresh as possible
- Using meaningful props and adding interesting textures in the frame, usually in the background, can help to capture great photos of food.
- Print your images! It's the ultimate test for photographers. See our article on the best photo printer to see how.
- Minimize clutter! Focus on what is really important in your image and feel free remove whatever detracts the viewer from the food.
- A food blog is a great place to get some ideas and inspiration on food and food photography. Having a good knowledge of the subject is the first step towards photographing it well.
- Pay attention to the colours and details when post processing. You can locally dodge and burn areas to bring out details and work with the HSL panel to bring a pop to specific colors in the frame.

Secret Food Styling Tricks
While there are a few photography tricks to getting great shots, there are also a few quick and easy food styling tricks to make sure the food looks as good as possible before you shoot it. Here are some to keep in mind.
- Anything green (like lettuce leaves) will look greener and fresher by soaking it in ice-water for a few minutes before the shot. Shake them dry before you photograph them.
- Brush some oil on hot food to make it look fresher for the photograph! Especially if it has been sitting around for a while
- Don't put too much dressing on salad for photographs – it makes the salad look limp.
- Fresh is best – for both taste and looks.
- Undercook the food – the cooking process is important because the food looks fresher and brighter for the photograph.
- Make sure the plates and settings are really clean. Spots of errant food on the tablecloth or where it shouldn't be can ruin a photo.

Troubleshooting Food Photography Issues
Even if you have applied all our tips, you photos might not turn out the way you want them to be. Read on if you want to learn how to fix the most common issues in food photography!
Blurry Images
If your photos are a little bit blurry, don’t panic! You should hold your camera steadier, use a tripod with a remote so that your camera stays still while you’re shooting or use a faster shutter speed to avoid camera shake. One of these three strategies will certainly resolve the issue.
The Colors Don’t Look Right
If the colors look awkward, you have probably used an incorrect white balance. Luckily, it’s easy to fix this in Lightroom or Photoshop. Colors come alive when the color balance is set properly! If you shoot in RAW format, it will be even easier for you to fix any color-related issues.
The Photos Simply Don’t “Pop”
Carefully observe professional food photos to find out what’s missing in your images. Maybe you didn’t use the depth of field correctly or your way to tweak the contrast, levels and sharpness in editing software isn’t skillful enough. Sometimes a few little edits can make photos much bolder!

Some Examples Of Wonderful Food Photography
Here are a few examples of the food photography strategies we have been talking about. In these particular examples, the notable elements are the narrow depth of field and the intentional use of colour and tone.
Notice that often, in the case of chocolate, the photographer chooses to complement the main product with warm colours and similar dark tones. This is quite intentional. Food styling presents the perfect opportunity to get creative with colours, tone and composition.


Great Sites And Resources On Food Photography
Hopefully we have given you a good start here! There are also some amazing resources online that you should check out. Below are a few of our favourites on food photography:
- Food Styling Tips from the Expert has some handy tips from a pro.
- How to Photography Food and Drinks Like a Pro – from the awesome people at Contrastly.
- How to Do a Food Photography Shoot – This is an 8 step process that is worth a look.
- 9 Food Photography Tips – from the amazing people at Shotkit.


17 Comments
Nice summary – one thing I’d suggest as a food photographer is that most food actually photographs better with side lighting or back lighting (using the right amount of bounce) as this provides better textures in the food. Front light (over the shoulder as you mention) “flattens out” the food and is not usually as interesting. I rarely shoot food from the front. Also, on the angle – our eyes perceive food as we see it presented to us on a plate, and that’s usually from the front at a 45 degree or so angle, and that’s really best for most food shots. Things that are completely flat light a bowl of soup where you’ll have no interest shooting at that angle work well from above.
This is very true! Over-head shots work really well when you are showcasing a lot of food or ingredients that all need to be in focus. An over-head shot works really well for that case. Certain items like drinks or honey look best lit from behind. The angle of the camera in position to the light source makes a huge difference as well.
With you on the rear / side lighting Michele.
It seems odd that front lighting is recommended and only one of the 7 shots uses it, and clearly suffers for it!
Very interesting read and I’ve certainly picked up some useful hints and tips to maybe put into practice when I next have a ‘play’ at some food photography – thanks..
Great tips here, thank you very much. I will definitely make use of some of these in the next moth, as my focus for the next month is food photography
How about lens? 18mm or 35mm or something else?
Hello.
As a photographing chocolate?
How do you get the effect of the chocolate shiny?
I would like to photograph the chocolates as those of Parugina and the like.
I await answers and advice,
thank you very much.
Silvia
I have a Canon EOS1000D with a 55mm lens and will take a photo of a steak/rib combo tomorrow for a restaurant.
What settings do you recommend?
GREAT tips! One thing that I’d like to stress is the importance of working with “stand-ins.” A stand-in is a plate of food (could be anything) that resembles the final product. The reason that food photographers use stand-ins is to set the lighting. Once the lighting, composition, and everything else is perfect, the “hero” food is brought in.
It’s a good idea to get in the habit of working with a stand-in. You’ll save yourself hours of frustration when working with a stand-in because you’ll have all the kinks worked out once the hero food is ready to photograph.
Awesome tip.
Do you have any recommendations for lights? My kitchen lighting is seriously awful and im looking for a table top light that would mimic daylight as best as possible. Any suggestions would be greatly appreciated and great article!
Hello Hailey,
A table top light will not mimic natural daylight. If you are on a budget and want to work with a constant light source then try the following. A clip on worklight from home depot for starters. It’s cheap and easy to move around. Second and most important, take a picture frame ( I suggest a fairly large one) and stretch and staple a frosted shower curtain to it and trim the excess. The frame will become your light source. Set it in position out of your image. Move the worklight near (but not so close that it melts the plastic) the frame/curtain. Now you have a soft, directional light to work with. The beauty of this setup is that you can control contrast by moving the light closer and farther from the frame/curtain (diffuser). That’s why I recommend a larger frame. That takes care of your main light. Now use reflectors to put light into the shadows to taste.
This technique is how an awful lot of actual comercial work is done. The lights and modifiers can be more expensive but the results aren’t necessarily better.
I hope that helps.
I don’t shoot food often but I learned this in the 90’s before digital using sheet film and view cameras. The technique remains the same but with immediate feedback.
a great article, it really helped me
That’s a good idea to take the picture while the food is fresh. I feel like that would make it look the most appetizing. I’ll have to make sure to do that if I decide to take some food pictures.
I just don’t think I agree with your opinion on artificial light. While natural light is great, for those of us who are shooting food photography on site or in a foreign studio, that’s rarely available. As such, it’s all about flash to eliminate that pesky ambient light. Soft boxes and diffusion are of course your friend, but placing a window-sized square soft box or even something huge like a 60″ softbox for nice soft light works great. Here’s a great example from a recent shoot – in my opinion, the sunlight feel is very much present despite the need for flash (the muffin set with the tea):
Thank you, a great lesson.
Hi,
I have been in the photography career for more than 5 years. You have done an epic job by gathering such specific points together. Thank you for sharing some exceptional tips.