Food photography is about capturing the delicious nature of food and this process requires the perfect light, fresh food, and the right composition to make it look delicious. When it comes to lifestyle food photography, it can be a vast and varied genre.
In this article, we will take a look at the important steps to capture visual stories of food through lifestyle photography, and in this process, you can capture stories of people involved in the process, the flavors of the food, and the stories around food. Lifestyle food photography shows how the raw materials for the food are procured, how the food is prepared, presented, served, and enjoyed.
You can create these visual stories in your home all by yourself, along with your family, friends or photograph in cafes, pubs, restaurants if you want to add a different mood and story to the images. It is also a great way to capture and share your own cooking and dining experiences.
With the holidays fast approaching, and a lot of baking and cooking happening, this would be a great time to capture interesting visual stories of food when you are having a great time together with friends and family. Since everyone is in a jolly mood, they will be happy to participate in the photography process.
Lifestyle food photography is an amazingly creative genre whether taken professionally or as a hobby and will do well with proper planning and setting up everything correctly before capturing the photographs. Here are some tips and ideas to capture success stories of food.
Planning And Setup To Capture Lifestyle Food Photography
When capturing food stories, you need to capture the essence of the location and the flavor of the food. The photos should make someone want to taste that food or prepare that dish.
Here are some things and ideas to take into account when photographing food stories:
- Look at the location where the food is served whether it is your own home, a café, a pub or a backyard garden, etc., and see what ambience the place has. Based on this, try to capture the food along with the essence of the location in your photos.
- It is always good to include the surroundings in at least one of the photos, so you can show the viewers where the food was served and photographed. This could be as a background or elements included as part of the composition.
- If it is a family recipe, you can even include a recipe sheet from a recipe book that you or someone had handwritten. This can make the process look more authentic.
- If you are capturing stories for your blog, to tell a story of an occasion, a cosy morning or an afternoon tea, and so on, it will be great to capture a series of photos from start to finish to complete the session.

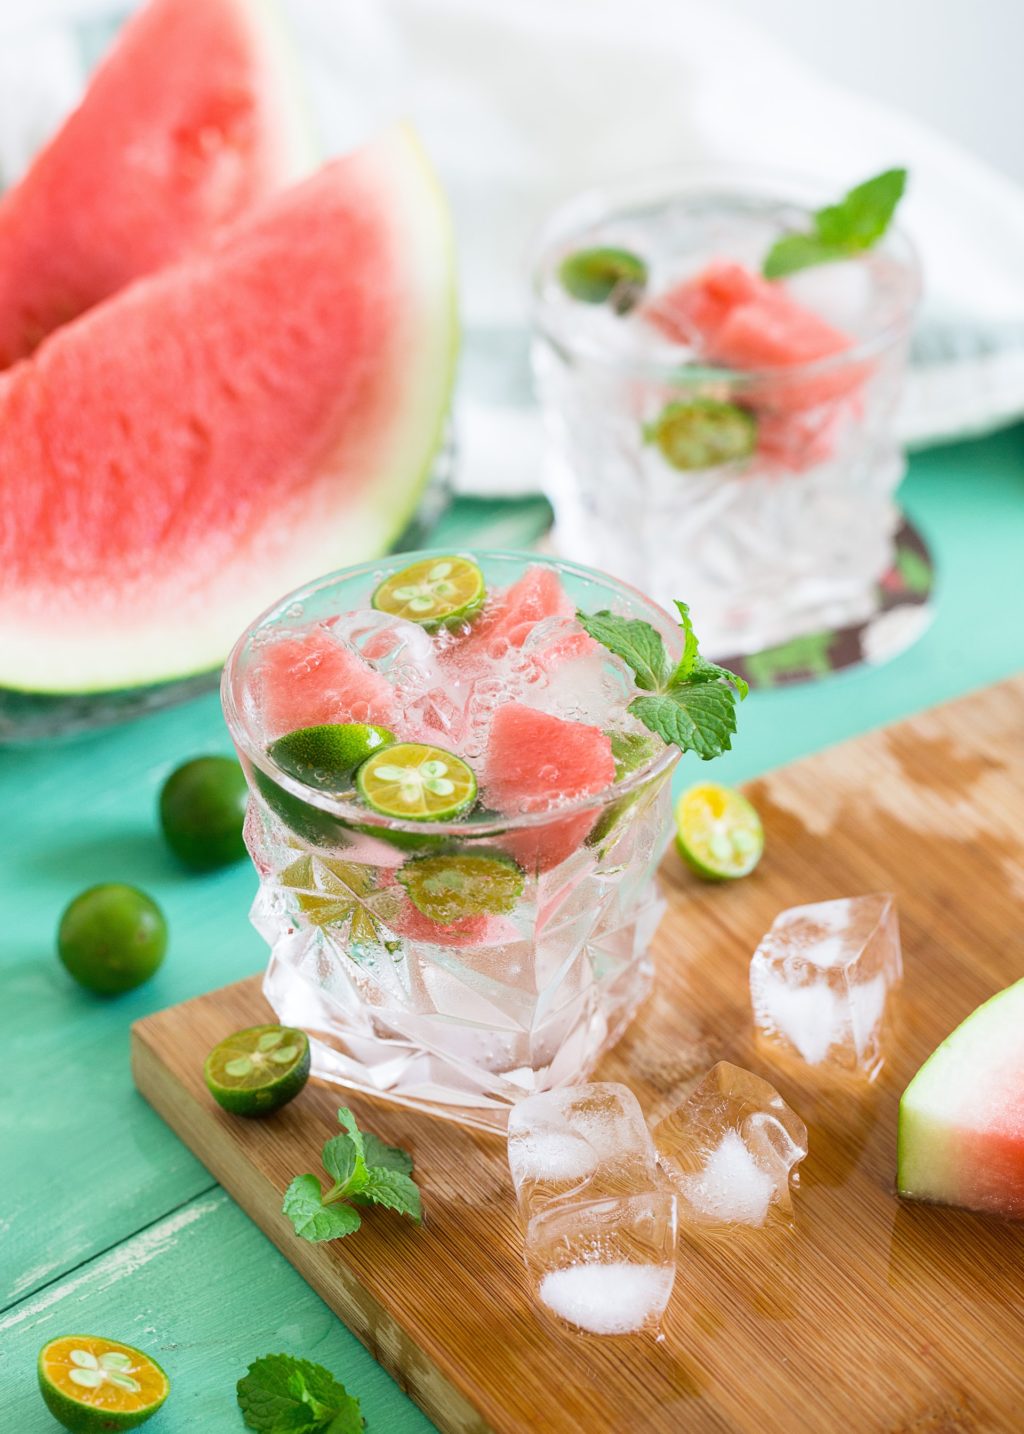
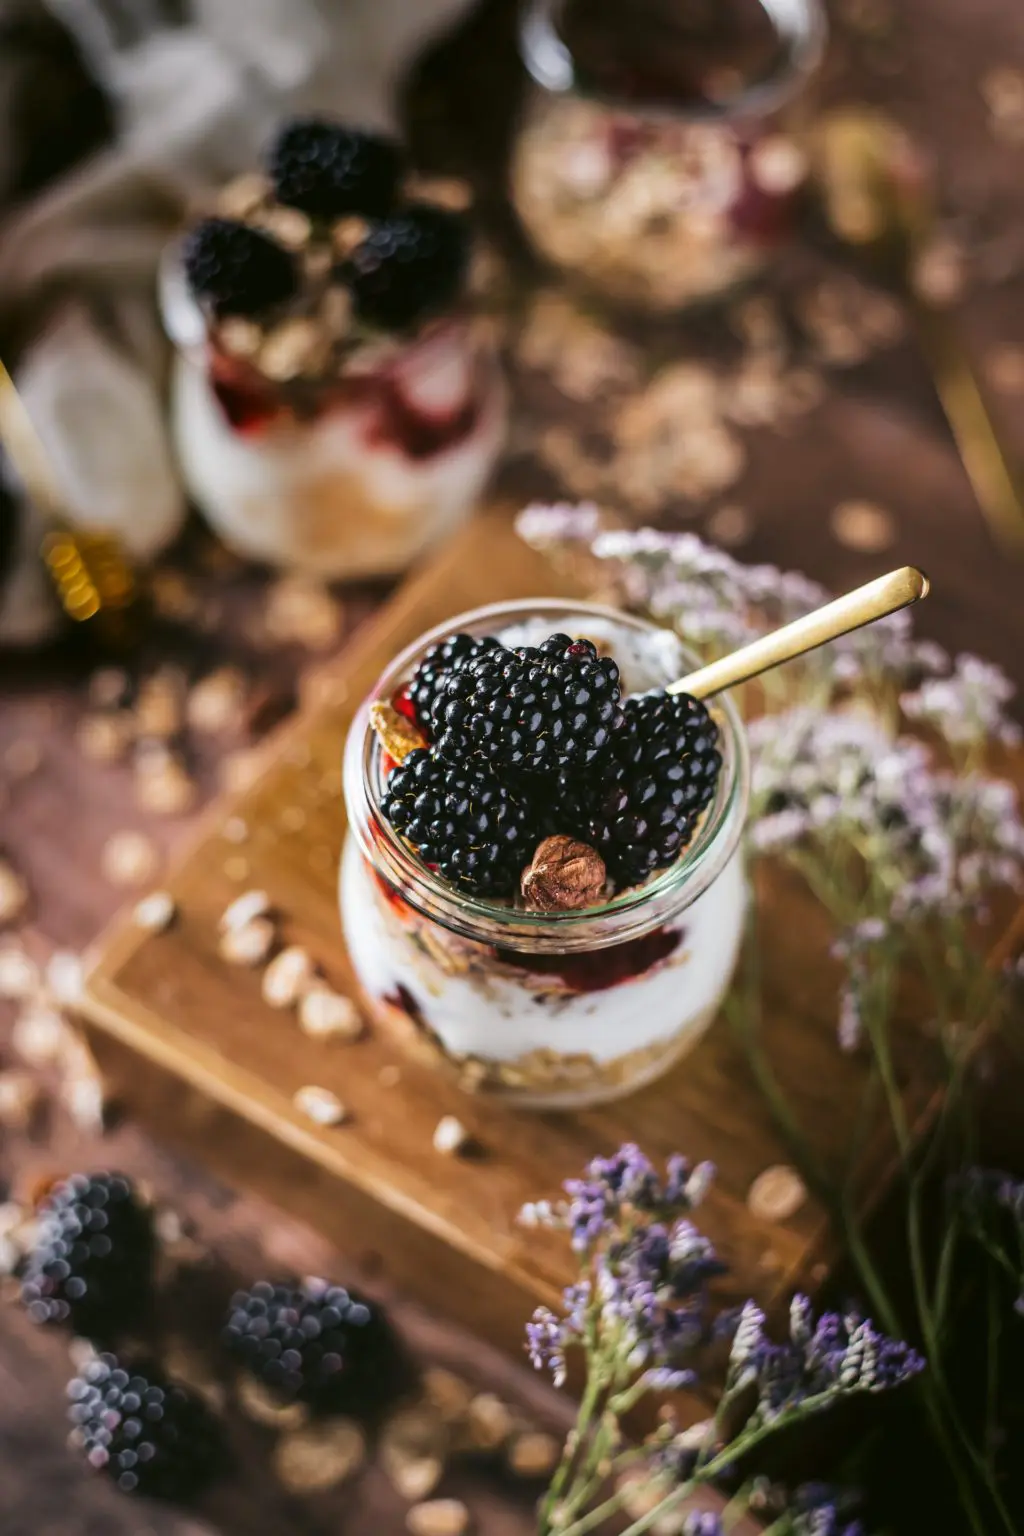
- Decide on the mood of the session, especially the colours you want to use based on the time of the day, weather, season and location. Summer food stories may require bright light and vibrant colours that are usually shot outdoors whereas an autumn food photo series will do well with a moody light and rustic colour tones set by a fireplace.
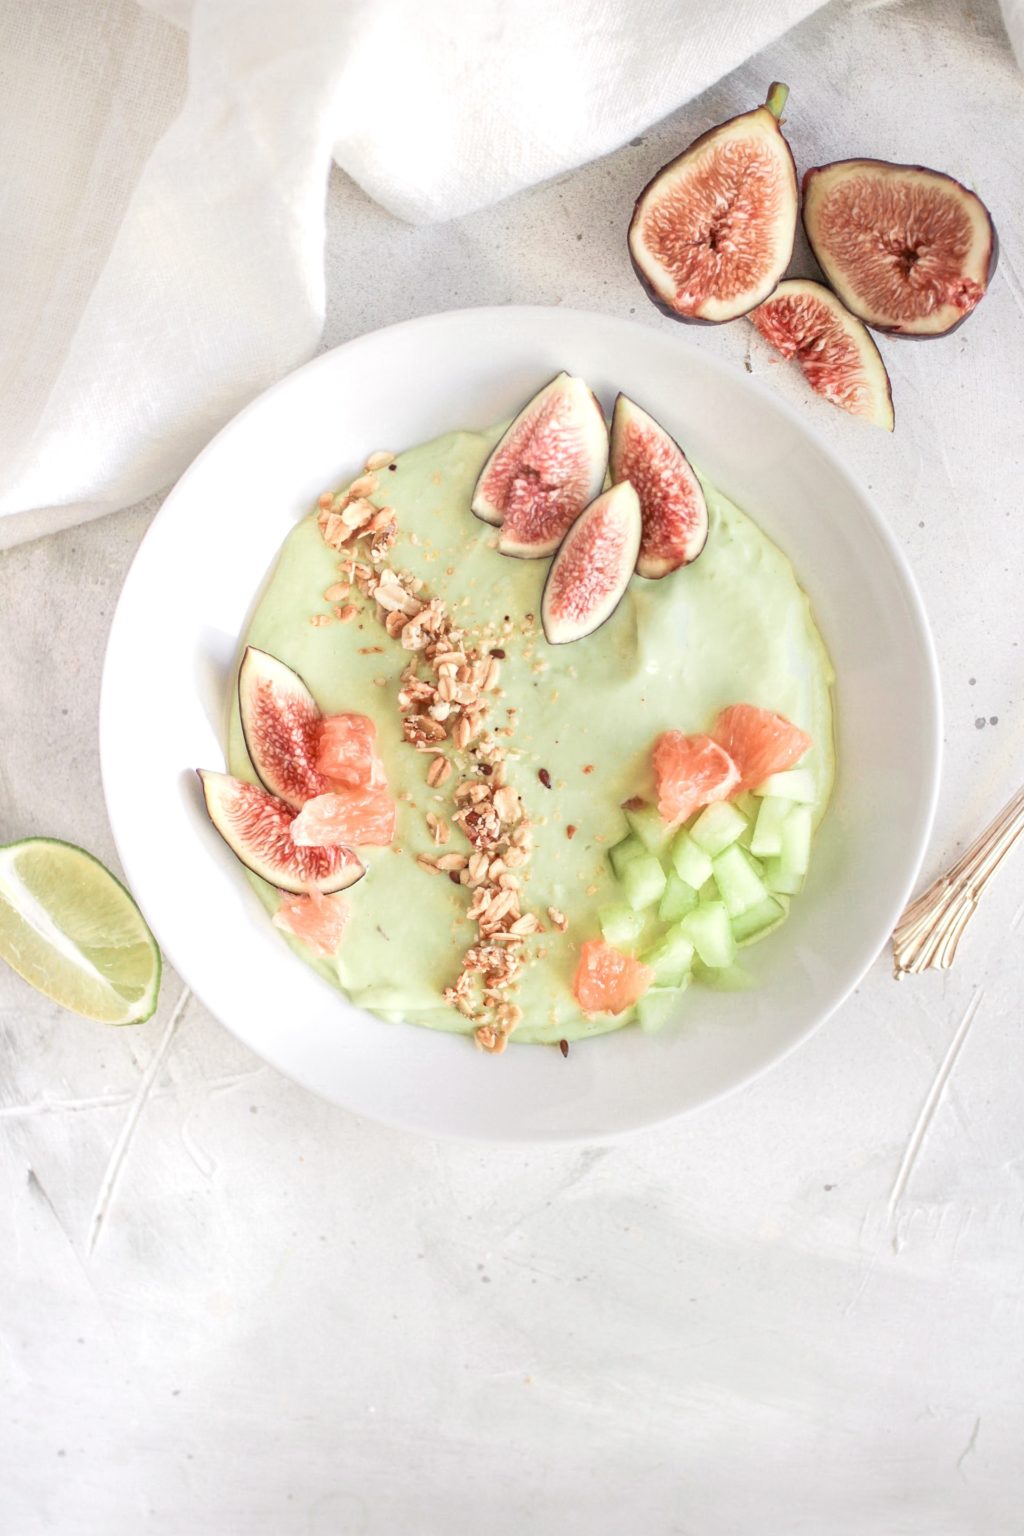
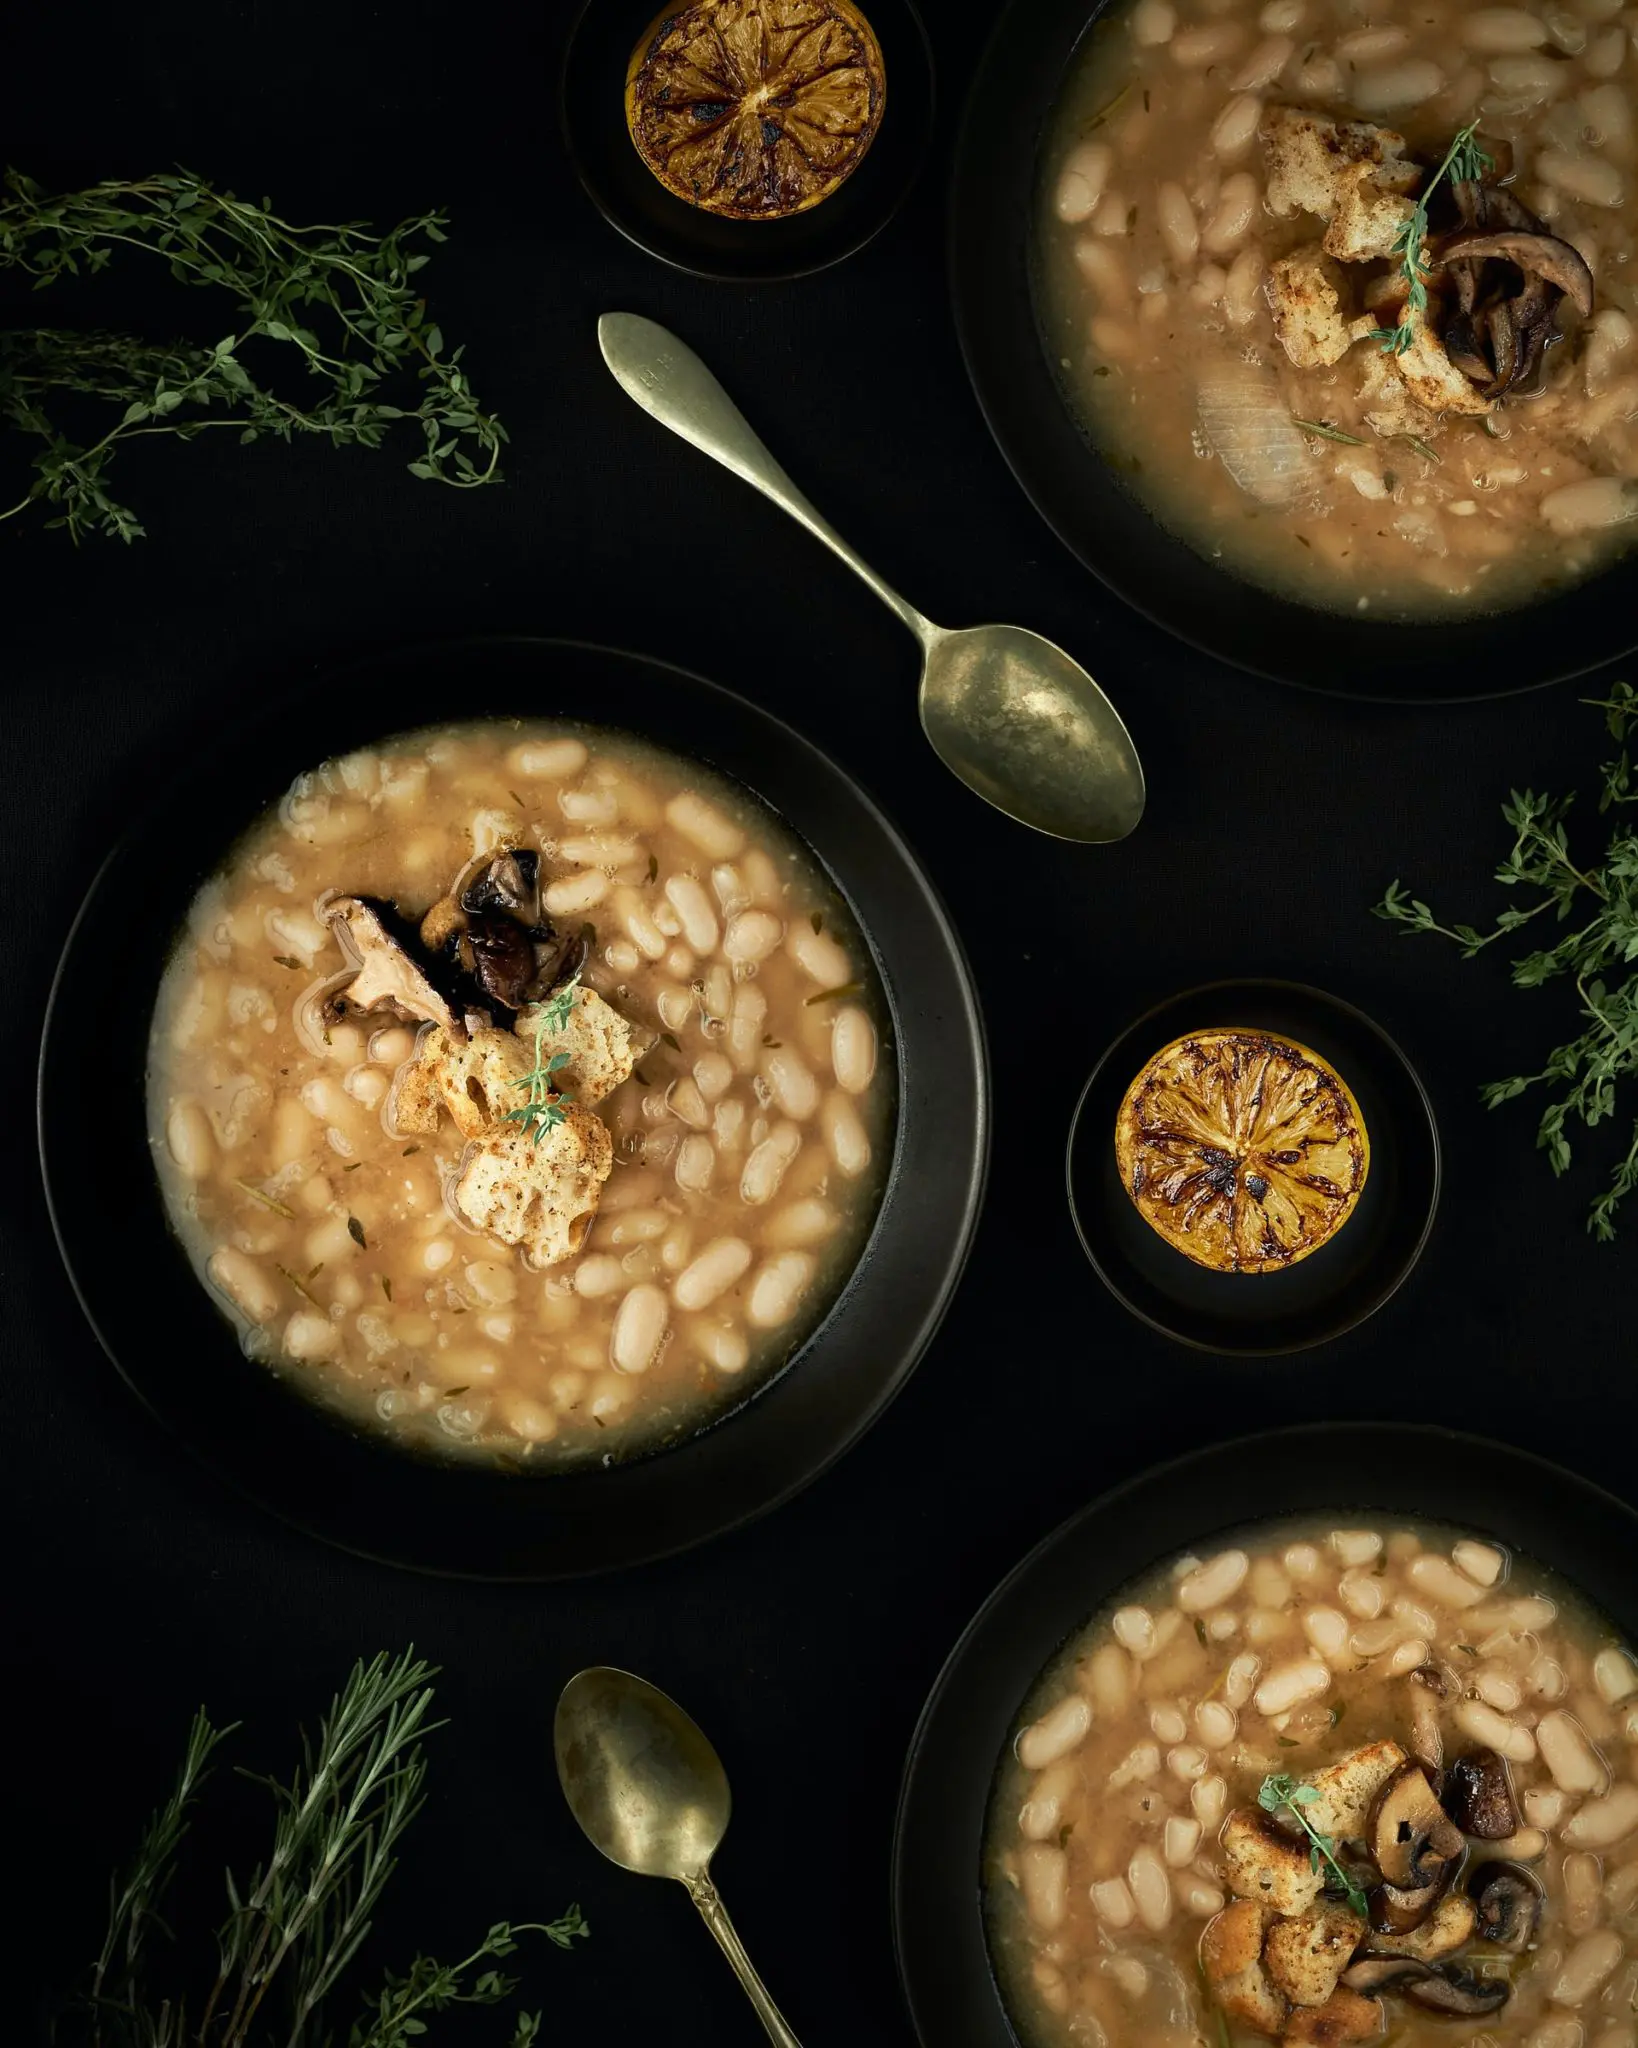
- Try to include natural food ingredients as props. For example, if you are photographing a warm soup, you can use some of the fresh vegetables, spices as props around the food to make it look more meaningful and to add interest to the photo you are capturing.
- If you have the person who is preparing the food willing to take part in the photoshoot, include them in the series. It could be them preparing the food, setting it up and even finally the people enjoying the food. You do not need to always show full details of the person, like their face. Sometimes just including the hands will tell a great story.

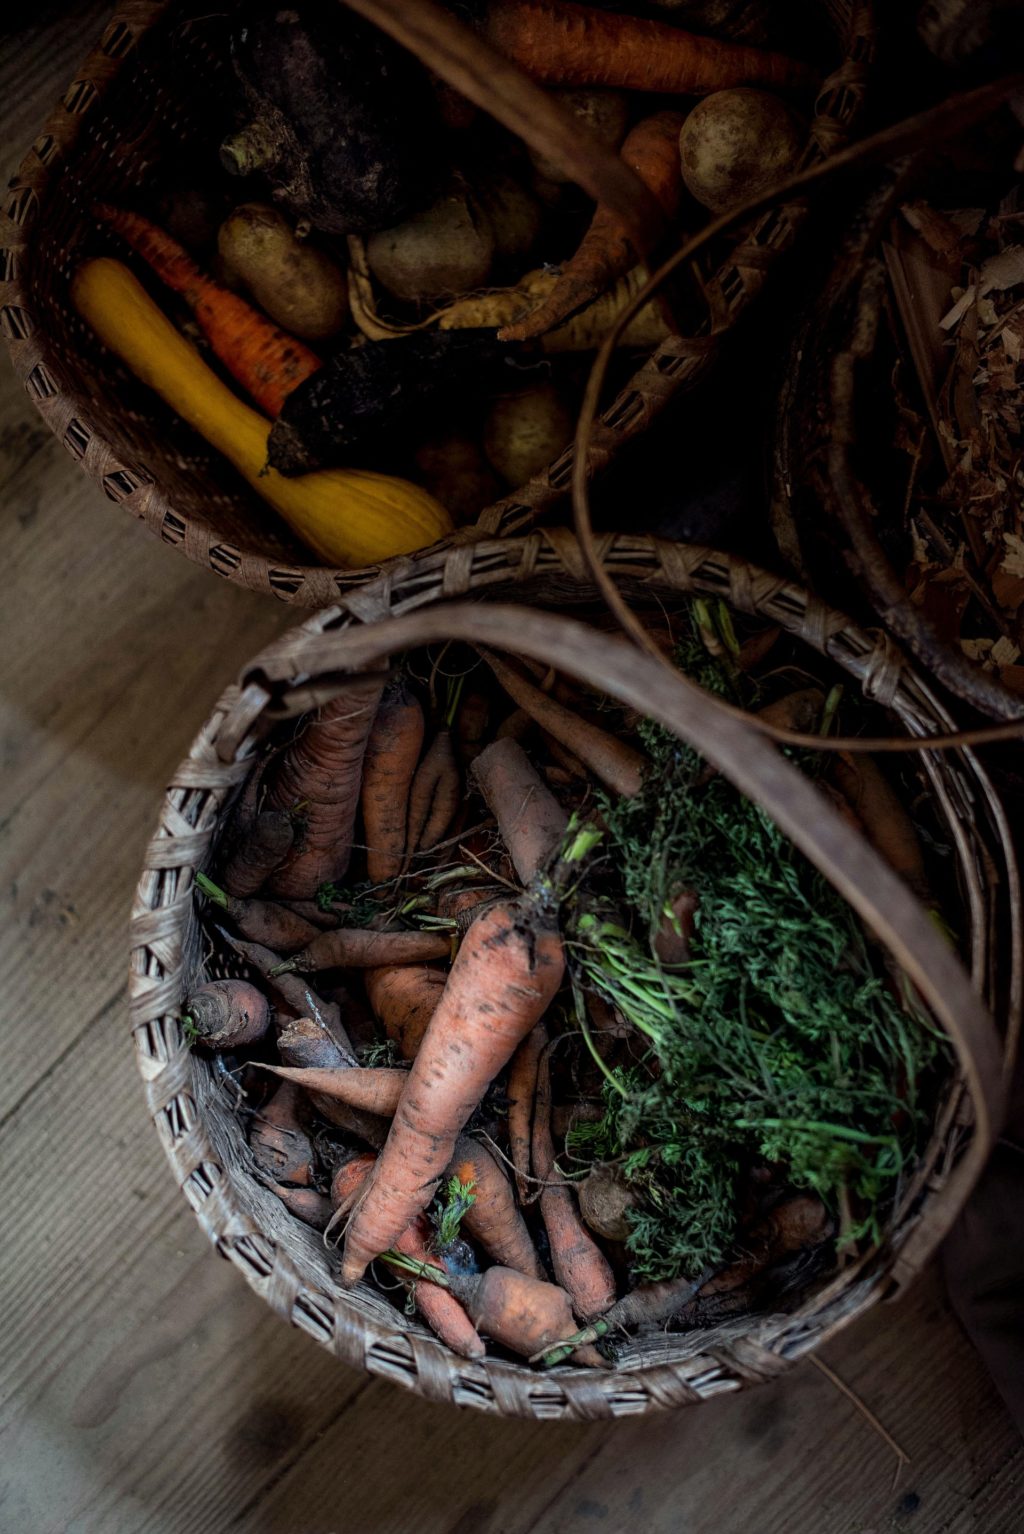
- If you are picking up fresh ingredients from your garden, like vegetables, fruits, herbs, etc., you can also document that as the first part of the photo series.
Note: We have an article here that goes into all the details on Garden Photography – Tips For Stunning Garden Photography
- If you have permission to access food preparation and presentation in pubs, restaurants or cafés, it would be a great way to document it and tell a story.
- When photographing a series, your series of shots can include the following:
- “Ingredients shots” that include the fresh ingredients that will go into the food that is being prepared.
- “Overview shots” that show photos of the location where the food is prepared, or the location where the food is local to, like markets where the food was sourced from.
- Also in the above set, you can include overview shot of the food preparation (include hands and tools in the frame for more engaging shots) and then followed by “detailed shots” of food preparation, presentation, the food itself with other supporting elements.
- “People shots” of friends and family enjoying the food. Again here, you do not always have to include the people, just their hands will be enough in most stories. If there are interesting shots of kids enjoying the meal, that can be great to capture and preserve.
- “Wrap up” shots in the end if required to complete the story.


- If the person preparing the food agrees to be a part, you can also have a portrait of them with the food or food preparation.
Gear And Settings For Lifestyle Food Photography
Visual stories of food can be captured with almost any gear that you have. It can be any camera and lens that you have or even a smartphone. You do not need a lot of gear and accessories to capture stories of food. The right light conditions, story, and a camera are all that you need. to get started.

If you are looking for advice on specific lenses, a 35mm or 50mm prime lens can be a good choice if you are looking for a fast lens. Besides, if you are looking to have some flexibility in focal length, you can make use of the 24-70mm lens so you can capture a variety of shots from wide to closeup using a single lens.
When capturing lifestyle food photography, you need to show some details of the surroundings in a few of the shots in the series to tell the story. So it is important to choose the aperture value wisely. Depending on the focal length used and how much of the surrounding elements you want in focus, you can use aperture values between f/2.8 and f/5.6.
Best Light For Capturing Food Stories
When it comes to food photography, natural light always works the best. So look for beautiful soft side light near windows. If you are shooting outdoors, look for a place where you can get the light just right on the food. When light is harsh, photograph in a shady area.
If you are looking for a dark and moody atmosphere, have a black cloth draped around the scene that you photograph so you do not have reflected light from the surroundings falling on the subject. This is possible when shooting indoors in your home or in a studio. You can also use black cardboards that can be bought from stationery or art supply store, to stop light from falling on the subject.
For bright, light, and airy kinds of images, use bright walls or material surrounding the subject. This will help to add more light to the scene and make the frame look bright.
If you are looking to fill in light in some dark areas, then use a reflector or a whiteboard. This will help to lighten up any unwanted shadow areas.
When shooting indoors, make use of only one light in the room. When you are working with natural light, turn off the rest of the lights in the room, so you have just that one source of light to work with that will make your stories come alive.
Use light that suits the mood and season. You may need some bright light for summer food photos and drinks whereas, an autumn or winter meal will need soft low key light that will show coziness in the photo.
Backdrops For Compelling Lifestyle Food Photographs
Backdrops are very important for food photography. Before capturing the photograph, think about the theme for the story, what color tones do you want to capture and what mood do you want to bring in the photographs. This can vary with seasons.
If you are shooting at home or in a studio, you have the option to use the desired backdrop that would suit the food that you are photographing and the mood that you would like to create. Old barn doors, rustic planks of wood, weathered elements of both wood, and metal, cotton clothes and towels, etc., are all great materials and ideas for backdrops.
Interesting Compositions For Food Photography
When composing lifestyle food photography, keep it simple. When you have minimal elements in the frame, it is easy for the viewer to focus on the main part and take in the essence of the things in the frame. Cluttered food scenes are not visually appealing and are not engaging but sometimes they can be used to show abundance and do it in a neat and artistic way.
Some of the compositions that you can try when composing food photographs are:
- Rule of Thirds – This is one the most basic compositional guidelines in photography and this guideline can be used as a basis combined with other guidelines. This rule helps to make an image look better than just leaving the subject in the centre of the frame.
- Rule of Odds – When composing photographs, try incorporating 3 elements in the frame instead of two. This will help to bring in more visual appeal and help to create compelling images. So, as much as possible, try to include odd number of elements, especially three to bring in that wow factor in the frame.
- Negative Space – This is a very simple and minimal way to compose lifestyle food photography. In this composition, you can arrange the food in one part of the frame and leave the remaining area blank or add very minimal artistic elements to complement the food that you are photographing.
- Golden Spiral – This is a very compelling way to capture food photographs. Place the main subject at the centre of the spiral and the supporting elements along the line of the spiral, so it can lead the viewer through the line to the main subject.
- Leading Lines – Leading lines are a great way to take viewers' attention to a part of the image. Use food ingredients like spring onions, sprigs of herbs, or cutleries as leading lines to compose the shot so they point to the main part of the scene. These kind of compositions look interesting and appealing.
- Contrasting Colours – When arranging food for photography, it is good to look for interesting contrasts in colours to bring attention and interest in the image. The contrast can be between the ingredients in the food, for example salads, between the food and the serving utensil, or even the backdrop.

- Cropped off Compositions – You can also add interest to a frame where you do not have to include the entire food in the frame but show part of it. Intentionally leaving out part of the food will arouse curiosity and look interesting. Do not just crop off slightly at the edge as that will look like a mistake.

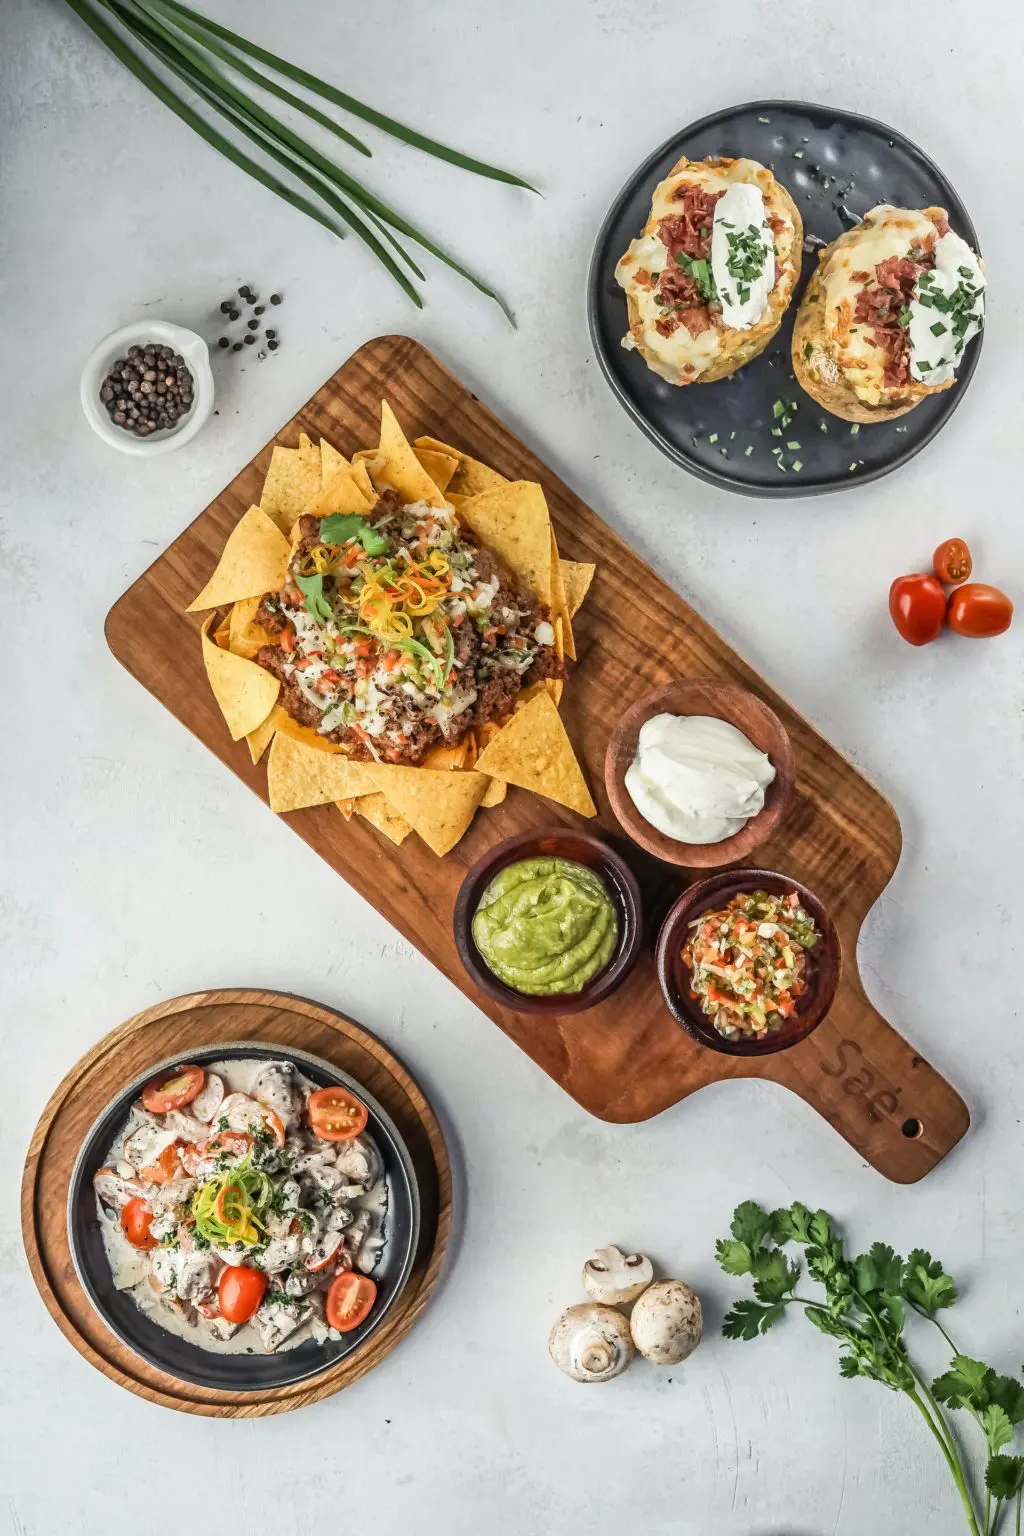
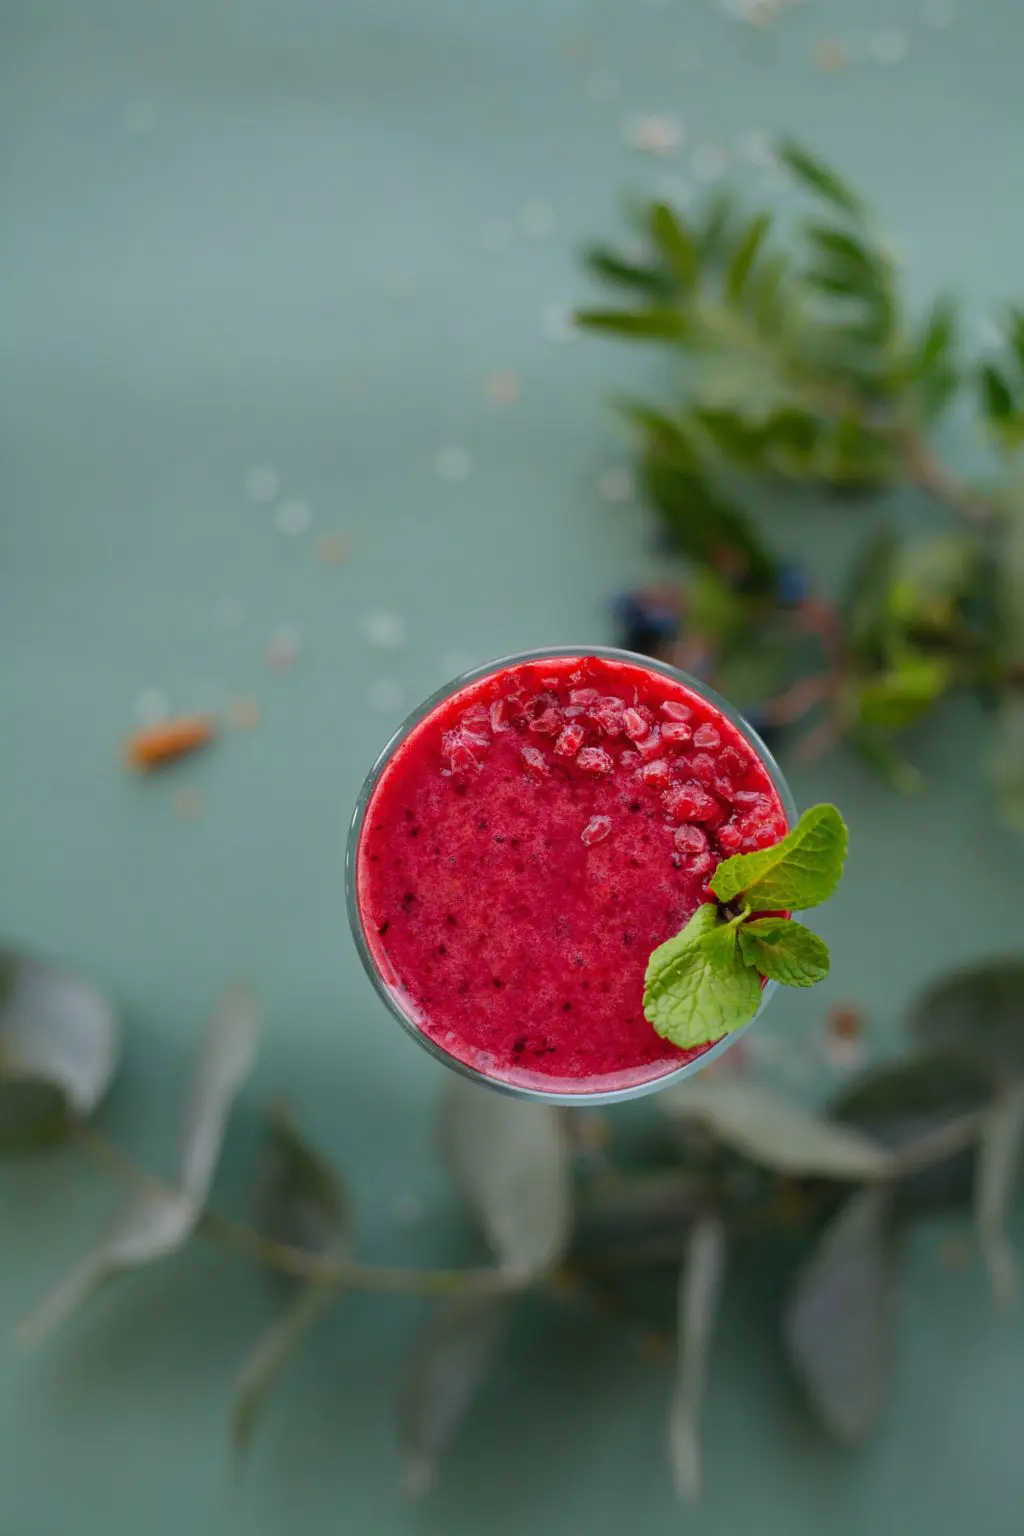
- Flat Lay or Shooting From Above – Flat lays are one of the best compositions for impressive food photography. It allows the photographer to show everything in detail and in sharp focus. It also gives an aesthetic feel to the photograph.
- Closeup Shots – Do not forget to capture some closeups as they are great ways to highlight the details and textures in the food and they also can be an important part of the story telling process.
Important Tips When Telling Stories Of Food
In traditional food photography, we often tend to keep the frame clean, the food looking perfect and any accompanying elements around to be spotlessly clean, and well set up. When telling visual stories with food, we need to capture the real essence and story of the moment. So here are some tips to follow:
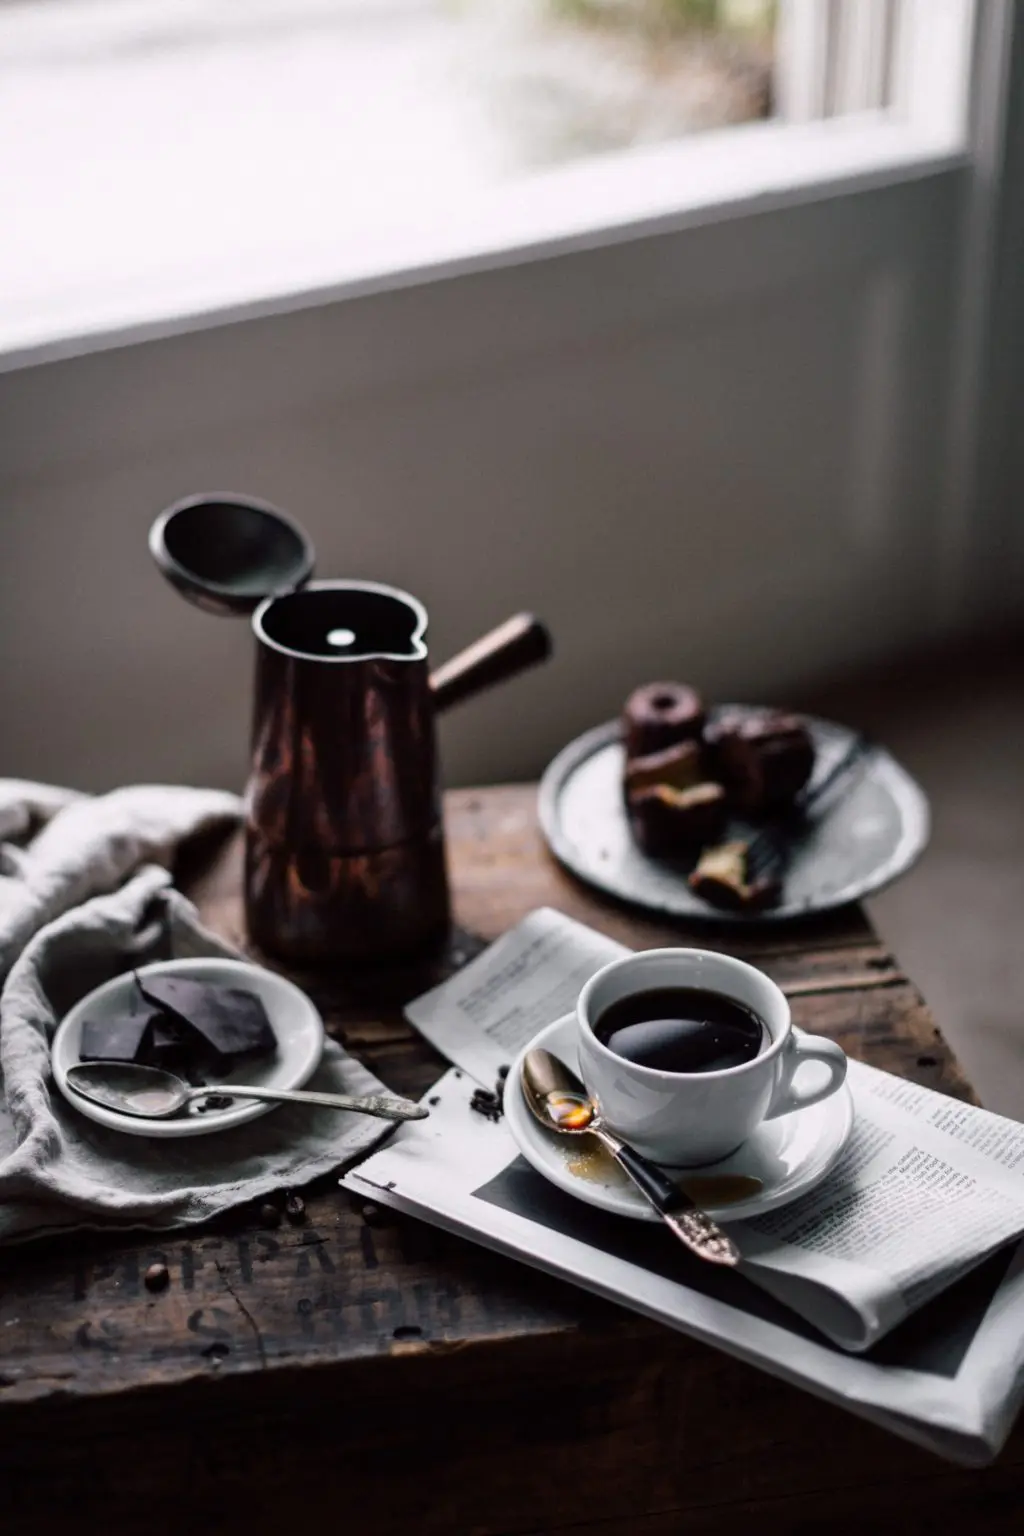
- Whether you are capturing a breakfast scene or an afternoon tea, let the food in the scene look natural. For example, bread crumbs in the scene if you have sliced a piece of bread for breakfast, imperfect butter and jam in a bowl, coffee sliding down the edges of the cup and so on.
- Adding more to the story would be a half bitten slice of bread or a cup of coffee or any drink half full through to show that someone has been eating or drinking from it. Do not wipe off any dripping bits. This gives life to the photograph and takes it away from a normal static or still image.
- If you are capturing a story through a series of images, then capture a set from start to finish. For example, for a breakfast scene with bread, butter, jam, cheese and some coffee, you could just photograph the bread on its own, then photograph when slicing the bread or after it’s been sliced. The next one can be applying butter and jam, or toasting the bread, then pouring in the coffee and finally the breakfast setup of the entire breakfast.


- Once you have composed a shot, look at the frame to see if it works. Sometimes it may feel a bit too much and in situations like these try to remove some elements or rearrange the elements differently to see if that helps.
- Capture food from many angles and perspectives. The part that you need to highlight or give importance to, should be the main focus.
- An angle looking down at about 30 to 45 degrees can be a great way to show the food and any details on the crockeries used.
- If you want to include yourself or your hands in the food and food preparation process, you will need to set the camera on a tripod, compose the shot, manually focus on the scene, adjust the exposure, set the camera on about 10 seconds timer and then get in the scene before the shutter releases.
Lifestyle photographs of food is a very creative way to capture and present food adventures and it is something that will reflect your style of presenting the food that you love. Do you love photographing food that you prepare or enjoy? Share any tips and experiences with us in the comments section below!
Further Resources:
- How To Photograph Food Like A Pro
- 8 Tips and Tricks To Improve Your Food Photography
- These Are The Secrets of Professional Food Photographers
- Daniel Krieger’s Lifestyle Food Photography
- 3 useful tips for a successful onsite food & lifestyle restaurant photoshoot
- 3 Things To Unlearn When Shooting Editorial and Lifestyle Food Images


