We all have searched the web for ways to accomplish better portrait retouching. There are more methods and programs that people use, all of which have a different look and not one is technically better than another. I use different methods depending on the portrait and look I am going for. Sometimes I use a portrait retouching program, but most of the time I just use Photoshop.
This is what I am going to explain here. I took a simple self portrait using a single flash setup in my studio. The set-up can be seen below, a single SB700 flash camera left shot through a shoot through 42″ umbrella. Camera right slightly underneath the model I had a white reflector disc to push some of the light back up into the model and reduce falloff. I wanted a shadow on the side of the face, but not too deep of one.
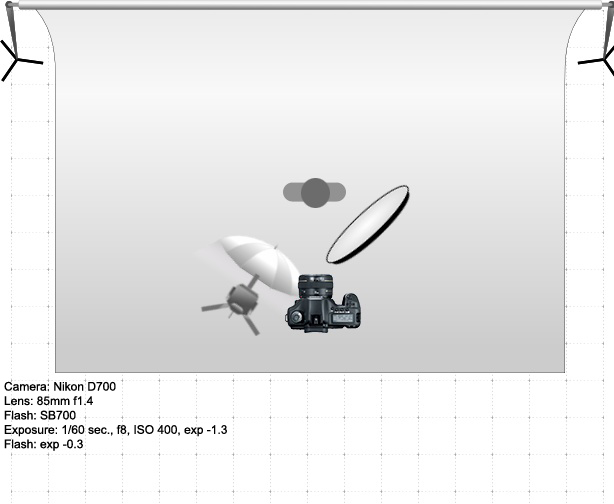
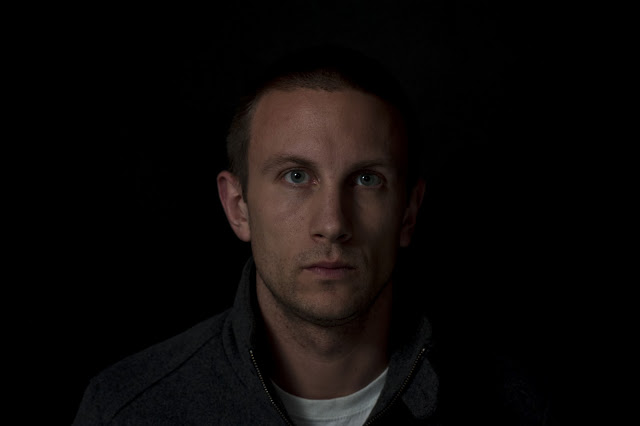
You can see the camera settings and flash setting in the corner. I had the camera in close to just shoot a head shot. This is the resulting shot (I am not angry, just my smile pics just do not look genuine when I am doing this):
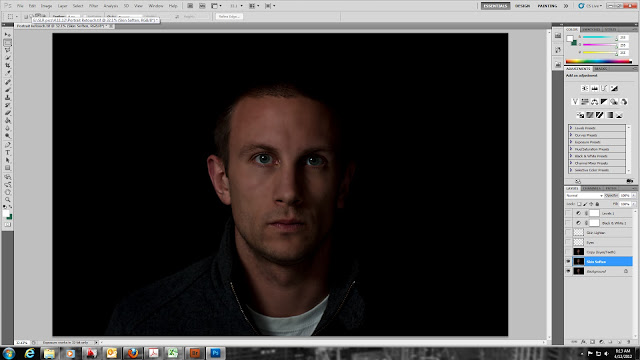
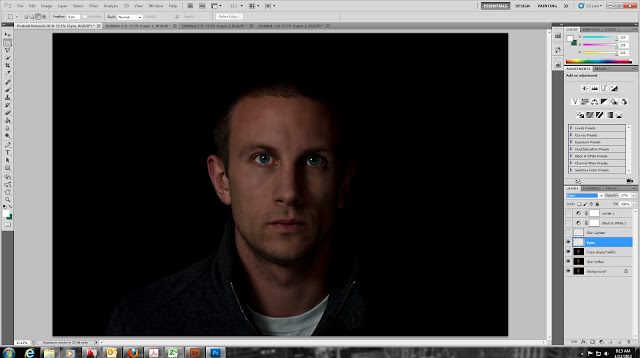
This is after importing into Lightroom and converting the RAW file. Not much adjustments were made there since I set the white balance in camera. Now you can see I have some blemishes, some large pores, etc. These are areas I want to correct on my skin. Now here is where some decisions need to be made on the look you are going for. What I want for this photograph is to not porcelain out the skin like a high fashion shoot, but not have that rough/tough look. This will control the amount of softening you will use on the skin. For this shot, I wanted a medium look, so I duplicated my original layer twice. I do this to leave the original “background” layer untouched if I need to go back. The middle layer I did a Filter->Blur->Gaussian Blur on it. I chose a radius of 9.3 but this is really dependent on your photo, I go by the motto blur until you can still see the features of the face decently well. On the top layer, I add a Layer Mask and choose the Brush Tool. Use a soft brush with the size depending on how big the skin area is, use something relatively small because you need to go around items like eyebrows, eyes, mouth, etc to keep the details in model's face. For opacity I usually choose right around 20%. The results after skin softening:
You can see that my skin does look smoother, but not porcelain. The next step for me is usually whitening the whites of the eyes and the teeth. This example doesn't have teeth but you can do the same practice on them as well. Some duplicate the new layer and zoom into the eyes. Grab the dodge tool and choose an exposure around 15%. Use a small soft brush and lighten the whites of the eyes a little bit. While doing this, also using the same tool, lighten up the color portion of the eye. Next, grab the burn tool and a small brush and just darken the outside of the iris since it may have been lightened during the dodge process and to really add some contrast in the eyes. This can really draw out a model's eyes. You can see below how my eyes are :

The second step I take on the eyes is to draw out the color. Create a New Layer and grab the Eyedropper Tool. Select the color section of the eye. Now grab a soft brush at 100% opacity. The size should be the size of the color portion of the eye. Paint the eye in like below:

Go to the layer, set it from Normal to Color and change the opacity to around 55%, depending on how much you want the eyes to stand out. The results are below:
Even though I did light the image with the shadow in mind, I wanted to lighten a little bit of the right of my face. This can come in handy when you want to add highlight to a models skin on the cheeks or above the brow. Add a New Layer and grab a soft white brush. Set the opacity around 20% and paint the areas you want lightened as I did below:

Set the layer to Soft Light and drop the opacity until you match the skin tone. You can see the results below.

Now in my work flow depending on if I am going to do a color or a black and white portrait I do two different things. If I am doing a color portrait I adjust the levels next. This is what the result looked like if I was going to do that:
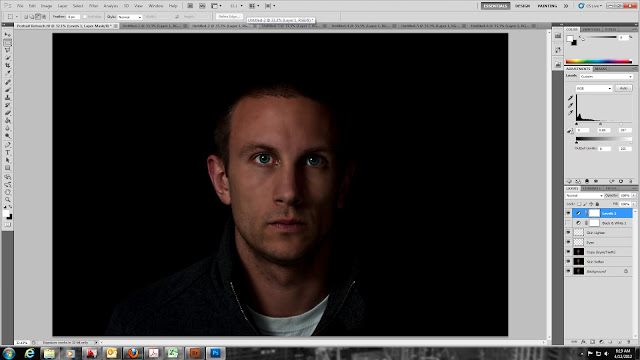
But I wanted this portrait in Black and White, so first I add an adjustment layer Black and White and adjust the color channels how I see fit. Then I go and add a levels adjustment layer.
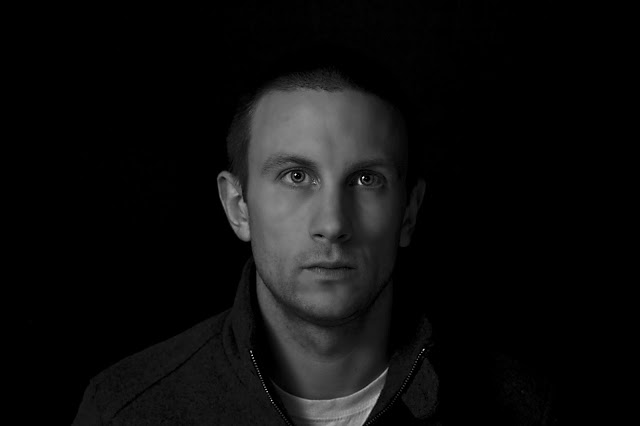
Here is the final result below:
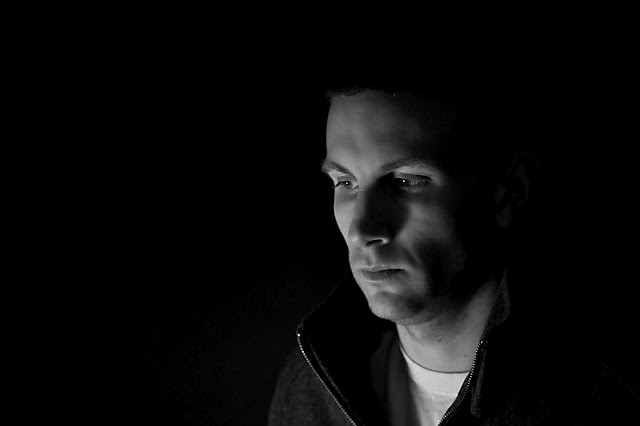
Here is one more shot taken at a different angle and with a slightly different lighting setup. Still the shoot through umbrella, but it is placed right underneath and shooting up into the model's face. The reflector has been removed.
So what techniques do you use to retouch? Do you use a program like Perfect Portrait? Like I said this is just one methodology I use to retouch, depends on the portraits, skin tones, etc.


