One of the most powerful features of Photoshop for many years has been the ability to create little automated scripts called actions. These actions allow you to repeat the steps carried out on one photo on any subsequent photo, either individually or in batches. Adobe’s Lightroom incorporates a similar facility called presets. Presets can be pre made and downloaded for free or bought from websites and can allow you to to apply a certain look to an image. Today we are going to have a look how to create your own preset, step by step. One thing to bear in mind when creating presets is they tend to work best on images with similar exposures and conditions, use them on something dramatically different from the original template and your results may vary.
The preset we are going to create today is to liven up a flat image by boosting it’s contrast and adding a graduated filter to the sky. The image I have chosen to work on is one of a series taken at Machu Picchu in Peru on a dull overcast day.
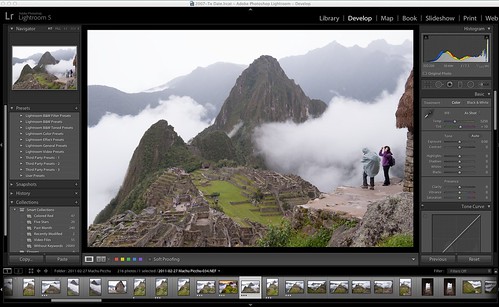
Original Image by Jason Row Photography, on Flickr
So having decided on the image we wish to use, we now go to the Develop module, using the tabs at the top right of the Lightroom interface. To the left hand side of the screen underneath the Navigator, you will see a window for Presets.
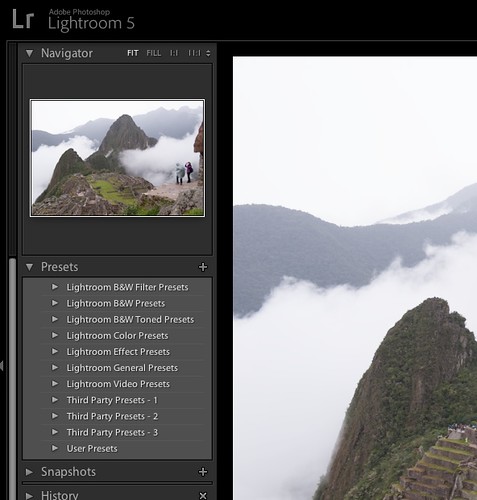
The presets panel by Jason Row Photography, on Flickr
In this window are all of the presets already added to Lightroom, from the default versions that came with the program and any third party or user created ones. We are going to create a new one so click on the + icon at the top of the window. A new window will open showing all the adjustments that we can record with this preset. For the most part its best to leave this as the default setting however if you wish to add things such as vignetting, you will need to check the relevant box. At the top you can name your preset, I will name mine Contrast Boost and Grad, by default it will be saved in the User Presets folder.
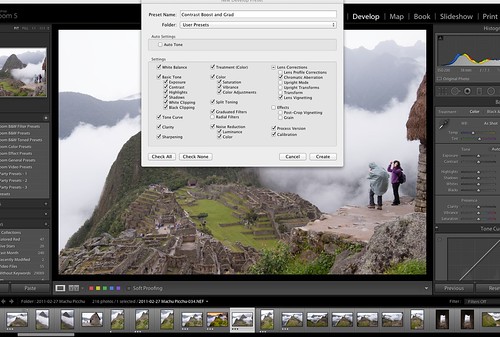
Name your Preset by Jason Row Photography, on Flickr
With the preset named, we can set to creating the look we want. The preset will use the final setting that you make to any of the adjustments in the Develop module, so you are free to experiment to get the right look. Here I am using the Tone Curve tool to add contrast by deepening the shadow and the tone levels to tweak the look. I then adjust the saturation and vibrance to add some color to the shot.
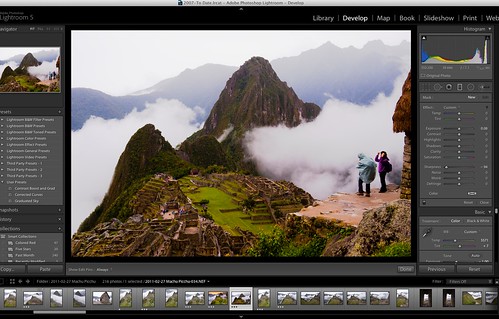
Making tone curve and color adjustments by Jason Row Photography, on Flickr
Next, because of the dull uninteresting sky, I am going to add a coloured graduated filter using the graduated tool. I use exposure, contrast and color sliders to get the sky effect I am looking for.
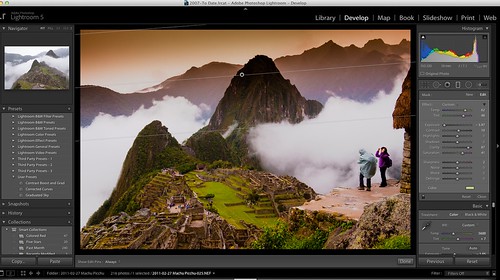
Adding the Grad by Jason Row Photography, on Flickr
Once happy with the way the preset looks, it is time to save that preset. At first this might seem confusing as there appears to be no way to save it, however it is quite a simple process. Hover your mouse over the name of your preset, do not click on it. Right click and select Update with Current Settings. A new window will appear allowing you to select the corrections that you wish to update. This will save the preset to do exactly the corrections you have just carried out.
Now for this sample we have carried out a number of adjustments in one preset. This is more to demonstrate what is possible in a preset, however creating all your adjustments in one preset is a bit of a blunt tool, for more finesse, it is well worth creating a series of presets to do the job and then applying them individually. In this case you might create presets for Contrast Boost using the tone curve, Saturation Boost, using the saturation and vibrance tools and final a Color Grad preset to add the sky.
So having created a preset, how do we apply them. Well that is the simplest part of the process. Again select the desired image and go to the Develop module. Find the required preset and simply click on it. The preset will be applied to the new image. The exciting bit is that you can now simply adjust the relevant settings in the develop module to get the image to look the way you want.
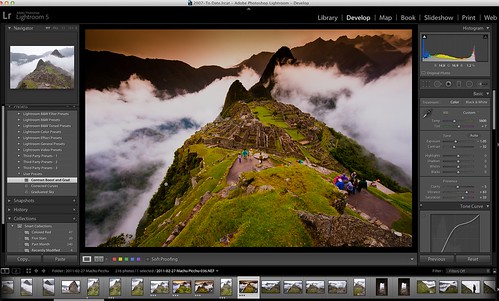
Same preset, different image by Jason Row Photography, on Flickr
Presets are powerful tools, they can quickly apply a certain style to an image. They should not be seen as getting you the final image more as a tool to get you close to the desired effect, from there you can make further adjustments to refine the image to the way you want it to look.
Other Lightroom-related Articles at Light Stalking
How to Organize Your Photos With Lightroom
The Modules of Adobe Lightroom
A Killer Collection of Adobe Lightroom Tutorials
How to Import Photographs into Lightroom
3 Easy Lightroom Adjustments to Add Drama to a Landscape


