Remember this article? Here's one of the follow-ups! Today, I'm going to show you how to use props to aid you in your flying ambition.
What you will need:
- A camera
- A tripod
- A prop to sit/stand/recline on
Optional:
- Trigger release
- Flash (entirely up to you)
- Other props to add to the look of the photo
So what can you use? As outlined previously, a lot of things. Most people use something like a table or chair, a ladder or two, planks of wood, boxes; the list is endless. In my example, I'll be using a box.
I'll be the first to admit that this potentially isn't the comfiest method of achieving levitation (depending on your prop), but it's one of the most frequently used methods and one of the most convenient to boot. Always remember to keep safety first, and don't do anything too risky! You might get hurt, and that wouldn't be fun at all.
First, choose your location. It could be anywhere – the local park, the beach, a room in your house, a studio, and if you're feeling really brave, maybe even a shopping centre! Be prepared to get some odd looks if you decide on the last one though.
Next, set up. Take your prop along with your camera, tripod and anything else you've decided to use. I use a remote trigger as it saves on trips back and forth to the camera, but if you're photographing yourself there's nothing wrong with using your timer setting. If you're photographing somebody else you might not even need one.
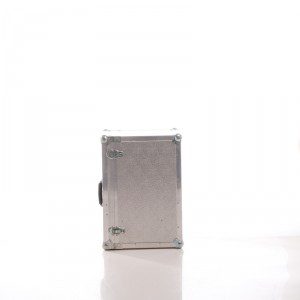
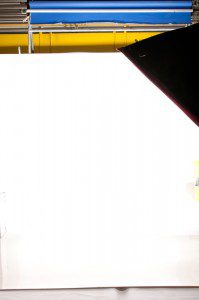
Frame your shot the way you want it, get it focused and then before you do anything else, take a photo of the scene without you or your prop in it (I call this the canvas image). This is key. I've been in the situation where I didn't have a canvas image to work from, and it was no fun at all when I tried editing it. So, always always always take a photograph of your scene without you in it, even if it is just a brick wall!
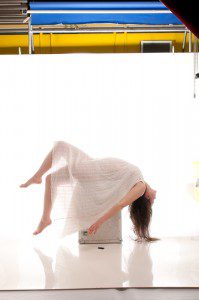
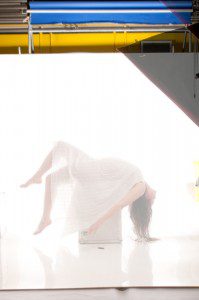
Once you have your canvas image, don't move the camera or the tripod. Don't zoom in, don't reframe. This is another reason why you might want to use a remote trigger. It avoids any accidental movement of the scene and saves you time later on when it comes to the all important editing stage. Place the prop you want to use as an aid to levitation in your scene somewhere, and start posing with it. Here's an example of a pose I did in the studio:
You might want to take several photographs before you're happy with the outcome, but when you are, you're ready to pack everything up and head to your photo editor of choice. I use Photoshop, but they're all pretty similar and the process is fairly simple so don't worry about it too much.
Load your images and sift through them until you find the ones you want to use. Keep your canvas image to one side, and keep it safe. This is what you will build on. Open that one first. Next, find the photograph with the pose you want to use. Make it a new layer on top of the canvas image, and make sure it lines up with the image underneath. You can do this easily by making it snap to guidelines or decreasing the opacity and shuffling it around. Just make sure to turn the opacity back up or you'll look like a ghost, unless that's what you're after of course.
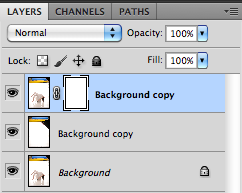
The next step involves something called layer masks, which you're either very familiar with or have no idea what I'm talking about. These are used to non-destructively mask out areas in the image that you don't want to keep. It's better to use this than the eraser tool as if you make a mistake on a layer mask, it is very easily modified. In Photoshop, you can find layer masks under Layers > Layer Mask. Make sure the layer you want to modify is selected. You can use either a hide all or reveal all layer mask, personally I prefer to use reveal all. This won't appear to change anything, but it will create a little white box next to your ‘posing' layer with a link icon next to it. Like this:
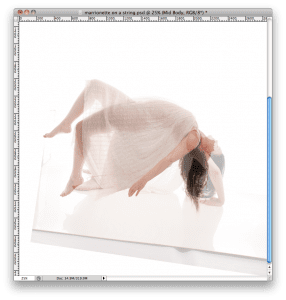
Make sure this white box is selected by clicking on it once, or the next step won't work. In order to remove areas of the image, take the brush tool and paint in black the area you wish to hide. In this case, it'll be the prop you're using. Watch as the canvas image shows through and makes it seem as though you're flying! To hide areas again, paint in white. It's worth mentioning that if you choose hide all instead, you'll get a black box instead of a white box as above and your subject will appear to vanish! Don't worry, they're still there. Just paint on the mask in white instead and you'll see them re-appear.
You could leave it like this, but for some extra realism you may want to do things like make it so the body and clothing doesn't look squared off by the prop.
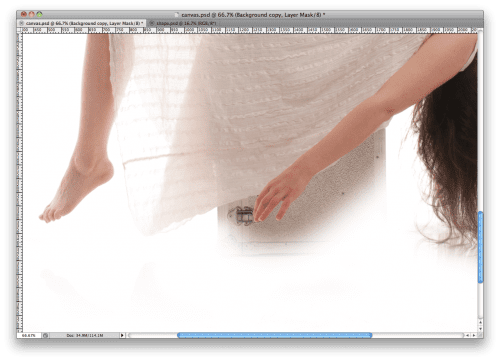
You can do this by taking bits of clothing either from the same photograph or different ones you took that day and pasting them in on a different layer and making sure they blend in with more layer masks and strategic placement. In the below image, I decided my back was too squared off by the box. So I took another pose I did without the box where the curve of the back was more visible. With some layer masks, I hid the parts I didn't want and made sure the whole thing blended together seamlessly.
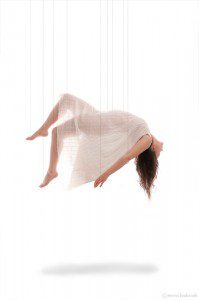
Another way to add to the realism is to include a shadow. You can easily paint a shadow in by taking a large soft brush and painting in black underneath and altering the opacity and blending modes. Another method for the shadow is to use the burn tool which tends to look more realistic, though it depends on your location. In my example, I painted the shadow in with some black and changed the opacity.
And that's it! These kinds of photos are very good editing practice and will get you used to everything mentioned above very quickly. You could get even crazier and put several different versions of yourself floating in the same image. Have fun, and post your levitating photos in the comments. I look forwards to seeing more!
Article by Emma Brabrook – Emma is a photographer from the UK. You can follow her on Twitter, visit her Flickr, find her on 500px, join her Page on Facebook or visit her Blog.



6 Comments
This is an excellent tutorial! So simple and fun to read! Thank you so much for sharing!
Thank-you, Missy! I’m glad you enjoyed it!
Most excellent! Thanks for sharing!
Great tutorial! Very cool effect
This is a great tutorial on levitation, thanks!
Thank you very much for your posting on levitation. I enjoyed it very much. Regards from Indonesia.