Macro photography is often casually referred to as “close-up” photography. While it’s probably a safe bet that no one is going to be shunned by their fellow photographers for tossing around such a loose definition, the classical definition of macro photography is a photograph in which the subject is magnified to life size or greater. Typically, subjects of macro photography are very small, such as insects or flowers; larger objects may also prove useful as macro photography subjects if, for instance, you want to focus on some very specific, smaller detail of the large object in question. Macro photography can be incredibly fun and rewarding, but it can also be a challenge. While I don’t profess to be any sort of macro wizard, I have acquired a certain level of proficiency and am inspired to share my knowledge with those who may be looking to take the plunge into macro photography.
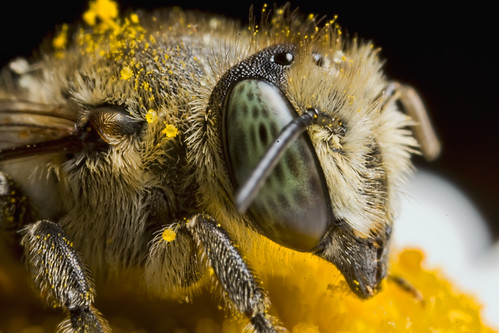
Photo by spettacolopuro, on Flickr
Equipment matters — sort of
Whether you’re using a decent point-and-shoot or the latest full-frame flagship camera of your preferred maker, just about anyone can get a cool close-up shot of a blade of grass sporting beads of morning dew. In order to realize the full potential in such a shot (and make it a “true” macro), however, some specialized equipment is certain to be of great benefit. Assuming you are using a DSLR, your best bet is to obtain a dedicated macro lens. If your budget won’t allow for a new lens, you can try a set of extension tubes to use in conjunction with a lens you already own.

Photo by Ana_Cotta, on Flickr
Get familiar with your subject
This is true no matter what kind of photography you are doing. If you were doing a photo shoot with a human subject, you’d want to have a good rapport with him or her, right? It makes for a better photo. The same principle applies to macro photography, especially when shooting insects. It helps to know their behavior; how do they respond to being approached by humans? Obviously if you are shooting flowers or sea shells, then you aren’t concerned with them scurrying away if you get too close. But it is still important to know as much as possible about the traits of whatever you’re shooting.
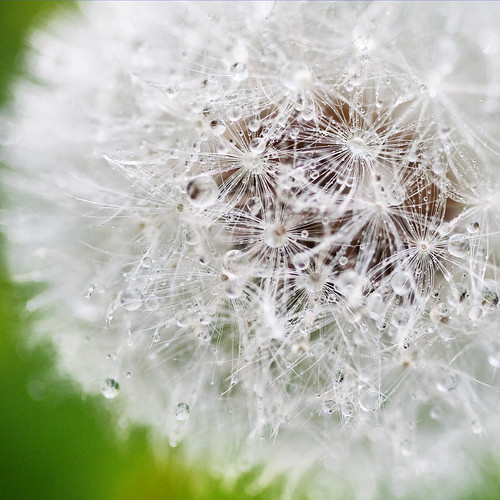
Photo by Cynthia.Lou, on Flickr
Patience, patience, patience
As in patience with your subject and patience with yourself. If you intend to photograph an insect, stalking said insect will more than likely prove unsuccessful. Instead of hunting down that elusive dragonfly, simply position yourself in an area that dragonflies frequent…and wait. If you remain vigilant, an opportunity will present itself eventually. But what if that perfect opportunity finally occurs and you blow it? Well, it happens. And this is where patience with yourself comes into play. Trust me when I say you’re going to take a lot of bad shots; a lot of poorly lit, out of focus, out of frame shots. Just keep trying. When you do nail that perfect shot you will be giddy with delight.
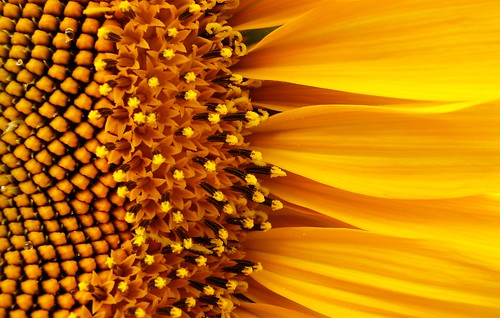
Photo by Hamed Saber, on Flickr
Let there be light
Excellent lighting is key for successful macro photography. We would all love to use natural light, but sometimes even the sun won’t get the job done. There are a few variables to account for in determining whether natural light will be enough: your subject, the time of day/intensity of the sunlight, the lens you are using. If you are outdoors shooting leaves in low morning light, for example, you might be okay, as the translucence of the leaves will allow you to backlight them. Backlighting could also work for flowers and butterflies. The lens itself could possibly make getting good light more difficult; simply, the closer you are to your subject, the more difficult it is to light it.
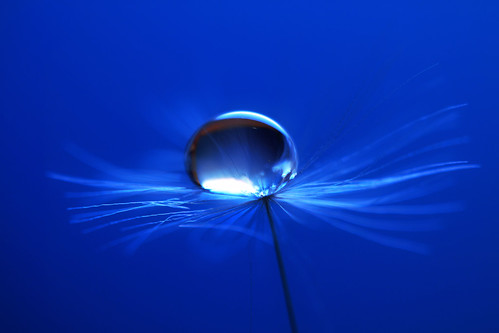
Photo by Neal., on Flickr
If it is a case of you and/or your lens blocking out the sun, this can be solved by using flash. Your camera’s built-in flash is not likely to be up to the task of providing adequate light for macro photography, so an external flash is in order. Getting that flash off the camera will provide even better results. If you think macro photography will become something you invest a lot of time in, you may even want to consider a ring flash. Given that a ring flash sits at the very end of your lens, you should be sure to diffuse the light.
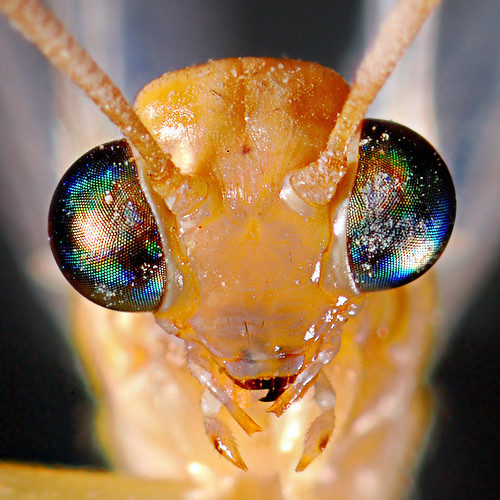
Photo by Budzlife, on Flickr
Perfect focus
Nailing focus is perhaps the trickiest aspect of macro work. The best advice I can give here is to get comfortable with manual focus. Attempting to autofocus will do nothing but frustrate you. Before you try your hand at moving subjects, get in some good manual focusing practice on anything that won’t run or fly away from you. Once you’ve mustered the courage to test out your newly acquired skill on more animated lifeforms, you can further aid yourself by pre-focusing. This involves placing an object of similar size as your subject in an area within the camera’s field of view where you expect your subject to make an appearance. When the real thing finally shows up, you’ll be ready to shoot. Yes, there is some guess work involved with this method and, depending on what your subject is, may never find yourself needing to use it. But if you practice it, it’ll be there just in case.
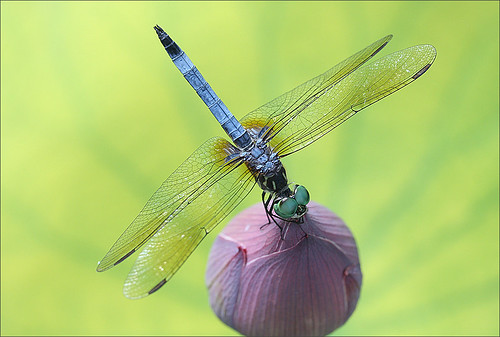
Photo by Bahman Farzad, on Flickr
Learning to see
Macro photography subjects are by no means limited to insects and flowers. In everyday life, we’re accustomed to seeing the “whole” of things. Start paying attention to the parts that make the whole and you will expand your vision for macro photography exponentially.
Practice, patience, and creativity will be the strongest weapons in your arsenal. So grab whatever gear you have and go have some fun! Don't forget to print your images – it's very satistfying for any photographer, and we even have a guide to the best photo printer for the task. For some examples of macro photography, check out my set on Flickr.


20 Comments
Great tips! Thanks.
Excellent ideas!
I thought this was going to be one of those articles with the super obvious stuff. I think it’s very good for beginners and very well written. I think you could have used one of yours in the article: https://www.jdevaun.portfoliobox.net/gallery/image/50934#0
Jeff
Try again.
very cool
Great selection of images! And thanks for the encouragement. 🙂
great tips!
What about the settings of the camera? Manual mode, aperture and shutterspeed? Thanks.
All depends on what you want to achieve in the final image really. I personally use 2 primary methods for my macro work:
1. off-camera flash (on a bracket) in manual mode (1/125, f-22, ISO-100) and get images with a nice, dark curtain behind them and the whole subject in full focus. >>>
2. no-flash with higher ISO in aperature priority mode, to achieve softer, brighter, bokehlicious pics like this. >>>
Dangit. Sorry. Still trying to figure out image linking HTML jazz. :/
image 1:
https://farm8.staticflickr.com/7119/7428590614_7f620e4302.jpg
image 2:
https://farm9.staticflickr.com/8218/8378415371_499a99a5b9.jpg
Have just purchased a Canon 100mm EF f2.8L Macro IS USM
Finding it real hard to get desired result.
Thanks you for your comments on Macro.
Will paste an image when I finally get the results I am aiming for
great article…. good advice for a novice like myself
today there were snowflakes on a spiderweb. and the tiniest breeze. darn you tiny breeze.
but it finally calmed down. patience…
Great tips. I always get inspired to shoot macro this time of year when the flowers start coming out.
Lately I’ve been experimenting with indoor macro-photography; I use small flashlights, lamps and pocket mirrors to light the subject. It’s both easy and fun to move the light sources around and see the results. You can tape some paper (it can be colored paper if you wish!) over the flashlight for a nice diffuse light source.
Good idea about the flashlight. Everybody’s got one of those around the house!
Excellent tips for doing macros. Thanks for the informative article!
Thanks for this. I have been having trouble focusing with my new Canon Macro 100mm f2.8 USM lens, but it is a very good lens. Today I went out with it and got some great shots. With this lens not everything needs to be tiny.
I have got some great shots with tiny things, but have to learn new things, like what you have just said to get better at that.
I find with this lens, I can’t change settings when I have it on AP. Have to set it on manual to set it up. Always use manual focus though.
I like the part that says ” … paying attention to the parts that make the whole..”