Lightstalking's Latest Lightroom CC Tutorial – The Guided Upright Tool
How Exciting Is Adobe's Latest Update? Very…So, We Had To Write About It.
One of the advantages of Lightroom’s subscription service (The Creative Cloud) is that Adobe can now make frequent smaller improvements to its products.

One such improvement came with the recent Lightroom update 2015.6. It's called the Guided Upright Tool and it’s an improved variation of the Upright tool that was used to straighten horizons and remove converging verticals.
The new tool is much more controllable allowing you to make fine adjustments by using up to four lines defining the “shape” of the image.
In This Lightroom CC Tutorial, We Will Cover:
- Why we need the Guided Upright tool
- How to use the Guided Upright Tool
The two primary uses of the tool are
- To correct skewed horizons, and (perhaps more importantly)
- Reduce or eliminate converging verticals.
2 Genuine Reasons Behind Why We Need Lightroom's Guided Upright Tool
1. Skewed horizons happen to the best of us and can easily ruin a good shot whilst converging verticals are a common problem not only for close -up shots of architecture but also for distance shot of cityscapes and even landscapes.
They occur when the lens is pointed either up or down from 90 degrees parallel to the ground giving a skewed perspective.
2. Another problem that the tool can correct is lens distortion. This manifests itself as barrel distortion or pincushion distortion, giving an image a slight concave or convex look.
Fortunately for us all, with the new Lightroom tool, we can easily correct all of these obstacles with a great deal of fine adjustment. Read on and we'll show you the tips and tricks in this Lightroom CC tutorial.
Further Learning
We've got some excellent “Lightroom Tutorials” in easy-to-follow Videos here.
Learn how to use Lightroom to “Transform Your Images Into Powerful and Share-Worthy Works of Art.”
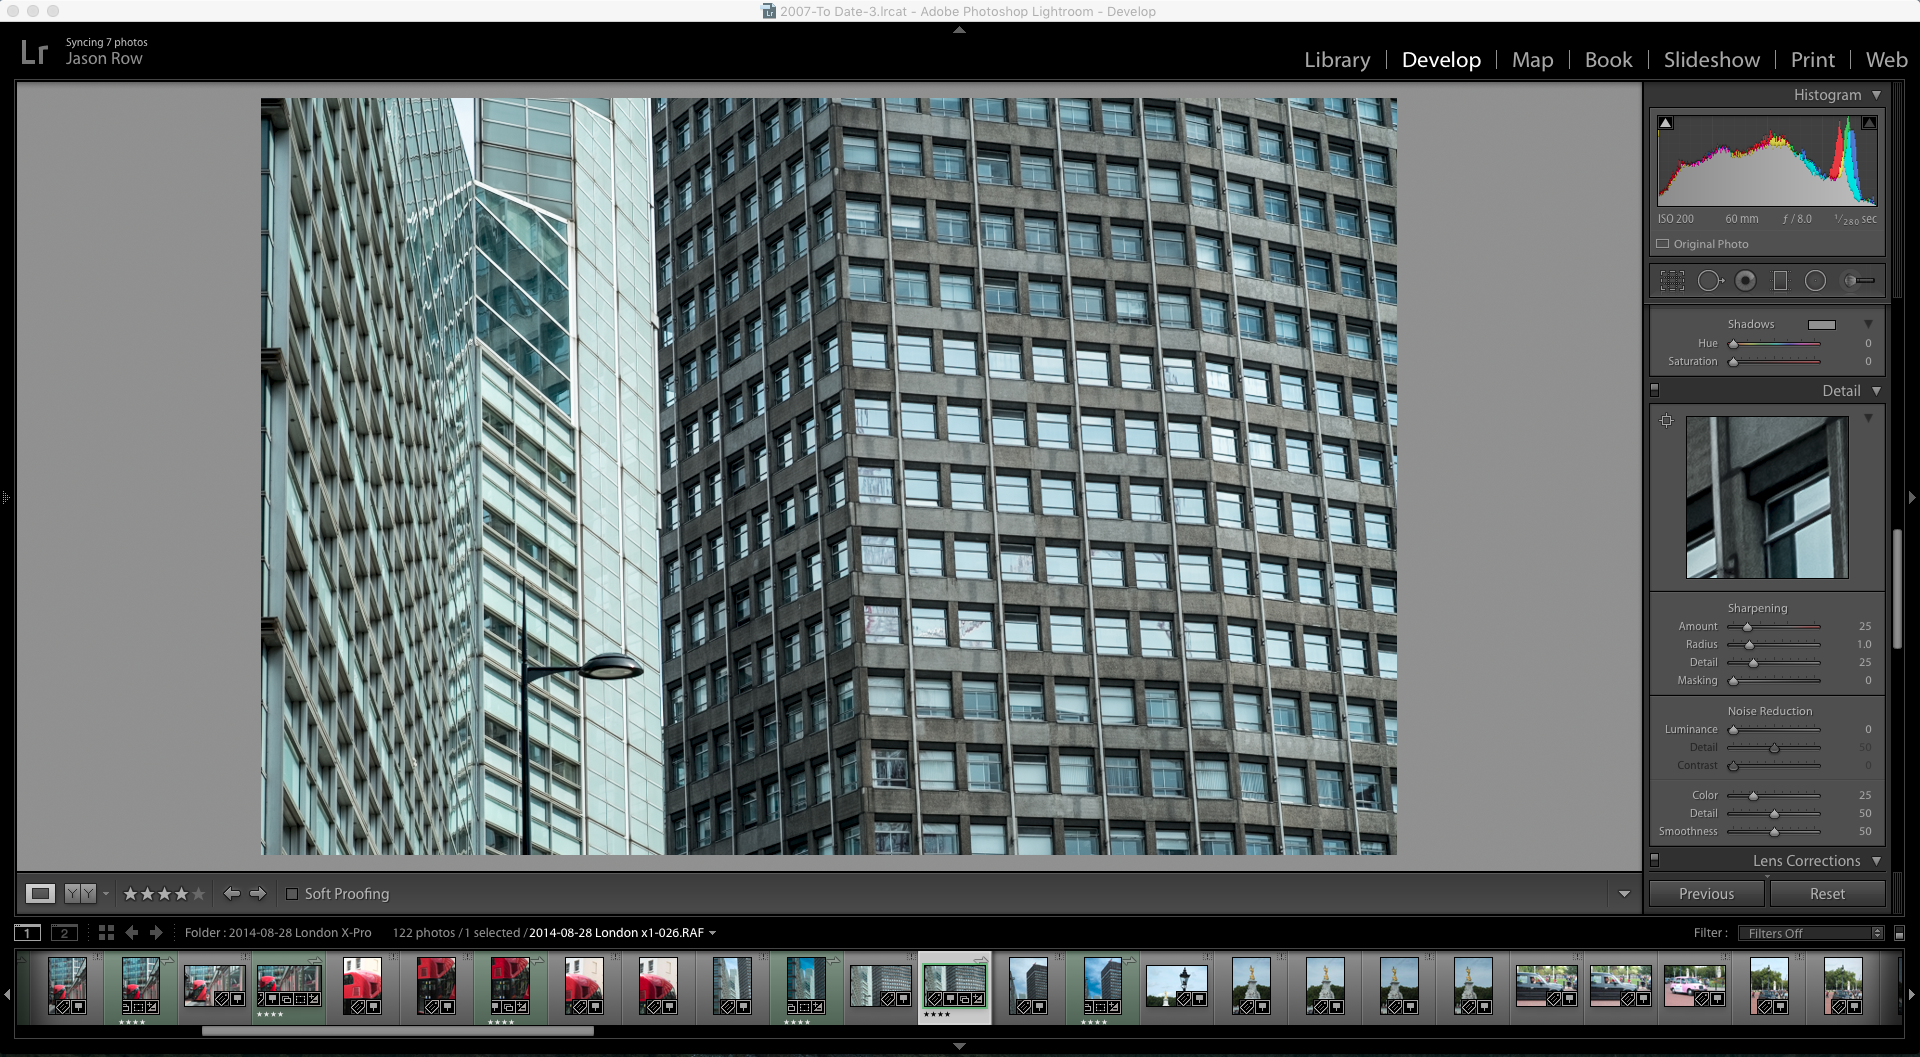
How to Use The Guided Upright Tool – A Step By Step Tutorial
First Question, Where Do I locate it?
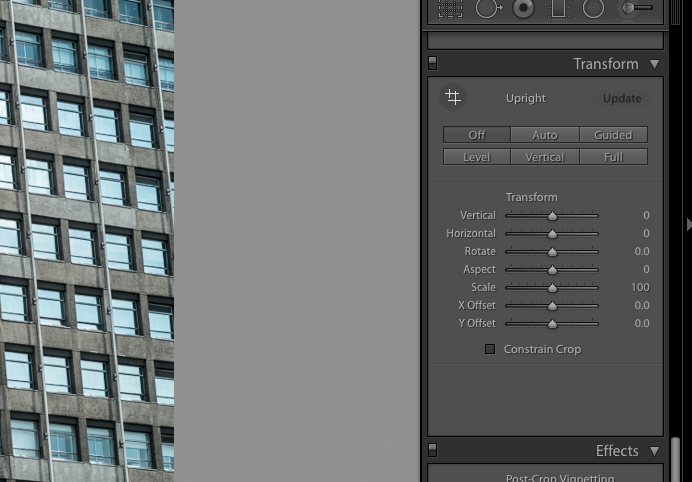
1. The Guided Upright tool resides in a new section to the Lightroom Develop module called Transform. It is grouped there with a number of tools previously found in the lens correction manual tab.
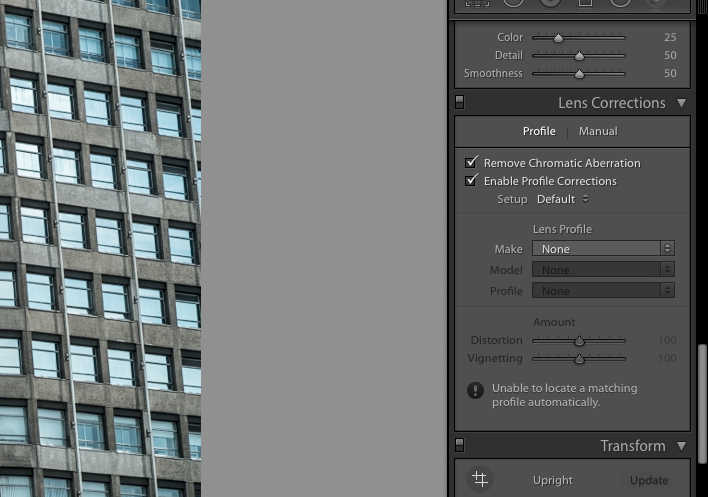
To enable guided uprights we first need to go to the Develop module’s Lens Correction panel and enable both Remove Chromatic Aberration and Enable Profile Corrections.
2. We can then go to the Transform panel where we will see the Guided Upright tool in the top left of the panel. I am going to demonstrate it on this image of tall buildings in London’s Victoria district.
The image is suffering from slightly converging verticals as well as not being entirely straight.
3. Clicking on the Guided Upright tool reveals a crosshair cursor and a loupe.
To aid our correction we can switch on a grid by going to the menu and selecting View – Loupe Overlay and checking both Show and Grid.
4. I am now going to use the tool to draw a line down the far left wall of the leftmost building. I can use the loupe to accurately aline that line to the wall.
5. When you release the cursor nothing will happen. That is because we need a minimum of two lines to make the correction.
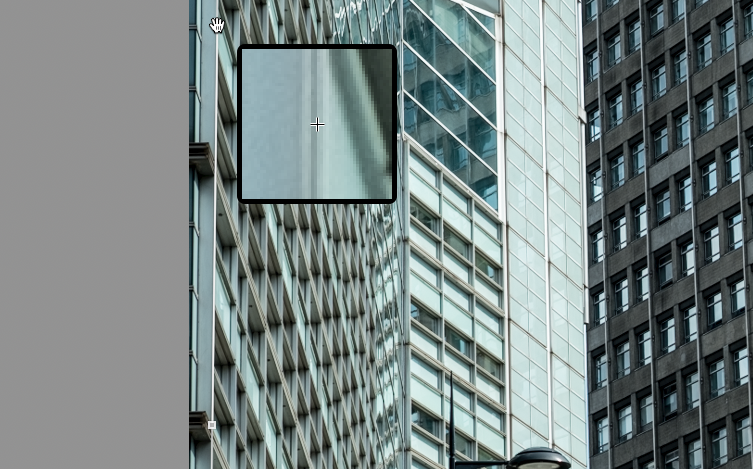
6. The next line I will draw is on the building to the right, following the line of the wall down. As I release the mouse button now, you will see the upright correction applied.
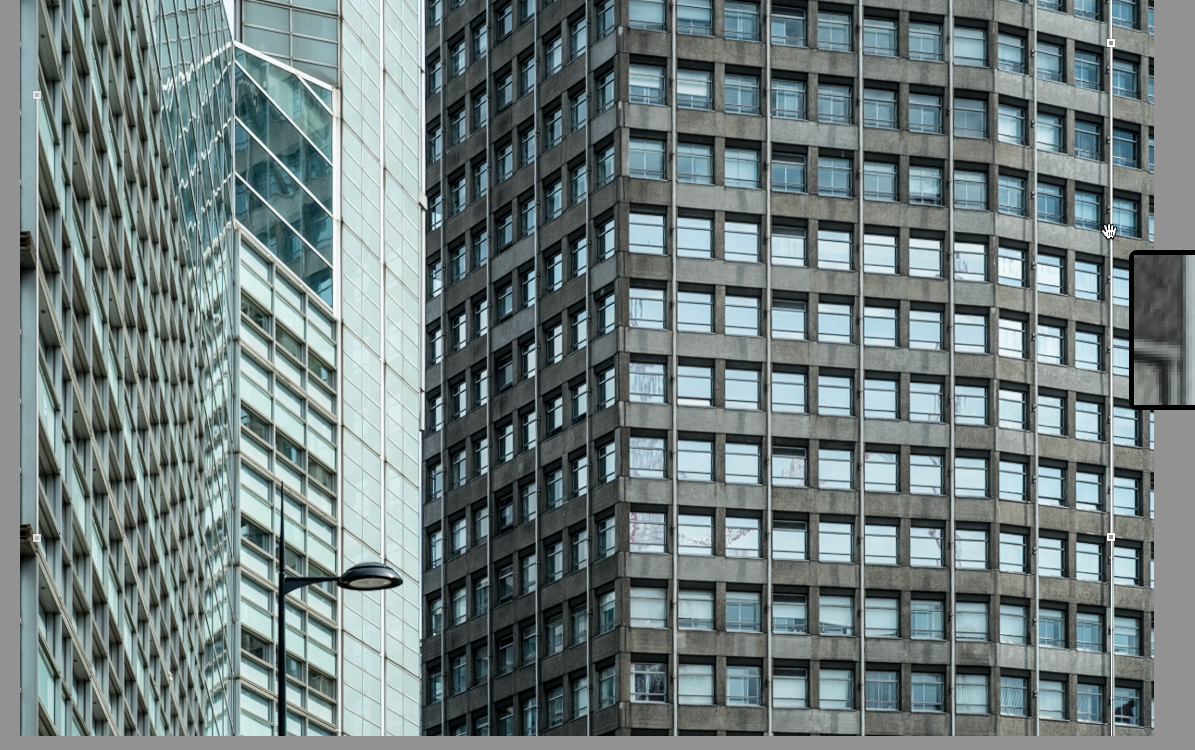
7. To correct any horizontal distortion I will select one of the lower horizontal part of the building as this is closer to my eye level. In this particular shot, there is no need to apply a fourth line as the shot looks good.
In most cases, the fourth line would be used to correct the aforementioned pincushion and barrel distortions.
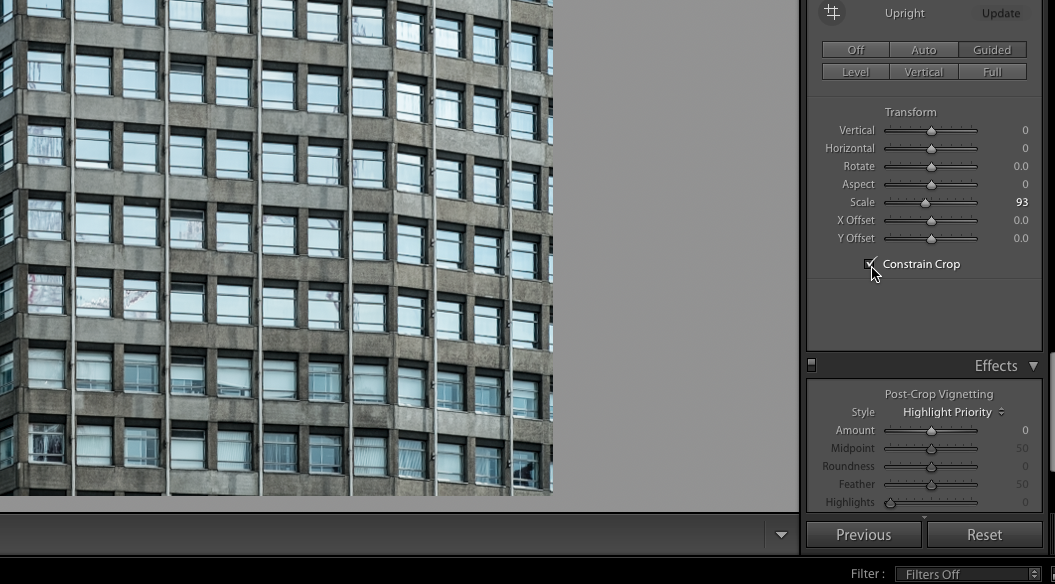
8. Although the image is now corrected the correction has revealed the canvas underneath. We can correct this two ways.
- Firstly we can check the Constrain Crop check box at the bottom of the Transform Panel. This will automatically crop the images to the maximum dimension within the canvas.
- The second option is to use the Scale tool to effectively zoom into the image as required.
Any Other Additions For This Tool?
Two other tools have been added to this panel in this update, the X Offset and Y Offset.
These tools allow us to use the Scale tool to zoom into the image then move the framing around either the horizontal or vertical axis to get the best composition.
Summary
Although a seemingly small addition to the Lightroom toolbox, the Guided Upright tool is powerful, and very visual way to accurately correct common distortions within our images.
With a little practice, I am sure you will find this tool to be both an easy and powerful addition to your editing repertoire.
Our Lightroom CC Tutorial On The Guided Upright Tool – Top Takeaways
- Use this tool to accurately straighten horizons and remove converging verticals.
- Unwanted lens distortion is now a thing of the past!
Further Resources
- How to Remove Lens Distortion in Your Photographs With Lightroom by LightStalking
- 7 Smooth Tips For Using Lightroom As A Photo Organizer by Jason Row
- 10 Very Useful Tutorials on Lightroom for Landscape Photographers by LightStalking
- Is Lightroom Struggling? These Tips Should Fix That by Dzvonko Petrovski
Further Learning
We've got some excellent “Lightroom Tutorials” in easy-to-follow Videos here.
Learn how to use Lightroom to “Transform Your Images Into Powerful and Share-Worthy Works of Art.”



1 Comment
The biggest problem I have with this tool is an inability to accurately place the cross hair over an edge. When seen in the loupe the 16MP images from my camera reveal a slightly pixelated appearance, so assuming each block is a pixel, I see the following behaviour. I can move the cross hair close to an edge and if I’m lucky hit it exactly. More often though it ends up three or four pixels to either side of the edge. Then I should be able to move slowly until I’m dead on the edge, but what happens is that the slightest movement of the mouse jumps the cross hair right over the edge so it ends up four or five pixels on the other side. No amount of trying allows me to get it spot on. What is really needed here is a modifier, Ctrl/Cmd say, that when pressed reduces the mouse sensitivity allowing the edge to be approached with much finer control.